
1. Introducció
This manual provides detailed instructions for the assembly, care, and display of your TAMIYA 35274 1/35 British Challenger 2 Main Battle Tank model kit. The Challenger 2 is a highly detailed static display model, replicating the British Main Battle Tank with specific features of its Iraq deployment version. This kit is designed for modelers aged 12 and above.
The Challenger 2 features improved second-generation Chobham armor, an updated fire control system with digital technology, and a powerful 120mm L30 rifled main gun. Modifications for Iraq deployment include reactive armor, composite side armor, a special exhaust cover, canvas skirts, Commander's Independent Thermal Viewer (CITV), and Combat Identification Panels (CIP).
2. Informació de seguretat
Please read and understand all safety warnings before beginning assembly. This kit contains small parts and requires the use of sharp tools, adhesives, and paints, which can be hazardous if not handled properly.
- Peces petites: Keep all small parts out of reach of young children to prevent choking hazards. This kit is not suitable for children under 12 years of age.
- Sharp Tools: Exercise extreme caution when using hobby knives, clippers, and other sharp tools. Always cut away from your body and keep fingers clear of blades.
- Adhesives and Paints: Use model cement and paints in a well-ventilated area. Avoid inhaling fumes. Some adhesives and paints are flammable; keep them away from heat and open flames. Wear appropriate personal protective equipment, such as gloves and safety glasses, if recommended by the product manufacturer.
- Protecció ocular: Consider wearing safety glasses during assembly, especially when cutting or sanding, to protect your eyes from flying debris.
- Eliminació: Dispose of waste materials, including empty paint and glue containers, according to local regulations.
3. Muntatge i muntatge
This section outlines the general steps for assembling your TAMIYA Challenger 2 model kit. Refer to the detailed assembly instructions included in your kit for specific part numbers and step-by-step diagrams. Ensure you have all necessary tools and materials before starting.
3.1 Eines i materials necessaris
- Plastic nippers or sprue cutters
- Hobby knife or craft blade
- Plastic model cement (e.g., Tamiya Extra Thin Cement)
- Sandpaper or sanding sticks (various grits)
- Pinces
- Paints and brushes (acrylic or enamel, as desired)
- Masking tape (for painting)
- Petit files (optional, for detail work)
3.2 Passos de l'Assemblea General
- Preparació de la peça: Carefully remove parts from the sprues using nippers. Trim any excess plastic (flash) with a hobby knife and smooth rough edges with sandpaper.
- Sub-Assembly: Begin by assembling smaller components and sub-assemblies as indicated in the instruction manual. This often includes the turret, hull sections, and running gear.
- Hull Assembly: Join the main hull components. Ensure proper alignment before applying cement.
- Equipament per córrer: Assemble the road wheels, drive sprockets, and idler wheels. The kit features accurately replicated tracks and wheels.
- Muntatge de pista: Attach the tracks. The kit includes rubber tracks that can be joined with regular plastic cement.
- Turret Assembly: Assemble the turret, including the 120mm L30 rifled main gun. The main gun and Commander's Independent Thermal Viewer (CITV) are designed to be movable. The CITV and gunner's sight lens cover can be assembled in either an opened or closed position.
- Detalls: Add smaller details such as antennas, tools, and the included Commander and loader half-body figures. Transparent parts are used for gun sight lenses, headlights, tail lights, and the rotating light. Note that clear periscope windows may need to be cut from a clear styrene sheet using the provided template.
- Iraq Version Accessories: Attach specific accessories for the Iraq version, including canvas skirts and Combat Identification Panels (CIP).
- Painting and Decals: Once assembly is complete, prepare the model for painting. Apply paint according to your desired scheme. After painting, apply the included decals (3 sets of markings are provided) following the decal instructions.

Image 1: Box art of the TAMIYA 35274 Challenger 2 model kit, illustrating the completed model with desert camouflage and crew figures.

Image 2: A detailed rear-side view of the assembled Challenger 2 model, highlighting the intricate track system, side armor, and rear-mounted fuel drums.

Image 3: Close-up of the Challenger 2 turret, featuring the commander and loader figures in their respective hatches, the main gun, and various turret details including the Union Jack flag decal.
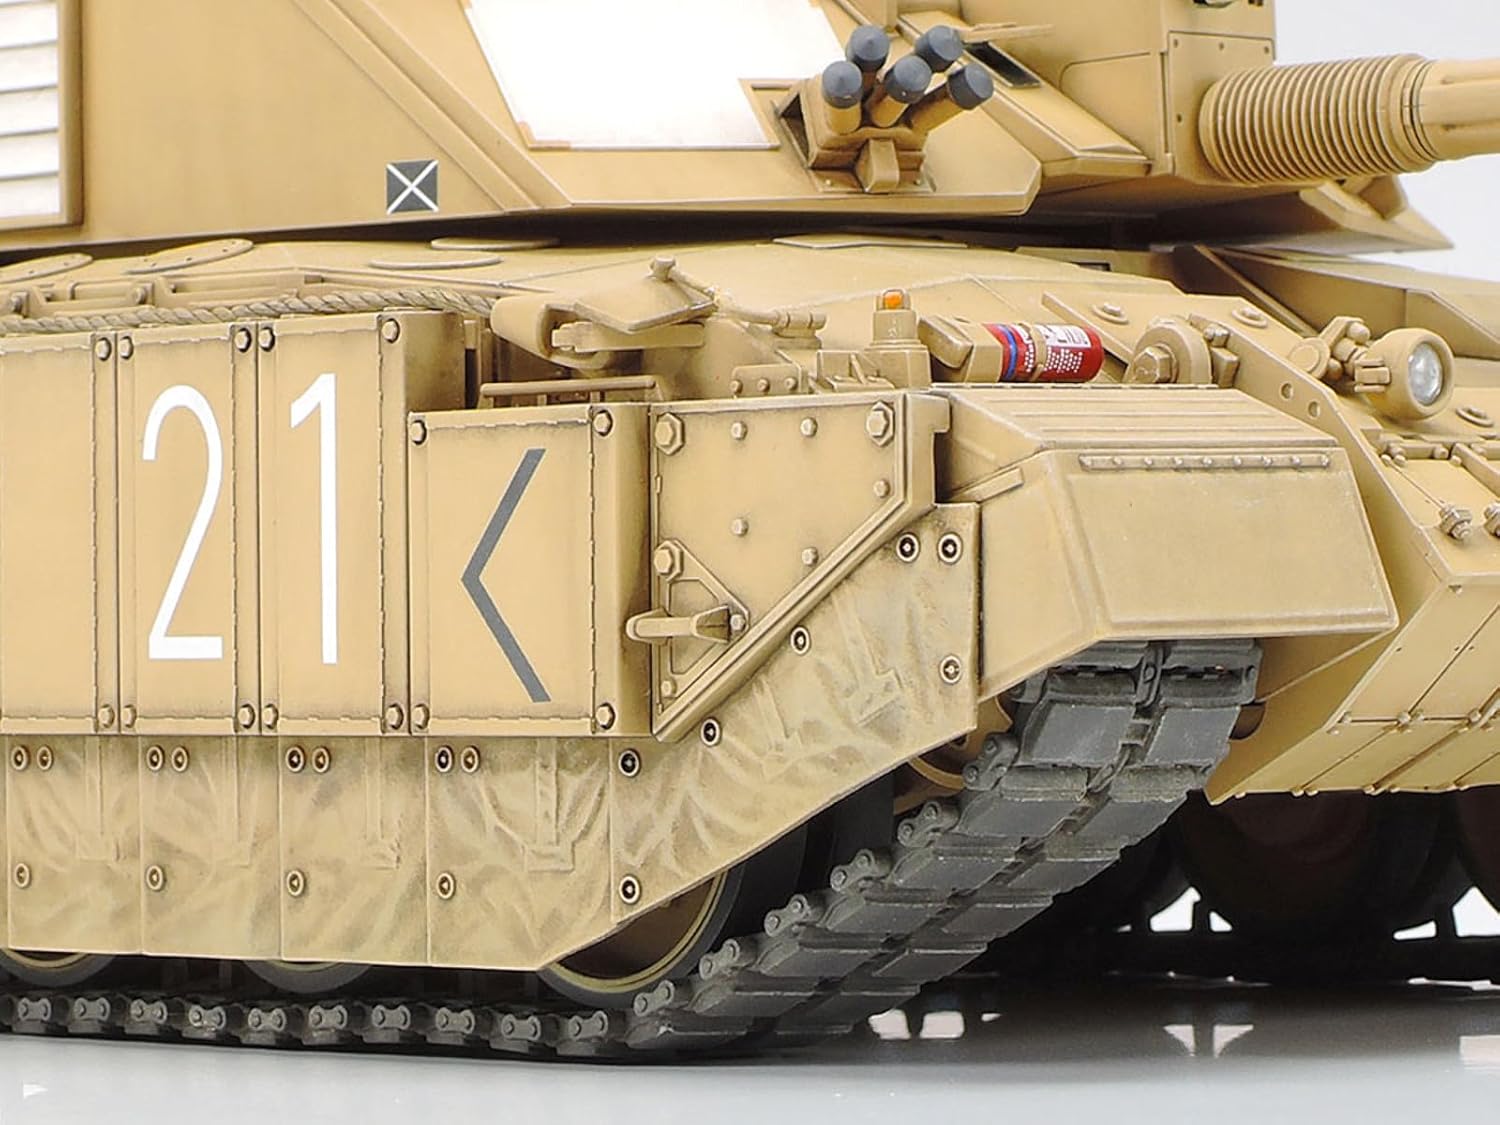
Image 4: A detailed perspective of the Challenger 2's side hull, illustrating the track assembly, road wheels, and the layered reactive armor panels.
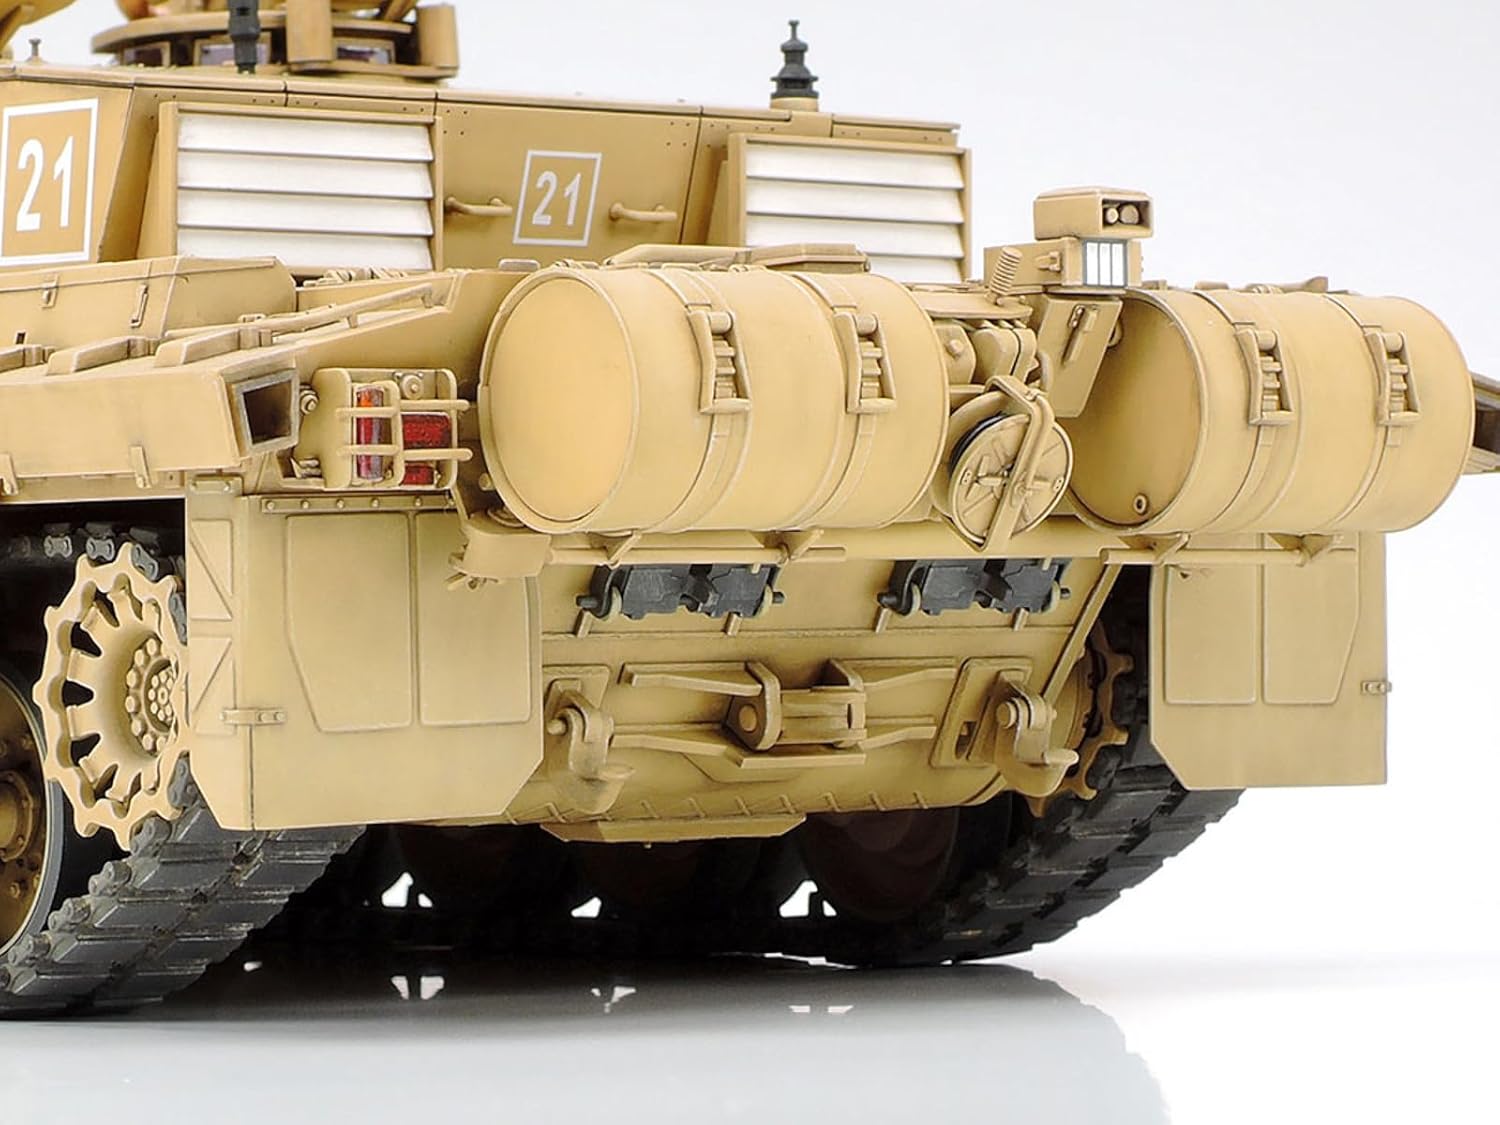
Imatge 5: posterior view of the Challenger 2 model, showcasing the detailed exhaust grilles, rear storage bins, and the additional fuel drums.
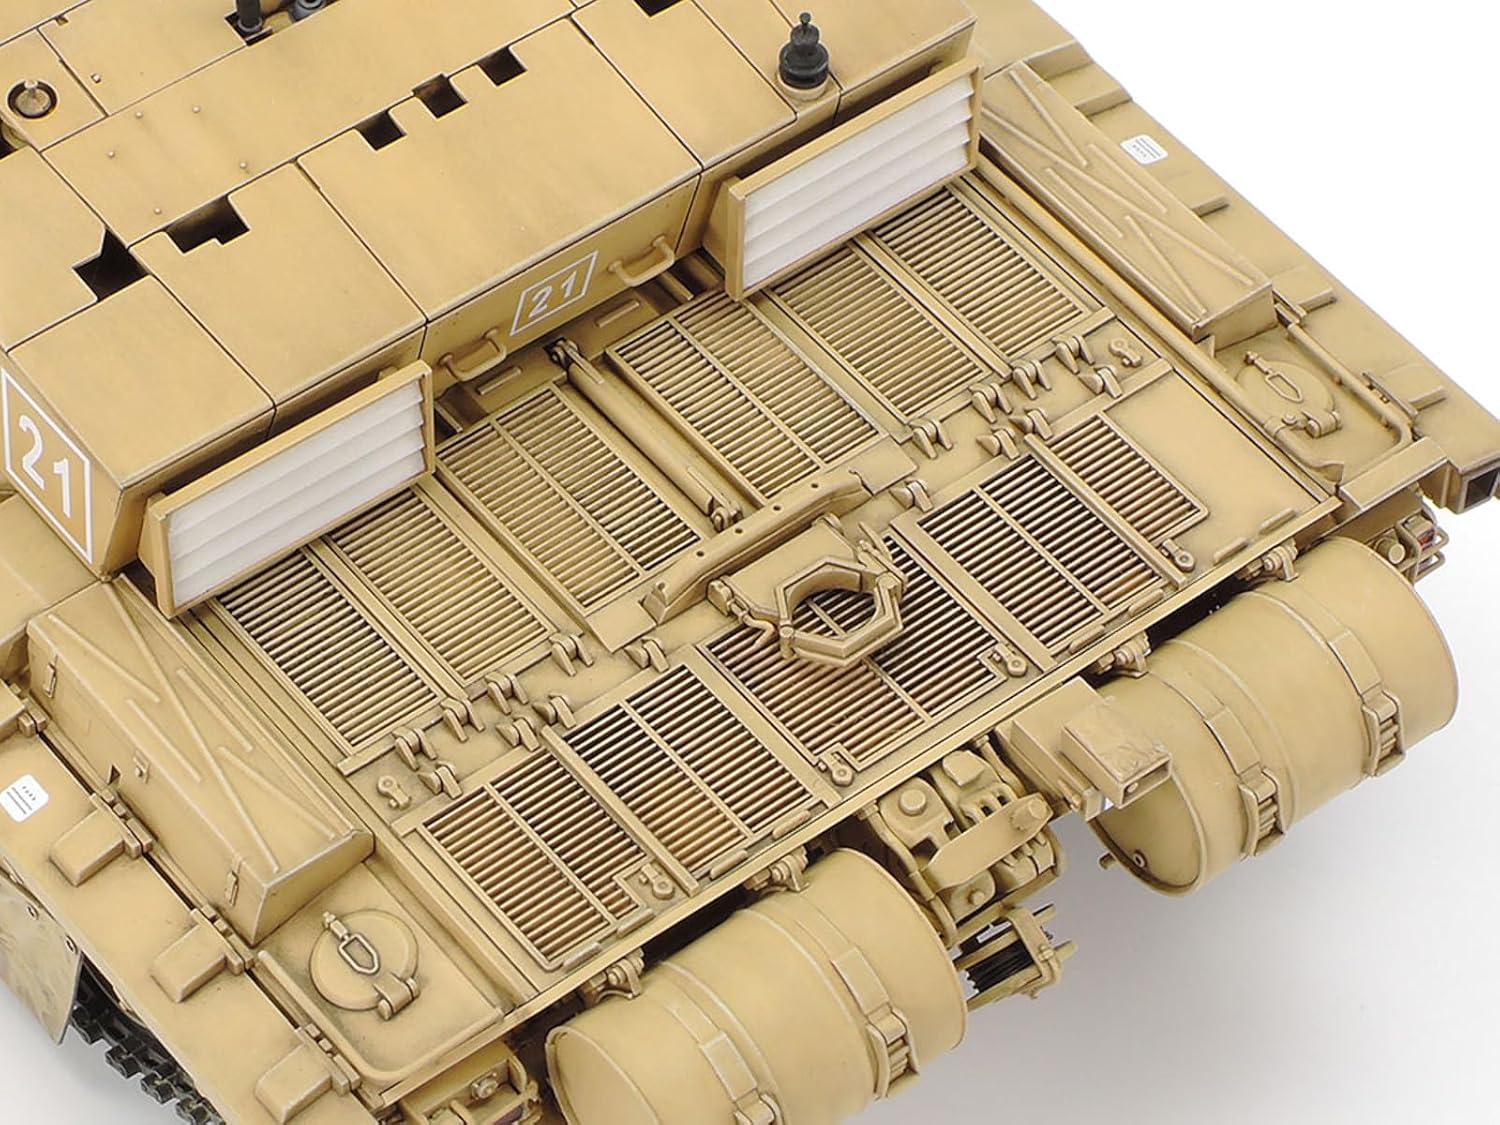
Imatge 6: De dalt a baix view of the Challenger 2's engine deck, revealing the detailed grille patterns and various access hatches.
4. Presentació i manipulació
Once assembled and painted, your TAMIYA Challenger 2 model is a static display piece. Proper handling and display will ensure its longevity and preserve its appearance.
- Manipulació: Always handle the model by its main body or base. Avoid touching delicate parts like antennas, machine guns, or figures, as they can break easily.
- Ubicació de la pantalla: Place your model on a stable, flat surface away from direct sunlight, extreme temperatures, and high humidity. Direct sunlight can fade paints and decals over time, while temperature fluctuations can cause plastic to warp or crack.
- Protecció contra la pols: Consider displaying the model in a dust-proof display case to minimize dust accumulation and protect it from accidental damage.
- Parts mòbils: While some parts like the main gun and CITV are designed to be movable, operate them gently to prevent damage.
5. Manteniment
Regular, gentle maintenance will keep your model looking its best.
- Pols: Use a soft, dry brush (such as a makeup brush or a dedicated model dusting brush) to gently remove dust from the model's surface. For hard-to-reach areas, a can of compressed air (used carefully and from a distance) can be effective.
- Neteja: Avoid using water, cleaning solutions, or harsh chemicals on your model, as these can damage paint, decals, and plastic. If a stubborn mark appears, try gently dabbing with a very slightly damp (water only) cotton swab, but test on an inconspicuous area first.
- Reparacions: In case of minor breakages, use plastic model cement to reattach parts. For paint chips, touch up with matching paints.
- Emmagatzematge: If storing the model for an extended period, ensure it is clean, dry, and placed in a protective container to prevent dust and physical damage.
6. Solució De Problemes
This section addresses common issues encountered during model kit assembly and display.
| Problema | Causa possible | Solució |
|---|---|---|
| Les peces no encaixen correctament. | Excess plastic (flash) on parts; incorrect part orientation; insufficient sanding. | Carefully trim flash with a hobby knife. Ensure parts are oriented correctly according to the instructions. Lightly sand mating surfaces for a better fit. |
| Glue marks or excess cement visible. | Too much cement applied; cement applied to visible surfaces. | Use a minimal amount of cement, especially thin liquid cement, applied to the joint. Allow cement to dry completely before handling. Lightly sand dried excess if possible, or paint over. |
| Paint appears uneven or clumpy. | Paint too thick; improper mixing; dirty brush; painting in humid conditions. | Thin paint with appropriate thinner. Mix thoroughly. Ensure brushes are clean. Paint in a dry, well-ventilated area. Apply multiple thin coats instead of one thick coat. |
| Decals do not adhere or silver. | Surface not smooth; insufficient water; air trapped under decal. | Ensure the surface is glossy and smooth before applying decals. Use decal setting solutions to help decals conform to surfaces and eliminate silvering. Gently press out air bubbles with a cotton swab. |
| Small parts break off easily. | Delicate parts; rough handling; insufficient glue. | Handle the model with care. Re-glue broken parts using a strong plastic cement. Consider reinforcing very delicate parts with a small amount of super glue if plastic cement is insufficient. |
7. Especificacions
Key specifications for the TAMIYA 35274 1/35 British Challenger 2 Main Battle Tank model kit:
- Nom del model: Challenger 2
- Número de model: 35274 (Tamiya P/N: 35274)
- Marca: TAMIYA
- Escala: 1:35
- Tipus de material: Plastic PS
- Overall Length (assembled): Approximately 334mm (13.15 inches)
- Overall Width (assembled): Approximately 115mm (4.53 inches)
- Edat recomanada: 12 anys o més (edat mínima del fabricant: 144 mesos)
- Components inclosos: Commander and loader half-body figures, 3 sets of markings, canvas skirts, Combat Identification Panels (CIP).
- Característiques: Accurate replication of Challenger 2 tank including new turret and 120mm L30 rifled main gun. Moveable main gun and CITV. Accurately replicated tracks and wheels. CITV and gunner's sight lens cover can be assembled opened or closed. Transparent parts for gun sight lens, headlights, tail lights, and rotating light.
- Tema: Militars
- Mode de funcionament: Manual (static display model)
8. Garantia i Suport
For any questions regarding your TAMIYA model kit, including missing parts, assembly difficulties, or general inquiries, please contact TAMIYA customer support directly. Refer to the contact information provided on the product packaging or TAMIYA's official weblloc.
TAMIYA products are known for their quality and precision. If you encounter any manufacturing defects, please retain your proof of purchase and contact the manufacturer for assistance.
Note: This model kit is intended for assembly and static display. TAMIYA does not typically offer a warranty on individual components after assembly has begun, as proper assembly and care are the responsibility of the modeler.


