
1. Introducció
This manual provides essential information for the safe and efficient use of your Lexmark E260D Monochrome Laser Printer. Please read these instructions carefully before operating the device and retain them for future reference. The Lexmark E260D is designed for fast, high-quality black and white document printing, featuring automatic two-sided printing for efficiency.
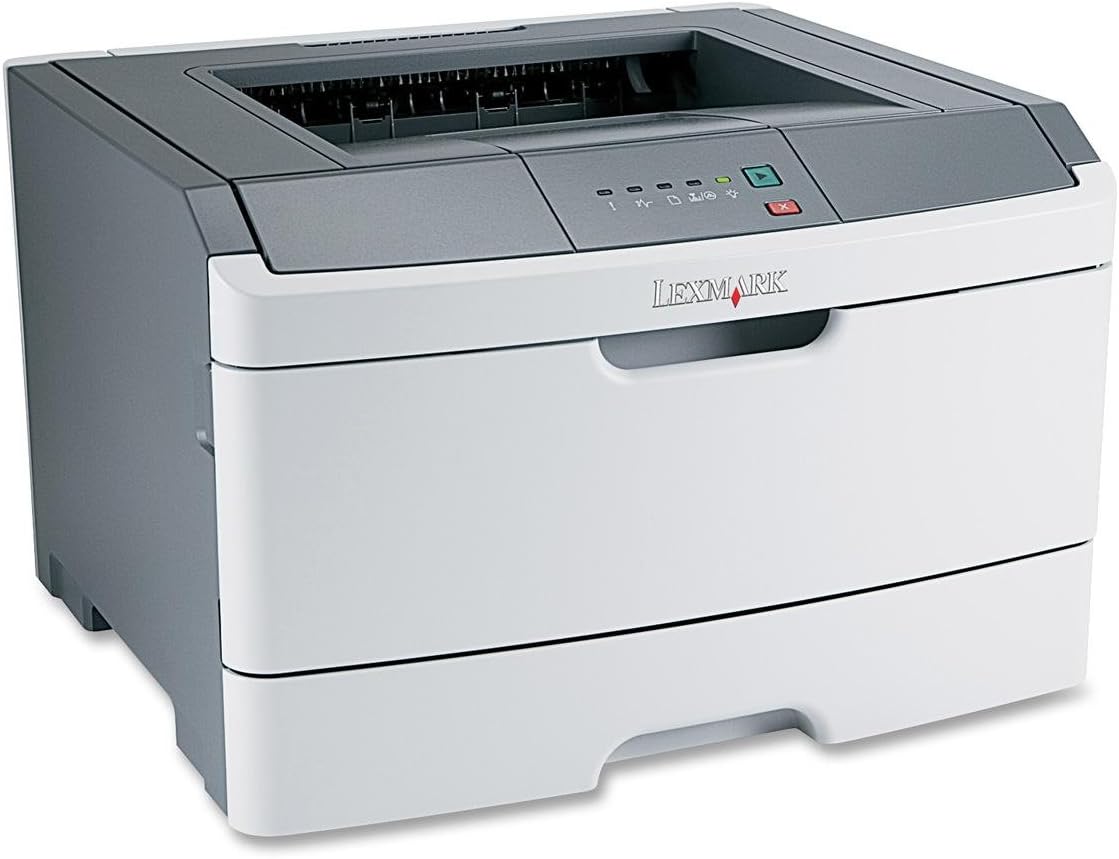
Figura 1: Lexmark E260D Monochrome Laser Printer. This image shows the printer from a front-right angle, highlighting its compact design with a white body and a dark gray top cover. The output tray is visible on top, and the Lexmark logo is displayed on the front panel above the paper input tray.
2. Informació de seguretat
- Connecteu sempre la impressora a una presa de corrent amb connexió a terra.
- No bloquejar les obertures de ventilació.
- Mantingueu la impressora allunyada de l'aigua o d'una humitat excessiva.
- Feu servir només els cables d'alimentació i els accessoris especificats.
- Eviteu tocar la zona del fusor, ja que pot estar calenta.
3. Contingut del paquet
Verifiqueu que tots els elements siguin presents al paquet:
- Lexmark E260D Monochrome Laser Printer
- Cable d'alimentació
- Starter Toner Cartridge (may vary by region)
- Setup Guide or Documentation
- Cable USB (es pot vendre per separat)
4. Configuració
4.1 Desembalatge de la impressora
- Traieu la impressora del seu embalatge.
- Traieu tots els materials d'embalatge, les cintes adhesives i les pel·lícules protectores de l'exterior i l'interior de la impressora.
- Col·loqueu la impressora sobre una superfície estable i anivellada amb una ventilació adequada.
4.2 Connexió de la impressora
- Connecteu el cable d'alimentació a la impressora i després a una presa de corrent amb connexió a terra.
- Connecteu un extrem del cable USB al port USB de la impressora i l'altre extrem a l'ordinador.
4.3 Instal·lació del cartutx de tòner
- Obriu la porta d'accés frontal de la impressora.
- Carefully remove the toner cartridge from its packaging and shake it gently to distribute the toner.
- Introduïu el cartutx de tòner a la impressora fins que encaixi al seu lloc.
- Close the front access door securely.
4.4 Càrrega de paper
- Traieu la safata de paper.
- Ajusteu les guies del paper perquè coincideixin amb la mida del paper que carregueu.
- Carregueu el paper a la safata, assegurant-vos que estigui pla i que no superi la línia d'ompliment màxim.
- Empenyeu la safata de paper cap a dins de la impressora fins que quedi bloquejada.
4.5 Instal·lació del controlador
After connecting the printer, your operating system may automatically detect and install the necessary drivers. If not, follow these steps:
- Insert the driver CD (if included) into your computer's CD/DVD drive, or download the latest drivers from the official Lexmark support weblloc.
- Seguiu les instruccions a la pantalla per completar la instal·lació del controlador.
- Reinicieu l'ordinador si se us demana.
5. Funcionament de la impressora
5.1 Impressió bàsica
- Assegureu-vos que la impressora estigui engegada i connectada a l'ordinador.
- Obriu el document que voleu imprimir a l'ordinador.
- Seleccioneu File > Imprimeix (o l'ordre equivalent a la vostra aplicació).
- Choose the Lexmark E260D from the list of available printers.
- Adjust print settings as needed (e.g., number of copies, page range).
- Feu clic Imprimeix.
5.2 Impressió a doble cara (a dues cares)
The Lexmark E260D supports automatic two-sided printing.
- When sending a print job, access the printer properties or preferences.
- Busca una opció relacionada amb Impressió dúplex or Imprimeix a les dues cares.
- Seleccioneu l'opció d'impressió a doble cara desitjada (per exemple, enquadernació de la vora llarga, enquadernació de la vora curta).
- Confirmeu la configuració i feu clic a Imprimeix.
6. Manteniment
6.1 Neteja de la impressora
- Exterior: Netegeu les superfícies exteriors amb un damp, drap sense borrissol. No utilitzeu productes de neteja abrasius ni dissolvents.
- Interior: Periodically open the front access door and gently remove any loose toner dust with a dry, lint-free cloth. Avoid touching sensitive components.
6.2 Substitució del cartutx de tòner
When the toner level is low, the printer's control panel will indicate it. Replace the toner cartridge as follows:
- Assegureu-vos que la impressora estigui engegada.
- Obriu la porta d'accés frontal.
- Traieu amb cura el cartutx de tòner antic estirant-lo cap a fora.
- Unpack the new Lexmark E260D compatible toner cartridge and shake it gently.
- Introduïu el cartutx nou a la impressora fins que encaixi al seu lloc.
- Tanqueu la porta d'accés frontal.
7. Solució De Problemes
7.1 Embussos de paper
If a paper jam occurs, the printer's control panel will display an error. Follow these general steps:
- Apagueu la impressora i desendolleu-la de la presa de corrent.
- Open all accessible covers (front door, rear door, etc.).
- Carefully remove any jammed paper, pulling it in the direction of the paper path to avoid tearing.
- Tanqueu totes les cobertes de manera segura.
- Connecteu i engegueu la impressora.
7.2 Problemes de qualitat d'impressió
- Estampats descolorits o clars: The toner cartridge may be low. Try shaking the cartridge gently or replace it.
- Ratlles o taques: Clean the interior of the printer, especially around the toner cartridge area. Ensure the paper type setting matches the loaded paper.
- Pàgines en blanc: Ensure the toner cartridge is properly installed and has toner. Check printer drivers and print settings.
7.3 Problemes de connectivitat
- Impressora no detectada: Ensure the USB cable is securely connected to both the printer and the computer. Try a different USB port or cable. Reinstall printer drivers if necessary.
- Print Jobs Stuck: Clear the print queue on your computer. Restart both the printer and the computer.
7.4 Envelope Printing on Mac
Users printing envelopes on macOS may encounter issues with incorrect print orientation or partial printing. To resolve this:
- In the print dialogue box, locate the menu that initially reads 'Layout'.
- Select 'Paper Feed' from this menu.
- Change the 'Auto Select' option to 'Manual Envelope'.
- Procediu amb la impressió.
8. Especificacions
| Característica | Especificació |
|---|---|
| Nom del model | E260D |
| Tecnologia d'impressió | Làser |
| Sortida de la impressora | Monocrom |
| Velocitat màxima d'impressió (monocrom) | 35 ppm |
| Resolució màxima d'impressió (blanc i negre) | 1200 ppp |
| Impressió dúplex | Automàtic |
| Tecnologia de connectivitat | USB 2.0 |
| Capacitat màxima del full d'entrada | 250 fulls |
| Suports d'impressió compatibles | Envelopes, Labels, Paper (plain), Transparencies |
| Capacitat d'emmagatzematge de memòria | 32 MB |
| Dimensions del producte | 16.5 x 18.1 x 14 polzades |
| Pes de l'article | 29.8 lliures (13.53 kg) |
| Consum d'energia (mode encès) | 16 watts |
9. Informació de la garantia
The Lexmark E260D Monochrome Laser Printer comes with an Exchange Warranty. For specific terms, conditions, and duration of your warranty, please refer to the warranty documentation included with your product or visit the official Lexmark support weblloc.
10. Atenció al client
For further assistance, technical support, or to order replacement parts and supplies, please contact Lexmark Customer Support. You can find contact information and additional resources on the official Lexmark weblloc:
- Assistència de Lexmark Weblloc: www.lexmark.com/support (Nota: Això és un marcador de posició) URL. Refer to your product documentation for the exact support link.)