
1. Introducció
This manual provides detailed instructions for the installation, operation, and maintenance of your Weiser GDC9471 Single Cylinder Deadbolt. Please read these instructions carefully before beginning installation or use to ensure proper function and security. Keep this manual for future reference.
2. Producte acabatview
The Weiser GDC9471 is a bright brass single cylinder deadbolt designed for enhanced security. It features a full one-inch throw bolt and includes SmartKey Re-Key technology, allowing you to re-key the lock yourself in minutes. This deadbolt comes with a round corner adjustable latch for versatile installation.
Característiques principals:
- Single cylinder operation (key outside, thumb turn inside)
- Full one-inch throw bolt for added security
- SmartKey Re-Key technology for easy re-keying
- Adjustable latch for 2-3/8" or 2-3/4" backsets
- Bright Brass finish
Components:
- Exterior Cylinder Assembly
- Interior Thumb Turn Assembly
- Pestillo de cèrcol
- Placa de vaga
- Cargols de muntatge
- Keys (3 keyed alike)
- Eina d'aprenentatge SmartKey
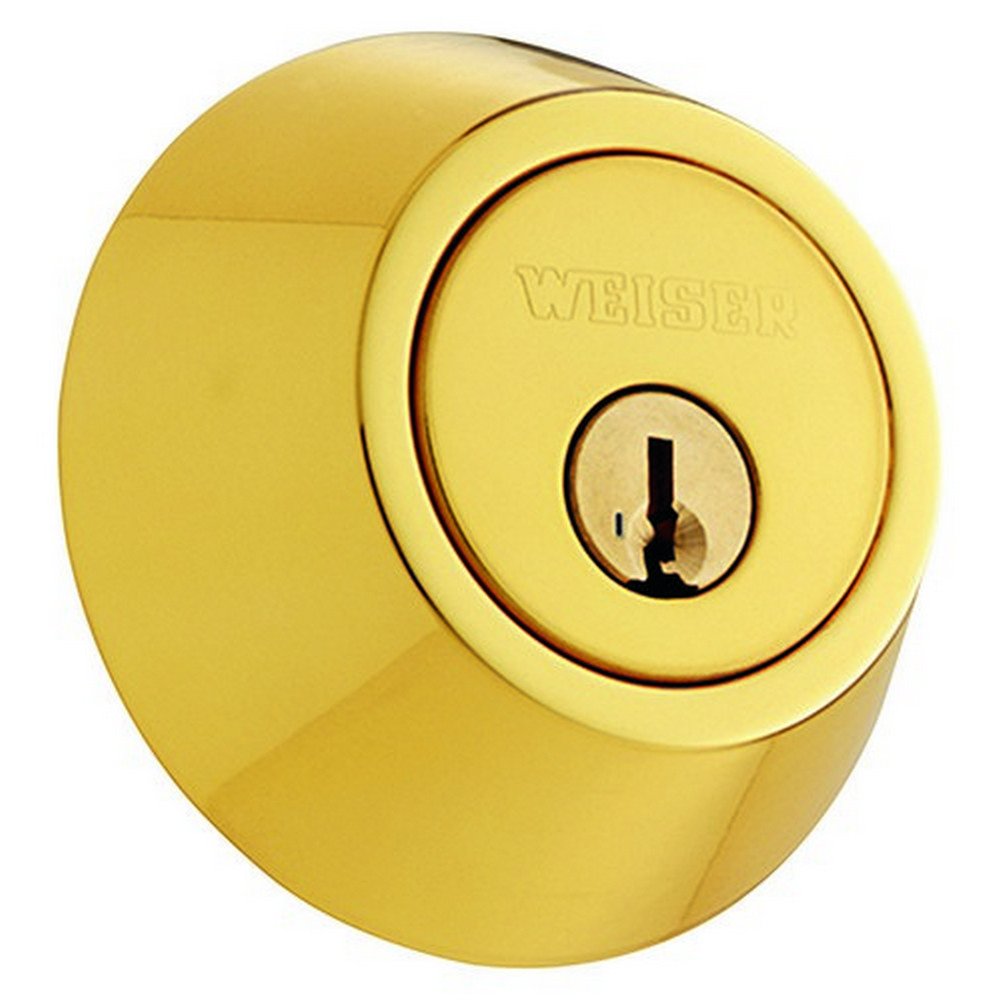
Image: Weiser GDC9471 Single Cylinder Deadbolt in Bright Brass. This image displays the complete deadbolt assembly, including the exterior keyed cylinder and the interior thumb turn mechanism, along with the latch and strike plate.
3. Configuració i instal·lació
Proper installation is crucial for the security and functionality of your deadbolt. Follow these general steps. Refer to the detailed template included with your product for precise measurements and drilling instructions.
Eines necessàries:
- Tornavís Phillips
- Cinta mètrica
- Llapis
- Drill (if new installation)
Passos d'instal·lació:
- Prepara la porta: Ensure the door has the correct bore holes (typically 2-1/8" diameter for the lock body and 1" diameter for the latch). If replacing an existing lock, remove the old hardware.
- Instal·leu el tancament: Insert the deadbolt latch into the edge bore hole. Ensure the word "TOP" on the latch faceplate is facing upwards. Adjust the latch backset (2-3/8" or 2-3/4") if necessary by twisting the latch mechanism. Secure the latch with the provided screws.
- Install Exterior Cylinder: Insert the exterior cylinder assembly into the door, ensuring the tailpiece passes through the center hole of the latch.
- Install Interior Thumb Turn: Place the interior thumb turn assembly over the tailpiece and align the mounting posts with the holes in the exterior cylinder.
- Secure the Assemblies: Fasten the interior and exterior assemblies together using the long mounting screws. Tighten securely, but do not overtighten, to avoid binding the mechanism.
- Instal·leu la placa de tancament: Close the door and mark the position for the strike plate on the door frame, aligning it with the deadbolt latch. Chisel out a mortise for the strike plate and secure it with screws. Ensure the deadbolt extends fully into the strike plate when locked.
- Prova de funcionament: With the door open, test the deadbolt operation using both the key from the outside and the thumb turn from the inside. Ensure the bolt extends and retracts smoothly without resistance.
4. Instruccions de funcionament
Bloqueig i desbloqueig:
- Des de l'exterior: Insert the key into the cylinder and turn it to extend or retract the deadbolt. Remove the key once the desired position is achieved.
- Des de l'interior: Rotate the thumb turn knob to extend or retract the deadbolt.
SmartKey Re-Key Technology:
The SmartKey Re-Key technology allows you to re-key your lock to a new key in three simple steps, without removing the lock from the door. This is useful if you lose a key or want to match your deadbolt to other SmartKey locks.
- Insereix la clau actual: Insert your currently working key (the 'old' key) fully into the cylinder.
- Rotate 90 Degrees: Rotate the key 90 degrees clockwise (to the 3 o'clock position) and ensure it stays in this position.
- Insereix l'eina SmartKey: Insert the SmartKey Learn Tool firmly into the SmartKey hole on the cylinder face. You will feel a click. Remove the SmartKey Learn Tool.
- Remove Old Key: Remove the old key.
- Insert New Key: Insert your new key (the key you want the lock to work with) fully into the cylinder.
- Rotate 180 Degrees: Rotate the new key 180 degrees counter-clockwise (to the 9 o'clock position), then back 90 degrees clockwise (to the 12 o'clock position).
- Test New Key: Remove the new key and test its operation. The lock is now re-keyed.
Important: Always test the new key with the door open first to ensure proper re-keying before closing and locking the door.
5. Manteniment
To ensure the longevity and smooth operation of your Weiser deadbolt, follow these maintenance guidelines:
- Neteja: Netegeu les superfícies exteriors amb un drap suau iamp drap. Eviteu netejadors o dissolvents abrasius, ja que poden danyar l'acabat.
- Lubricació: If the lock mechanism feels stiff, apply a small amount of graphite-based lubricant or a silicone-based spray lubricant specifically designed for locks into the keyway and around the deadbolt mechanism. Do not use oil-based lubricants, as they can attract dirt and dust.
- Estancament del cargol: Periodically check and tighten all mounting screws. Loose screws can affect the lock's performance and security.
6. Solució De Problemes
If you encounter issues with your Weiser GDC9471 deadbolt, refer to the following common problems and solutions:
| Problema | Causa possible | Solució |
|---|---|---|
| La clau no gira o està rígida. | Dirt/debris in keyway, worn key, misaligned cylinder. | Clean keyway with compressed air, lubricate with graphite. Try a different key. Check for proper alignment during installation. |
| Deadbolt bolt does not extend or retract fully. | Misaligned strike plate, door frame issues, internal mechanism binding. | Check strike plate alignment and adjust if necessary. Ensure door frame is not warped. Lubricate the bolt mechanism. Re-check mounting screw tightness. |
| SmartKey re-keying fails. | Old key not fully inserted/turned, SmartKey tool not fully inserted, incorrect new key rotation. | Ensure the old key is fully inserted and turned exactly 90 degrees. Insert the SmartKey tool firmly until a click is felt. Follow new key rotation steps precisely. Ensure the new key is a compatible Weiser SmartKey key. |
| Lock appears discolored or tarnished. | Exposure to harsh chemicals, environmental factors, natural aging of brass finish. | Netejar amb un suau, damp cloth. Avoid abrasive cleaners. For significant tarnishing, specialized brass polish may be used, but test on an inconspicuous area first. |
If the problem persists after attempting these solutions, please contact Weiser customer support.
7. Especificacions
Below are the technical specifications for the Weiser GDC9471 Single Cylinder Deadbolt:
| Característica | Especificació |
|---|---|
| Marca | Weiser |
| Número de model | GDC9471 |
| Tipus de bloqueig | Pernil únic de cilindre |
| Característica especial | Key Lock, SmartKey Re-Key Technology |
| Material | Llautó |
| Color | Llautó brillant |
| Dimensions de l'article (L x A x A) | 4.5 x 3.18 x 9.13 polzades |
| Pes de l'article | 1.2 lliures |
| Pestillo ajustable | 2-3/8" or 2-3/4" backset |
| Keys Included | 3 (keyed alike) |
| Fabricant | WHITEHALL PROD LTD |
8. Garantia i Suport
Weiser products are manufactured to the highest standards and undergo rigorous quality checks. For specific warranty information regarding your GDC9471 Single Cylinder Deadbolt, please refer to the warranty card included with your product packaging or visit the official Weiser weblloc.
For technical assistance, troubleshooting beyond this manual, or to inquire about replacement parts, please contact Weiser Customer Support:
- Weblloc: Visita el Weiser oficial weblloc web per a recursos de suport i informació de contacte.
- Telèfon: Refer to your product packaging or the Weiser weblloc web amb els números de telèfon d'atenció al client més actualitzats.
When contacting support, please have your product model number (GDC9471) and purchase information readily available.


