1. Introducció
This manual provides essential instructions for the safe and effective use, maintenance, and care of your KNIPEX 97 71 180 Crimping Pliers for Wire Ferrules. Please read this manual thoroughly before operating the tool and retain it for future reference.
2. Informació de seguretat
Always observe the following safety precautions when using the crimping pliers:
- Protecció ocular: Always wear appropriate eye protection to prevent injury from flying debris.
- Inspeccionar l'eina: Before each use, inspect the pliers for any damage, wear, or loose parts. Do not use damaged tools.
- Aplicació adequada: Use the pliers only for their intended purpose: crimping wire ferrules. Do not use them as a hammer, pry bar, or for cutting hardened materials.
- Peça de treball segura: Ensure the wire and ferrule are properly positioned and stable before crimping.
- Mantingueu les mans clares: Keep fingers and other body parts away from the crimping jaws during operation.
- Emmagatzematge: Guardeu l'eina en un lloc sec i segur, fora de l'abast dels nens.
3. Producte acabatview
The KNIPEX 97 71 180 Crimping Pliers are designed for reliable crimping of wire ferrules. Key features include:
- Precision crimping profiles for various ferrule sizes.
- Nanses ergonòmiques per a un funcionament còmode.
- Durable construction for long service life.

Figura 1: Mésview of the KNIPEX 97 71 180 Crimping Pliers. The image displays the pliers with red handles and polished steel jaws, showing the various crimping profiles and the KNIPEX branding.
4. Configuració
The KNIPEX 97 71 180 Crimping Pliers are ready for use out of the packaging. No assembly is required. Before first use, ensure the tool is clean and free from any packaging materials.
5. Instruccions de funcionament
Follow these steps for proper crimping of wire ferrules:
- Prepara el cable: Strip the insulation from the end of the wire to the appropriate length for the ferrule being used. The stripped length should match the metal tube length of the ferrule.
- Insert Wire into Ferrule: Insert the stripped end of the wire completely into the ferrule. Ensure all wire strands are contained within the ferrule's metal tube.
- Select Crimping Profile: Identify the correct crimping profile on the pliers that matches the size of your wire ferrule. The pliers feature multiple profiles for different ferrule sizes (e.g., 1.5, 2.5, 4, 6, 10, 16 mm²).
- Position Ferrule: Place the ferrule, with the wire inserted, into the selected crimping profile of the pliers. Ensure the ferrule is seated firmly and squarely within the jaws.
- Perform Crimping: Squeeze the handles of the pliers firmly and completely until the crimping action is finished. The pliers are designed to apply the correct pressure for a secure crimp.
- Inspect Crimped Connection: After crimping, release the handles and remove the ferrule. Visually inspect the crimp for proper formation. The ferrule should be securely fastened to the wire, and the wire strands should not be visible or loose. A gentle tug test can confirm the connection's integrity.
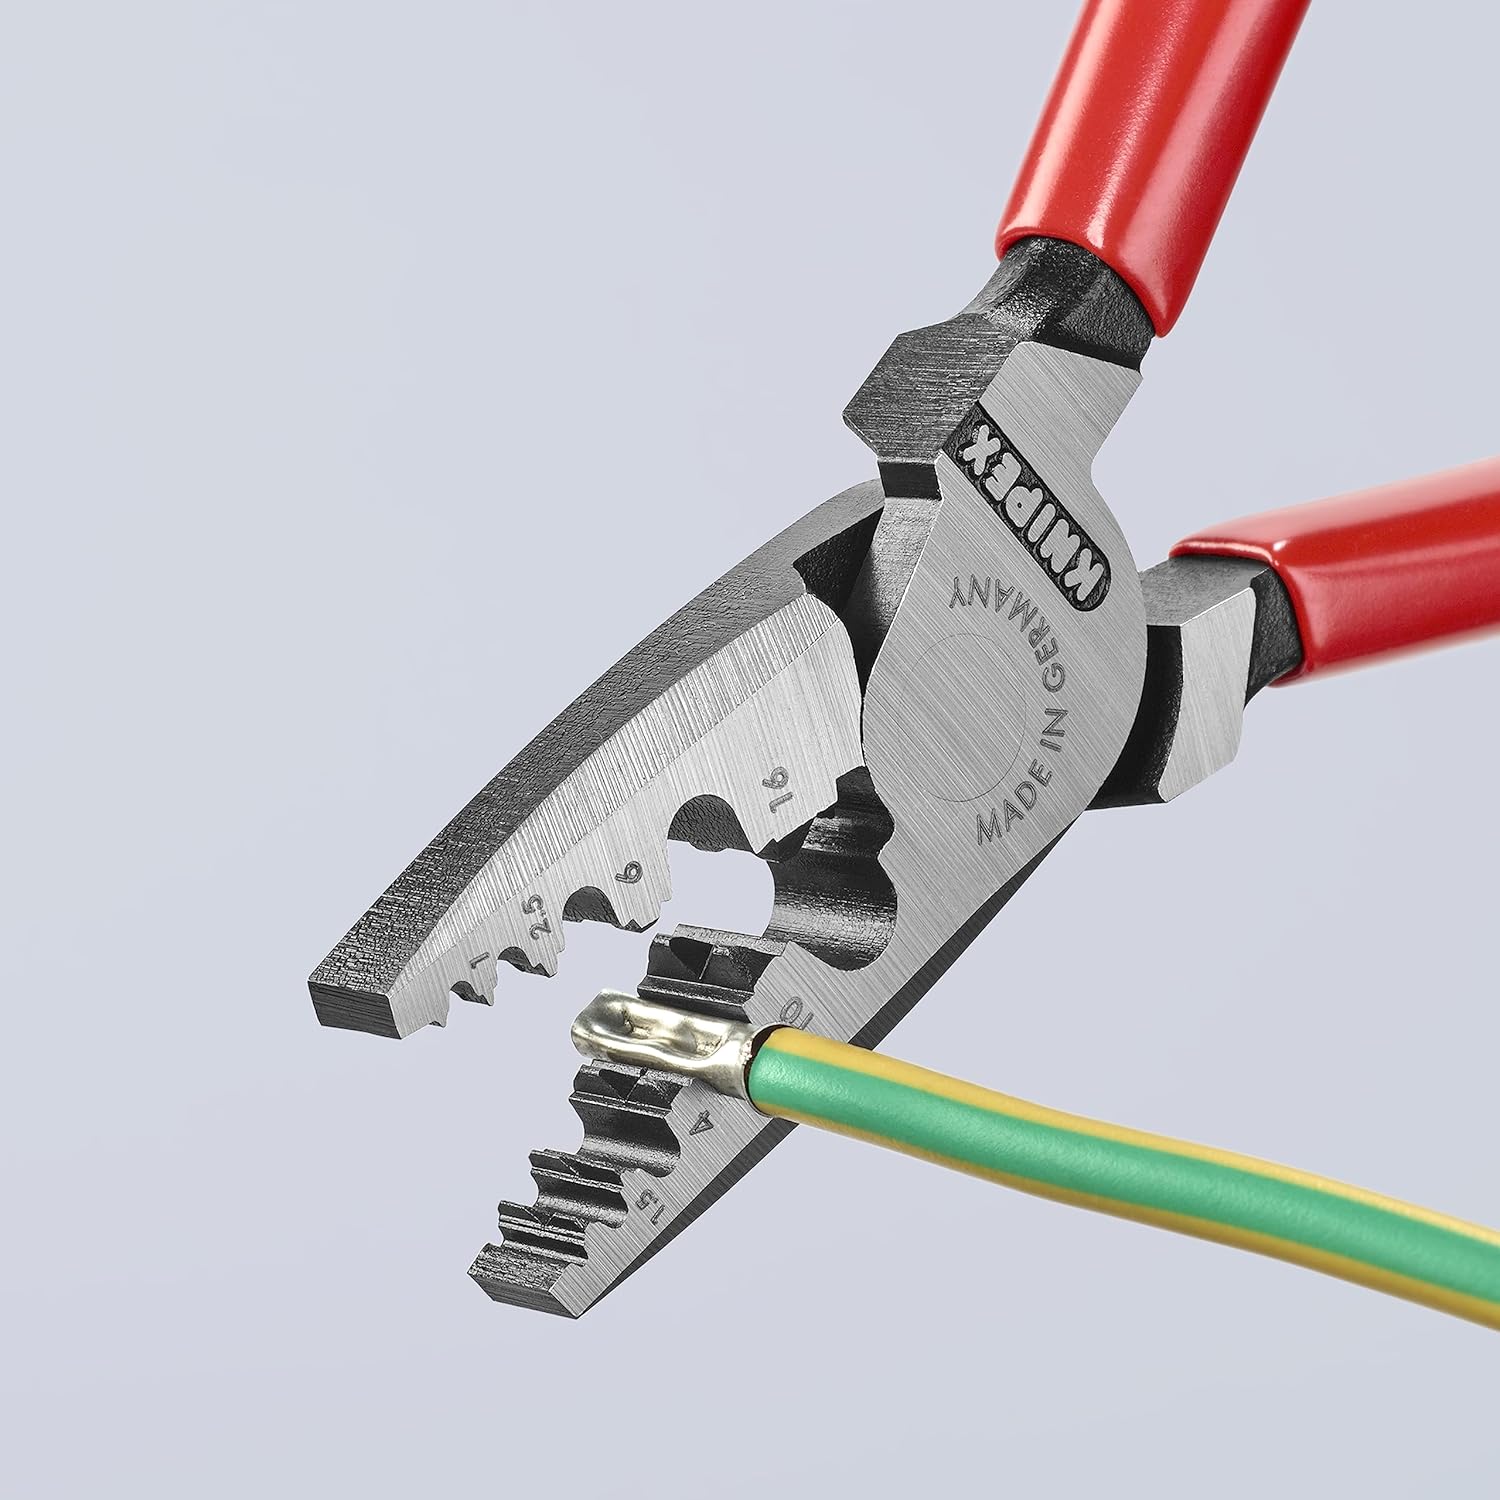
Figure 2: The image shows a wire ferrule with a green and yellow wire inserted into the crimping jaws of the pliers, ready for crimping. The ferrule is positioned in the appropriate size slot.

Figure 3: This image depicts the pliers in the process of crimping a wire ferrule. The jaws are partially closed, compressing the ferrule around the wire strands.

Figure 4: The image shows a fully crimped wire ferrule, securely attached to the wire, demonstrating a successful crimp. The pliers are open, revealing the crimped ferrule.
6. Manteniment
- Neteja: After each use, wipe the pliers clean with a dry cloth to remove any dirt, dust, or debris. For stubborn grime, a slightly damp es pot utilitzar un drap, seguit d'un assecat complet.
- Lubricació: Periodically apply a small amount of light machine oil to the pivot points to ensure smooth operation and prevent rust.
- Emmagatzematge: Store the pliers in a dry environment to prevent corrosion. Keep them away from corrosive chemicals.
7. Solució De Problemes
Si teniu problemes durant el funcionament, tingueu en compte el següent:
- Mala qualitat de crimpat:
- Ensure the correct crimping profile is selected for the ferrule size.
- Verify the wire is fully inserted into the ferrule and all strands are captured.
- Apply sufficient pressure by fully closing the pliers handles.
- Difficulty Squeezing Handles:
- Check if the correct ferrule size is used for the selected crimping profile. Using an oversized ferrule can make crimping difficult.
- Lubricate the pivot points if the pliers feel stiff.
8. Especificacions
| Atribut | Valor |
|---|---|
| Número de model | 97 71 180 |
| Marca | KNIPEX |
| Número de part | 97 71 180 |
| Dimensions del producte | 18.03 x 4.95 x 1.65 cm |
| Pes de l'article | 0.28 g |
| Mida | 7.08 polzades |
| Color | Red and Silver |
| Material | Blend (Handle: red, silver) |
| Font d'alimentació | Accionat a mà |
| Certificació | RoHS |
| Ús | Electrical work, Retrofitting, IT server room, Domestic electrical systems, Lighting and entertainment electronics installation |
| País d'origen | Xina |
| UPC | 843221006228 |
9. Garantia i Suport
For information regarding warranty coverage, product support, or service, please refer to the official KNIPEX website or contact KNIPEX customer service directly. Contact details can typically be found on the manufacturer's packaging or weblloc.
Fabricant: KNIPEX Tools LP
Weblloc: www.knipex.com