
1. Introducció
This manual provides comprehensive instructions for the safe and efficient operation, setup, maintenance, and troubleshooting of your Juki Pearl Line MO-654DE 2/3/4 Thread Serger. Please read this manual thoroughly before using the machine to ensure proper understanding and to maximize its performance and longevity.
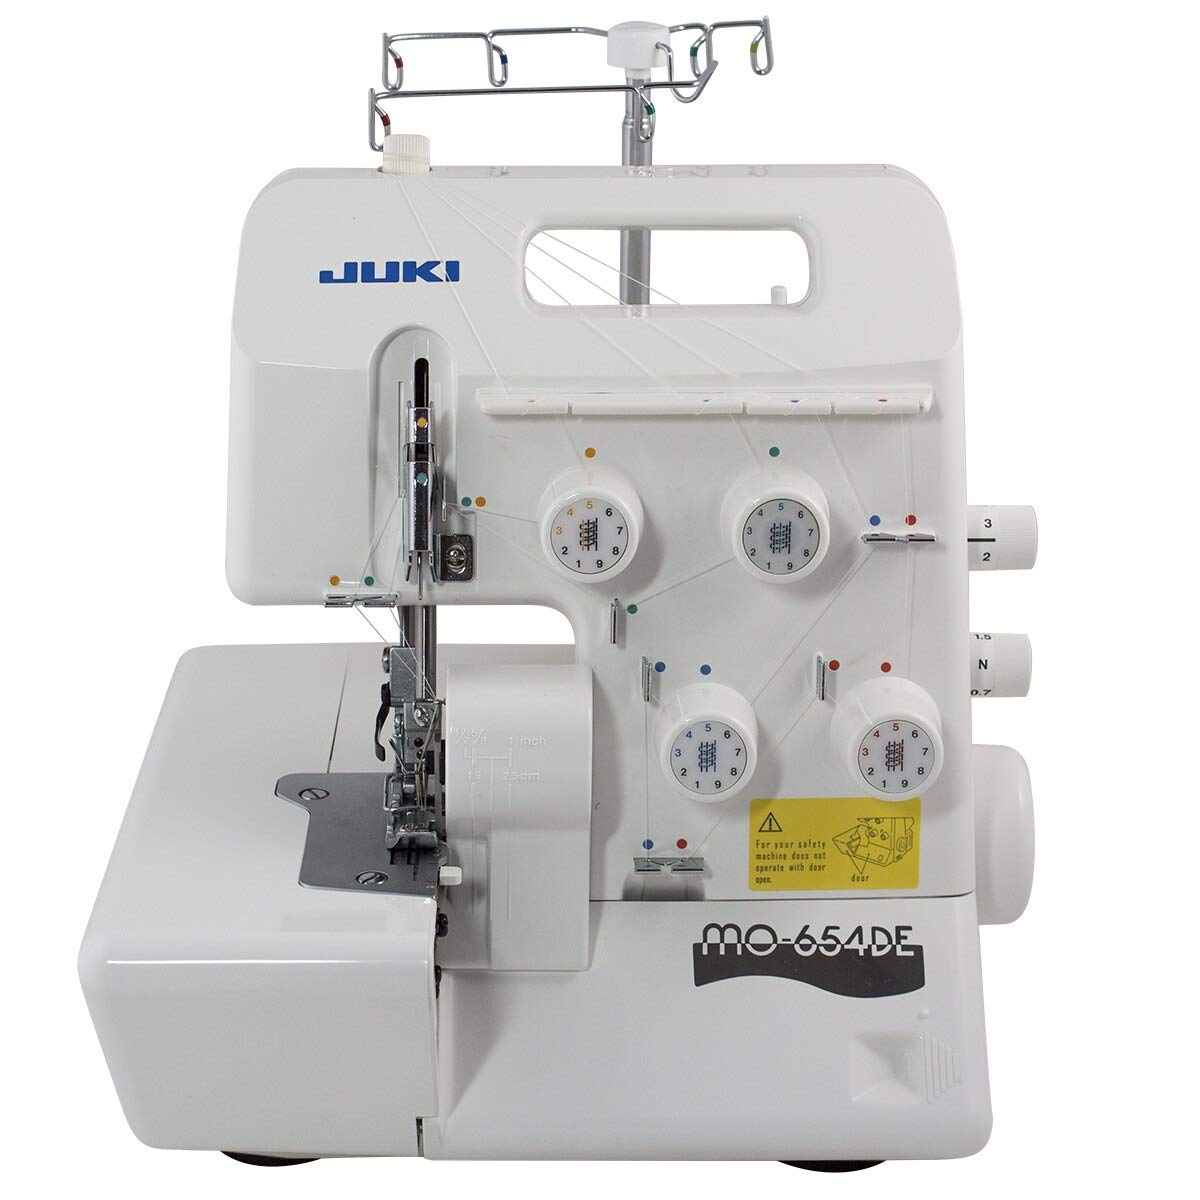
Figura 1.1: Juki Pearl Line MO-654DE Serger. This image shows the overall view of the Juki MO-654DE serger machine.
2. Instruccions de seguretat
- Always disconnect the machine from the power supply before cleaning, lubricating, or performing any maintenance.
- Keep fingers away from all moving parts, especially the needles and cutting blades, during operation.
- Use only the recommended needles and accessories for this machine.
- Do not operate the machine if the power cord is damaged or frayed.
- Ensure adequate lighting in your work area.
- Mantingueu els nens i les mascotes lluny de la màquina durant el funcionament.
- No deixeu mai la màquina desatesa mentre està en funcionament.
3. Configuració
3.1 Desembalatge i col·locació
Carefully remove the serger from its packaging. Place the machine on a stable, level surface. Ensure there is sufficient space around the machine for fabric handling and ventilation.
3.2 Connexió d'alimentació
Connect the power cord to the machine and then to a suitable electrical outlet. Ensure the power switch is in the "OFF" position before connecting.
3.3 Enfilar la màquina
Proper threading is crucial for optimal serger performance. The Juki MO-654DE features color-coded threading paths to simplify the process. Always thread the loopers first, then the needles.
- Looper superior: Follow the color-coded path for the upper looper, ensuring the thread passes through all guides and tension discs.
- Lower Looper: Follow the color-coded path for the lower looper. This is often the most intricate part; refer to the machine's internal diagrams.
- Agulla dreta: Thread the right needle, following its designated path.
- Agulla esquerra: Thread the left needle, following its designated path.

Figura 3.1: Thread Tension Dials. This image displays the four color-coded tension dials on the Juki MO-654DE, essential for proper stitch formation.

Figura 3.2: Needle and Looper Threading Area. This image shows a close-up of the needle bar and looper threading guides, highlighting the intricate path threads must follow.

Figura 3.3: Lower Looper and Cutting Knife. This image provides a detailed view of the lower looper mechanism and the cutting knife, crucial components for serging.
3.4 Instal·lació de l'agulla
Ensure the machine is turned off. Loosen the needle clamp screw, insert the new needle with the flat side facing the back, and push it up as far as it will go. Tighten the screw securely. Use only household serger needles (HAx1SP or ELx705).
4. Instruccions de funcionament
4.1 Basic Serging
After threading, raise the presser foot and place the fabric under it. Lower the presser foot. Turn the handwheel towards you to lower the needles into the fabric. Start sewing slowly, guiding the fabric evenly.
4.2 Stitch Type Selection (2, 3, or 4 Thread)
The MO-654DE can perform 2, 3, or 4-thread overlock stitches.
- 4-Thread Overlock: Uses both needles and both loopers for a strong, durable seam. Ideal for knits and woven fabrics.
- 3-Thread Overlock: Uses one needle and both loopers. Suitable for finishing edges, decorative stitching, and light seams.
- 2-Thread Overlock: Uses one needle and one looper (with a converter). Best for fine fabrics, rolled hems, and delicate edge finishes.
To change stitch types, you may need to remove one needle or engage/disengage the upper looper converter as per the machine's specific instructions.
4.3 Ajust de la tensió
Correct thread tension is vital for balanced stitches. Adjust the tension dials (Figure 3.1) according to the fabric type and thread used. A balanced stitch will have the looper threads meeting neatly at the fabric edge, with needle threads appearing straight on the top and bottom.
- Increase tension by turning the dial to a higher number.
- Decrease tension by turning the dial to a lower number.
- Always test on a scrap piece of your fabric before sewing your project.
4.4 Differential Feed
The differential feed feature allows you to adjust the feeding ratio of the front and rear feed dogs.
- Ratio > 1 (e.g., 1.5): Gathers fabric, ideal for knits to prevent stretching.
- Ratio < 1 (e.g., 0.7): Stretches fabric, useful for preventing wavy seams on delicate fabrics.
- Ratio = 1: Normal feeding.
Adjust the differential feed dial located on the machine as needed.
4.5 Stitch Length and Width Adjustment
Adjust the stitch length and width using the dedicated dials or levers on the machine.
- Longitud de la puntada: Controls the distance between stitches. Shorter stitches are denser, longer stitches are looser.
- Amplada de punt: Controls how wide the overlock stitch is from the cut edge.
4.6 Knife Operation
The upper and lower knives trim the fabric edge before the stitch is formed. The upper knife can be disengaged if you wish to sew without trimming, for example, when using decorative stitches or when the fabric edge is already finished. Refer to your machine's specific instructions for engaging/disengaging the knife.
5. Manteniment
Regular maintenance ensures your serger operates smoothly and extends its lifespan.
5.1 Neteja
- Eliminació de pelusses: Use a small brush or vacuum cleaner to remove lint and dust from the feed dogs, looper area, and under the needle plate after each use.
- Neteja exterior: Netegeu l'exterior de la màquina amb un damp tela. No utilitzeu productes químics durs.
5.2 Lubricació
Refer to your machine's specific lubrication points and frequency in the included manual. Use only high-quality sewing machine oil. Over-oiling can cause issues.
5.3 Substitució de l'agulla
Replace needles regularly, especially if they become bent, dull, or if you experience skipped stitches. Always use the correct type and size of needle for your fabric and thread.
6. Solució De Problemes
This section addresses common issues you might encounter with your Juki MO-654DE serger.
| Problema | Causa possible | Solució |
|---|---|---|
| Punts saltats | Incorrect needle installation, bent or dull needle, improper threading, incorrect tension. | Reinstall needle correctly, replace needle, rethread machine, adjust tension. |
| Trencament del fil | High tension, poor quality thread, burrs on thread path, incorrect threading, damaged needle. | Reduce tension, use quality thread, check thread path for obstructions, rethread, replace needle. |
| Uneven Stitches / Looping | Incorrect tension, improper threading, incorrect differential feed setting. | Adjust tension dials, rethread all threads, adjust differential feed. |
| La tela no s'alimenta correctament | Lint in feed dogs, presser foot pressure too low, incorrect differential feed. | Clean feed dogs, increase presser foot pressure, adjust differential feed. |
| La màquina no arrenca | Power cord not connected, power switch off, foot controller issue. | Check power connections, ensure switch is on, inspect foot controller. |
If problems persist after attempting these solutions, please contact Juki customer support or a qualified service technician.
7. Especificacions
| Característica | Detall |
|---|---|
| Marca | JUKI |
| Número de model | MO-654DE |
| Font d'alimentació | Elèctric amb cable |
| Nombre de fils | 2/3/4 fils |
| UPC | 786173756233, 012545893535, 789542270392 |
8. Garantia i Suport
For specific warranty information, please refer to the warranty card included with your product or visit the official Juki website. For technical support, service, or to order replacement parts, please contact Juki customer service. Keep your purchase receipt as proof of purchase for warranty claims.


