1. Producte acabatview
The Field Tuff FTF-603PTS 3-Point Seeder is designed for efficient seeding across fields, lawns, gardens, or food plots. This 60-inch seeder is compatible with Category 1 hitches, making it suitable for a variety of tractors. It features 10 rows for rapid seeding, with adjustable row spacing and sowing depth to accommodate different seed types and planting requirements.
The seeder is constructed for durability and reliability, ensuring long-term performance. It includes two boxes with closeable slides for precise seed distribution.
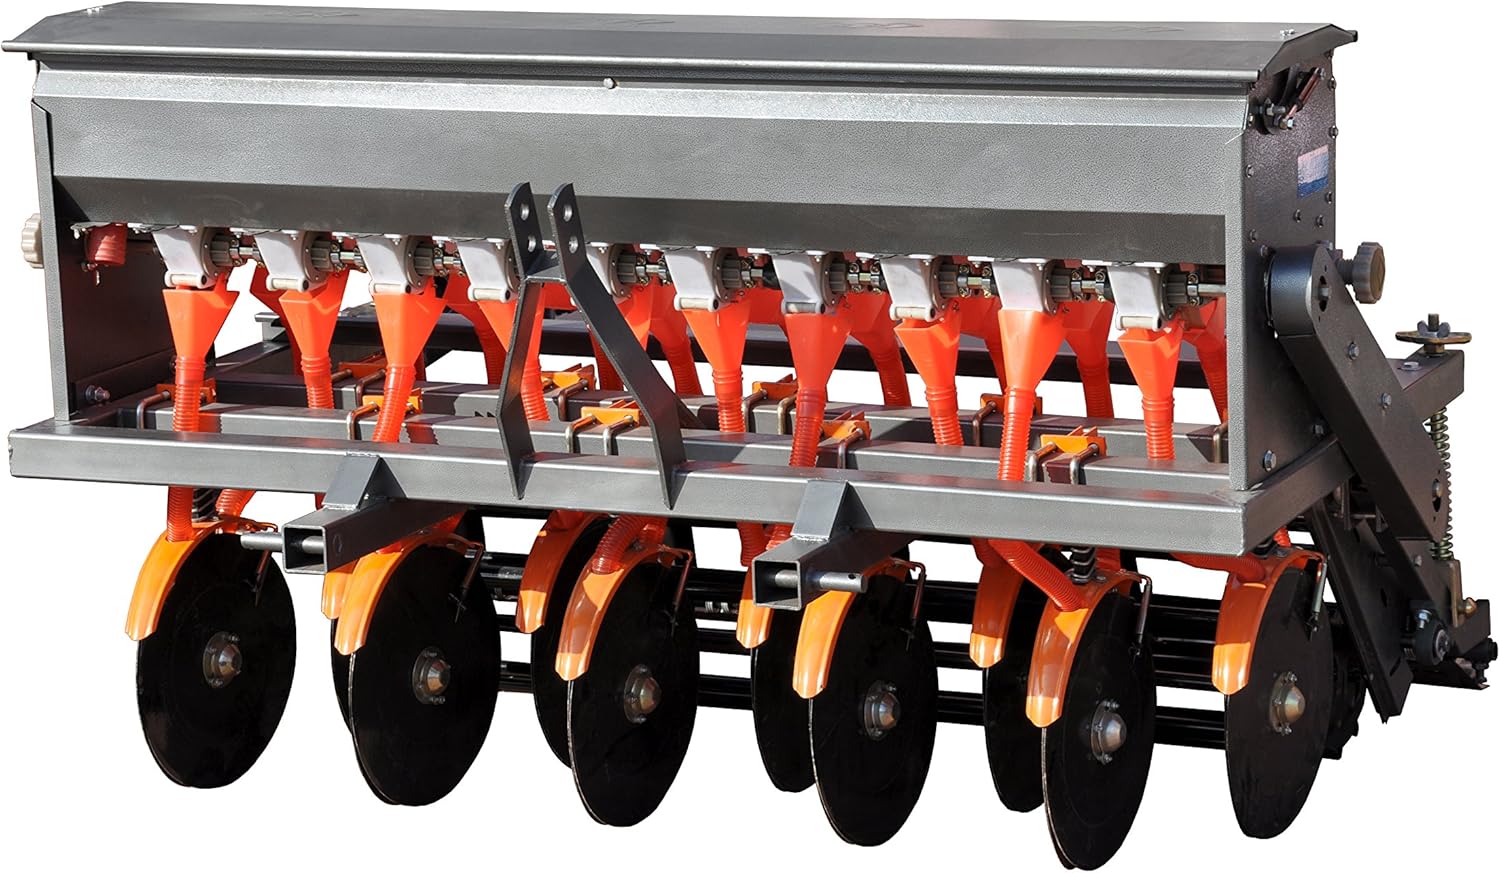
Imatge 1: Cara frontal view of the Field Tuff FTF-603PTS 3-Point Seeder, showcasing its robust construction and multiple seeding rows.
2. Informació de seguretat
Always read and understand the entire instruction manual before operating the seeder. Failure to follow instructions can result in serious injury or equipment damage.
- Utilitzeu equips de protecció individual (EPI) adequats, com ara ulleres de seguretat, guants i calçat resistent.
- Ensure the seeder is securely attached to a Category 1 hitch on a compatible tractor before operation.
- Keep all bystanders, especially children and pets, away from the operating area.
- Never operate the seeder on excessively steep slopes or uneven terrain where stability may be compromised.
- Turn off the tractor engine and engage the parking brake before performing any adjustments, maintenance, or clearing blockages.
- Do not exceed the recommended operating speed for the seeder.
- Inspect the seeder for any damaged or loose parts before each use. Replace or repair as necessary.
3. Muntatge i muntatge
The Field Tuff FTF-603PTS 3-Point Seeder requires assembly. Refer to the detailed assembly instructions provided with your product packaging for step-by-step guidance. Ensure all fasteners are tightened to the manufacturer's specifications.
3.1 Enganxament al tractor
- Position the tractor on a level surface and engage the parking brake.
- Align the seeder's 3-point hitch with the tractor's lower lift arms.
- Secure the lower lift arms to the seeder using appropriate pins.
- Connect the top link of the tractor's 3-point hitch to the seeder's top link bracket.
- Ensure all connections are secure and pins are properly latched.
3.2 Filling the Hoppers
The seeder includes two boxes with closeable slides. Fill the hoppers with your desired seed or food plot mix. Ensure the material is dry and free of debris to prevent blockages.

Imatge 2: Part superior view of the seeder with hoppers open, ready for filling with seed or fertilizer.
4. Instruccions de funcionament
The FTF-603PTS seeder is designed for precise and efficient planting. Follow these guidelines for optimal performance:
4.1 Adjusting Sowing Depth and Row Spacing
- The seeder offers a sowing depth range of ¾ inch to 2 inches. Adjust the depth according to the specific requirements of your seed type.
- Row spacing is fixed at 6 inches, providing consistent planting patterns for various crops like corn, beans, oats, grass seed, and food plot mixes.
- Adjustable slots allow you to specify the opening for your specific needs, controlling the seed flow rate.
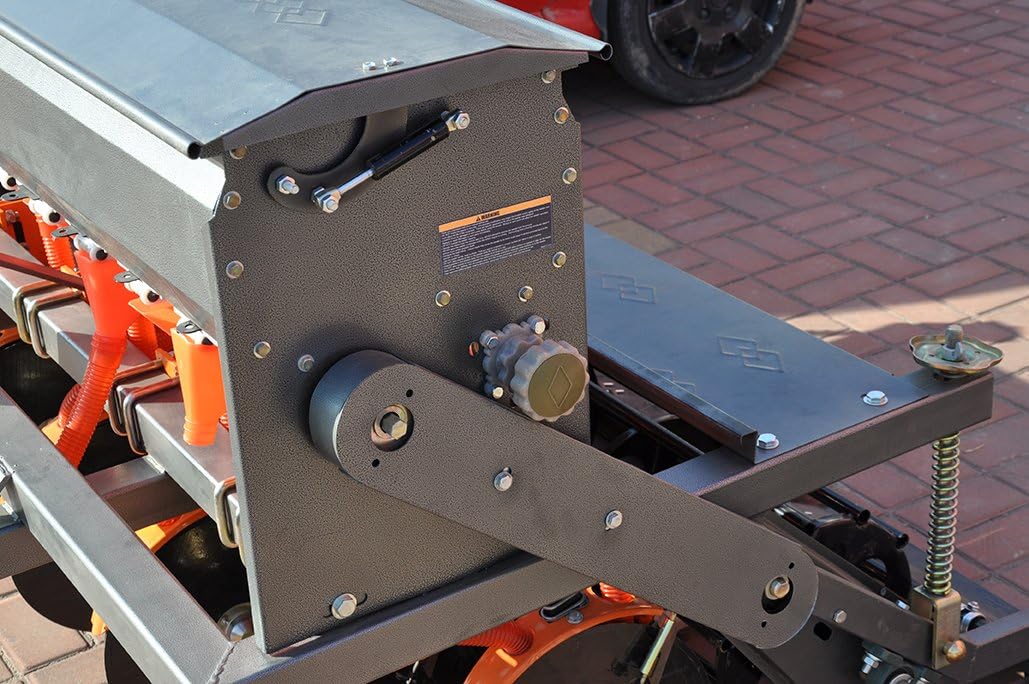
Imatge 3: Lateral view of the seeder, highlighting the gear mechanism responsible for driving the seed distribution system.
4.2 Seeding Operation
- Once the seeder is attached and filled, slowly lower it to the desired sowing depth.
- Begin driving the tractor at a consistent, appropriate speed for your terrain and seed type.
- Monitor the seed flow to ensure even distribution. Adjust the slots as needed.
- The 10-row design ensures efficient coverage of large areas.
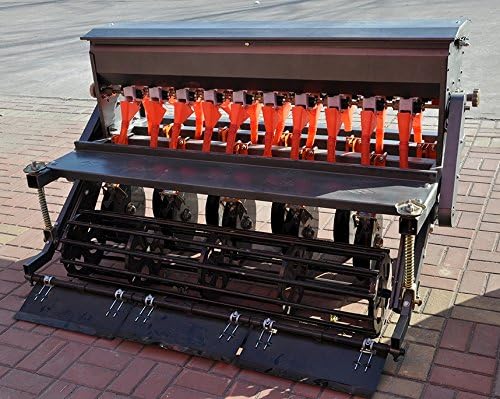
Imatge 4: posterior view of the seeder, showing the rollers that help cover the seeds after planting.
5. Manteniment
Regular maintenance ensures the longevity and optimal performance of your Field Tuff seeder.
- After each use, thoroughly clean the hoppers and all seed distribution components to prevent residue buildup and corrosion.
- Inspect all moving parts, including chains, gears, and discs, for wear or damage. Lubricate moving parts as recommended by the manufacturer.
- Comproveu que tots els elements de fixació estiguin ben ajustats i torneu-los a apretar si cal.
- Store the seeder in a dry, protected area when not in use to prevent rust and weather damage.
6. Solució De Problemes
If you encounter issues with your seeder, consider the following common troubleshooting steps:
- Uneven Seed Distribution: Check for blockages in the seed tubes or adjustable slots. Ensure the seed material is dry and free-flowing. Verify the agitator is functioning correctly.
- Inconsistent Sowing Depth: Ensure the 3-point hitch is properly adjusted and the ground is adequately prepared. Check for any obstructions affecting the seeder's depth control.
- Seeder Not Engaging: Inspect the drive chains and gears for proper tension and alignment. Ensure no debris is interfering with the mechanism.
For persistent issues, consult the full product manual or contact Field Tuff customer support.
7. Especificacions
| Característica | Especificació |
|---|---|
| Número de model | FTF-603PTS |
| Dimensions del producte | 91 x 63 x 42 polzades |
| Pes de l'article | 528 lliures |
| Seeding Width | 60 polzades |
| Nombre de files | 10 |
| Espaiat entre files | 6 polzades |
| Profunditat de sembra | ¾ - 2 inches |
| Tipus enganxat | Categoria 1 |
8. Garantia i Suport
The Field Tuff FTF-603PTS 3-Point Seeder comes with a 1-year limited Manufacturer’s parts warranty. For warranty claims, technical support, or replacement parts, please refer to the contact information provided in your product packaging or visit the official Field Tuff weblloc.