
Introducció
This manual provides detailed instructions for the installation, operation, and maintenance of your Hozelock 20 Pot Drip Watering Kit with AC1 Timer. This automatic watering system is designed to efficiently water up to 20 pots, hanging baskets, borders, vegetable patches, and greenhouse plants, saving you time, water, and effort. Please read these instructions carefully before use to ensure proper setup and safe operation.
Informació de seguretat
ADVERTIMENT: Use with caution during installation and when adjusting the timer. Always read the instructions thoroughly before operating the device.
- Assegureu-vos que totes les connexions estiguin ben fixades per evitar fuites.
- Do not expose the AC1 timer to extreme temperatures or direct sunlight for prolonged periods.
- Mantenir fora de l'abast dels nens.
- Only use the system with clean water.
Contingut del paquet
Verifiqueu que tots els components siguin presents abans de començar la instal·lació.
- Hozelock AC1 Water Timer
- 15 meters of 4mm micro hose
- Reductor de pressió
- 20 x Drip Emitters (stakes)
- Connectors and T-pieces
- Toqueu el connector
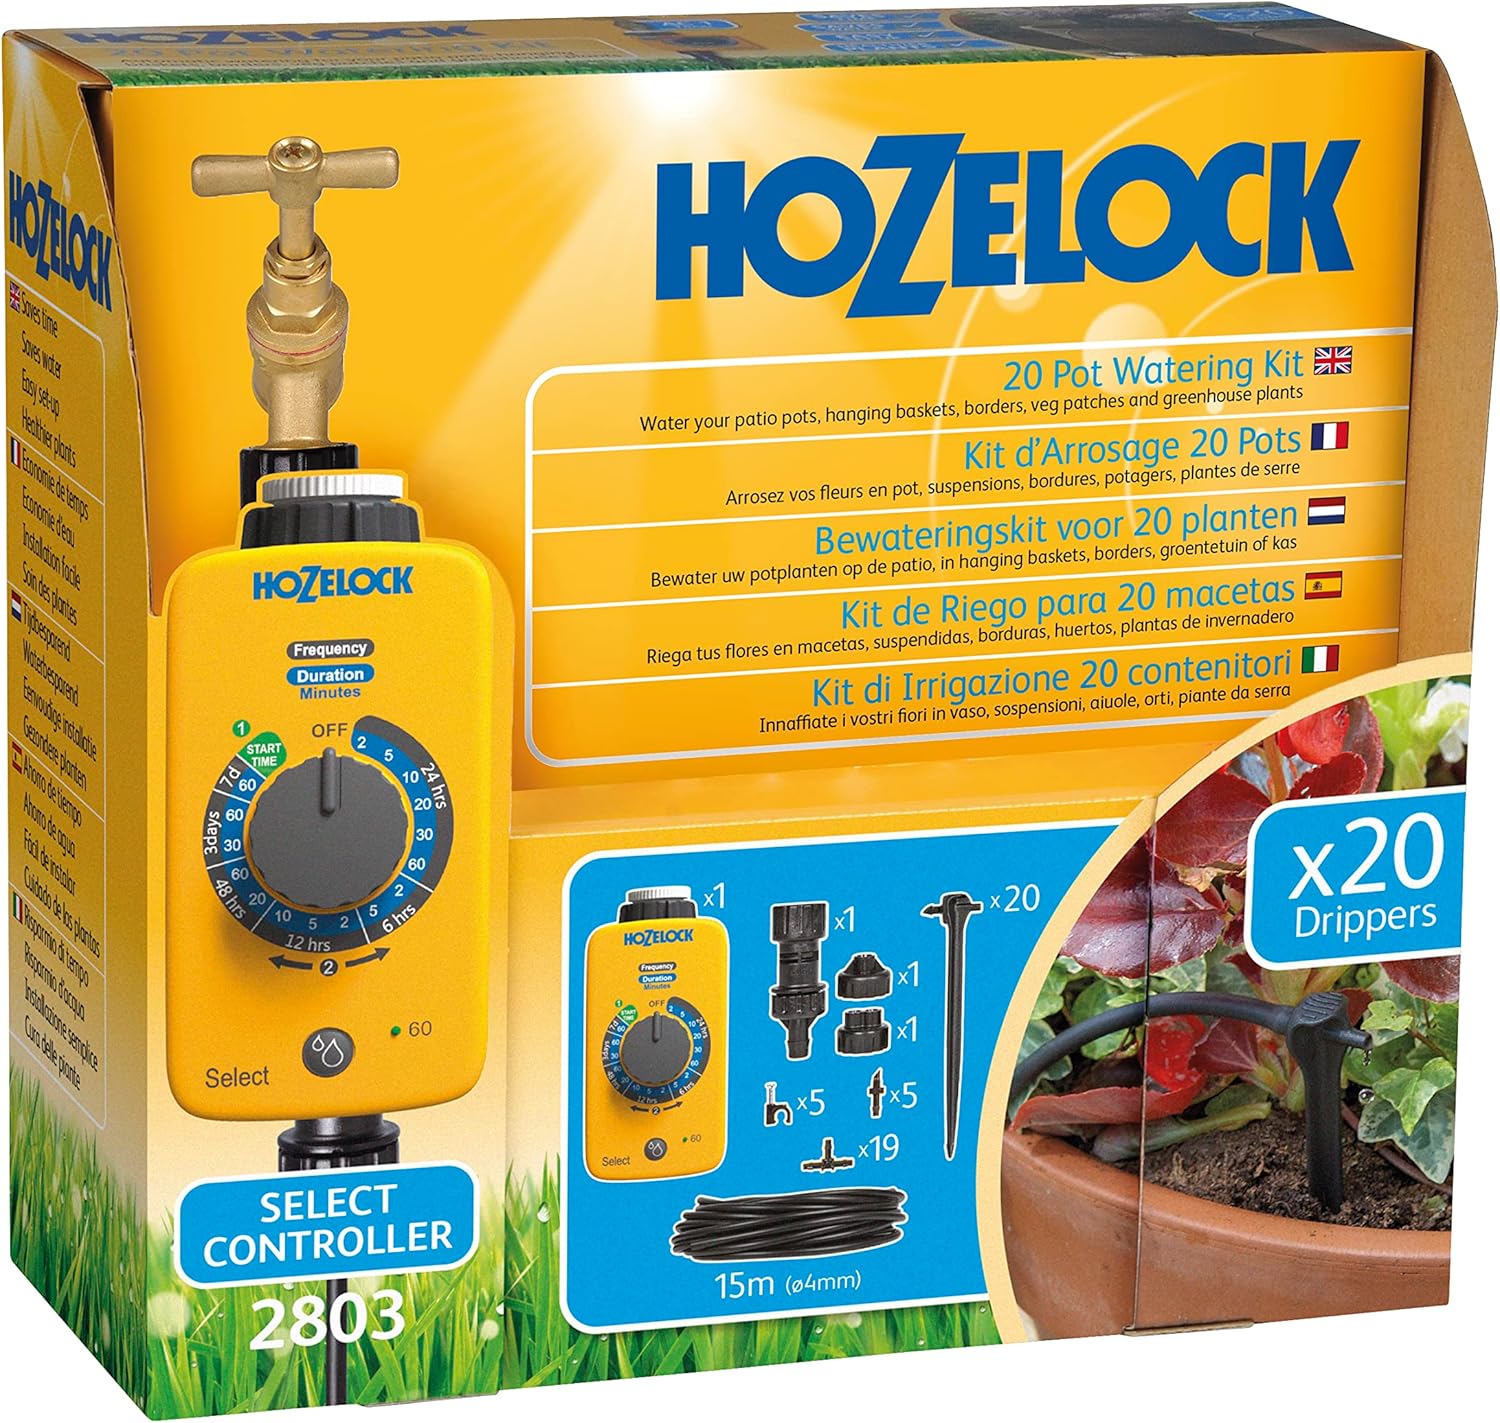
Imatge: Més deview of the Hozelock 20 Pot Drip Watering Kit components, including the AC1 timer, micro hose, drippers, and connectors.
Instruccions de configuració
- Install Batteries in AC1 Timer:
Unscrew the battery panel on the AC1 timer. Insert 2 C-size batteries (not included), ensuring correct polarity. Securely screw the panel back on, making sure the rubber seals are properly seated to prevent water ingress.
- Connect Timer to Tap:
Attach the AC1 timer to your outdoor tap using the provided threaded fittings. Hand-tighten to ensure a secure, leak-free connection.
- Attach Pressure Reducer:
Connect the pressure reducing adaptor to the bottom outlet of the AC1 timer. This is crucial for optimal drip system performance.
- Lay Out Micro Hose:
Unroll the 15-meter micro hose. Plan the layout to reach all 20 pots or plants you intend to water. Cut the hose to the required lengths using scissors.
- Connect Drippers:
Use the provided connectors and T-pieces to branch off the main micro hose to individual pots. At the end of each branch, push on a drip emitter stake and insert it into the soil of the plant pot, ensuring it is close to the plant's root zone.
- Comprovació del sistema:
Once all components are connected, briefly turn on the tap (and set the timer to manual ON if applicable) to check for any leaks and ensure water flows to all drippers. Adjust connections as needed.
Image: The Hozelock 20 Pot Drip Watering Kit fully installed, showing the AC1 timer connected to a tap and micro hoses leading to drippers in various potted plants.
Operating the AC1 Timer
The AC1 timer features a dial with three colored sections for different operating modes:
- RED Section: Manual watering (ON/OFF).
- GREEN Section: 'Auto Start' timed watering periods (e.g., 2, 5, 15, 30, 60 minutes).
- BLUE Section: 'Auto Start' predefined program watering periods (e.g., On for 10 minutes every 12 hours, On for 2 minutes every 6 hours).
Setting the 'Auto Start' Time:
- To set the 'Auto Start' time, turn the dial to the 'Auto Start' position within the BLUE section at the exact time you want watering to begin each day. For example, if you want watering to start at 7:00 AM, turn the dial to 'Auto Start' at 7:00 AM.
- The timer will memorize this time. There is no visual confirmation, but the setting is stored. You do not need to set it again unless you wish to change the start time.
Selecting a Watering Program:
- After setting the 'Auto Start' time, turn the dial to your desired watering period in either the GREEN or BLUE 'Auto Start' sections.
- Per example, to water for 30 minutes at 7:00 AM, first set the 'Auto Start' time at 7:00 AM, then turn the dial to the '30 minutes' option in the GREEN section.
- The timer will then activate for the selected duration at the programmed 'Auto Start' time.
Reg manual:
To manually water, turn the dial to the RED 'ON' position. The water will flow continuously. Turn the dial to 'OFF' to stop manual watering. Manual watering overrides any programmed settings temporarily. Once you return the dial to an 'Auto Start' setting, the timer will resume its programmed schedule from the last set 'Auto Start' time.
Manteniment
- Substitució de la bateria: Replace batteries annually or when the timer display indicates low power. Always use fresh C-size batteries.
- Dripper Cleaning: Periodically check drippers for blockages from sediment or mineral buildup. Clean them by gently removing any debris.
- Inspecció de la mànega: Inspect the micro hose for kinks, damage, or leaks. Repair or replace damaged sections as needed.
- Emmagatzematge d'hivern: Before the first frost, disconnect the timer and all hoses from the tap. Drain all water from the system to prevent freezing damage. Store the timer and components in a dry, frost-free location.
Resolució de problemes
| Problema | Causa possible | Solució |
|---|---|---|
| No surt aigua dels degotadors. |
|
|
| Fuites d'aigua per les connexions. |
|
|
| Timer not activating at programmed time. |
|
|
Especificacions
- Número de model: 100-001-400
- Marca: Hozelock
- Capacitat: Up to 20 pots/containers
- Longitud de la mànega: 15 metres (aprox. 590.55 polzades)
- Font d'alimentació: Battery powered (2 x C-size batteries, not included)
- Material: Plàstic
- Dimensions del producte (L x A x A): 19.75 x 39.75 x 59.5 cm (aprox. 7.78 x 15.65 x 23.43 polzades)
- Pes de l'article: 957.2 Grams (approx. 1.2 Kilograms)
- Característica especial: Reg automàtic
- Programes de temporitzador: 13 predefined programs (AC1 timer)
Garantia i Suport
For warranty information and technical support, please refer to the official Hozelock website or contact Hozelock customer service directly. Keep your proof of purchase for warranty claims.
Hozelock Official Weblloc: www.hozelock.com