
1. Introducció
This manual provides detailed instructions for installing, configuring, and maintaining your GIGABYTE GA-B150M-D3H Micro ATX motherboard. The GA-B150M-D3H is designed to support 6th Generation Intel Core Processors and features Dual Channel DDR4 memory, PCIe Gen3 x4 M.2 connector, SATA Express, and 8-channel HD audio with Audio Noise Guard.
Si us plau, llegiu aquest manual detingudament abans de començar la instal·lació per garantir una configuració i un funcionament correctes.
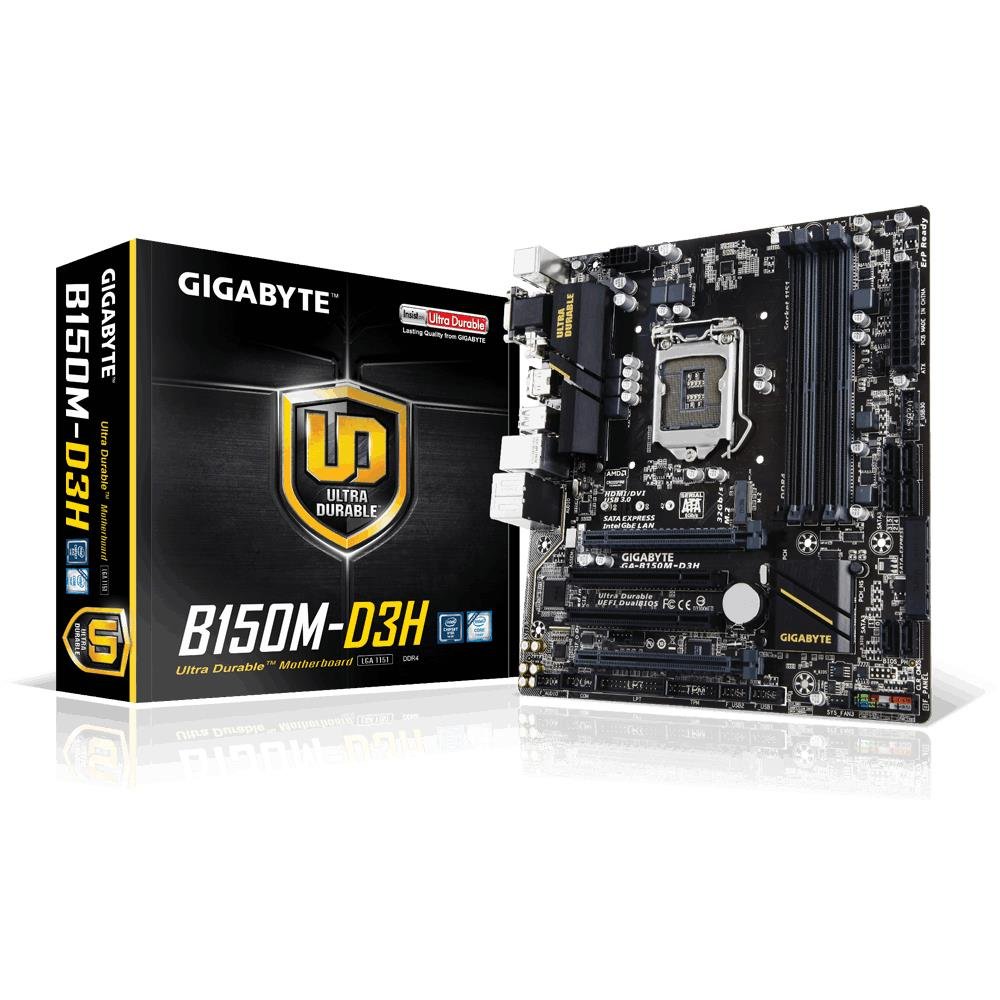
Image 1.1: GIGABYTE GA-B150M-D3H Micro ATX Motherboard. This image displays the overall layout of the motherboard, highlighting its compact Micro ATX form factor and various component slots.
2. Informació de seguretat
Observeu les següents precaucions de seguretat per evitar danys a la placa base i lesions personals:
- Desconnecteu sempre el cable d'alimentació de la presa de corrent abans de tocar qualsevol component.
- Porteu una corretja antiestàtica al canell o toqueu sovint un objecte metàl·lic connectat a terra per descarregar l'electricitat estàtica.
- Manegeu la placa base per les vores per evitar tocar els components sensibles.
- Mantingueu la placa base allunyada de la humitat i de les temperatures extremes.
- Assegureu-vos que hi hagi una ventilació adequada dins de la carcassa de l'ordinador per evitar el sobreescalfament.
3. Contingut del paquet
Verifiqueu que tots els elements estiguin presents a l'embalatge de la placa base:
- GIGABYTE GA-B150M-D3H Motherboard
- Manual d'usuari
- Escut d'E / S
- Cables SATA
- CD/DVD de controladors
Note: Contents may vary slightly depending on region or revision.
4. Disseny de la placa base
Familiarize yourself with the various components and connectors on the GA-B150M-D3H motherboard.
Image 4.1: GIGABYTE GA-B150M-D3H Motherboard Layout. This image provides a visual reference for the location of key components such as the CPU socket, DIMM slots, PCIe slots, SATA ports, and M.2 connector.
Components clau:
- Sòcol de la CPU LGA 1151: For 6th Generation Intel Core Processors.
- Ranures per a DIMM DDR4 (4): Supports Dual Channel DDR4 memory up to 2133 MHz.
- Ranures PCIe: Includes PCIe Gen3 x16 for graphics cards and PCIe x1 slots for expansion.
- M.2 Connector: Supports PCIe NVMe & SATA SSDs with up to 32Gb/s data transfer.
- SATA Express Connector: For up to 16Gb/s data transfer.
- Ports SATA de 6 Gb/s: For connecting traditional SATA storage devices.
- Connector d'alimentació ATX de 24 pins: Entrada d'alimentació principal.
- 8-Pin ATX 12V Power Connector: CPU power input.
- Capçaleres del panell frontal: For power button, reset button, LED indicators, and USB ports.
- Connectors d'àudio: 8-channel HD Audio with high quality capacitors and Audio Noise Guard.
5. Configuració i instal·lació
Segueix aquests passos per instal·lar correctament la placa base i els components.
5.1. Instal·lació de la CPU
- Locate the LGA 1151 CPU socket.
- Obriu la palanca del sòcol de la CPU i aixequeu la placa de càrrega.
- Alineeu amb cura la CPU amb el sòcol, assegurant-vos que el triangle daurat de la CPU coincideixi amb el triangle del sòcol. No forceu la CPU al sòcol.
- Baixeu la placa de càrrega i fixeu-la amb la palanca.
5.2. Instal·lació del refrigerador de la CPU
Refer to your CPU cooler's instruction manual for specific installation steps. Ensure thermal paste is applied correctly between the CPU and cooler base.
5.3. Instal·lació de memòria (RAM)
- Obriu els clips als dos extrems de les ranures DIMM DDR4.
- Alineeu el mòdul de memòria amb la ranura, assegurant-vos que l'osca del mòdul coincideixi amb la clau de la ranura.
- Premeu fermament els dos extrems del mòdul de memòria fins que els clips encaixin al seu lloc.
- For dual-channel performance, install memory modules in matching colored slots (e.g., DIMM1 and DIMM2).
5.4. Instal·lació de targetes d'expansió
- Remove the metal bracket from the desired PCIe slot on your computer case.
- Alineeu la targeta d'expansió amb la ranura PCIe i premeu fermament fins que quedi correctament col·locada.
- Secure the card with a screw to the computer case.
5.5. Connexió de dispositius d'emmagatzematge
- Dispositius SATA: Connect one end of the SATA data cable to a SATA 6Gb/s port on the motherboard and the other end to your hard drive or SSD. Connect the SATA power cable from your power supply to the device.
- SSD M.2: Insert the M.2 SSD into the M.2 slot at an angle, then gently push it down and secure it with the provided screw.
- SATA Express: If using a SATA Express device, connect it to the designated SATA Express connector.
5.6. Connecting Front Panel Connectors
Connect the cables from your computer case's front panel (power button, reset button, HDD LED, power LED, front USB, front audio) to the corresponding headers on the motherboard. Refer to the motherboard layout diagram for exact locations and pin assignments.
5.7. Connexió de la font d'alimentació
- Connect the 24-pin ATX main power connector from your power supply to the 24-pin power socket on the motherboard.
- Connect the 8-pin ATX 12V CPU power connector to the 8-pin socket near the CPU.
- Assegureu-vos que totes les connexions d'alimentació estiguin segures.
6. Instruccions de funcionament
6.1. Primera arrencada
After assembling all components, connect your monitor, keyboard, and mouse. Power on the system. The system should display the GIGABYTE splash screen and then enter the BIOS/UEFI setup or attempt to boot from a connected storage device.
6.2. Configuració de la BIOS/UEFI
Per entrar a la configuració de la BIOS/UEFI, premeu la tecla DEL key repeatedly during the boot process when the GIGABYTE logo appears. Here you can configure system settings, boot order, and monitor hardware status. The GA-B150M-D3H features GIGABYTE UEFI Dual BIOS for enhanced reliability.
6.3. Instal·lació del controlador
After installing your operating system, install the necessary drivers for the motherboard components. These can be found on the included driver CD/DVD or downloaded from the official GIGABYTE website. Key drivers include chipset, audio (Realtek ALC892 codec), LAN, and any integrated graphics drivers.
6.4. Instal·lació del sistema operatiu
Insert your operating system installation media (USB drive or DVD) and configure the boot order in the BIOS/UEFI to boot from it. Follow the on-screen instructions to install your preferred operating system (e.g., Windows 8.1, Windows 10).
7. Manteniment
7.1. Neteja
Netegeu regularment l'interior de la carcassa de l'ordinador per evitar l'acumulació de pols, que pot provocar un sobreescalfament. Utilitzeu aire comprimit per eliminar la pols dels ventiladors, els dissipadors de calor i els components de la placa base. Assegureu-vos que el sistema estigui apagat i desendollat abans de netejar-lo.
7.2. Actualitzacions de la BIOS
GIGABYTE periodically releases BIOS updates to improve system stability, compatibility, and performance. Visit the official GIGABYTE website for your motherboard model (GA-B150M-D3H) to check for the latest BIOS version and follow the provided instructions for updating. Exercise caution during BIOS updates, as an interruption can render the motherboard inoperable.
8. Solució De Problemes
Aquesta secció tracta problemes comuns que podeu trobar.
8.1. No Power / System Does Not Turn On
- Comproveu si la font d'alimentació està connectada correctament a la placa base (connectors de 24 i 8 pins).
- Assegureu-vos que l'interruptor de l'alimentació estigui en la posició ON.
- Verify that the front panel power button cable is correctly connected to the motherboard header.
- Proveu la font d'alimentació amb un altre sistema o un provador de fonts d'alimentació.
8.2. Sense sortida de pantalla
- Ensure the monitor is connected to the correct graphics output (either integrated graphics on the motherboard or a dedicated graphics card).
- Torneu a col·locar la targeta gràfica i els mòduls de memòria.
- Try booting with only one memory module installed.
- Check if the monitor is powered on and set to the correct input source.
8.3. Inestabilitat / Fallades del sistema
- Comproveu les temperatures de la CPU i la GPU per assegurar-vos que estiguin dins dels límits de funcionament segurs.
- Verify that all drivers are installed and up to date.
- Executeu eines de diagnòstic de memòria per comprovar si hi ha defectes a la memòria RAM.
- Ensure the power supply provides sufficient and stable power to all components.
9. Especificacions
Detailed technical specifications for the GIGABYTE GA-B150M-D3H motherboard:
| Característica | Especificació |
|---|---|
| Nom del model | GA-B150M-D3H |
| Factor de forma | Micro ATX (24.4 cm x 22.5 cm) |
| Socket de CPU | LGA 1151 |
| Processadors compatibles | Processadors Intel Core de 6a generació |
| Chipset | Conjunt de xips Intel B150 Express |
| Tecnologia de la memòria | DDR4 |
| Ranures de memòria | 4 sòcols DIMM DDR4 (doble canal) |
| Capacitat màxima de memòria | 16 GB |
| Velocitat de rellotge de memòria | 2133 MHz |
| PCIe tragamonedas | 1 x PCI Express x16, 1 x Total PCIe Ports |
| Interfícies d'emmagatzematge | PCIe Gen3 x4 M.2, SATA Express, SATA 6Gb/s |
| Còdec d'àudio | Còdec Realtek ALC892, àudio HD de 8 canals |
| Ports USB | Total 8 USB Ports (including USB 2.0) |
| Connector d'alimentació principal | ATX de 24 pins |
| Connector d'alimentació de la CPU | 8-Pin ATX 12V |
| Característiques úniques | GIGABYTE UEFI Dual BIOS, Audio Noise Guard with LED Trace Path Lighting, App Center (Easy Tune, Cloud Station) |
10. Garantia i Suport
For warranty information, please refer to the warranty card included in your product package or visit the official GIGABYTE weblloc. Els termes i condicions de la garantia poden variar segons la regió.
For technical support, driver downloads, BIOS updates, and further product information, please visit the GIGABYTE official support weblloc:
https://www.gigabyte.com/Support
When contacting support, please have your motherboard model (GA-B150M-D3H) and serial number ready.