Introducció
Thank you for choosing the Seiko QHE143JLH Bedside Analog Alarm Clock. This manual provides detailed instructions for the setup, operation, and maintenance of your new clock. Please read this manual thoroughly before use to ensure proper function and longevity of your device.
Precaucions de seguretat
- No exposeu el rellotge a temperatures extremes, llum solar directa ni humitat elevada.
- Eviteu deixar caure el rellotge o sotmetre'l a impactes forts.
- No intenteu desmuntar ni reparar el rellotge vosaltres mateixos. Demaneu ajuda a personal de servei qualificat.
- Mantingueu les piles fora de l'abast dels nens. En cas d'ingestió, busqueu atenció mèdica immediata.
- Eliminar les bateries usades d'acord amb la normativa local.
Contingut del paquet
Verifiqueu que tots els elements siguin presents al vostre paquet:
- Seiko QHE143JLH Bedside Analog Alarm Clock
- 3 piles AA (preinstal·lades o incloses per separat)
- Manual d'usuari (aquest document)
Identificació de peces
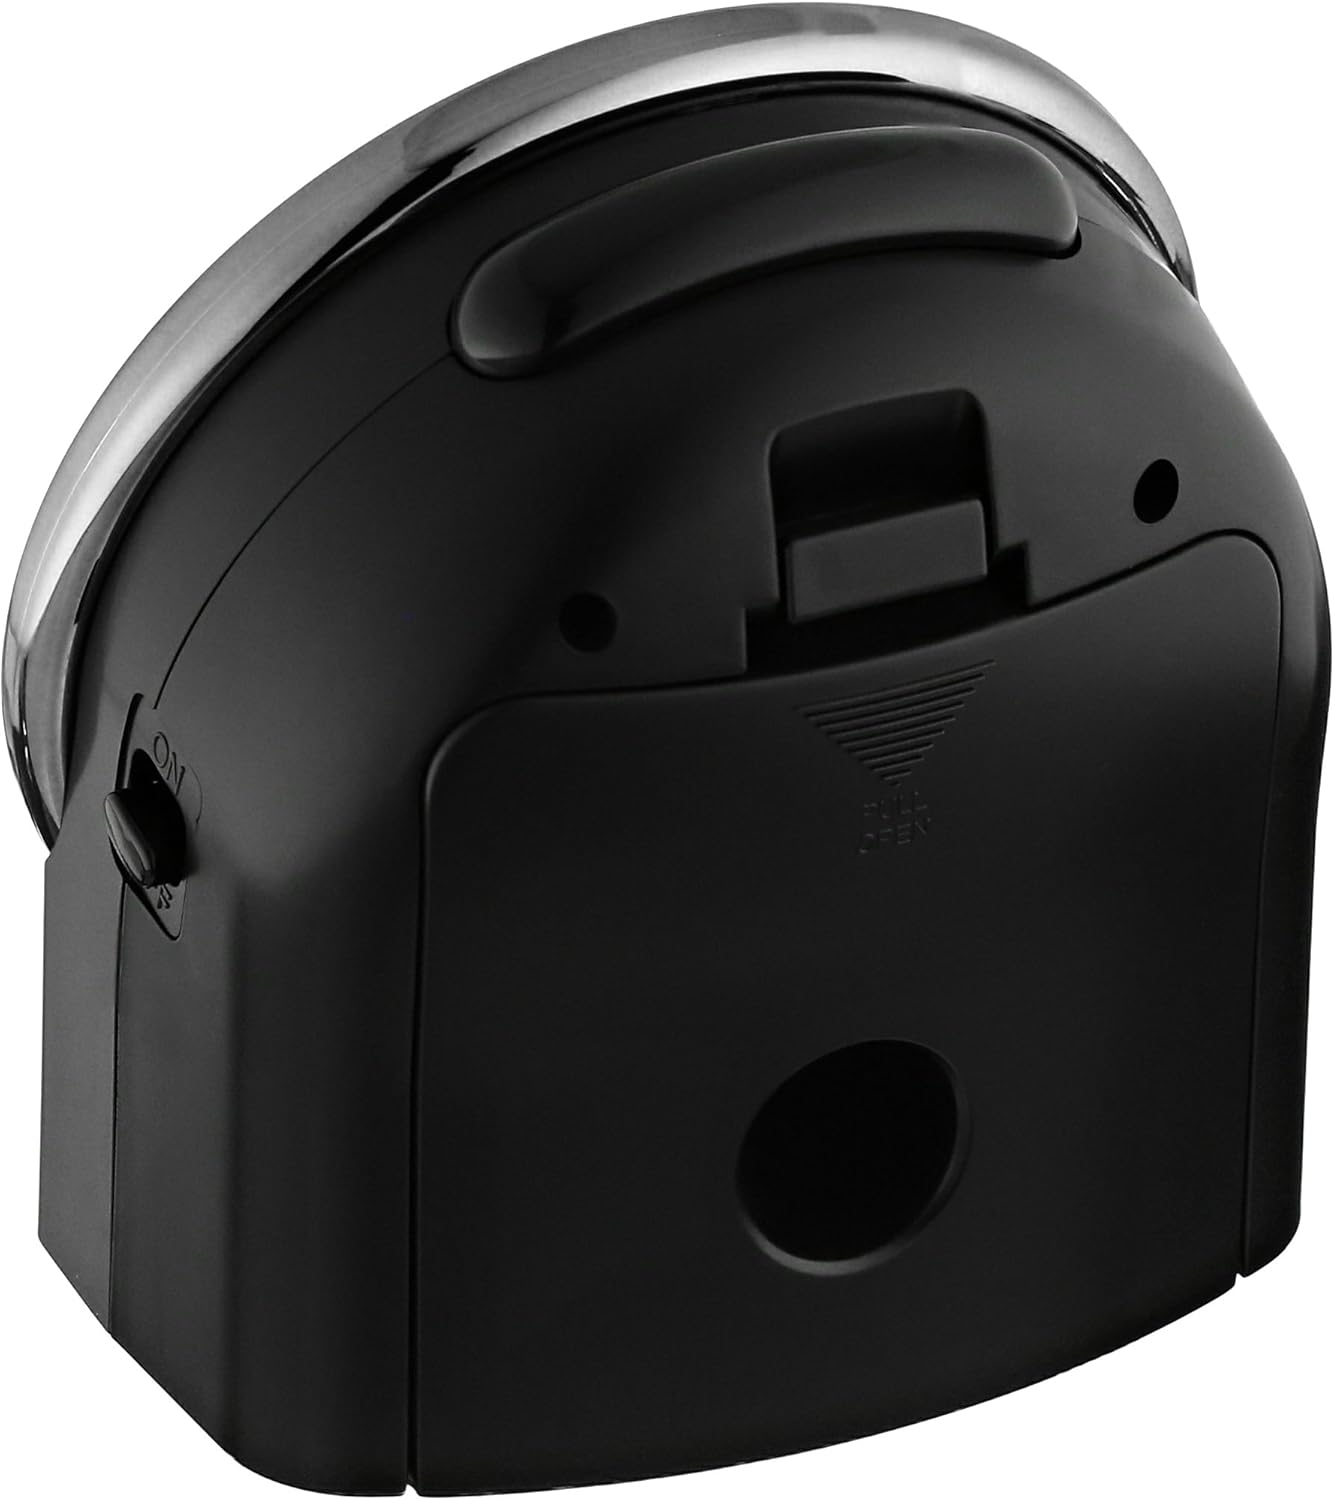
Figura 1: Frontal View. This image displays the front of the Seiko QHE143JLH alarm clock, featuring the analog clock face with clear hour, minute, and second hands, and numerical hour markers. The clock face is white with black numbers, encased in a silver-colored bezel.

Figura 2: Esquena View. This image shows the rear of the Seiko QHE143JLH alarm clock. Visible features include the battery compartment cover, the time setting knob, the alarm setting knob, and the alarm ON/OFF switch. A chrome-colored handle is also visible at the top.
- Botó de configuració de l'hora: Located on the back, used to adjust the current time.
- Alarm Setting Knob: Located on the back, used to set the desired alarm time.
- Interruptor d'activació/desactivació d'alarma: Located on the side/back, slides to activate or deactivate the alarm.
- Botó Posposa/Llum: Located on the top, activates snooze function when alarm sounds, or illuminates the dial for a few seconds.
- Compartiment de la bateria: Located on the back, holds the AA batteries.
- Alarm Reminder Light: An indicator light (green/yellow) that shows the alarm status.
Configuració
1. Instal·lació de la bateria
- Obriu la tapa del compartiment de les piles que es troba a la part posterior del rellotge (vegeu la Figura 2).
- Insert 3 AA batteries, ensuring the correct polarity (+ and -) as indicated inside the compartment.
- Tanqueu bé la tapa del compartiment de la bateria.
2. Configuració de l'hora
- Locate the Time Setting Knob on the back of the clock.
- Rotate the knob clockwise or counter-clockwise to move the hour and minute hands to the current time.
- Ensure the time is set accurately, especially for AM/PM if applicable (though this is an analog clock, consider the 12-hour cycle for alarm setting).
3. Configuració de l'alarma
- Locate the Alarm Setting Knob on the back of the clock.
- Gireu aquest botó per moure la petita maneta de l'alarma a l'hora de despertador desitjada.
- Be precise when setting the alarm hand to ensure it triggers at the correct time.
Instruccions de funcionament
1. Activació/desactivació de l'alarma
- To activate the alarm, slide the Alarm ON/OFF Switch to the "ON" position. The alarm reminder light will illuminate green.
- To deactivate the alarm, slide the Alarm ON/OFF Switch to the "OFF" position. The alarm reminder light will illuminate yellow/amber.
2. Funció de posposició
- When the alarm sounds, press the large Snooze/Light Button on the top of the clock.
- L'alarma s'aturarà temporalment i tornarà a sonar al cap d'uns 5 minuts.
- To completely turn off the alarm, slide the Alarm ON/OFF Switch to the "OFF" position.
3. Funció de llum nocturna
- To illuminate the clock face in the dark, press the Snooze/Light Button on the top of the clock.
- The light will stay on for a few seconds, allowing you to read the time.
Manteniment
1. Neteja
- Netegeu el rellotge amb un drap suau i sec.
- No utilitzeu netejadors abrasius, dissolvents ni esprais químics, ja que poden danyar l'acabat.
2. Substitució de la bateria
- When the clock starts to lose time or the alarm becomes weak, it is time to replace the batteries.
- Seguiu els passos d'instal·lació de la bateria que s'indiquen a la secció "Configuració".
- Always replace all 3 AA batteries at the same time with new ones.
Resolució de problemes
| Problema | Causa possible | Solució |
|---|---|---|
| Clock not running or losing time. | Dead or weak batteries; incorrect battery installation. | Substituïu les piles per unes de noves, assegurant la polaritat correcta. |
| L'alarma no sona. | Alarm switch is OFF; alarm time not set correctly; weak batteries. | Slide alarm switch to ON; re-set alarm time; replace batteries. |
| La llum nocturna no funciona. | Bateries febles. | Substituïu les piles. |
| Alarm is too quiet. | This model has a fixed alarm volume. | Ensure the clock is placed in an optimal position for audibility. |
Especificacions
- Marca: SEIKO
- Número de model: QHE143JLH
- Tipus de visualització: Analògic
- Color: Negre
- Material: Resin (Plastic Frame)
- Dimensions del producte: 3.85 cm d'amplada x 3.85 cm d'alçada
- Pes de l'article: 0.66 lliures
- Font d'alimentació: Alimentat per piles (calen 3 piles AA, incloses)
- Característiques: Quiet sweep second hand, Alarm reminder light, Snooze function, Night light
- Tipus de muntatge: Taula
Garantia i Suport
Seiko products are manufactured to high-quality standards. For specific warranty information, please refer to the warranty card included with your purchase or visit the official Seiko website. If you encounter any issues not covered in this manual, please contact Seiko customer support for assistance.
For further support, you may visit the Botiga SEIKO a Amazon.