
Introducció
The Melnor 2-Zone Digital Water Timer is designed to automate watering for two distinct areas of your lawn or garden. This device simplifies your watering tasks with its straightforward two-step programming process. Once configured, the timer will manage your watering schedule automatically, ensuring consistent hydration for your plants.
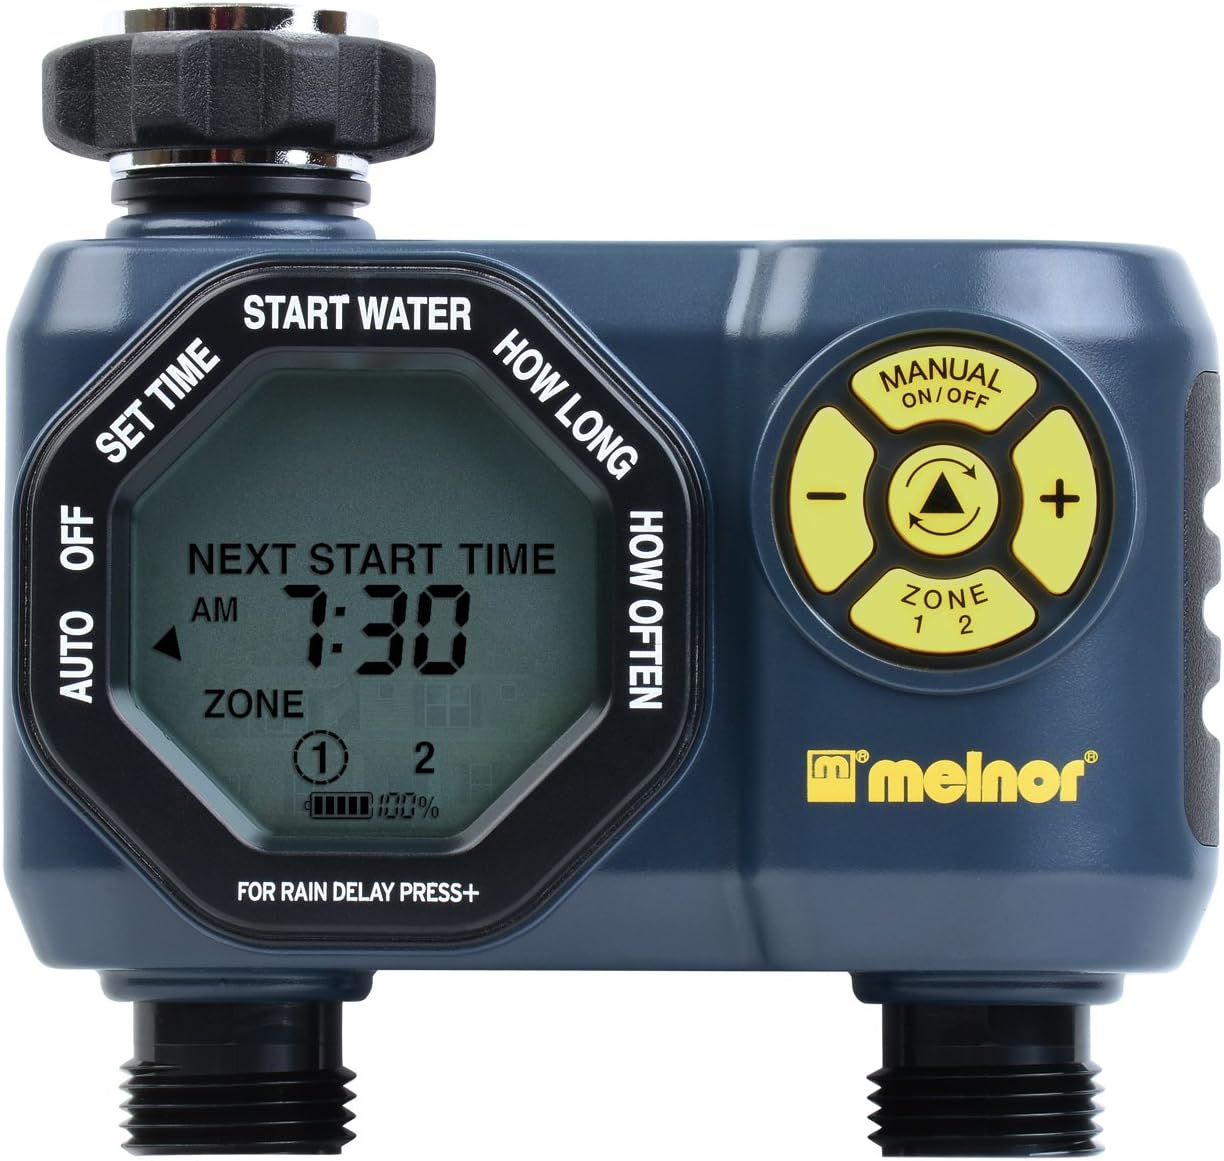
Davant view of the Melnor 2-Zone Digital Water Timer, showing the digital display and control buttons.
Configuració
1. Instal·lació de la bateria
The water timer requires two (2) AA batteries for operation. Ensure the batteries are inserted with the correct polarity.
- Localitzeu el compartiment de les piles a la part posterior de la unitat temporitzadora.
- Feu lliscar la tapa de la bateria oberta.
- Insert two fresh AA alkaline batteries, matching the positive (+) and negative (-) terminals as indicated inside the compartment.
- Tanqueu la tapa de la bateria amb seguretat.

Enrere view of the timer, highlighting the battery compartment for two AA batteries.
2. Connexió a l'aixeta
Attach the timer securely to your outdoor faucet.
- Assegureu-vos que l'aixeta estigui tancada.
- Thread the timer's inlet connector onto the faucet. Hand-tighten only to prevent damage.
- Verify that the rubber washer is properly seated within the timer's inlet to prevent leaks.
3. Connexió de mànegues
Connect your garden hoses to the two outlets on the timer.
- Thread your garden hoses onto the threaded outlets at the bottom of the timer.
- Hand-tighten each hose connection.
- Ensure any attached watering devices (sprinklers, drip systems) are properly connected to the hoses.

A baix view of the timer, showing the two hose outlets and integrated filter screen.
Instruccions de funcionament
The Melnor 2-Zone Digital Water Timer features simple two-step programming for each zone.
1. Configuració de l'hora actual
Abans de programar, configureu l'hora actual al temporitzador.
- Premeu el botó TEMPS botó.
- Utilitza el +/- botons per ajustar l'hora i els minuts.
- Premeu OK per confirmar.
2. Programming Watering Schedule (Each Zone)
Each zone can be programmed independently.
- Select the desired zone (Zone 1 or Zone 2) using the ZONA botó.
- Premeu el botó PROGRAMA botó.
- Estableix la freqüència de reg: Utilitza el +/- buttons to select how often you wish to water (e.g., every 6 hours, 12 hours, or specific days of the week). Press OK.
- Configura la durada del reg: Utilitza el +/- buttons to set how long you wish to water (e.g., 10 minutes, 30 minutes). Press OK.
- Repeat for the second zone if desired.
3. Reg manual
Per regar manualment fora de l'horari programat:
- Premeu el botó MANUAL botó.
- Select the zone you wish to water manually.
- Utilitza el +/- botons per configurar la durada de reg manual desitjada.
- Premeu OK to start manual watering. The timer will automatically shut off after the set duration.
4. Funció de retard per pluja
The rain delay feature allows you to pause your watering schedule for a set period, preventing overwatering after rainfall.
- Premeu el botó RETARD botó.
- Utilitza el +/- buttons to select the desired delay duration (e.g., 24, 48, 72 hours).
- Premeu OK per activar el retard per pluja. El temporitzador reprendrà la seva programació després del període de retard.
Manteniment
Canvi de bateria
Replace batteries annually or when the low battery indicator appears on the display to ensure continuous operation. Refer to the "Battery Installation" section under Setup for instructions.
Neteja de la pantalla del filtre
Periodically check and clean the filter screen located at the timer's inlet to prevent debris from clogging the unit and affecting water flow.
- Tanqueu el subministrament d'aigua a l'aixeta.
- Desenrosqueu el temporitzador de l'aixeta.
- Remove the small filter screen from the inlet.
- Esbandiu la pantalla amb aigua corrent per eliminar qualsevol residu acumulat.
- Torneu a inserir la malla del filtre neta i torneu a enganxar el temporitzador a l'aixeta.
Hivernització
To prevent damage from freezing temperatures, remove the water timer from the faucet before the first frost. Store the timer indoors in a dry, protected location. Remove batteries before storage.
Resolució de problemes
| Problema | Causa possible | Solució |
|---|---|---|
| Timer does not turn on/display is blank. | Piles gastades o instal·lades incorrectament. | Substituïu les piles per piles alcalines AA noves, assegurant-vos de la polaritat correcta. |
| Water does not flow or flow is weak. | Faucet is off; clogged filter screen; low water pressure; incorrect programming. | Ensure faucet is fully open. Clean the filter screen. Check household water pressure. Verify programming for correct start times and durations. |
| El temporitzador rega contínuament o no s'apaga. | Valve malfunction; electronic failure. | Turn off water at the faucet immediately. Remove batteries and reinsert after a few minutes. If the problem persists, contact customer support. |
| Timer makes unusual noises during operation. | Water pressure fluctuations; vibration in pipes. | Ensure the timer is securely attached. Adjust water flow at the faucet slightly to reduce pressure if necessary. |
| Screen locks up or programming is erratic. | Low batteries; electronic glitch. | Replace batteries. Remove batteries for 5 minutes to reset the unit, then re-program. |
Especificacions
- Número de model: 33100
- Marca: Melnor
- Color: Gris
- Material: Plàstic
- Pes de l'article: 0.84 lliures
- Nombre de zones: 2
- Mida de la pantalla: 3 polzades
- Font d'alimentació: 2 piles AA (no incloses)
- Components inclosos: Unitat de temporitzador
Informació de seguretat
ADVERTIMENT: Aquest producte us pot exposar a substàncies químiques, com ara l'estirè, que l'estat de Califòrnia sap que causa càncer. Per a més informació aneu a www.P65Warnings.ca.gov.
For outdoor use only. Do not use this product with indoor plumbing or for purposes other than watering.
Garantia i Suport
Melnor stands behind the quality of its products. If you experience any issues with your 2-Zone Digital Water Timer, please contact Melnor customer support for assistance. In many cases, Melnor may offer replacement units for defective products. Keep your purchase receipt for warranty claims.
For further assistance, visit the official Melnor weblloc o poseu-vos en contacte amb el seu departament d'atenció al client.


