1. Salvaguardes importants
Quan utilitzeu aparells elèctrics, sempre s'han de seguir les precaucions bàsiques de seguretat per reduir el risc d'incendi, descàrrega elèctrica i lesions a les persones, incloses les següents:
- Read all instructions before operating the kettle.
- No toqueu superfícies calentes. Utilitzeu nanses o poms.
- To protect against fire, electric shock, and injury to persons, do not immerse cord, plugs, or the kettle base in water or other liquid.
- És necessària una supervisió estreta quan qualsevol aparell és utilitzat per o a prop dels nens.
- Desendolleu la presa de corrent quan no utilitzeu i abans de netejar. Deixeu refredar abans de posar o treure peces i abans de netejar l'aparell.
- No feu funcionar cap aparell amb el cable o l'endoll danyats, o després que l'aparell no funcioni correctament o s'hagi danyat de qualsevol manera. Poseu-vos en contacte amb el servei d'atenció al client per a la seva revisió, reparació o ajust.
- L'ús d'accessoris no recomanats pel fabricant de l'aparell pot provocar incendis, descàrregues elèctriques o lesions a persones.
- No utilitzar a l'aire lliure.
- No deixeu que el cable pengi de la vora de la taula o del taulell, ni toqui superfícies calentes.
- No col·loqueu-lo sobre o prop d'un cremador de gas o elèctric calent, ni en un forn calent.
- Connecteu sempre primer l'endoll a l'aparell i després el cable a la presa de corrent. Per desconnectar-lo, gireu qualsevol control a la posició "off" i, a continuació, retireu l'endoll de la presa de corrent.
- No utilitzeu l'aparell per a un altre ús que el previst.
- Aquest aparell funciona amb 120 Volts. Ensure your power supply matches this requirement to prevent damage or malfunction.
- Do not overfill the kettle. Fill only to the maximum fill line to prevent boiling water from overflowing.
2. Producte acabatview
The Brewista SmartPour Variable Digital Kettle is designed for precise temperature control, ideal for brewing coffee and tea. It features a gooseneck spout for controlled pouring and a digital display for accurate temperature readings.

Figura 2.1: Davant view of the Brewista SmartPour Variable Digital Kettle. This image shows the stainless steel kettle body, the gooseneck spout, the handle, and the digital control base.
2.1 Components
- Cos del bullidor: Stainless steel construction with a 1.2-liter capacity.
- Broc de coll de cigne: Designed for precise pouring control.
- Tapa: Removable lid with a handle.
- Mànec: Disseny ergonòmic per a una subjecció còmoda.
- Base d'alimentació: Contains the heating element and digital controls.
- Pantalla digital: Shows current and target temperatures, and timer settings.
- Botons de control: Power, Temperature Up/Down, Set Temperature, Keep Warm, Auto-Start.
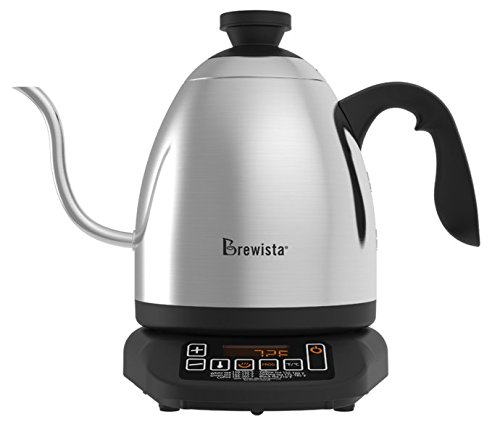
Figura 2.2: Close-up of the control panel on the Brewista SmartPour Kettle base. This image highlights the digital display and various control buttons for temperature adjustment and function selection.
3. Configuració
3.1 Neteja inicial
- Remove all packaging materials and labels from the kettle and base.
- Netegeu l'exterior de la tetera i la base amb un anunciamp tela.
- Wash the interior of the kettle and the lid with warm, soapy water. Rinse thoroughly.
- Fill the kettle with water to the maximum fill line and boil. Discard this water. Repeat this process two to three times to ensure the kettle is clean and free of manufacturing residues.
3.2 Col·locació
- Col·loqueu la base d'alimentació sobre una superfície seca, plana, estable i resistent a la calor.
- Assegureu-vos que el cable d'alimentació no pengi ni estigui en contacte amb superfícies calentes.
- Connecteu el cable d'alimentació a una presa de corrent de 120 V CA amb connexió a terra.
4. Instruccions de funcionament
4.1 Omplir la tetera
- Traieu la tetera de la seva base elèctrica.
- Remove the lid and fill the kettle with fresh, cold water. Do not fill below the minimum or above the maximum fill lines. The capacity is 1.2 liters.
- Col·loqueu la tapa amb seguretat.
- Torneu a col·locar el bullidor a la base elèctrica.
4.2 Engegada i configuració de la temperatura
- Premeu el botó PODER button to turn on the kettle. The digital display will illuminate.
- To select a preset temperature, press the SET TEMP button repeatedly to cycle through common brewing temperatures (e.g., 175°F, 195°F, 205°F, 212°F).
- To set a custom temperature, use the + i - buttons to adjust the desired temperature in 1-degree increments.
- The kettle will automatically begin heating to the selected temperature. The display will show the current water temperature as it heats.
4.3 Canvi d'unitats de temperatura (°F/°C)
Per canviar entre Fahrenheit (°F) i Celsius (°C), premeu i manteniu premut el botó + i - buttons simultaneously for a few seconds until the unit changes on the display.
4.4 Funció Mantenir Calent
- After setting your desired temperature, press the MANTENIR-SE CALIENT botó.
- The kettle will heat to the set temperature and then maintain that temperature for up to one hour.
- To deactivate the Keep Warm function, press the MANTENIR-SE CALIENT button again or turn off the kettle.
4.5 Auto-Start Timer
The auto-start timer allows you to program the kettle to begin heating at a specific time.
- Ensure the kettle is filled with water and placed on the base.
- Set your desired target temperature using the SET TEMP or +/- botons.
- Manteniu premut el botó INICI AUTOMÀTIC botó. La pantalla mostrarà l'hora actual.
- Utilitza el + i - botons per configurar l'hora d'inici desitjada.
- Premeu el botó INICI AUTOMÀTIC button again to confirm. The kettle will now display the current time and a small timer icon, indicating the auto-start is active.
- The kettle will begin heating at the programmed time.
Note: The auto-start timer can typically be set for up to 24 hours in advance.
5. Manteniment i Neteja
Regular cleaning and maintenance will extend the life of your kettle.
5.1 Neteja diària
- Unplug the kettle from the power outlet and allow it to cool completely before cleaning.
- Netegeu l'exterior del bullidor i la base elèctrica amb un drap suau i sec.amp tela. No utilitzeu netejadors abrasius ni fregalls.
- The kettle body and lid can be hand washed with warm, soapy water. Rinse thoroughly and dry completely before returning to the base.
- Do not immerse the power base, cord, or plug in water or any other liquid.
5.2 Descalcificació
Mineral deposits (limescale) can build up inside the kettle over time, affecting performance. Descale your kettle regularly, depending on water hardness and frequency of use.
- Fill the kettle with a solution of equal parts white vinegar and water, or use a commercial descaling solution according to its instructions. Ensure the solution covers the mineral deposits.
- Allow the solution to soak for at least 30 minutes, or longer for heavy buildup. For stubborn deposits, you may heat the solution to just below boiling (do not boil vinegar).
- Buideu la tetera i esbandiu-la bé diverses vegades amb aigua fresca.
- Boil a full kettle of fresh water and discard it to remove any residual descaling agent.
6. Solució De Problemes
| Problema | Causa possible | Solució |
|---|---|---|
| La tetera no s'encén. | Not plugged in; power outlet not working; kettle not properly seated on base. | Ensure the power cord is securely plugged into a working 120V outlet. Check if the kettle is correctly placed on the power base. |
| L'aigua no s'escalfa. | Kettle not powered on; temperature not set; insufficient water. | Press the POWER button. Set a desired temperature. Ensure water level is between MIN and MAX lines. |
| La visualització de la temperatura no és precisa. | Mineral buildup on temperature sensor; internal sensor malfunction. | Descale the kettle thoroughly. If the problem persists, contact customer support. |
| Kettle leaks or rusts. | Overfilling; manufacturing defect; hard water corrosion. | Do not overfill past the MAX line. Regular descaling can prevent corrosion from hard water. If a defect is suspected, contact customer support. |
| Kettle is slow to heat. | Mineral buildup; low voltage. | Descale the kettle. Ensure the kettle is connected to a stable 120V power supply. |
| Auto-start timer does not activate. | Timer not set correctly; power interruption. | Review the auto-start timer setting process. Ensure continuous power supply. |
For issues not listed here, or if solutions do not resolve the problem, please contact Brewista customer support.
7. Especificacions
| Número de model | BKV12S02 |
| Marca | Brewista |
| Capacitat | 1.2 litres |
| Material | Acer inoxidable |
| Voltage | 120 Volts |
| Característiques especials | Concealed Heating, Indicator Light, Variable Temperature Control, Gooseneck Spout, Keep Warm Function, Auto-Start Timer |
| Cura del producte | Rentat a mà, Neteja amb un eixugar |
| Pes de l'article | 3 lliures (aprox. 1.36 kg) |
| Dimensions (LxWxH) | 27.3 x 21.1 x 30.4 centímetres |
| UPC | 735343350429, 645240812855 |
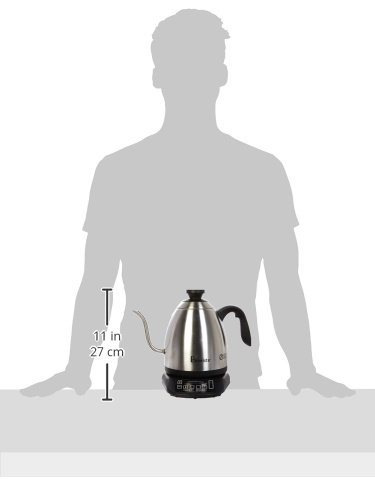
Figura 7.1: Image illustrating the approximate size of the Brewista SmartPour Kettle in relation to a person, showing its compact countertop footprint.
8. Garantia i Suport
For warranty information, product registration, or technical support, please refer to the official Brewista weblloc web o poseu-vos en contacte amb el seu departament d'atenció al client. Conserveu el rebut de compra com a comprovant de compra per a reclamacions de garantia.
You may also find additional resources and product information by scanning the QR code provided on the product packaging or by visiting the link below: