
1. Introducció i finalview
The Teslong Industrial Endoscope Camera is a versatile inspection tool designed for evaluating and diagnosing issues in various environments, including automotive, HVAC, plumbing, and home inspections. Featuring an upgraded 4.5-inch IPS monitor and a 0.21-inch waterproof gooseneck camera, it provides clear visuals in hard-to-reach areas. Its all-inclusive design eliminates the need for external devices like smartphones, offering a convenient and efficient inspection experience.

Figure 1: Teslong Industrial Endoscope Camera
2. Què hi ha a la caixa
Your Teslong Industrial Endoscope Camera package includes the following components:
- Endoscope Monitor (Main Unit)
- 3-meter Camera Probe (Gooseneck Snake Camera)
- Cable de càrrega micro USB
- Targeta MicroSD de 32 GB (preinstal·lada o inclosa per separat)
- Accessories: Side-view Mirror, Hook, Magnet
- Hard Plastic Tool Box
- Manual d'usuari

Figura 2: Contingut del paquet
3. Configuració
3.1 Càrrega del dispositiu
Before initial use, ensure the endoscope monitor is fully charged. Connect the provided Micro USB cable to the charging port on the side of the monitor and plug the other end into a compatible USB power source. A red light will flash during charging and will turn off once the battery is fully charged. The device features a 2500mAh rechargeable lithium battery.
3.2 Inserció de la sonda de la càmera
Align the connector of the camera probe with the port on the top of the monitor. Ensure the keying marks align (often indicated by a red dot) and gently push the probe into the port. Screw the collar to secure the connection. The probe is designed to be semi-rigid, allowing it to hold its shape for easier navigation into tight spaces.
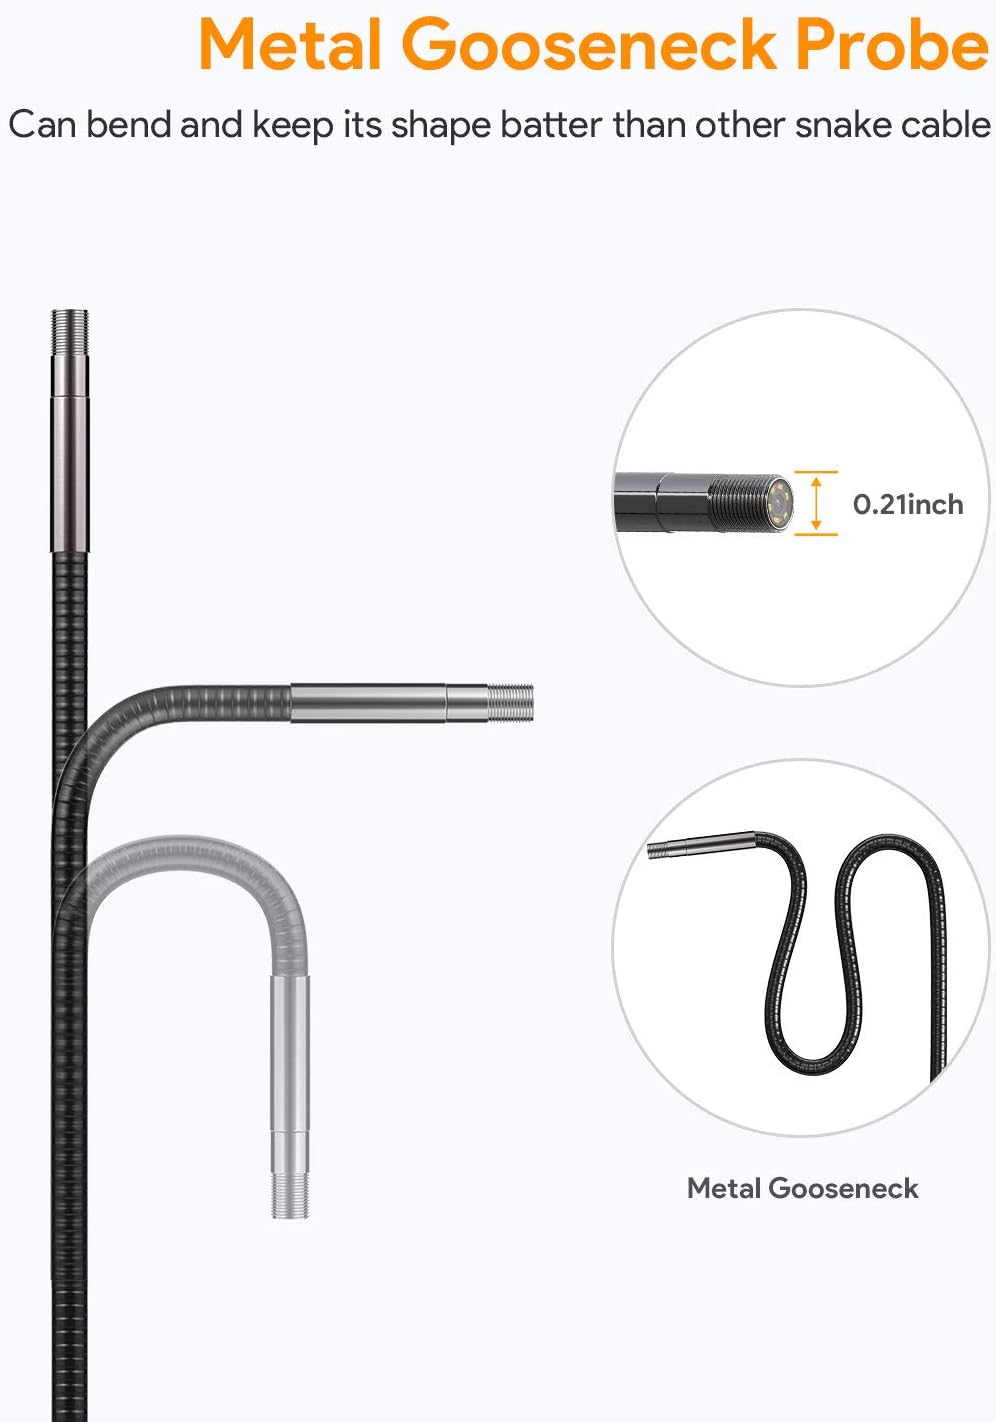
Figure 3: Metal Gooseneck Probe
3.3 Engegada i configuració inicial
Press and hold the power button (usually marked with a circle and vertical line) to turn on the device. Upon startup, you may be prompted to set the date and time. Navigate the menu using the directional buttons and confirm selections with the 'OK' button. The device supports multiple languages.
4. Instruccions de funcionament
4.1 Funcionament bàsic
Once powered on, the live feed from the camera probe will appear on the 4.5-inch IPS monitor. Use the directional buttons to navigate menus and adjust settings. The device features a dedicated button for controlling the LED lights on the camera probe, allowing you to adjust brightness levels for optimal visibility in dark environments.
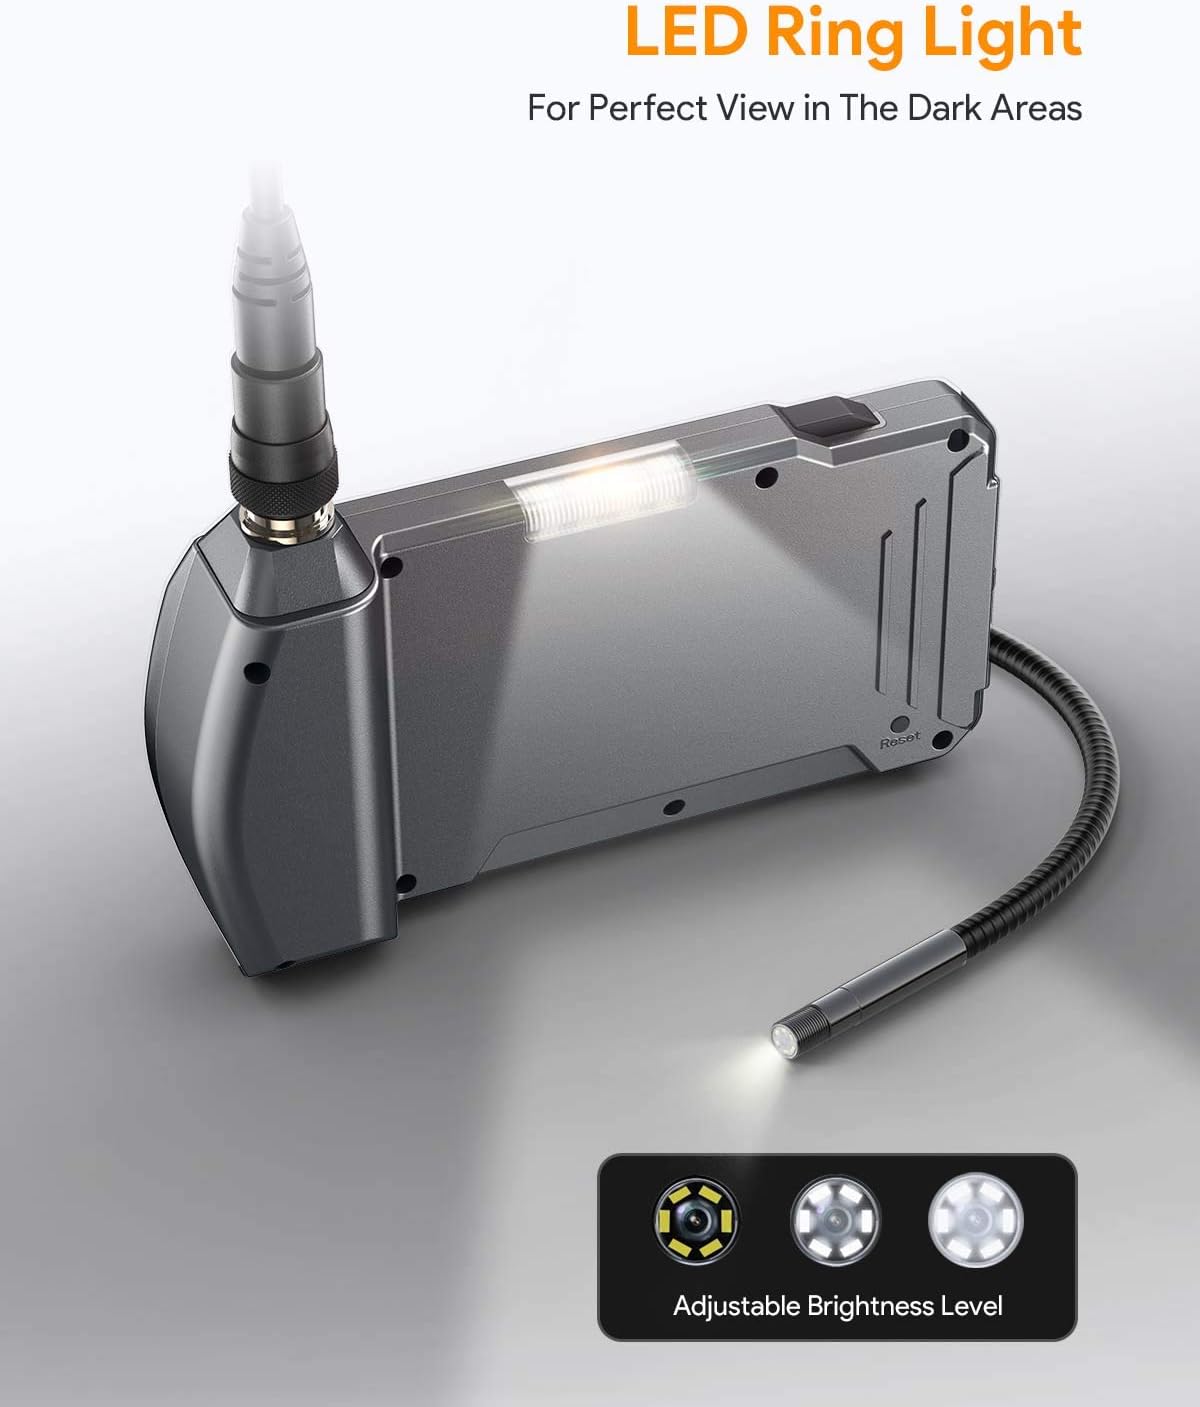
Figure 4: LED Ring Light Control
4.2 Recording Video and Capturing Images
To record video, press the record button (often indicated by a camera icon). Press it again to stop recording. To capture a still image, press the capture button (often indicated by a camera icon with a single dot). All recorded videos and images are saved to the MicroSD card. You can review saved media by switching to playback mode via the 'Mode' button.
4.3 Ús d'accessoris
The endoscope comes with several useful accessories that can be attached to the camera probe:
- Lateralview Mirall: Attaches to the camera head to provide a 90-degree viewing angle, useful for inspecting sides of pipes or hidden corners.
- Ganxo: Can be used to retrieve small objects from hard-to-reach areas.
- Imant: Ideal for picking up metallic items like screws or nuts that have fallen into inaccessible spots.
To attach an accessory, carefully screw it onto the threaded tip of the camera probe. Ensure it is securely fastened before use.
4.4 Aplicacions pràctiques
The Teslong endoscope is suitable for a wide range of applications:
- Automoció: Inspect engine cylinders, valves, spark plugs, and other internal components without disassembly.
- Climatització: Examine ducts, vents, and internal mechanisms of heating and cooling systems.
- Drain Pipe Inspection: The waterproof probe is perfect for checking clogs, corrosion, or damage in plumbing systems.
- House Check: Inspect walls for wiring, insulation, or pest issues; check behind appliances or in crawl spaces.

Figure 5: Endoscope Usage Scenarios
5. Manteniment
To ensure the longevity and optimal performance of your Teslong Industrial Endoscope Camera, follow these maintenance guidelines:
- Cleaning the Probe and Lens: After each use, especially in dirty or wet environments, gently wipe the camera probe and lens with a soft, damp cloth. For stubborn grime, use a small amount of mild soap. Ensure the probe is dry before storage.
- Cura de la bateria: Recharge the device regularly, even if not in frequent use, to maintain battery health. Avoid fully discharging the battery for extended periods. Store the device in a cool, dry place.
- Emmagatzematge: Store the endoscope and its accessories in the provided hard plastic toolbox to protect them from dust, moisture, and physical damage.
- Monitor Protection: The monitor features a tempered glass protective screen. Avoid dropping the device or exposing the screen to sharp objects.

Figure 6: Waterproof and Protective Features
6. Solució De Problemes
If you encounter issues with your Teslong Industrial Endoscope Camera, consider the following common troubleshooting steps:
- Sense energia: Ensure the battery is fully charged. If the device does not turn on after charging, try pressing the reset button (if available, typically a small pinhole).
- Mala qualitat d'imatge: Check if the camera lens is clean and free from debris. Adjust the LED light brightness for better illumination. Ensure the object being viewed is within the optimal focal range (30mm-60mm).
- Els llums no funcionen: Verify that the LED light control button is functioning. If the lights are dim or not working, the battery may be low.
- Problemes de gravació: Ensure the MicroSD card is properly inserted and has sufficient free space. The card may need to be formatted (refer to Section 3.3 for menu navigation).
- Congela el dispositiu: Premeu el botó de reinici per reiniciar el dispositiu.
For more detailed troubleshooting or persistent issues, please refer to the comprehensive user manual included in your package or contact Teslong customer service.
7. Especificacions
| Característica | Especificació |
|---|---|
| Tipus de pantalla | 4.5 inch IPS Full Color Screen |
| Resolució de gravació de vídeo | 720p |
| Resolució de captura d'imatges | 640x480 (Pixels) |
| Diàmetre de la càmera | 0.21 polzades (5.5 mm) |
| Viewangle ing | 60° |
| Profunditat de camp | 30 mm - 60 mm |
| Font de llum | 6 Adjustable High-intensity LEDs |
| Llum de flaix LED | 4pcs High Brightness LEDs |
| Port | Micro USB, ranura per a targetes TF |
| Temperatura de funcionament | De 32 a 113 °F (de 0 a 45 °C) |
| Font d'alimentació | Bateria de liti de 2500 mAh |
| Durada màxima de la bateria | 5-6 hores |
| Nivell de resistència a l'aigua | Waterproof (Probe) / Rainproof (Monitor) |
8. Garantia i Suport
The Teslong Industrial Endoscope Camera comes with a worry-free 18-month warranty. For warranty claims, technical support, or any inquiries, please refer to the contact information provided in your user manual or visit the official Teslong weblloc.
You can also access the Safety Information PDF aquí for additional safety guidelines.