
1. Introducció
The iOptron SkyTracker Pro is a compact, portable equatorial (EQ) mount designed for astrophotography. It allows cameras to track celestial objects, compensating for the Earth's rotation, which enables longer exposures without star trails. This manual provides instructions for the setup, operation, and maintenance of your SkyTracker Pro.
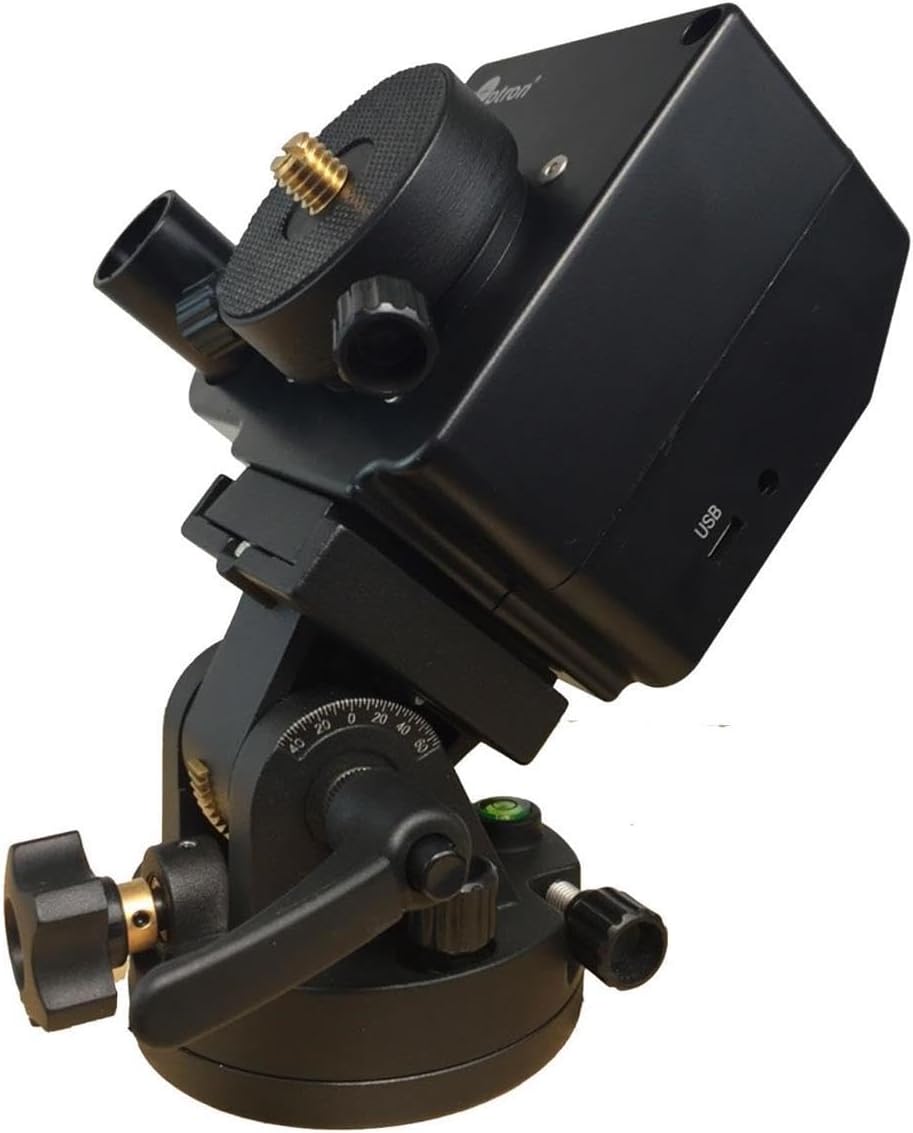
Figure 1.1: The iOptron SkyTracker Pro Camera Mount, illustrating its compact design and key components including the camera mounting plate and polar scope.
2. Característiques clau
The SkyTracker Pro offers several enhancements for improved performance and user experience:
- Disseny compacte: Small form factor for enhanced portability.
- High Precision Tracking: Designed for accurate celestial tracking.
- Funcionament silenciós: Ensures smooth camera motion, suitable for long exposures.
- Integrated Power Source: Built-in rechargeable battery provides up to 24 hours of continuous operation.
- Illuminated Polar Scope: Features a fine engraved reticule with adjustable illumination (eight brightness levels) for precise polar alignment.
- Multiple Tracking Rates: Includes 1X (sidereal), 1/2X (sky and landscape), solar, and lunar tracking rates, operable in both Northern and Southern Hemispheres.
- Construcció robusta: All-metal structure with ABS covers for durability.
- Muntatge versàtil: Attaches to camera tripods with 3/8" or 1/4" threads and accepts cameras up to 3 kg (6.6 lbs).
- Detachable Alt-Azi Base: Equipped with fine latitude and azimuth adjusters for easy and accurate polar alignment.
- Reversible Mounting Post: Accommodates both 3/8" and 1/4" threaded ball head mounting.
3. Components mésview
The SkyTracker Pro consists of the main tracking unit and a detachable altitude-azimuth base. Familiarize yourself with the following components:
- Main Tracking Unit: Houses the motor, gears, battery, and control switches.
- Camera Mounting Plate: Top plate with a standard camera screw for attaching a ball head or camera directly.
- Polar Scope: Integrated scope for polar alignment.
- Polar Scope Illuminator: Adjustable LED for illuminating the polar scope reticule.
- Interruptor d'alimentació: Encén/apaga la unitat.
- Tracking Rate Switch: Selects between 1X, 1/2X, Solar, and Lunar tracking.
- Hemisphere Switch (S/N): Selects Northern or Southern Hemisphere operation.
- Port de càrrega USB: Per recarregar la bateria interna.
- Altitude-Azimuth Base: Provides fine adjustments for latitude and azimuth during polar alignment.
- Tripod Mounting Thread: Located at the bottom of the Alt-Azi base, compatible with 3/8" and 1/4" tripod screws.
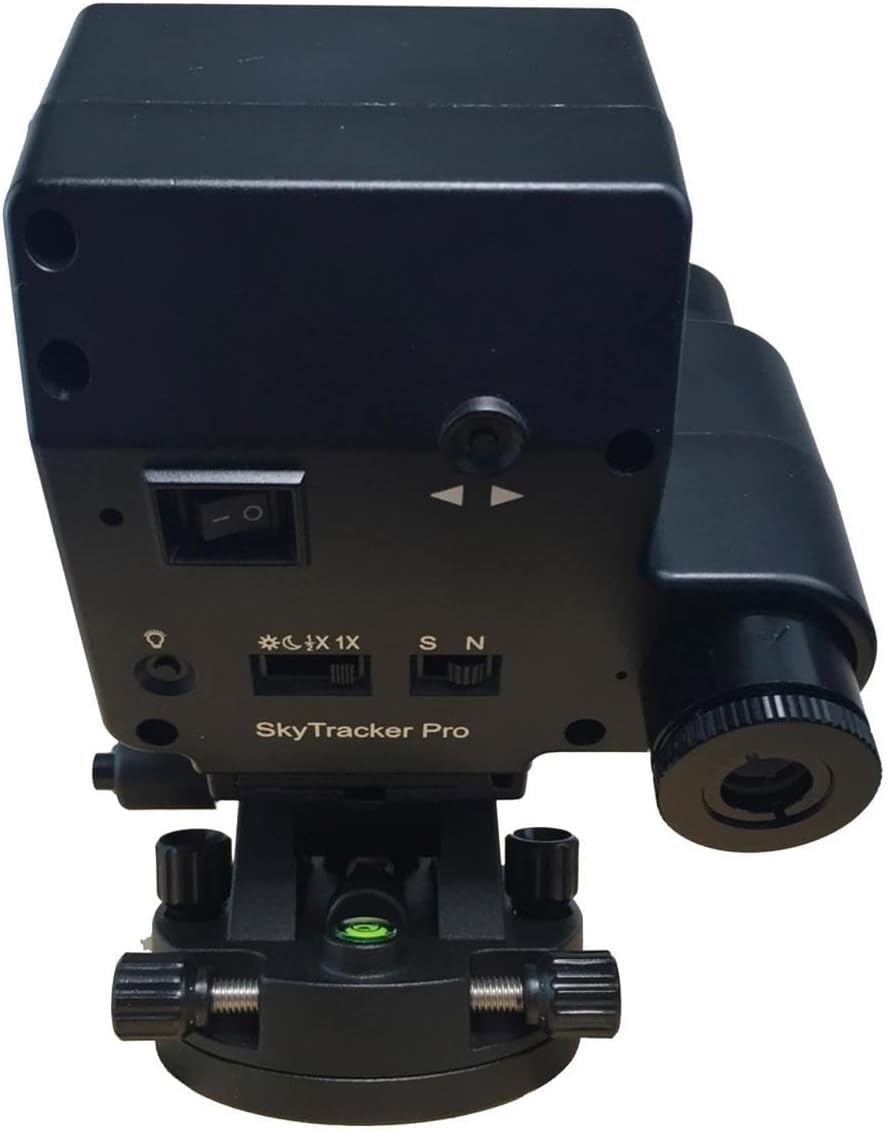
Figure 3.1: Rear panel of the SkyTracker Pro, highlighting the control switches and polar scope eyepiece.

Figure 3.2: The included carrying bag for the SkyTracker Pro, designed for protection and portability.
4. Configuració
- Connectar al trípode: Secure the SkyTracker Pro's altitude-azimuth base to a sturdy camera tripod using the 3/8" or 1/4" mounting thread. Ensure it is firmly tightened.
- Mount Ball Head/Camera: Attach your camera's ball head (recommended for easier framing) or the camera directly to the SkyTracker Pro's mounting plate. The mounting post is reversible to accommodate both 3/8" and 1/4" threads. Ensure the total weight of your camera setup (camera + lens + ball head) does not exceed 3 kg (6.6 lbs).
- Rough Alignment: Point the SkyTracker Pro roughly towards the celestial pole (Polaris in the Northern Hemisphere, Sigma Octantis in the Southern Hemisphere).
- Polar Alignment (Northern Hemisphere):
- Turn on the polar scope illuminator and adjust its brightness.
- Look through the polar scope. You will see a reticule with a small circle for Polaris.
- Use the fine latitude and azimuth adjusters on the Alt-Azi base to position Polaris within the designated circle on the reticule. An iOptron smartphone app can assist in determining the exact position of Polaris within the reticule based on your location and time.
- Once Polaris is correctly positioned, lock the latitude and azimuth adjustments.
- Polar Alignment (Southern Hemisphere):
- Similar to the Northern Hemisphere, use the polar scope and an appropriate star (e.g., Sigma Octantis) or star pattern for alignment. Consult the iOptron smartphone app for precise guidance.
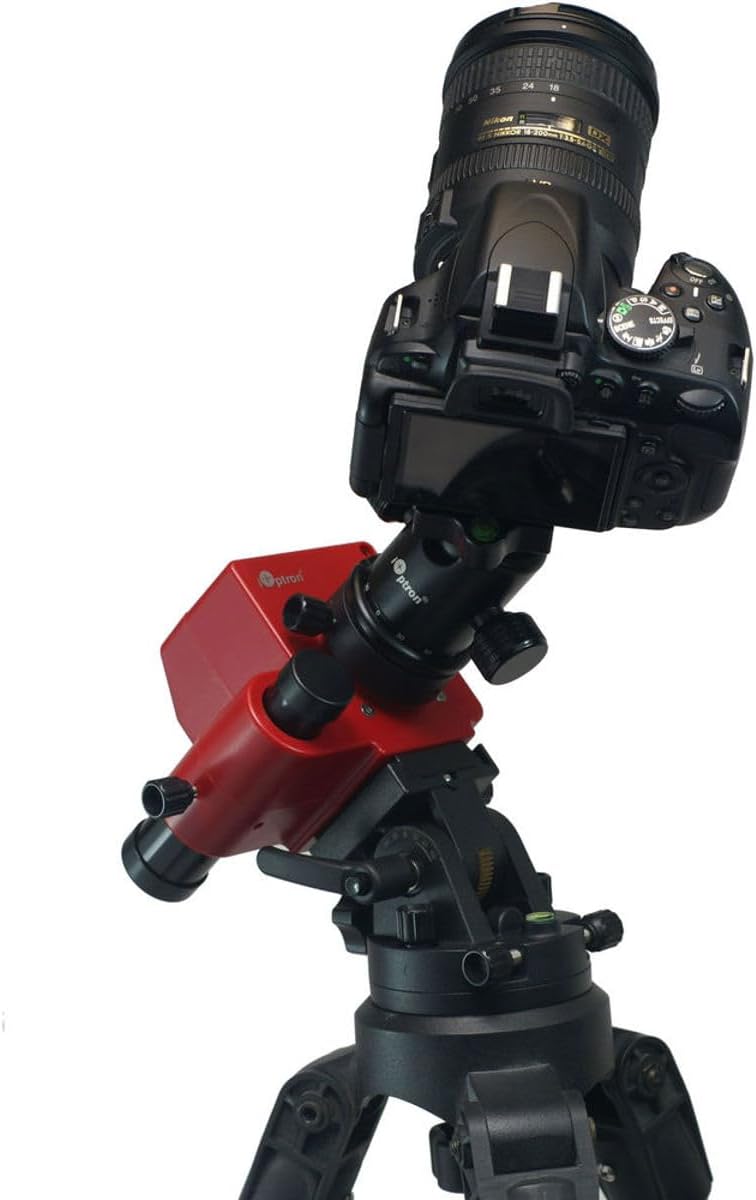
Figure 4.1: The SkyTracker Pro with a camera mounted, ready for operation. Note the ball head for camera positioning.
5. Instruccions de funcionament
- Encès: Flip the main power switch to the "ON" position.
- Select Hemisphere: Set the S/N switch to 'N' for Northern Hemisphere or 'S' for Southern Hemisphere.
- Choose Tracking Rate: Use the tracking rate switch to select the desired rate:
- 1X (Sidereal): For tracking stars and deep-sky objects.
- 1/2X: For capturing both the starry night sky and foreground landscapes, reducing star trails while keeping the landscape relatively sharp.
- Solar: For tracking the Sun.
- Lunar: For tracking the Moon.
- Funcionament de la càmera: Once the SkyTracker Pro is powered on and tracking, use your camera as usual for long-exposure photography. The mount will automatically track the chosen celestial object.
- Càrrega: To recharge the internal battery, connect a standard USB cable to the USB charging port. A full charge provides up to 24 hours of operation.
6. Manteniment
- Neteja: Use a soft, dry cloth to clean the exterior of the unit. For the polar scope optics, use a lens cleaning cloth and solution designed for optical surfaces.
- Emmagatzematge: When not in use, store the SkyTracker Pro in its carrying bag in a cool, dry place, away from direct sunlight and extreme temperatures.
- Cura de la bateria: For optimal battery life, avoid fully discharging the battery frequently. Recharge the unit periodically if stored for extended periods.
- Inspecció: Periodically check all screws and connections to ensure they are secure. Do not overtighten.
7. Solució De Problemes
- La unitat no s'encén:
- Assegureu-vos que l'interruptor d'alimentació estigui a la posició "ON".
- Check the battery charge level. Connect to a USB power source to charge.
- Poor Tracking Performance (Star Trails):
- Verify precise polar alignment. Re-align using the polar scope and a smartphone app for guidance.
- Ensure the correct hemisphere (S/N) and tracking rate are selected.
- Check that the camera setup weight does not exceed the 3 kg (6.6 lbs) limit. Overloading can affect tracking accuracy.
- Ensure all connections (tripod, ball head, camera) are secure and stable.
- Polar Scope Illumination Not Working:
- Comproveu el nivell de la bateria.
- Adjust the brightness control for the illuminator.
8. Especificacions
| Tipus de muntatge | Ultra compact single axis EQ |
| Material del cos | Die-cast aluminum with ABS cover |
| RA Shaft | 25mm diameter, steel |
| Roda de cuc | 74mm diameter, 144 teeth aluminum alloy |
| Engranatge de cuc | 11mm diameter, brass |
| Càrrega útil màxima | 3 kg (6.6 lliures) |
| Seguiment de tarifes | 1X (Sidereal), 1/2X, Solar, Lunar |
| Abast Polar | AccuAlign dark-field illuminated polar scope with 8 brightness levels |
| Font d'alimentació | Built-in rechargeable battery (up to 24 hours operation) |
| Muntatge del trípode | 3/8" or 1/4" threads |
| Dimensions del producte | 8.54 x 6 x 4.9 polzades (aprox.) |
| Pes de l'article | 3.34 lliures (aprox.) |
| Color | Negre |
| Número de model | SkyTracker Pro |
9. Garantia i Suport
iOptron products are designed for reliability and performance. For specific warranty information, please refer to the warranty card included with your product or visit the official iOptron website. For technical support, product registration, or service inquiries, please contact iOptron customer service through their official channels.
Conserveu el rebut de compra com a comprovant de compra per a reclamacions de garantia.