
1. Introducció
The AUTOPHIX OM126 is a versatile On-Board Diagnostics II (OBD2) scanner designed to help vehicle owners and technicians diagnose engine-related issues. This tool allows you to read and clear Diagnostic Trouble Codes (DTCs), view live data, and check I/M readiness status, providing essential information for maintaining your vehicle's performance and emissions compliance. This manual provides detailed instructions for the proper use and maintenance of your OM126 scanner.
2. Informació de seguretat
Always observe safety precautions when working on a vehicle. Improper use of diagnostic tools can lead to personal injury or damage to the vehicle. Read and follow all instructions carefully.
- Assegureu-vos que el vehicle estigui aparcat en una superfície plana amb el fre d'estacionament accionat.
- Turn off the ignition before connecting or disconnecting the scanner.
- Utilitzeu equips de protecció individual adequats, com ara ulleres de seguretat.
- Avoid contact with hot engine components or moving parts.
- No feu servir l'escàner mentre conduïu.
- Keep the scanner away from water, oil, and extreme temperatures.
3. Producte acabatview
The AUTOPHIX OM126 is a compact and user-friendly diagnostic tool. It features a clear display and intuitive buttons for easy navigation through its functions.
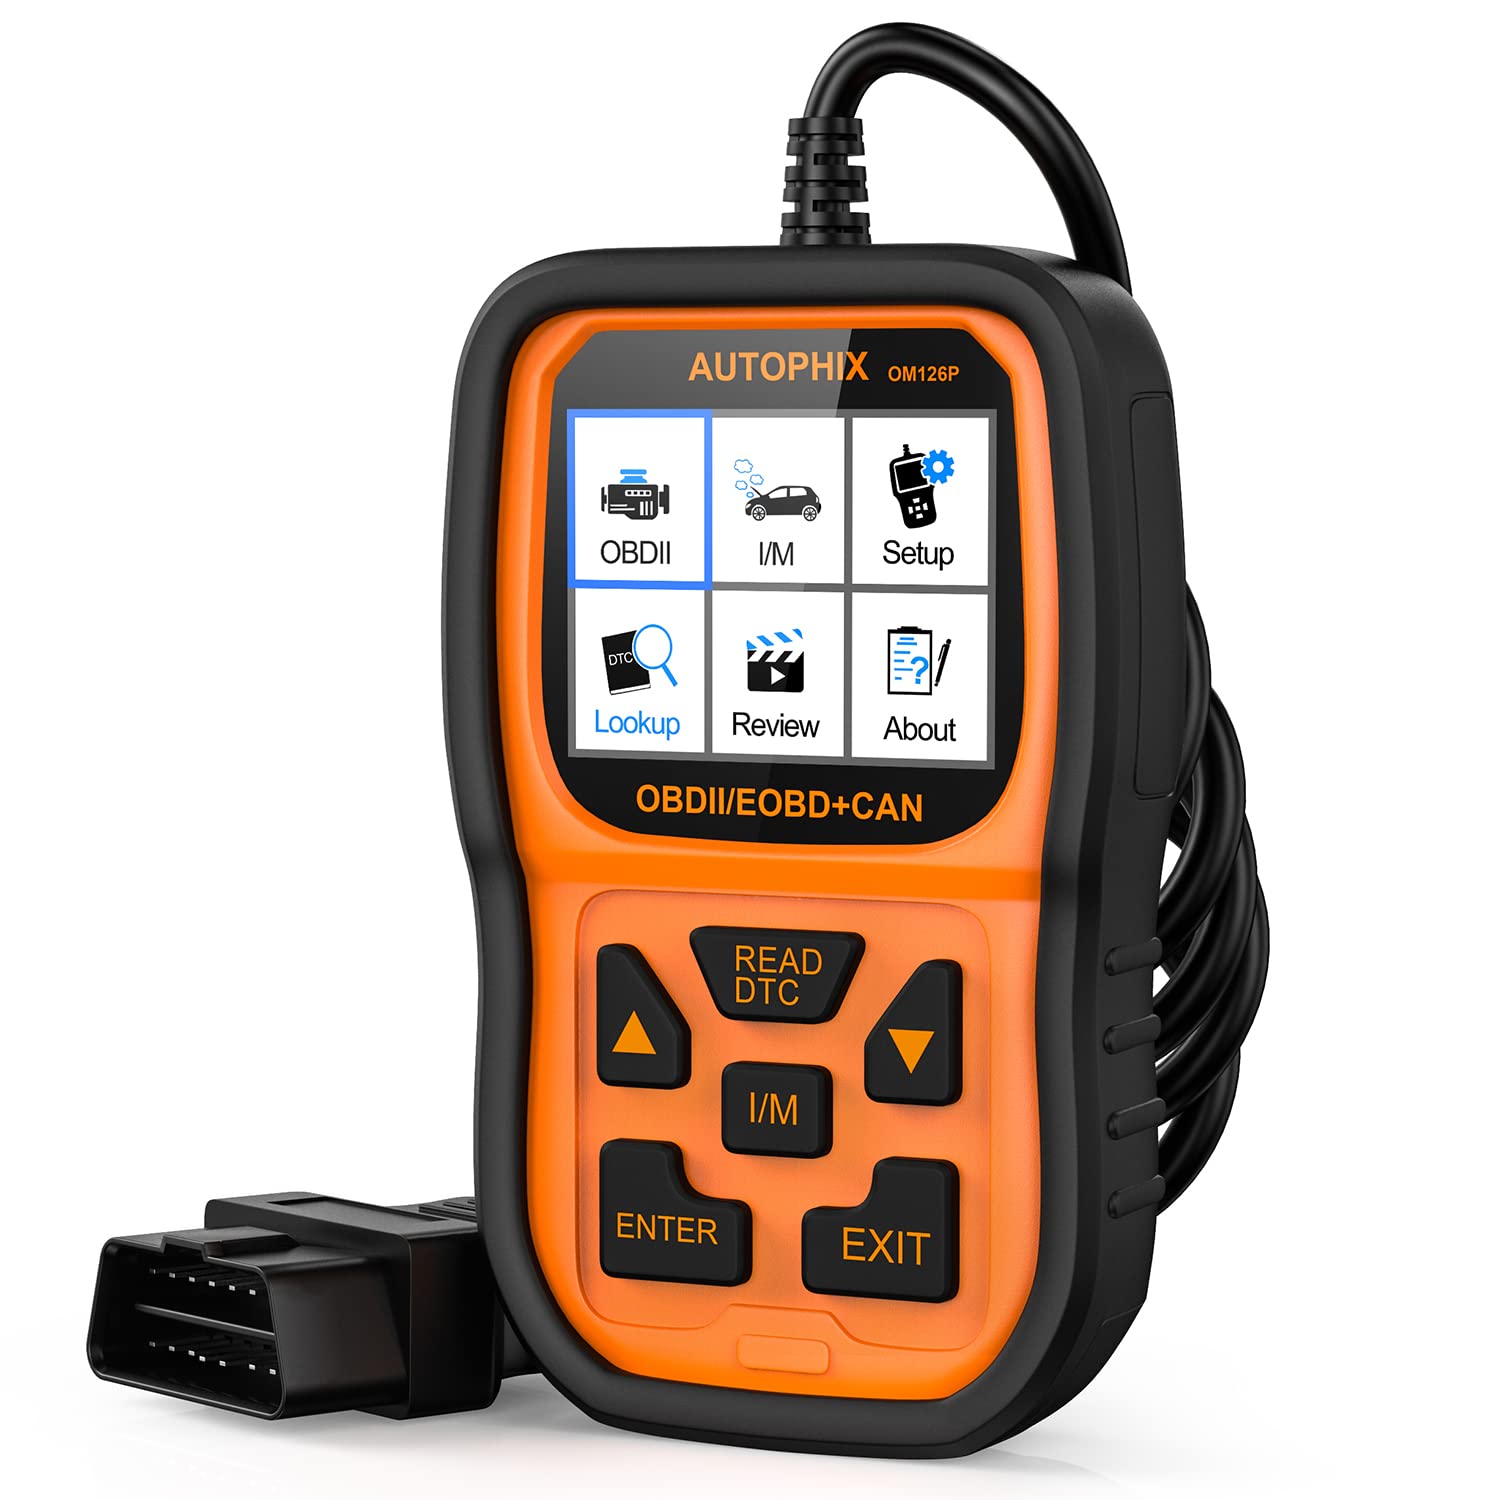
Figura 3.1: Frontal view of the AUTOPHIX OM126 OBD2 Scanner, showing the display screen and control buttons.
Característiques principals:
- Reads and clears generic and manufacturer-specific Diagnostic Trouble Codes (DTCs).
- Turns off Check Engine Light (MIL).
- Displays I/M readiness status.
- Retrieves vehicle information (VIN, CIN, CVN).
- Admet diversos idiomes.
- Plug-and-play operation.
4. Configuració
4.1 Initial Software Update (Recommended)
Before first use, it is recommended to update the scanner's software to ensure compatibility with the latest vehicle models and diagnostic protocols. Visit the official AUTOPHIX website to download the update tool and follow the provided instructions. This typically involves connecting the scanner to a computer via a USB cable.
4.2 Connexió al vehicle
- Locate the vehicle's 16-pin Data Link Connector (DLC). This port is usually found under the dashboard on the driver's side. Refer to your vehicle's owner's manual for the exact location.
- Assegureu-vos que el contacte del vehicle estigui en la posició OFF.
- Plug the OM126 scanner's OBD2 cable into the vehicle's DLC. Ensure a firm connection.
- Turn the vehicle's ignition to the ON position (engine off). The scanner will automatically power on and establish communication with the vehicle's onboard computer.
5. Instruccions de funcionament
5.1 Navegació de menús
Use the UP/DOWN arrow buttons to scroll through menu options. Press the ENTER button to select an option or confirm an action. The ESC/BACK button is used to return to the previous screen or cancel an operation.
5.2 Lectura de codis de diagnòstic d'errors (DTC)
- From the main menu, select "Read Codes" and press ENTER.
- The scanner will communicate with the vehicle and display any stored DTCs. Each code will typically include a numerical identifier and a brief description.
- Use the UP/DOWN buttons to scroll through multiple codes if present.
5.3 Esborrar els codis de diagnòstic d'errors (DTC)
Clearing DTCs will turn off the Check Engine Light (MIL) and erase all diagnostic data. Only clear codes after addressing the underlying issue, as they will reappear if the fault persists.
- From the main menu, select "Erase Codes" and press ENTER.
- A confirmation message will appear. Select "Yes" and press ENTER to proceed.
- The scanner will confirm that the codes have been cleared.
5.4 Estat de preparació I/M
The I/M Readiness function checks if the various emissions-related systems on the vehicle are operating correctly and have completed their self-tests. This is useful for emissions inspections.
- From the main menu, select "I/M Readiness" and press ENTER.
- The display will show the status of various monitors (e.g., O2 Sensor, Catalyst, EVAP System) as either "OK" (complete) or "INC" (incomplete).
5.5 Viewinformació del vehicle
This function allows you to retrieve the Vehicle Identification Number (VIN), Calibration ID (CIN), and Calibration Verification Number (CVN).
- From the main menu, select "Vehicle Info" and press ENTER.
- L'escàner mostrarà la informació disponible del vehicle.
6. Manteniment
- Neteja: Feu servir un drap suau i sec per netejar la part frontal de l'escàner.asing i pantalla. No utilitzeu productes de neteja abrasius ni dissolvents.
- Emmagatzematge: Store the scanner in a clean, dry environment, away from direct sunlight and extreme temperatures. Keep it in its original packaging or a protective case when not in use.
- Actualitzacions de programari: Periodically check the AUTOPHIX official weblloc web per a actualitzacions de programari per garantir un rendiment i una compatibilitat òptims.
7. Solució De Problemes
If you encounter issues while using the AUTOPHIX OM126, refer to the following common troubleshooting steps:
- L'escàner no s'encén:
- Ensure the OBD2 cable is securely connected to the vehicle's DLC.
- Verifiqueu que el contacte del vehicle estigui en la posició ON (motor apagat).
- Check the vehicle's fuse for the OBD2 port (consult your vehicle's manual).
- Error de comunicació amb el vehicle:
- Confirm the vehicle supports the OBD2 protocol (most vehicles manufactured after 1996 in the US, 2001 in EU gasoline, 2004 in EU diesel).
- Ensure the ignition is ON and the engine is OFF.
- Try connecting the scanner to a different OBD2-compliant vehicle to rule out scanner malfunction.
- Check for any loose connections in the OBD2 cable.
- No es poden esborrar els codis:
- Ensure the ignition is ON and the engine is OFF.
- If the underlying fault is still present, codes will not clear or will reappear immediately. Address the vehicle's issue first.
- Screen is blank after update:
- This can sometimes occur during the update process. Ensure the update process is completed fully as per the instructions on the AUTOPHIX weblloc.
- Disconnect and reconnect the device.
8. Especificacions
| Característica | Especificació |
|---|---|
| Model | OM126 |
| Pes de l'article | 11.2 unces |
| Dimensions del producte | 9 x 5 x 2.6 polzades |
| Voltage | 12 Volts |
| Mida de la pantalla | 2.4 polzades |
| Sistema operatiu | Windows 7 (for update software) |
| Font d'alimentació | Battery Powered (via vehicle OBD2 port) |