1. Introducció
This manual provides detailed instructions for the installation, configuration, and operation of the ASRock Z370 TAICHI motherboard. This motherboard is designed to support 8th Generation Intel Core Processors (Socket 1151) and DDR4 memory, offering a robust platform for personal computing.
2. Pautes de seguretat
Observe the following safety precautions during installation and operation to prevent damage to the motherboard or injury:
- Always disconnect the power cord from the wall outlet before handling any components.
- Wear an anti-static wrist strap or frequently touch a grounded object to discharge static electricity.
- Manegeu la placa base per les vores per evitar tocar els components sensibles.
- Assegureu-vos que hi hagi una ventilació adequada dins de la carcassa de l'ordinador per evitar el sobreescalfament.
- Mantingueu la placa base allunyada de la humitat i de les temperatures extremes.
3. Contingut del paquet
Verifiqueu que tots els elements siguin presents al paquet:
- ASRock Z370 TAICHI Motherboard
- SLI Bridge
- Cables SATA (la quantitat pot variar)
- Manual d'instruccions
- Support DVD Disk
- Wi-Fi Antenna (for integrated Intel 802.11ac WiFi)
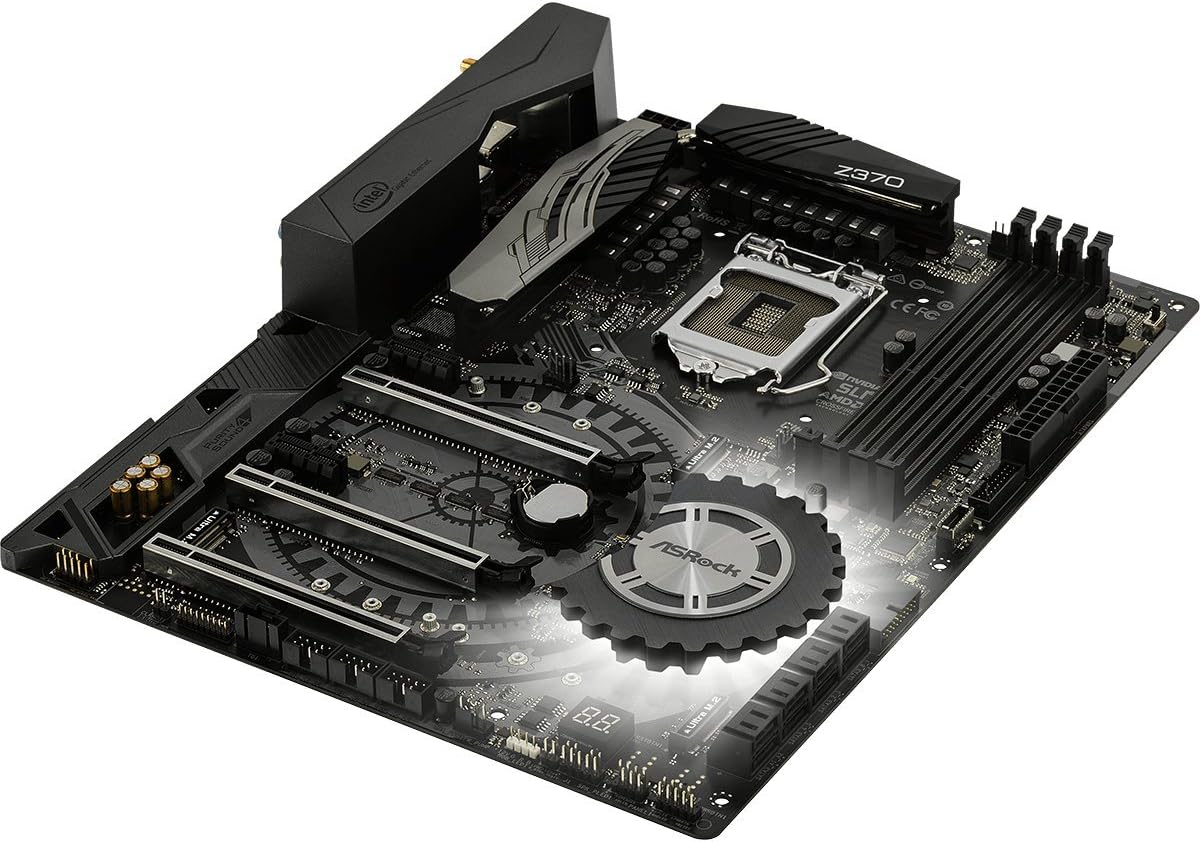
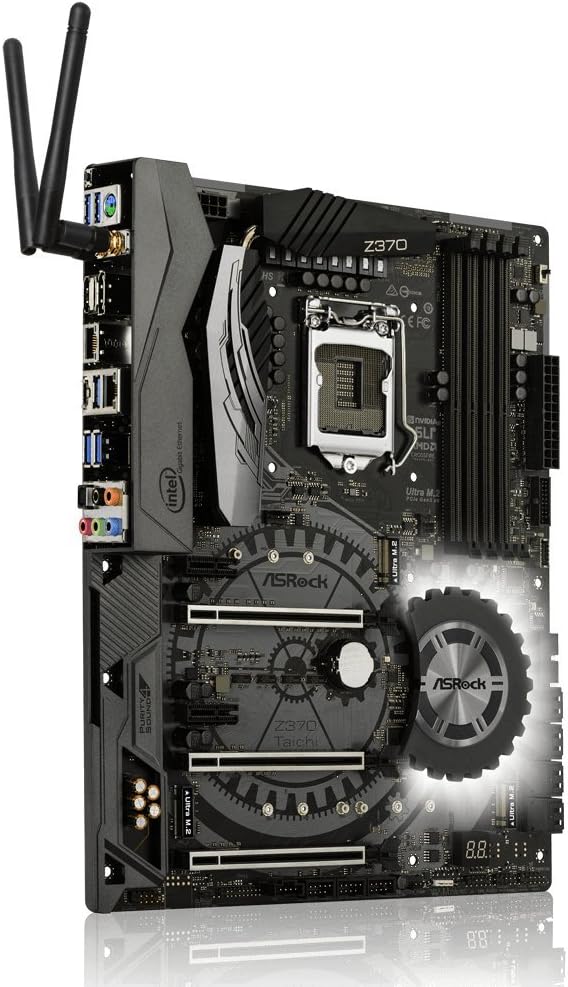
4. Disseny de la placa base
Familiaritzeu-vos amb els components i connectors clau de la placa base abans de la instal·lació.


5. Guia d'instal·lació
Follow these steps for proper installation of components onto the motherboard.
5.1. Instal·lació de la CPU
- Locate the LGA 1151 CPU socket.
- Obriu la palanca del sòcol de la CPU i aixequeu la placa de càrrega.
- Alineeu amb cura la CPU amb el sòcol, assegurant-vos que el triangle daurat de la CPU coincideixi amb el triangle del sòcol.
- Col·loca suaument la CPU al sòcol sense forçar-la.
- Tanqueu la placa de càrrega i assegureu-la amb la palanca.
- Instal·leu el refrigerador de CPU segons les instruccions del fabricant.
5.2. Instal·lació de RAM (DDR4)
- Identify the DDR4 DIMM slots. For dual-channel operation, refer to the motherboard manual for recommended slot pairing.
- Obriu els clips dels dos extrems de la ranura DIMM.
- Alineeu l'osca del mòdul DDR4 amb la clau de la ranura DIMM.
- Premeu fermament els dos extrems del mòdul de memòria fins que els clips encaixin al seu lloc.
5.3. Instal·lació de dispositius d'emmagatzematge (SATA i M.2)
5.3.1. SATA Drives
- Connect SATA data cables to the SATA3 ports on the motherboard and to your SATA hard drives or SSDs.
- Connecteu els cables d'alimentació SATA de la font d'alimentació a les unitats.
5.3.2. Ultra M.2 SSDs
- Locate the Ultra M.2 slots on the motherboard. The Z370 TAICHI features three Ultra M.2 slots (PCIe Gen3 x4 & SATA3).
- Traieu el cargol del separador M.2.
- Inseriu l'SSD M.2 a la ranura amb un angle de 30 graus.
- Gently push the M.2 SSD down and secure it with the standoff screw.
5.4. Instal·lació de la targeta PCIe
- Identify the PCIe 3.0 x16 and x1 slots.
- Traieu la coberta de la ranura d'expansió corresponent de la caixa de l'ordinador.
- Align the PCIe card with the slot and press down firmly until it is seated correctly.
- Fixeu la targeta a la carcassa amb un cargol.
5.5. Connexions d'alimentació
- Connecteu el connector d'alimentació ATX de 24 pins de la font d'alimentació a la placa base.
- Connect the 8-pin (or 4+4-pin) ATX 12V power connector to the motherboard.
5.6. Connexions d'E/S del panell frontal i posterior
- Connect the front panel headers (power switch, reset switch, HDD LED, power LED) to the corresponding pins on the motherboard. Refer to the motherboard manual for pin assignments.
- Connect USB 2.0, USB 3.1 Gen1, and USB 3.1 Gen2 Type-C front panel connectors if your case supports them.
- Connect audio cables from the front panel to the motherboard's audio header.
- Install the Wi-Fi antennas to the rear I/O panel connectors for Intel 802.11ac WiFi functionality.
- Connect peripherals (monitor, keyboard, mouse, network cable) to the rear I/O ports.
6. BIOS Setup and Software
After hardware installation, configure the system through the BIOS/UEFI and install necessary software.
6.1. Accessing the BIOS/UEFI
- Enceneu l'ordinador.
- Durant el procés d'arrencada, premeu repetidament la tecla Del or F2 clau per entrar a la utilitat de configuració de la BIOS/UEFI.
6.2. Initial BIOS Configuration
- Set the correct system date and time.
- Configura l'ordre d'arrencada per prioritzar els suports d'instal·lació del sistema operatiu (unitat USB o DVD).
- Review and adjust SATA mode (AHCI is generally recommended for SSDs).
- Deseu els canvis i sortiu de la BIOS.
6.3. Instal·lació de controladors i programari
- After installing your operating system, install the necessary drivers from the provided support DVD or download the latest versions from the ASRock website. Key drivers include chipset, audio, LAN, Wi-Fi, and graphics drivers.
- Install ASRock utility software for features like RGB LED control and system monitoring.
6.4. Actualitzacions de la BIOS
Regularly check the ASRock website for BIOS updates. BIOS updates can improve system stability, compatibility, and performance. Refer to the ASRock website for specific instructions on how to update the BIOS, typically involving a utility or flashing from within the BIOS itself.
7. Solució De Problemes
Aquesta secció tracta problemes comuns que podeu trobar.
7.1. Sense alimentació / Sense arrencada
- Assegureu-vos que tots els cables d'alimentació (ATX de 24 pins, ATX de 8 pins i 12 V) estiguin connectats correctament a la placa base i a la font d'alimentació.
- Verify the power supply switch is in the "ON" position.
- Comproveu la connexió de l'interruptor d'alimentació del panell frontal a la placa base.
- Prova d'arrencar amb components mínims (CPU, una memòria RAM, targeta gràfica si no hi ha gràfics integrats) per aïllar el problema.
7.2. Sense sortida de pantalla
- Confirm the monitor is connected to the correct graphics output (either dedicated GPU or motherboard's integrated graphics port).
- Reseat the graphics card and ensure its power connectors are attached.
- Prova amb un cable de monitor o pantalla diferent.
7.3. Inestabilitat / Fallades del sistema
- Check CPU and RAM temperatures. Ensure CPU cooler is properly installed.
- Verify RAM modules are correctly seated and compatible. Run a memory diagnostic tool.
- If overclocking, revert to default BIOS settings to check for stability.
- Assegureu-vos que tots els controladors estiguin actualitzats.
7.4. Perifèric no detectat
- Prova de connectar el perifèric a un port diferent.
- Consulteu el gestor de dispositius del sistema operatiu per detectar problemes de controladors.
- Ensure the peripheral is powered on and functioning correctly.
8. Especificacions
Detailed technical specifications for the ASRock Z370 TAICHI motherboard.
| Característica | Detall |
|---|---|
| Marca | ASRock |
| Nom del model | TAI-TXI |
| Socket de CPU | LGA 1151 |
| Processadors compatibles | Processadors Intel Core de 8a generació |
| Tipus de xipset | Intel Z370 |
| Tecnologia de memòria RAM | DDR4 |
| Velocitat de memòria | 2400 MHz (Supports DDR4 4333+(OC)) |
| Capacitat màxima de memòria | 64 GB |
| PCIe tragamonedas | 3 PCIe 3.0 x16, 2 PCIe 3.0 x1 |
| Suport multi-GPU | NVIDIA Quad SLI, AMD 3-Way CrossFireX |
| Graphics Output Options | HDMI, DisplayPort |
| Àudio | 7.1 CH HD Audio (Realtek ALC1220 Audio Codec), Purity Sound 4 & DTS Connect |
| Ports SATA | 8 SATA3 |
| M.2 Ranures | 3 Ultra M.2 (PCIe Gen3 x4 & SATA3) |
| USB 3.1 Gen2 | 3 (1 Front Type-C, 1 Rear Type-C, 1 Rear Type-A) |
| USB 3.1 Gen1 | 8 (4 Front, 4 Rear) |
| Ports USB 2.0 | 3 |
| LAN | Dual Intel Gigabit LAN |
| Connectivitat sense fil | Intel 802.11ac WiFi + BT 4.2 |
| Característiques especials | ASRock RGB LED, Hyper BCLK Engine II, Intel Optane Memory Ready |
| Dimensions (LxWxH) | 12.2 x 13.7 x 3.6 polzades |
| Pes de l'article | 3.3 lliures |
| Primera data disponible | 7 d'octubre de 2017 |
9. Informació de la garantia
ASRock provides a limited warranty for its motherboards. The specific terms and duration of the warranty may vary by region and retailer. Please retain your proof of purchase for warranty claims. For detailed warranty information, refer to the official ASRock weblloc web o poseu-vos en contacte amb el vostre distribuïdor local.
10. Suport tècnic
For further assistance, driver downloads, BIOS updates, or troubleshooting not covered in this manual, please visit the official ASRock support weblloc:
You can also find additional resources and FAQs on the ASRock product page for the Z370 TAICHI model.