ASUS 90MB0WQ0-M0EAY0
ASUS Intel B360 Micro ATX DDR4-SDRAM Motherboard User Manual
Model: 90MB0WQ0-M0EAY0
1. Introducció
This manual provides detailed instructions for the installation, operation, maintenance, and troubleshooting of your ASUS Intel B360 Micro ATX DDR4-SDRAM Motherboard. This motherboard supports 8th Generation Intel Core processors in the LGA1151 package, with integrated graphics, memory and PCI Express controllers to support onboard graphics output with dedicated chipsets, dual-channel (4-DIMM) DDR4 memory and 16 PCI Express 3.0/2.0 lanes for great performance.

Figure 1.1: The ASUS Intel B360 Micro ATX Motherboard alongside its retail packaging.
2. Característiques clau
- Supports up to 64GB Dual DDR4-SDRAM for high-speed memory performance.
- Micro ATX form factor, suitable for compact PC builds.
- Comprehensive port selection: 2 x PS/2, 1 x DVI-D, 1 x D-sub, 1 x HDMI, 2 x USB3.1 Gen2, 1 x USB3.1 Gen1, 2 x USB2.0, 1 x LAN (RJ45).
- Equipped with the Intel B360 Chipset for reliable performance.
- Designed for 8th Generation Intel Core processors (LGA1151 socket).
3. Guia de configuració
3.1. Component Overview
Familiarize yourself with the layout of the motherboard before beginning installation. Identify key components such as the CPU socket, RAM slots, PCIe slots, and various connectors.
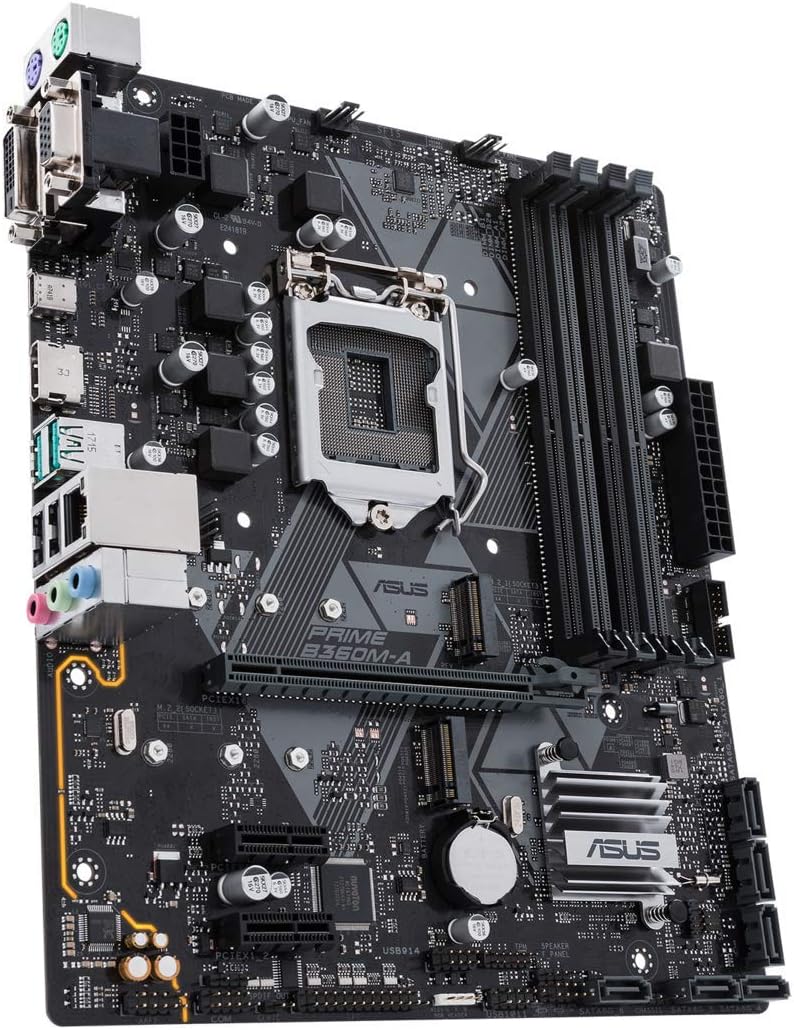
Figura 3.1: Un angle view of the motherboard, highlighting the CPU socket, RAM slots, and expansion slots.
3.2. Instal·lació de la CPU
- Obriu amb cura la palanca del sòcol de la CPU.
- Alineeu la marca triangular de la CPU amb la marca corresponent del sòcol.
- Col·loca suaument la CPU al sòcol sense forçar-la.
- Close the lever to secure the CPU in place.
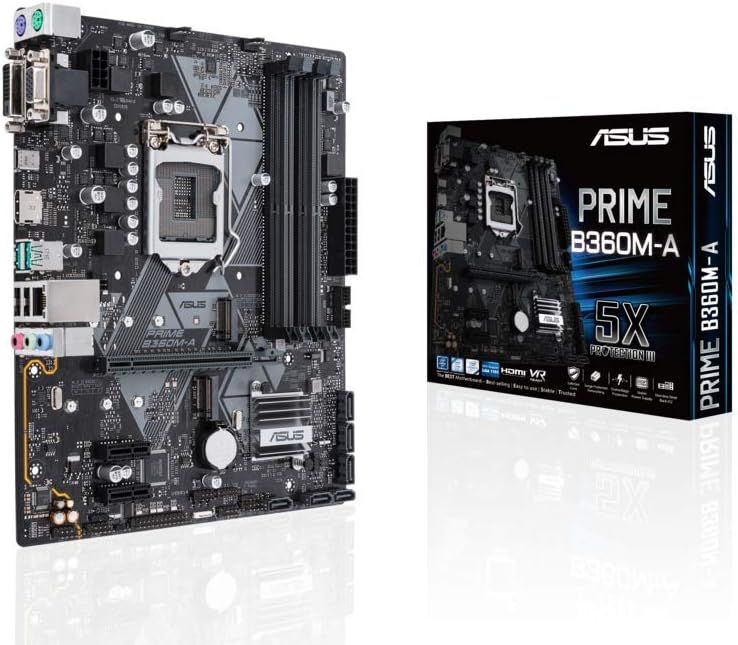
Figura 3.2: Detall view of the LGA1151 CPU socket, showing the mechanism for CPU installation.
3.3. Instal·lació de memòria (RAM)
- Obriu els clips dels dos extrems de les ranures DIMM.
- Alineeu l'osca del mòdul de memòria DDR4 amb la clau de la ranura DIMM.
- Premeu fermament els dos extrems del mòdul de memòria fins que els clips encaixin al seu lloc.
3.4. Connexió de perifèrics i alimentació
Connect your power supply unit (PSU) cables to the motherboard's 24-pin ATX power connector and 8-pin CPU power connector. Connect storage devices (SATA), front panel connectors (power button, USB ports), and any expansion cards (graphics card, etc.) to their respective slots and headers.

Figure 3.3: The rear I/O panel, displaying the various ports for external device connections.
Rear I/O Port Layout:
- Ports PS/2: For legacy keyboard and mouse connections.
- Port DVI-D: Digital video output.
- D-sub (VGA) Port: Analog video output.
- Port HDMI: High-definition multimedia interface for audio and video.
- Ports USB 3.1 Gen2: Transferència de dades d'alta velocitat.
- USB 3.1 Gen1 Port: Standard USB 3.0 speed.
- Ports USB 2.0: Standard USB 2.0 speed.
- LAN (RJ45) Port: Per a la connexió de xarxa amb cable.
- Preses d'àudio: Per a altaveus, auriculars i micròfons.
4. Instruccions de funcionament
4.1. Primera arrencada i configuració de la BIOS
Upon the first power-on, the system will typically enter the BIOS (Basic Input/Output System) or UEFI (Unified Extensible Firmware Interface) setup utility. Use the keyboard to navigate and configure settings such as boot order, date/time, and system information. Refer to the on-screen prompts for specific key presses to enter BIOS (commonly Del or F2).
4.2. Instal·lació del sistema operatiu
Once BIOS settings are configured, you can proceed with installing your preferred operating system. Ensure your installation media (USB drive or DVD) is bootable and set as the primary boot device in BIOS. Follow the on-screen instructions provided by your operating system installer.
5. Manteniment
- Eliminació de pols: Netegeu regularment la pols de la placa base i els components amb aire comprimit. Assegureu-vos que el sistema estigui apagat i desendollat abans de netejar-lo.
- Actualitzacions de controladors: Keep your motherboard drivers (chipset, audio, LAN, etc.) updated to ensure optimal performance and compatibility. Visit the ASUS support weblloc per als darrers controladors.
- Actualitzacions de la BIOS/UEFI: Periodically check for BIOS/UEFI updates from the ASUS website. Updates can improve stability, compatibility, and add new features. Follow the update instructions carefully to avoid system damage.
- Gestió de cables: Assegureu-vos que els cables interns estiguin ben encaminats per millorar el flux d'aire i evitar interferències.
6. Solució De Problemes
- Sense energia: Check all power connections from the PSU to the motherboard and components. Ensure the PSU is switched on.
- Sense pantalla: Verify that the monitor is connected correctly to the graphics output (either integrated or discrete GPU). Reseat the graphics card and RAM modules.
- Inestabilitat/Avaries del sistema: This can be caused by incompatible RAM, overheating, or faulty drivers. Check RAM compatibility, monitor temperatures, and update drivers.
- Problemes d'arrencada: Check boot order in BIOS. Ensure storage drives are properly connected and detected. Try resetting BIOS to default settings.
- Perifèric no detectat: Ensure the peripheral is properly connected to the correct port. Try a different port or update relevant drivers.
7. Especificacions tècniques
| Característica | Especificació |
|---|---|
| Marca | ASUS |
| Número de model | 90MB0WQ0-M0EAY0 |
| Socket de CPU | LGA 1151 |
| Processadors compatibles | Intel Core de 8a generació |
| Tipus de xipset | Intel B360 |
| Factor de forma | Micro ATX |
| Tecnologia de memòria RAM | SDRAM DDR4 |
| Capacitat d'emmagatzematge de memòria | 64 GB |
| Mida màxima de la memòria RAM | 64 GB |
| Velocitat de rellotge de memòria | 2666 MHz |
| Dimensions del producte (LxWxH) | 9.61 x 8.11 x 1.97 polzades |
| Pes de l'article | 1.1 lliures |
| Nombre de ports USB 2.0 | 2 |
| Voltage | 12 Volts |
| Data de primera disponibilitat | 3 d'abril de 2018 |
8. Garantia i Suport
This ASUS motherboard is backed by a Garantia del fabricant de 3 anys. For technical support, driver downloads, or further assistance, please visit the official ASUS support weblloc web o poseu-vos en contacte amb el seu servei d'atenció al client. Conserveu el rebut de compra com a comprovant de compra per a reclamacions de garantia.
Per obtenir la informació d'assistència més actualitzada, visiteu: www.asus.com/support/
Ask a question about this manual
Ask about setup, troubleshooting, compatibility, parts, safety, or missing instructions. Manuals+ will review the question and use this page’s manual context to help answer it.