
1. Introducció
The j5create JCD384 USB-C 10-in-1 Multi-Port Docking Station is designed to expand the connectivity of your USB-C enabled laptop, PC, or tablet. This docking station provides a comprehensive solution for connecting multiple displays, USB peripherals, Ethernet, and memory cards, enhancing your productivity and simplifying your workspace. It supports 4K HDMI and VGA outputs for versatile display options, along with USB 3.0 ports for high-speed data transfer and Power Delivery for charging your host device.
2. Característiques clau
- Multi-Display Connectivity: Connect your laptop to an additional monitor via HDMI (4K) or VGA (1080p).
- Expansió USB: Features two USB 3.1 Gen 1 Type-A ports for peripherals and one USB Type-A port with BC 1.2 for fast-charging mobile devices.
- Transferència de dades d'alta velocitat: USB 3.1 Gen 1 ports offer up to 5 Gbps transfer speed, significantly faster than USB 2.0.
- Memory Card Reader: Direct access to SD and MicroSD memory cards for convenient data storage and transfer.
- Port Ethernet: Provides a stable and reliable wired network connection.
- Subministrament d'energia: USB-C 3.1 port with Power Delivery allows charging of your host device while using the hub.
3. Guia de configuració
Follow these steps to set up your j5create JCD384 docking station:
- Connecta't al dispositiu amfitrió: Plug the integrated USB-C cable from the docking station into an available USB-C port on your laptop, PC, or tablet. Ensure your host device's USB-C port supports DisplayPort Alternate Mode and Power Delivery for full functionality.
- Connecteu l'adaptador de corrent (opcional però recomanat): If your host device requires charging or if you are connecting power-intensive peripherals, connect your original USB-C power adapter to the USB-C Power Delivery port on the docking station. This will charge your host device and provide power to connected peripherals.
- Connecteu pantalles externes:
- For HDMI display: Connect an HDMI cable from your monitor to the HDMI port on the docking station.
- For VGA display: Connect a VGA cable from your monitor to the VGA port on the docking station.
Note: The docking station supports either HDMI or VGA output at one time, not simultaneously for extended desktop. For mirrored display, both can be used.
- Connecteu els perifèrics USB: Plug your USB devices (e.g., keyboard, mouse, external hard drive) into the available USB 3.0 Type-A ports. The orange USB Type-A port supports BC 1.2 for faster charging of mobile devices.
- Connecteu el cable Ethernet: For a wired network connection, plug an Ethernet cable into the RJ-45 Gigabit Ethernet port on the docking station.
- Inserir targetes de memòria: Insert your SD or MicroSD cards into the corresponding slots for data access.

Figura 1: Mésview of the j5create JCD384 docking station with connected peripherals.
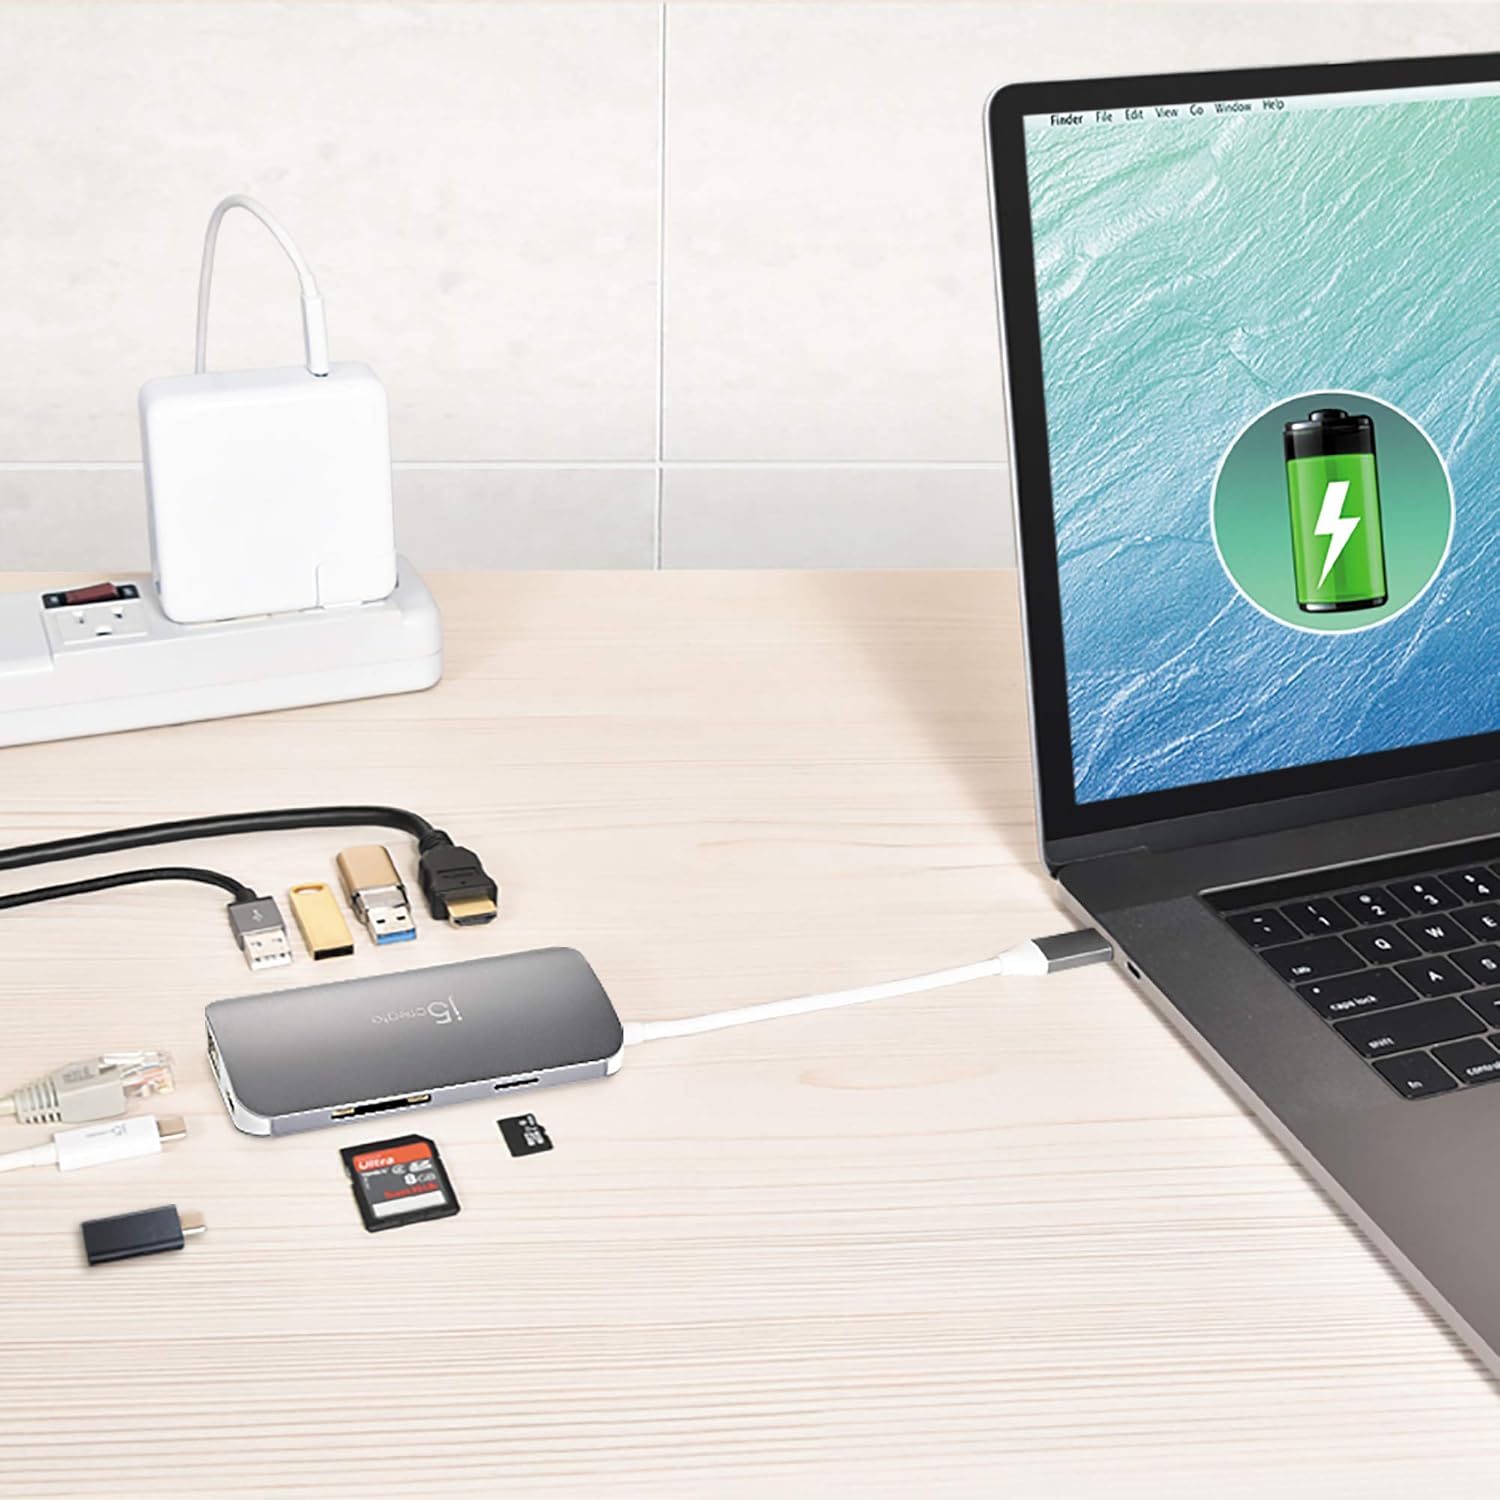
Figure 2: The docking station connected to a laptop, demonstrating power delivery and peripheral connections.
4. Instruccions de funcionament
Once the docking station is set up, it operates largely plug-and-play. Your operating system should automatically detect and configure most connected devices.
4.1 Configuració de la pantalla
After connecting your monitor(s), you may need to adjust display settings in your operating system:
- Windows: Right-click on the desktop, select "Display settings," and configure your displays (extend, duplicate, or second screen only).
- macOS: Go to "System Preferences" > "Displays" to arrange or mirror your displays.

Figure 3: A laptop connected to an external monitor, showcasing multi-display functionality.

Figure 4: A tablet and projector connected to a 4K UHD monitor, illustrating diverse display connections.
4.2 USB Device Usage
Simply plug your USB devices into the available USB 3.0 ports. For charging mobile devices, use the orange USB Type-A port which supports BC 1.2 for faster charging.
4.3 Memory Card Access
Insert your SD or MicroSD card into the appropriate slot. The card will appear as a removable drive in your file explorer, allowing you to transfer files.
4.4 Connexió Ethernet
Once connected, your host device should automatically detect the wired network. If not, check your network settings.
5. Especificacions
| Característica | Detall |
|---|---|
| Número de model | JCD384 |
| Marca | j5crear |
| Color | Gris |
| Material | Alumini |
| Interfície del maquinari | MicroSD, Secure Digital Card, USB 3.0, HDMI, VGA, Ethernet, USB-C |
| Dispositius compatibles | PC, Laptops, Tablets, Smartphones (with USB-C DisplayPort Alt Mode) |
| Ports USB totals | 3 (2x USB 3.0 Type-A, 1x USB Type-A with BC 1.2) |
| Velocitat de transferència de dades | 5 gigabits per segon (USB 3.0) |
| Nombre de Ports | 9 (HDMI, VGA, Ethernet, 3x USB 3.0, SD, MicroSD, USB-C PD) |
| Suport del sistema operatiu | Múltiples sistemes operatius |
| Pes de l'article | 88 grams |
| UPC | 847626002458 |

Figura 5: superior i inferior views of the docking station, showing various ports.

Figura 6: lateral view highlighting the VGA port and integrated USB-C cable.

Figura 7: lateral view displaying the Ethernet and USB-C Power Delivery ports.
6. Solució De Problemes
Si teniu problemes amb l'estació d'acoblament, consulteu les solucions habituals següents:
- Sense sortida de pantalla:
- Assegureu-vos que el port USB-C del dispositiu amfitrió admeti el mode alternatiu de DisplayPort.
- Check all cable connections (USB-C to host, HDMI/VGA to monitor).
- Verifiqueu que la font d'entrada del monitor estigui seleccionada correctament.
- Try connecting only one display at a time to isolate the issue.
- Actualitzeu els controladors gràfics del dispositiu amfitrió.
- Dispositius USB no reconeguts:
- Ensure the docking station is securely connected to your host device.
- Prova de connectar el dispositiu USB directament al dispositiu amfitrió per confirmar que funciona.
- If using a high-power USB device, ensure the docking station is connected to an external power source via its USB-C PD port.
- Some wireless peripherals (e.g., Logitech adapters) may have compatibility issues with certain hubs.
- Slow Ethernet Connection:
- Check your Ethernet cable for damage and ensure it's securely connected.
- Verify your network drivers are up to date.
- Test with a different Ethernet cable or port on your router/modem.
- Host Device Not Charging:
- Ensure your original USB-C power adapter is connected to the docking station's USB-C PD port.
- Verify your host device's USB-C port supports Power Delivery.
- Comproveu si l'adaptador de corrent i el cable estan danyats.
7. Manteniment
To ensure the longevity and optimal performance of your j5create JCD384 docking station, follow these maintenance guidelines:
- Neteja: Feu servir un drap suau i sec per netejar l'exterior de l'estació d'acoblament. Eviteu utilitzar netejadors líquids o aerosols, ja que poden fer malbé el dispositiu.
- Emmagatzematge: Guardeu l'estació d'acoblament en un lloc fresc i sec, allunyat de la llum solar directa i de temperatures extremes.
- Manipulació: Handle the device with care. Avoid dropping it or subjecting it to strong impacts. Do not pull on the integrated USB-C cable forcefully.
- Ventilació: Assegureu-vos que l'estació d'acoblament tingui una ventilació adequada per evitar el sobreescalfament, especialment durant un ús prolongat amb diversos dispositius connectats.
8. Garantia i assistència
The j5create JCD384 USB-C 10-in-1 Multi-Port Docking Station comes with a manufacturer's warranty. Please refer to the warranty card included in your product packaging for specific terms and conditions, including warranty duration and coverage details.
For technical support, product registration, or further assistance, please visit the official j5create website or contact their customer service department. Contact information can typically be found on the j5create weblloc web o a la documentació del producte.