
TC Electronic DITTO JAM X2 LOOPER
TC Electronic Ditto JAM X2 Looper Pedal User Manual
Model: DITTO JAM X2 LOOPER
Brand: TC Electronic
Introducció
Welcome to the user manual for the TC Electronic Ditto JAM X2 Looper Pedal. This intuitive looper pedal is designed for musicians seeking intelligent loop synchronization that responds to their band's rhythm. It features innovative BeatSense technology, allowing for automatic adjustment of loop tracks to your beat, and offers both Record-then-Play and Record-then-Overdub functionalities with unlimited overdubs and undo/redo capabilities. This manual provides essential information for setting up, operating, maintaining, and troubleshooting your Ditto JAM X2 Looper.
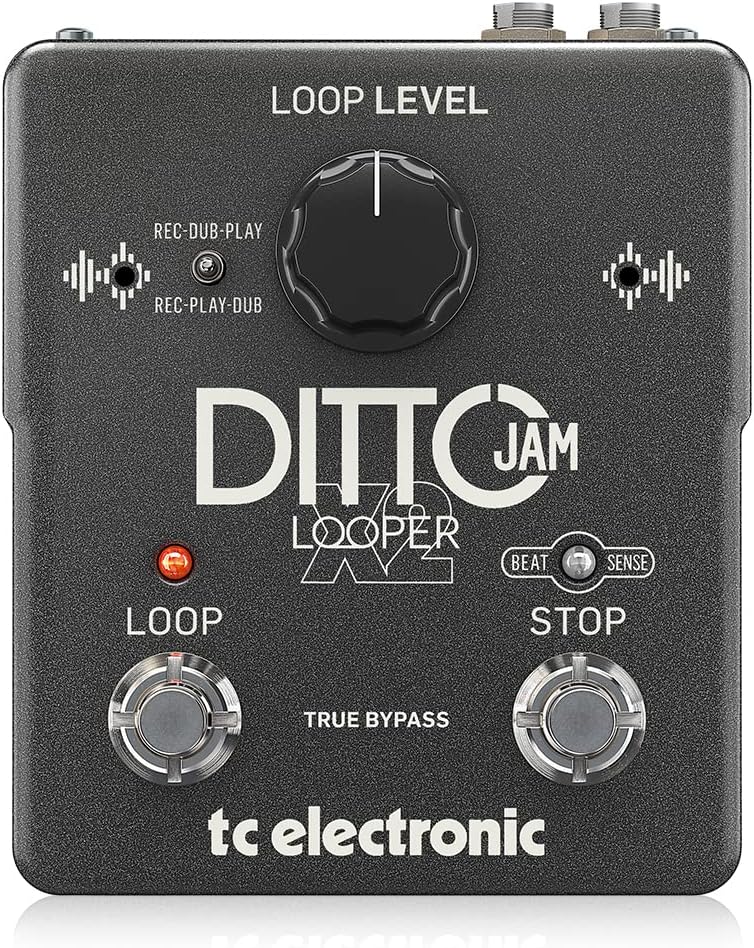
Imatge: Frontal view of the TC Electronic Ditto JAM X2 Looper Pedal, showcasing the 'LOOP LEVEL' knob, 'REC-DUB-PLAY' and 'REC-PLAY-DUB' switches, 'LOOP' and 'STOP' footswitches, and 'BEAT SENSE' indicator.
Característiques clau
- Intuitive looper pedal with intelligent loop synchronization that responds to your band.
- Innovative responsive BeatSense technology automatically adjusts loop tracks to your beat.
- Choose between Record-then-Play or Record-then-Overdub functionalities.
- Unlimited overdubs and undo/redo for total creative freedom.
- Dual built-in mics accurately track band tempo by focusing only on rhythmic elements.

Imatge: Un primer pla view of the "BEAT SENSE" indicator on the pedal, highlighting its function.

Image: An external microphone, likely used for the BeatSense technology, clipped onto a drum kit component.
Configuració
Font d'alimentació
The Ditto JAM X2 Looper requires a 9V power supply. Ensure you use a compatible power adapter (not included) to power the unit.
Connexions
- Connecta el teu instrument (per exemple, la guitarra) a ENTRADA jack utilitzant un cable d'instrument estàndard de 1/4 de polzada.
- Connecteu el SORTIDA jack al teu amplifier or next pedal in the signal chain using a standard 1/4-inch instrument cable.
- An MIC EXT input is available for connecting an external microphone to enhance BeatSense accuracy, particularly in complex rhythmic environments.

Imatge: Part posterior view of the Ditto JAM X2 pedal, clearly showing the INPUT, OUTPUT, EXT MIC jacks, and the power input.
Instruccions de funcionament
Bucle bàsic
- Gravació: Premeu el botó LOOP footswitch once to start recording your loop. The LED will illuminate red.
- Playback/Overdub: Premeu el botó LOOP footswitch again to stop recording and begin playback. If you press it again during playback, you will start overdubbing.
- Atura: Premeu el botó STOP footswitch once to stop playback.
- Desfer/Refer: Manteniu premut el botó STOP footswitch to undo the last overdub. Press and hold again to redo it.
- Bucle clar: Manteniu premut el botó LOOP interruptor de pedal per esborrar el bucle actual.
Loop Level Control
El NIVELL DE BUCLE knob adjusts the overall volume of your recorded loop. Turn clockwise to increase volume, counter-clockwise to decrease.
Record Modes (REC-DUB-PLAY / REC-PLAY-DUB)
The Ditto JAM X2 offers two recording modes, selectable via the small toggle switch:
- REC-DUB-PLAY: In this mode, the first press of the LOOP footswitch records, the second press starts overdubbing, and a third press initiates playback without further overdubbing.
- REC-PLAY-DUB: In this mode, the first press records, the second press starts playback, and a third press initiates overdubbing.

Imatge: Una imatge detallada view of the toggle switch for selecting between REC-DUB-PLAY and REC-PLAY-DUB modes.
BeatSense Technology
The innovative BeatSense technology uses dual built-in microphones to listen to your band's rhythmic elements (like drums) and automatically synchronize your loops to the detected tempo. This ensures your loops stay perfectly in time with the rest of the band.

Image: A musician's feet operating the Ditto JAM X2 pedal on a stage floor, demonstrating its use in a live setting.
Manteniment
- Keep the pedal clean and free from dust and debris. Use a soft, dry cloth for cleaning.
- Avoid exposing the pedal to extreme temperatures, humidity, or direct sunlight.
- Do not attempt to open the unit or perform repairs yourself, as this will void the warranty. Refer to qualified service personnel for any issues.
- Ensure proper ventilation around the pedal during use.

Image: The bottom label of the Ditto JAM X2 pedal, displaying compliance information, manufacturer details, and power requirements.
Resolució de problemes
Sense sortida de so
- Comproveu totes les connexions dels cables (entrada, sortida, alimentació).
- Ensure the pedal is receiving power.
- Verify the LOOP LEVEL knob is not set to minimum.
- Prova amb diferents cables i amplifier/instrument to isolate the issue.
Loop Not Synchronizing
- Ensure the BeatSense microphones are not obstructed.
- Verify the external microphone (if used) is properly connected and functioning.
- The BeatSense technology works best with clear, consistent rhythmic input (e.g., drums). Complex or irregular rhythms may affect synchronization accuracy.
- Ensure the pedal is placed in an optimal position to pick up rhythmic sounds from the band.
Footswitches Not Responding
- Comproveu la font d'alimentació.
- Si el problema persisteix, poseu-vos en contacte amb el servei d'atenció al client.
Especificacions
| Característica | Especificació |
|---|---|
| Model | DITTO JAM X2 LOOPER |
| Marca | TC Electrònica |
| Pes de l'article | 1.26 lliures (570 grams) |
| Dimensions del producte | 4.45 x 5.31 x 2.13 polzades (5.31" de llargada x 4.45" d'amplada x 2.13" d'alçada) |
| Color | Negre |
| Font d'alimentació | Funciona amb bateria (9 volts) |
| Interfície del maquinari | Àudio d'1/4 de polzada |
| Format del senyal | Analògic |
Garantia i Suport
For warranty information and technical support, please refer to the official TC Electronic weblloc web o contacteu directament amb el servei d'atenció al client. Conserveu el comprovant de compra per a reclamacions de garantia.
Recursos en línia: Visita el TC Electronic Store on Amazon per obtenir informació i recursos addicionals sobre el producte.
Ask a question about this manual
Ask about setup, troubleshooting, compatibility, parts, safety, or missing instructions. Manuals+ will review the question and use this page’s manual context to help answer it.