
1. Introducció
This manual provides detailed instructions for the installation, operation, and maintenance of your EPEVER MPPT 20A Solar Charge Controller, model Tracer2210AN-G3. This controller is designed for 12V/24V battery systems, featuring Maximum Power Point Tracking (MPPT) technology for efficient solar energy conversion.
Característiques principals:
- 20A charge/discharge current, 12V/24V DC battery system auto-identification.
- Max. PV input power: 260W for 12V battery, 520W for 24V battery. Max PV voltage de 100V.
- Common Negative ground design.
- Compatible with Lead-acid batteries (GEL/AGM, Sealed, Flooded) and Lithium batteries.
- Four load control modes: manual, light ON/OFF, light On+Timer, and test mode.
- Advanced MPPT technology with >99.5% tracking efficiency and 98% peak conversion efficiency.
- Backlight LCD display for monitoring.
- RS485 Communication port for optional modules (MT52, RTS, PC Cable, Bluetooth, Wifi).
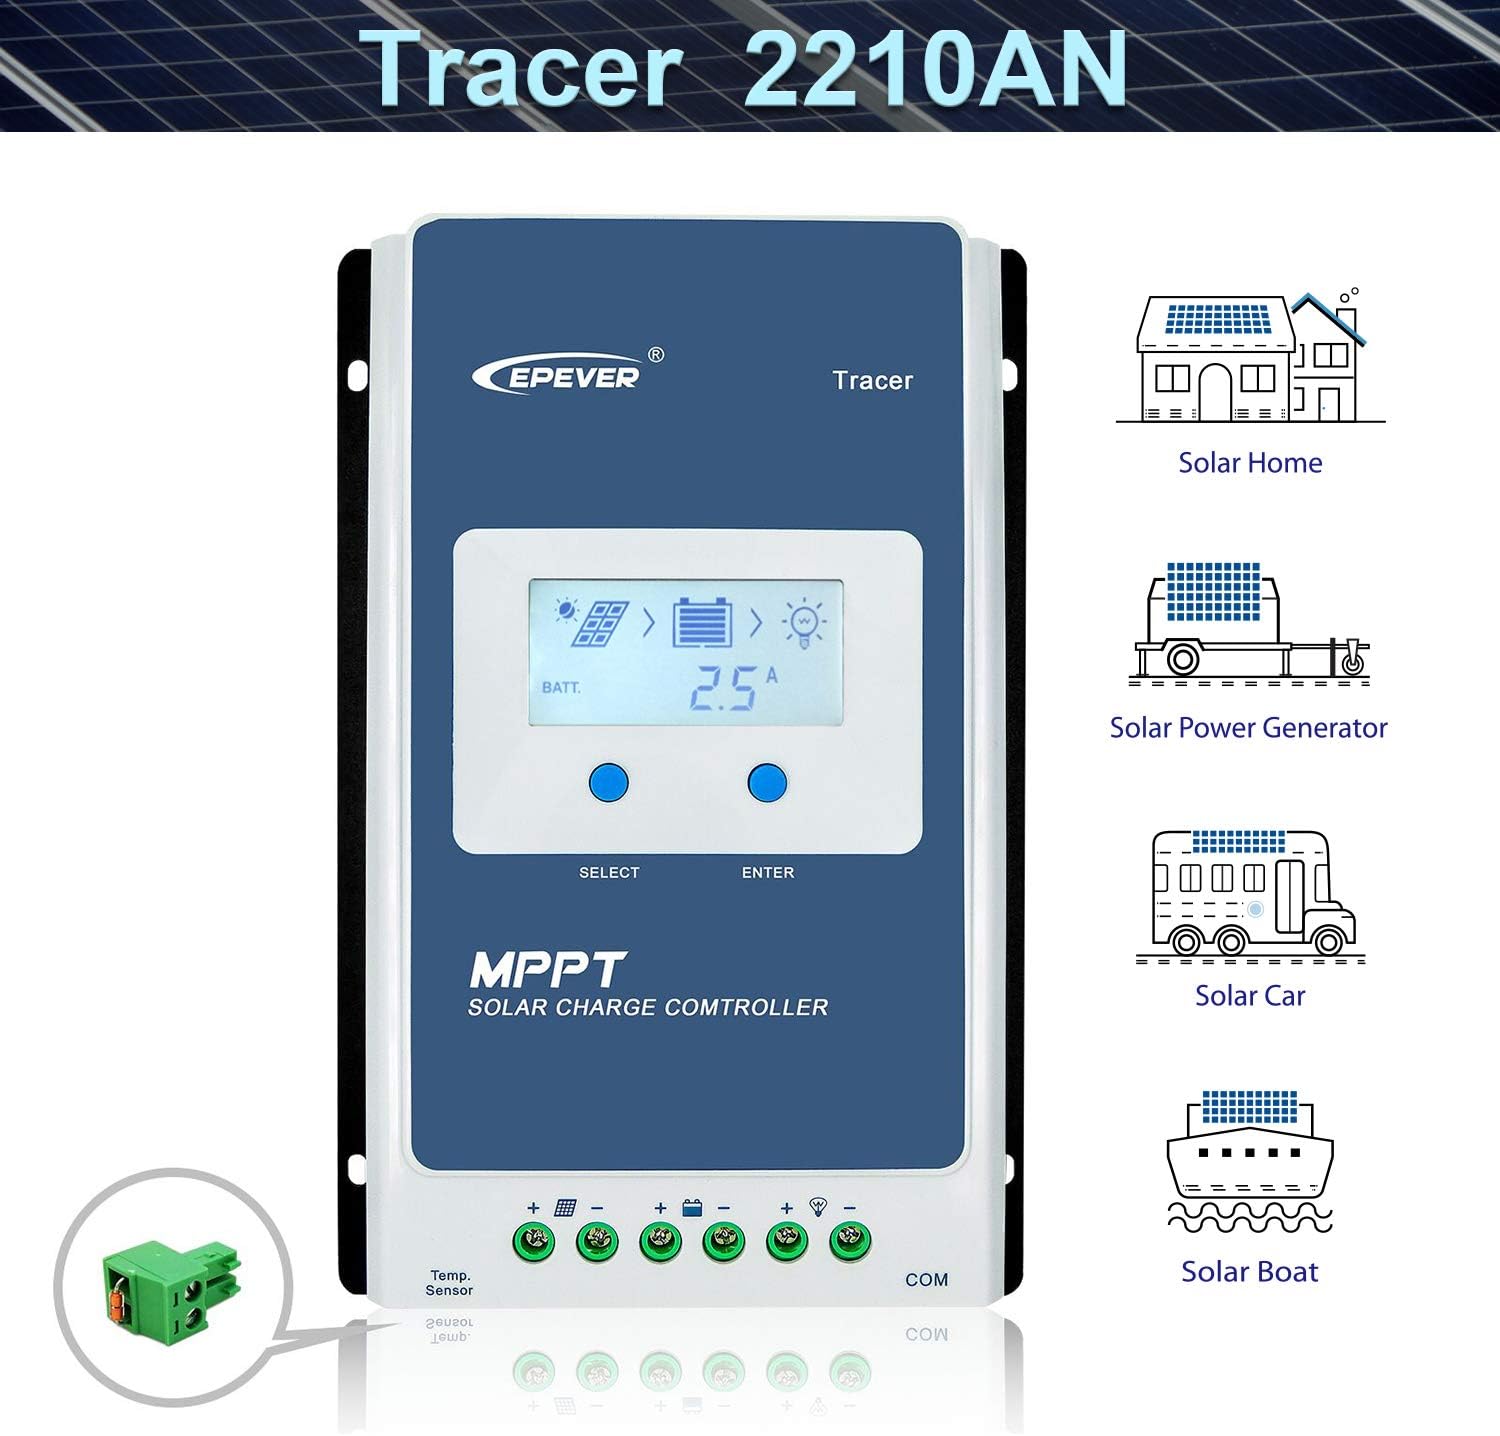
Figure 1: EPEVER MPPT 20A Solar Charge Controller Tracer2210AN-G3. This image shows the front view of the solar charge controller with its LCD display and control buttons, along with icons illustrating its use in solar homes, power generators, cars, and boats.
2. Instruccions de seguretat
Please read all instructions and warnings in this manual before installation and operation. Keep this manual for future reference.
- Assegureu-vos que tot el cablejat estigui correctament dimensionat i aïllat.
- Always connect the battery first, then the solar panel, and finally the load. Disconnect in reverse order.
- Do not use an electric screwdriver for terminal connections to avoid damage.
- Ensure proper ventilation around the controller to prevent overheating.
- The controller is designed for indoor use; avoid exposure to direct sunlight, high temperatures, and moisture.
- Només personal qualificat ha de fer la instal·lació i el manteniment.
3. Producte acabatview
Components:
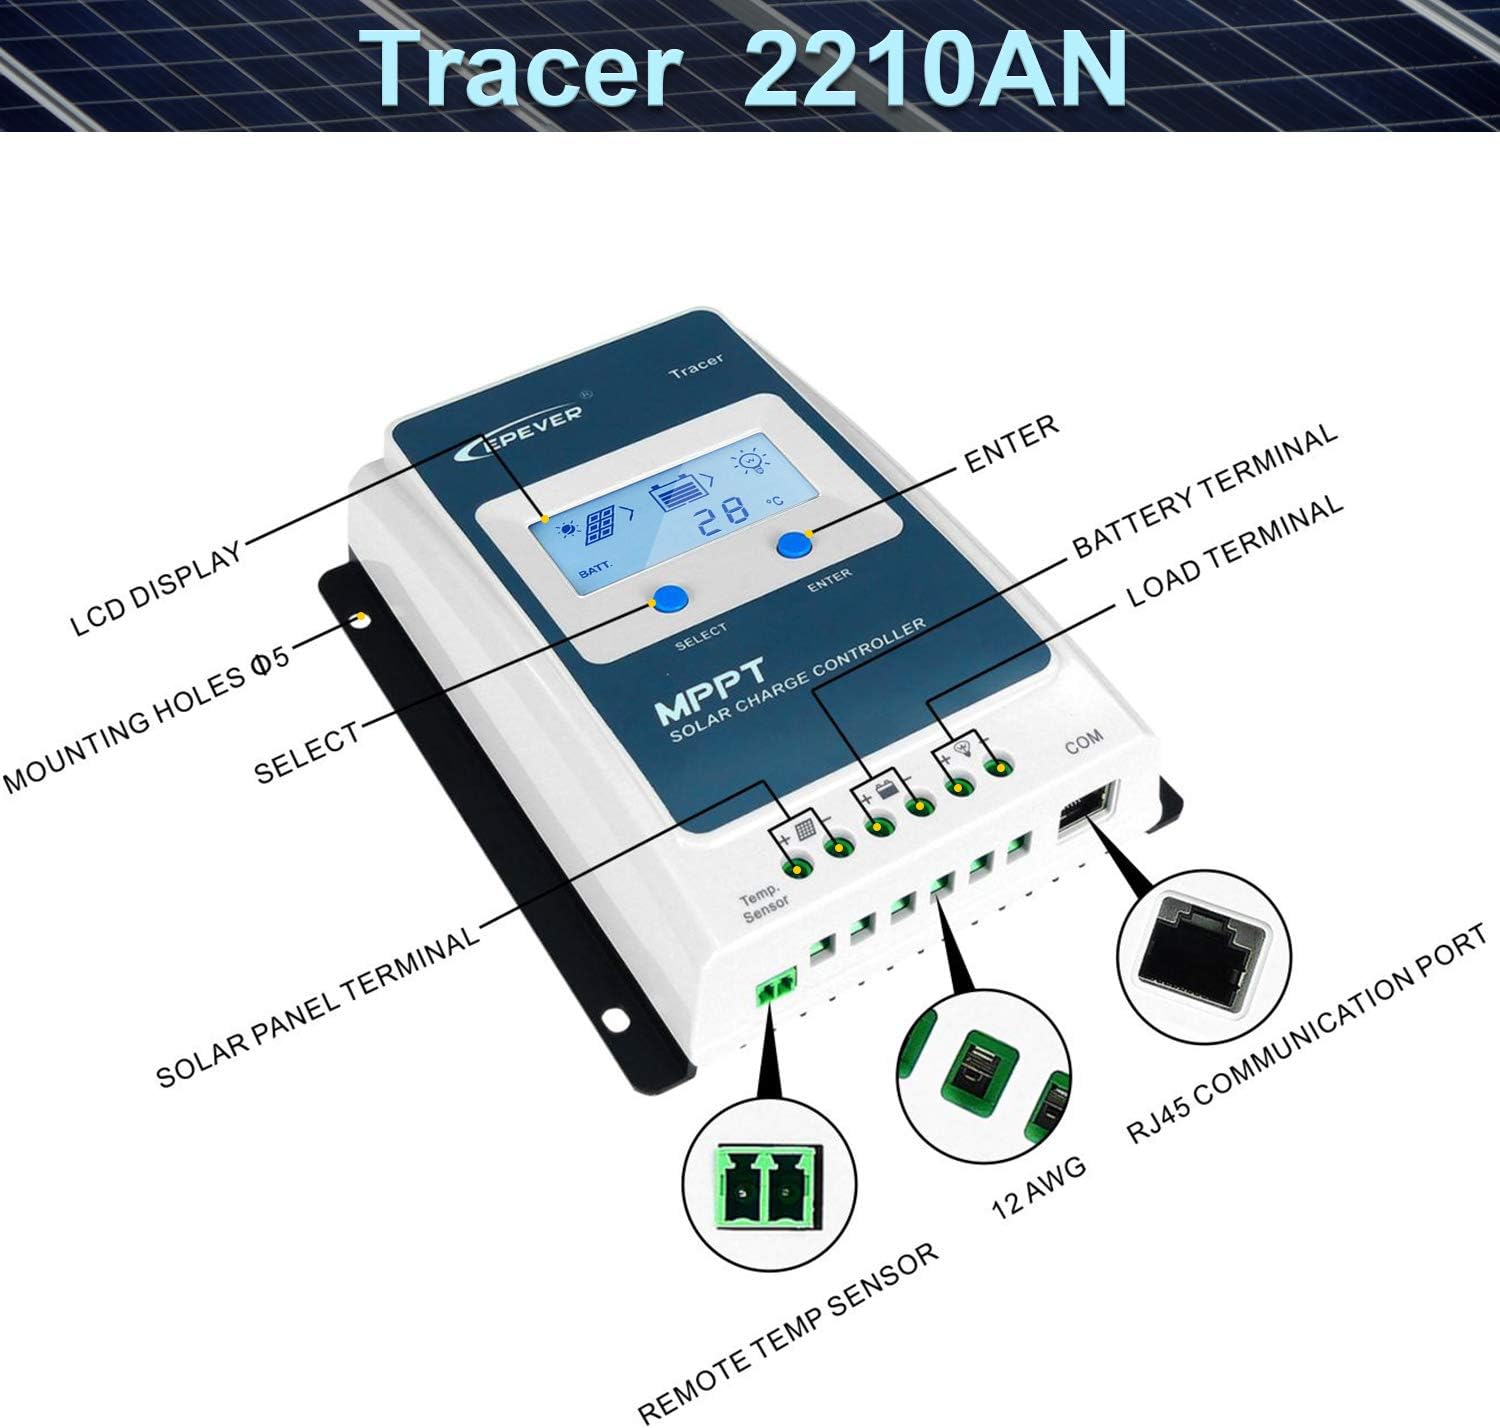
Figure 2: Labeled components of the Tracer2210AN-G3 controller. This image highlights the LCD display, mounting holes, Solar Panel Terminal, Remote Temp Sensor port, Battery Terminal, Load Terminal, and RJ45 Communication (COM) port.
Pantalla LCD:
The LCD display provides real-time monitoring of system parameters. Use the SELECT and ENTER buttons to navigate and adjust settings.

Figura 3: Detallada view of the LCD display showing various parameters such as PV Input voltage/current, Charging current, Power generation, Load work mode, Battery voltage/current, Discharge capacity/current, and Temperature.
4. Instal·lació i cablejat
Always Connect the Battery First!
Please read the complete installation instructions to familiarize yourself with the installation steps before proceeding.
Passos de connexió:
- Connexió de la bateria: Connect the battery to the controller. Ensure correct polarity (+ to + and - to -).
- Solar Panel (PV array) Connection: Connect the solar panel to the controller. Ensure correct polarity.
- Connexió de càrrega: Connect the DC load to the controller. Ensure correct polarity.
Disconnection Steps (Reverse Order):
- Desconnecteu la càrrega.
- Disconnect the Solar Panel (PV array).
- Disconnect the Battery.

Figure 4: Connection Diagram. This diagram illustrates the proper wiring sequence for the solar panel, battery, DC load, and optional AC load via an inverter, all connected to the solar charge controller.
Video d'instal·lació:
Video 1: MPPT Unboxing and Setting. This video demonstrates the unboxing process, connection of battery, solar panel, and load, and basic parameter settings for the EPEVER MPPT solar charge controller.
5. Funcionament
Configuració del tipus de bateria:
The controller supports various battery types. To set the battery type:
- Premeu el botó ENTRAR button and hold for 5 seconds under the battery voltage interfície.
- Premeu el botó SELECCIONA button when the battery type interface is flashing to choose your battery type (e.g., GEL, Sealed, Flooded, User, LiFePO4, Li(NiCoMn)O2).
- Premeu el botó ENTRAR botó per confirmar el tipus de bateria.
PRECAUCIÓ: For 'User' battery type, refer to Chapter 3 of the full user manual for battery control voltage settings. Lithium battery parameters may require setting via a phone APP if the controller has a built-in Bluetooth module.

Figure 5: Compatible Battery Types. This image lists various lead-acid and lithium battery types supported by the controller, including Sealed, Gel, Flooded, LiFePO4, and Li(NiCoMn)O2.
Setting Load Working Mode:
To set the load working mode:
- Premeu el botó ENTRAR button and hold for 5 seconds under the load mode interface.
- Premeu el botó SELECCIONA button when the load mode interface is flashing to choose the desired mode (e.g., Light ON/OFF, Test mode, Manual mode).
- Premeu el botó ENTRAR button to confirm the load mode.
PRECAUCIÓ: Light ON/OFF, Test mode, and Manual mode are set via Timer1. Timer2 will be disabled and display "2n".
6. Especificacions
Especificacions generals:
- Marca: SEMPRE
- Model: Tracer2210AN-G3
- Voltage: 12 Volts / 24 Volts Auto Work
- Material: Alumini
- Tipus de visualització: LCD
- UPC: 791262788231
Model Comparison (Tracer-AN Series):
| Model | Tracer1210AN | Tracer2210AN | Tracer3210AN | Tracer4210AN |
|---|---|---|---|---|
| Rate Charge Current | 10A | 20A | 30A | 40A |
| Rate Discharge Current | 10A | 20A | 30A | 40A |
| Voltage Rang | 8 ~ 32V | |||
| Màx. PV Voltage | 100 V | |||
| Màx. Potència d'entrada fotovoltaica | 130W/12V, 260W/24V | 260W/12V, 520W/24V | 390W/12V, 780W/24V | 520W/12V, 1040W/24V |
| Terminal del controlador | 12 AWG (4 mm²) | 6 AWG (16 mm²) | 6 AWG (16 mm²) | 6 AWG (16 mm²) |
| Cable recomanat | 12 AWG (4 mm²) | 10 AWG (6 mm²) | 8 AWG (10 mm²) | 8 AWG (10 mm²) |
Table 1: Comparison of Tracer-AN series models based on charging current and maximum PV input power.
Battery Type Parameters:

Figure 6: Suitable Battery Types: Lead-Acid or Lithium. This table provides detailed voltage settings for various battery types including Sealed, Gel, Flooded, User-defined, LiFePO4 (LFP4S, LFP8S), and Li(NiCoMn)O2 (LCNM3S, LCNM6S, LCNM7S) for parameters like Over Voltage Disconnect, Charging Limit, Equalize Charging, Float Charging, and more.
7. Accessoris opcionals
Enhance the functionality of your EPEVER MPPT Solar Charge Controller with these optional accessories:

Figure 7: Optional Accessories. This image displays various optional accessories such as Remote Temperature Sensor (RTS), USB to RS485 cable, Remote Meter (MT50), WiFi Serial Adapter (eBox-WIFI-01), RS485 to Bluetooth Adapter (eBox-BLE-01), Logger (eLOG01), and PT Adapter (PT-ADP), along with their descriptions and uses.
- Remote Temperature Sensor (RTS300R47K3.81A): For accurate battery temperature compensation.
- USB to RS485 Cable (CC-USB-RS485-150U): Connects controller to PC for monitoring via Solar Station PC software.
- Remote Meter (MT50): External display for monitoring operating data and fault information.
- WiFi Serial Adapter (eBox-WIFI-01): Enables monitoring via mobile APP over WiFi.
- RS485 to Bluetooth Adapter (eBox-BLE-01): Enables monitoring via mobile APP over Bluetooth.
- Logger (eLOG01): Records operating data for analysis via PC software.
- PT Adapter (PT-ADP): Manages communication with multiple controllers.
8. Manteniment
Regular maintenance ensures optimal performance and longevity of your solar charge controller:
- Comproveu les connexions: Periodically inspect all wiring connections for tightness and corrosion.
- Controlador net: Keep the controller clean and free from dust. Use a dry cloth for cleaning.
- Inspeccionar per danys: Check for any physical damage to the casing, cables, or terminals.
- Monitoritzar el rendiment: Regularly check the LCD display for normal operation and parameter readings.
9. Solució De Problemes
Si teniu problemes amb el controlador, consulteu els problemes i solucions habituals següents:
- Sense pantalla: Comproveu les connexions de la bateria i assegureu-vos que el volum de la bateriatage es troba dins del rang de funcionament.
- Sense càrrega: Verify solar panel connections and ensure sufficient sunlight. Check PV voltage a la pantalla.
- La càrrega no funciona: Check load connections and ensure the load control mode is correctly set. Verify battery voltage està per sobre del baix voltage disconnect setting.
- Sobreescalfament: Ensure adequate ventilation around the controller. Reduce load if necessary.
- Volum de bateria incorrectetage Lectura: Check battery connections and ensure the remote temperature sensor (if used) is properly connected.
For more complex issues, consult the detailed troubleshooting section in the complete user manual or contact EPEVER customer support.
10. Garantia i Suport
EPEVER products come with a standard warranty. Please refer to the warranty card included with your product for specific terms and conditions. For technical support, product inquiries, or warranty claims, please contact EPEVER customer service through their official weblloc web o el venedor on vau comprar el producte.