
EPEVER VS3024AU
EPEVER 30A 12V/24V Solar Charge Controller
Model: VS3024AU Instruction Manual
1. Introducció
The EPEVER VS-AU series controller is a common positive, PWM charge controller featuring a built-in LCD display and dual USB ports. Its multiple load control modes make it suitable for a wide range of applications, including solar home systems, traffic signals, solar street lights, and solar garden lamps. This manual provides detailed instructions for the safe and efficient operation of your VS3024AU solar charge controller.
2. Precaucions de seguretat
Please read all instructions and precautions in the manual before installation. Failure to do so may result in damage to the controller, battery, or other components, and may void the warranty.
- Ensure the battery has sufficient voltage perquè el controlador reconegui el tipus de bateria abans de la primera instal·lació.
- The charge controller is only suitable for regulating solar modules. Never connect another charging source to the charge controller.
- The controller will generate heat during operation. Please install it in a well-ventilated area.
- The controller is designed for indoor use. Avoid exposure to moisture, dust, or direct sunlight.
- Connect the battery first, then the solar panel, and finally the load. Disconnect in the reverse order.
- Ensure all wiring is secure and connections are tight to prevent loose connections and overheating.
- Use appropriate circuit breakers or fuses for the solar panel, battery, and load circuits.
3. Producte acabatview
3.1 Característiques clau
- 30A 12V/24V Auto Work, Dual USB design with Max. output 2.4A.
- LCD display for dynamically showing device’s operating data and working condition.
- Tres stage intelligent PWM charging: Equalize, Boost, and Float.
- Supports Sealed, Gel, and Flooded battery types.
- Various electronic protections: PV reverse polarity, Battery reverse polarity, Battery over voltage, Battery over discharge, Battery overheating, Controller overheating, Load short circuit, Load overload.
- Humanized button settings for comfortable and convenient operation.
- UL and VDE certified Nickel plated copper terminals for safe and solid connection.
3.2 Components and Interface

Figura 3.2.1: Frontal view of the EPEVER VS3024AU Solar Charge Controller, showing the LCD display, Menu and Set buttons, dual USB ports, and terminal connections for solar panel, battery, and load.

Figura 3.2.2: Angle view of the controller, highlighting the heat sink fins on the bottom for efficient heat dissipation.

Figure 3.2.3: A different angled perspective of the controller, providing a clearer view of the terminal block layout and the overall compact design.

Figura 3.2.4: A baix view of the controller, showing the product label with model number (VS3024AU), voltage (12/24V), and current (30A) information.
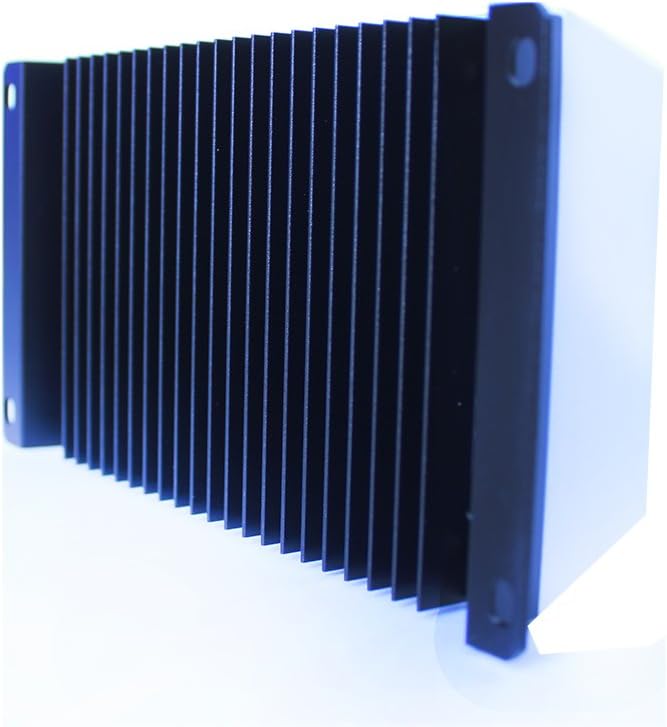
Figura 3.2.5: lateral view of the controller, emphasizing the robust heat sink design for effective thermal management during operation.
4. Configuració i instal·lació
4.1 Muntatge
- Choose a dry, well-ventilated location away from direct sunlight, high temperatures, and water.
- Ensure there is sufficient air circulation around the controller for heat dissipation.
- Mount the controller vertically on a wall or flat surface using appropriate screws.
4.2 Wiring Connection Order
Follow the connection order strictly to ensure proper and safe operation. Incorrect wiring may damage the controller or other components.
- Connecteu la bateria: Connect the battery to the controller's battery terminals (+ and -). The LCD will light up.
- Connecteu el panell solar: Connect the solar panel to the controller's solar panel terminals (+ and -).
- Connect the Load: Connect the load to the controller's load terminals (+ and -).
Ordre de desconnexió: Disconnect the load first, then the solar panel, and finally the battery.
5. Instruccions de funcionament
5.1 Pantalla LCD
The LCD display shows various parameters and operating statuses. Use the 'Menu' button to cycle through different display screens.
5.2 Funcions dels botons
- Botó MENÚ: Short press to browse different screens. Long press to enter or exit setting mode.
- Botó SET: Short press to increase values or switch options in setting mode. Long press to reset accumulated data.
5.3 Selecció del tipus de bateria
The controller supports Sealed (default), Gel, and Flooded battery types. To change the battery type:
- Long press the 'MENU' button until the battery type icon flashes.
- Short press the 'SET' button to select the desired battery type.
- Long press the 'MENU' button again to confirm and exit.
5.4 Modes de control de càrrega
The controller offers multiple load control modes for various applications. Refer to the detailed manual for specific settings and configurations.
6. Manteniment
Un manteniment regular garanteix un rendiment òptim i una llarga vida útil del controlador de càrrega solar.
- Comproveu periòdicament totes les connexions del cablejat per verificar si estan ben ajustades i si hi ha corrosió.
- Clean the controller's casing with a dry cloth. Do not use solvents or abrasive cleaners.
- Ensure the area around the controller is free from dust and debris to maintain proper ventilation.
- Inspect the battery terminals for any signs of corrosion and clean if necessary.
7. Solució De Problemes
Aquesta secció ofereix solucions a problemes comuns que podeu trobar.
| Problema | Causa possible | Solució |
|---|---|---|
| Sense pantalla a la pantalla LCD | Bateria no connectada o de baix volumtage; polaritat inversa. | Comproveu les connexions de la bateria i el voltage. Assegureu-vos de la polaritat correcta. |
| La càrrega no funciona | Load short circuit; overload; battery low voltage; load control mode setting. | Check load wiring and current. Verify battery voltage. Adjust load control mode. |
| PV not charging battery | PV reverse polarity; open circuit; insufficient sunlight. | Check PV connections and polarity. Ensure adequate sunlight. |
| Sobreescalfament del controlador | Poor ventilation; excessive load/PV current. | Improve ventilation. Reduce load or PV input if consistently high. |
8. Especificacions tècniques
| Paràmetre | Valor |
|---|---|
| Model | VS3024AU |
| Sistema nominal Voltage | 12V/24V Auto Work |
| Volum d'entrada de bateriatage Rang | 9~32V |
| Corrent nominal de càrrega/descàrrega | 30A |
| Màx. Circuit obert PV Voltage | 50 V |
| Opcions de tipus de bateria | Sealed (Default) / Gel / Flooded |
| Volum baixtage Reconnect Voltage | Segellat/Gel/Inundat: 12.6V |
| Volum baixtage Desconnectar Voltage | Segellat/Gel/Inundat: 11.1V |
| Autoconsum | ≤10mA |
| Coeficient de compensació de temperatura | -3mV/℃/2V (25℃) |
| Posada a terra | Comú positiu |
| Sortida USB | 5VDC/2.4A |
| Dimensió general | 181 x 100.9 x 59.8 mm |
| Terminals | 6 AWG (16 mm²) |
| Pes net | 0.55 kg |
| Tancament | IP30 |
| Temperatura de l'entorn de treball | -25 ℃ ~ +55 ℃ |
| Gamma d’humitat | ≤95% (N.C.) |
8.1 Extensive Electronic Protections
- Protecció de polaritat inversa PV
- Protecció de polaritat inversa de la bateria
- Battery Over Voltage Protecció
- Protecció de sobre descàrrega de la bateria
- Protecció contra el sobreescalfament de la bateria
- Controller Overheating Protection
- Protecció contra curtcircuits de càrrega
- Protecció contra sobrecàrrega de càrrega
9. Garantia i atenció al client
EPEVER products are manufactured to high-quality standards. For warranty information, technical support, or service inquiries, please contact your authorized EPEVER dealer or visit the official EPEVER website. Please have your product model number (VS3024AU) and purchase details ready when contacting support.
Ask a question about this manual
Ask about setup, troubleshooting, compatibility, parts, safety, or missing instructions. Manuals+ will review the question and use this page’s manual context to help answer it.