1. Introducció
Thank you for choosing the SunSun HJ-732 Aquarium Internal Filter. This filter is designed to provide efficient mechanical and biological filtration for small to medium-sized aquariums, ensuring a clean and healthy environment for your aquatic inhabitants. Please read this manual carefully before installation and operation to ensure proper use and maintenance.
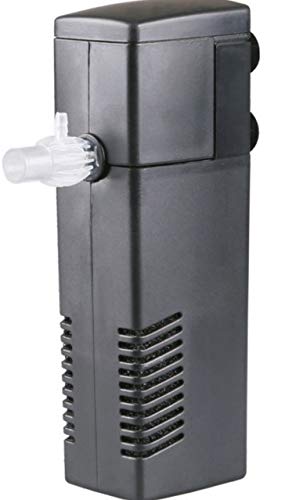
Figura 1: SunSun HJ-732 Aquarium Internal Filter. This image displays the main filter unit, its power cord, and included accessories such as the air tube and nozzle.
2. Instruccions de seguretat
- Desconnecteu sempre l'alimentació abans de realitzar qualsevol manteniment, instal·lació o neteja.
- Ensure your hands are dry when plugging or unplugging the filter.
- No feu funcionar el filtre si el cable d'alimentació o l'endoll estan danyats.
- The filter is designed for indoor use only and must be fully submerged in water during operation.
- Mantenir fora de l'abast dels nens.
- Do not use the filter for purposes other than those specified in this manual.
3. Contingut del paquet
Si us plau, comproveu l'embalatge per assegurar-vos que tots els components hi són i no estan danyats:
- SunSun HJ-732 Internal Filter Unit
- Mitjà de filtre d'esponja
- Air Tube and Air Inlet Nozzle
- Broquet de sortida d'aigua
- Suction Cups (4 pcs)
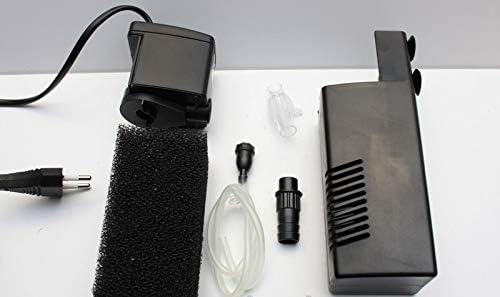
Figura 2: All components included with the SunSun HJ-732 filter. This image shows the main filter body, power unit, sponge filter, air tube, air inlet nozzle, and water outlet nozzle.
4. Característiques del producte
- Model: HJ-732
- Potència: 8W
- Caudal: 550 L/h
- Material: Plàstic durador
- Filtració: Sponge filter for mechanical and biological filtration.
- Aireació: Features a water blowing (aeration) capability to increase oxygen levels.
- Dimensions (Sponge Filter): Approximately 67x52x182 mm.
- Instal·lació: Easy to install with suction cups.
5. Configuració
- Prepareu el filtre: Unpack all components. Ensure the sponge filter media is correctly placed inside the filter housing.
- Col·loqueu ventoses: Securely attach the four suction cups to the designated slots on the back of the filter unit.
- Install Air Tube (Optional): If you wish to use the aeration feature, connect the air tube to the air inlet nozzle on the filter. The other end of the air tube should remain above the water surface.
- Posició a l'aquari: Submerge the filter completely in your aquarium water. Press the suction cups firmly against the inside glass wall to secure the filter in place. Ensure the filter is positioned vertically and is stable.
- Connectar l'alimentació: Once the filter is securely installed and fully submerged, plug the power cord into a suitable electrical outlet.

Figura 3: posterior view of the filter unit, highlighting the four suction cups for secure aquarium mounting.
6. Instruccions de funcionament
The SunSun HJ-732 filter is designed for continuous operation. Once plugged in, the filter will begin to circulate and filter the aquarium water. The water outlet nozzle can be adjusted to direct the flow as needed. If the air tube is connected, air will be drawn in and mixed with the water flow, creating bubbles for aeration.
- Inici: Plug the filter into a power outlet. The pump will start immediately.
- Parada: Unplug the filter from the power outlet.
- Direcció del flux: Adjust the water outlet nozzle to direct the water flow within the aquarium.
- Aeration Control: The air inlet nozzle often has a small valve to adjust the amount of air drawn in, controlling the bubble intensity.
7. Manteniment
Regular maintenance is crucial for the optimal performance and longevity of your filter.
- Desconnecteu l'alimentació: Always unplug the filter from the power outlet before any maintenance.
- Elimina el filtre: Carefully remove the filter unit from the aquarium.
- Clean Filter Sponge: Open the filter housing and remove the sponge filter media. Rinse the sponge thoroughly with old aquarium water (not tap water, as chlorine can kill beneficial bacteria) to remove accumulated debris. Do not over-clean; a light rinse is often sufficient to preserve beneficial bacteria.
- Impulsor net: Periodically, remove the impeller cover and clean the impeller and its shaft. Hair, debris, or mineral deposits can hinder its operation.
- Torneu a muntar: Reassemble the filter, ensuring all parts are correctly seated.
- Torneu a instal·lar: Place the filter back into the aquarium and plug it in.
Freqüència: Clean the filter sponge every 2-4 weeks, depending on the aquarium's bioload. Clean the impeller every 1-2 months.
8. Solució De Problemes
| Problema | Causa possible | Solució |
|---|---|---|
| El filtre no arrenca o el flux és feble | No power; clogged impeller; clogged filter media; airlock. | Check power connection; clean impeller; clean/replace filter sponge; ensure filter is fully submerged and gently shake to release air. |
| Soroll excessiu | Impeller obstructed or damaged; filter not securely mounted; air in pump. | Clean impeller; check for damage; re-secure filter with suction cups; ensure filter is fully submerged. |
| No aeration/bubbles | Air tube blocked; air inlet nozzle clogged; air valve closed. | Check and clear air tube; clean air inlet nozzle; open air valve. |
9. Especificacions
- Marca: SolSol
- Model: HJ-732
- Potència: 8W
- Caudal: 550 L/h
- Font d'alimentació: Elèctric amb cable
- Material: Plàstic
- Sponge Filter Dimensions: 67x52x182 mm (approximate)
10. Garantia i Suport
This product is covered by a standard manufacturer's warranty against defects in materials and workmanship. Please retain your proof of purchase for warranty claims. For technical support, spare parts, or further assistance, please contact your retailer or the manufacturer's customer service department. Do not attempt to repair the unit yourself, as this may void the warranty.