
1. Introducció
Thank you for choosing Arashi Version 2.2 Adjustable Rearsets. These rearsets are designed to enhance your riding experience by offering adjustable footrest positions, improved grip, and precise control. Crafted from billet 6061-T6 aircraft-grade aluminum, they provide superior strength and durability. This manual provides essential information for the proper installation, adjustment, and maintenance of your new rearsets.
2. Informació de seguretat
- Instal·lació professional recomanada: Installation of motorcycle components requires mechanical knowledge and specialized tools. If you are unsure about any step, consult a qualified motorcycle mechanic.
- Assegureu tots els elements de fixació: Ensure all bolts and nuts are tightened to the manufacturer's specifications. Use thread-locking compound (e.g., Loctite) on critical fasteners as recommended.
- Comprovar la liquidació: After installation, verify that all components have adequate clearance and do not interfere with other parts of the motorcycle, especially during full steering lock or suspension compression.
- Funcionalitat de prova: Before riding, thoroughly test the brake and shift mechanisms to ensure they operate correctly and safely.
- Inspecció periòdica: Periodically inspect the rearsets for any signs of wear, damage, or loose fasteners.
3. Contingut del paquet
Your Arashi Version 2.2 Adjustable Rearsets package should include the following components:
- Left and Right Rearset Assemblies
- Barra d'enllaç de canvi
- Brake Pedal Return Spring
- Maquinari de muntatge (cargols, volanderes, femelles)
- Instruction Sheet (basic diagram)
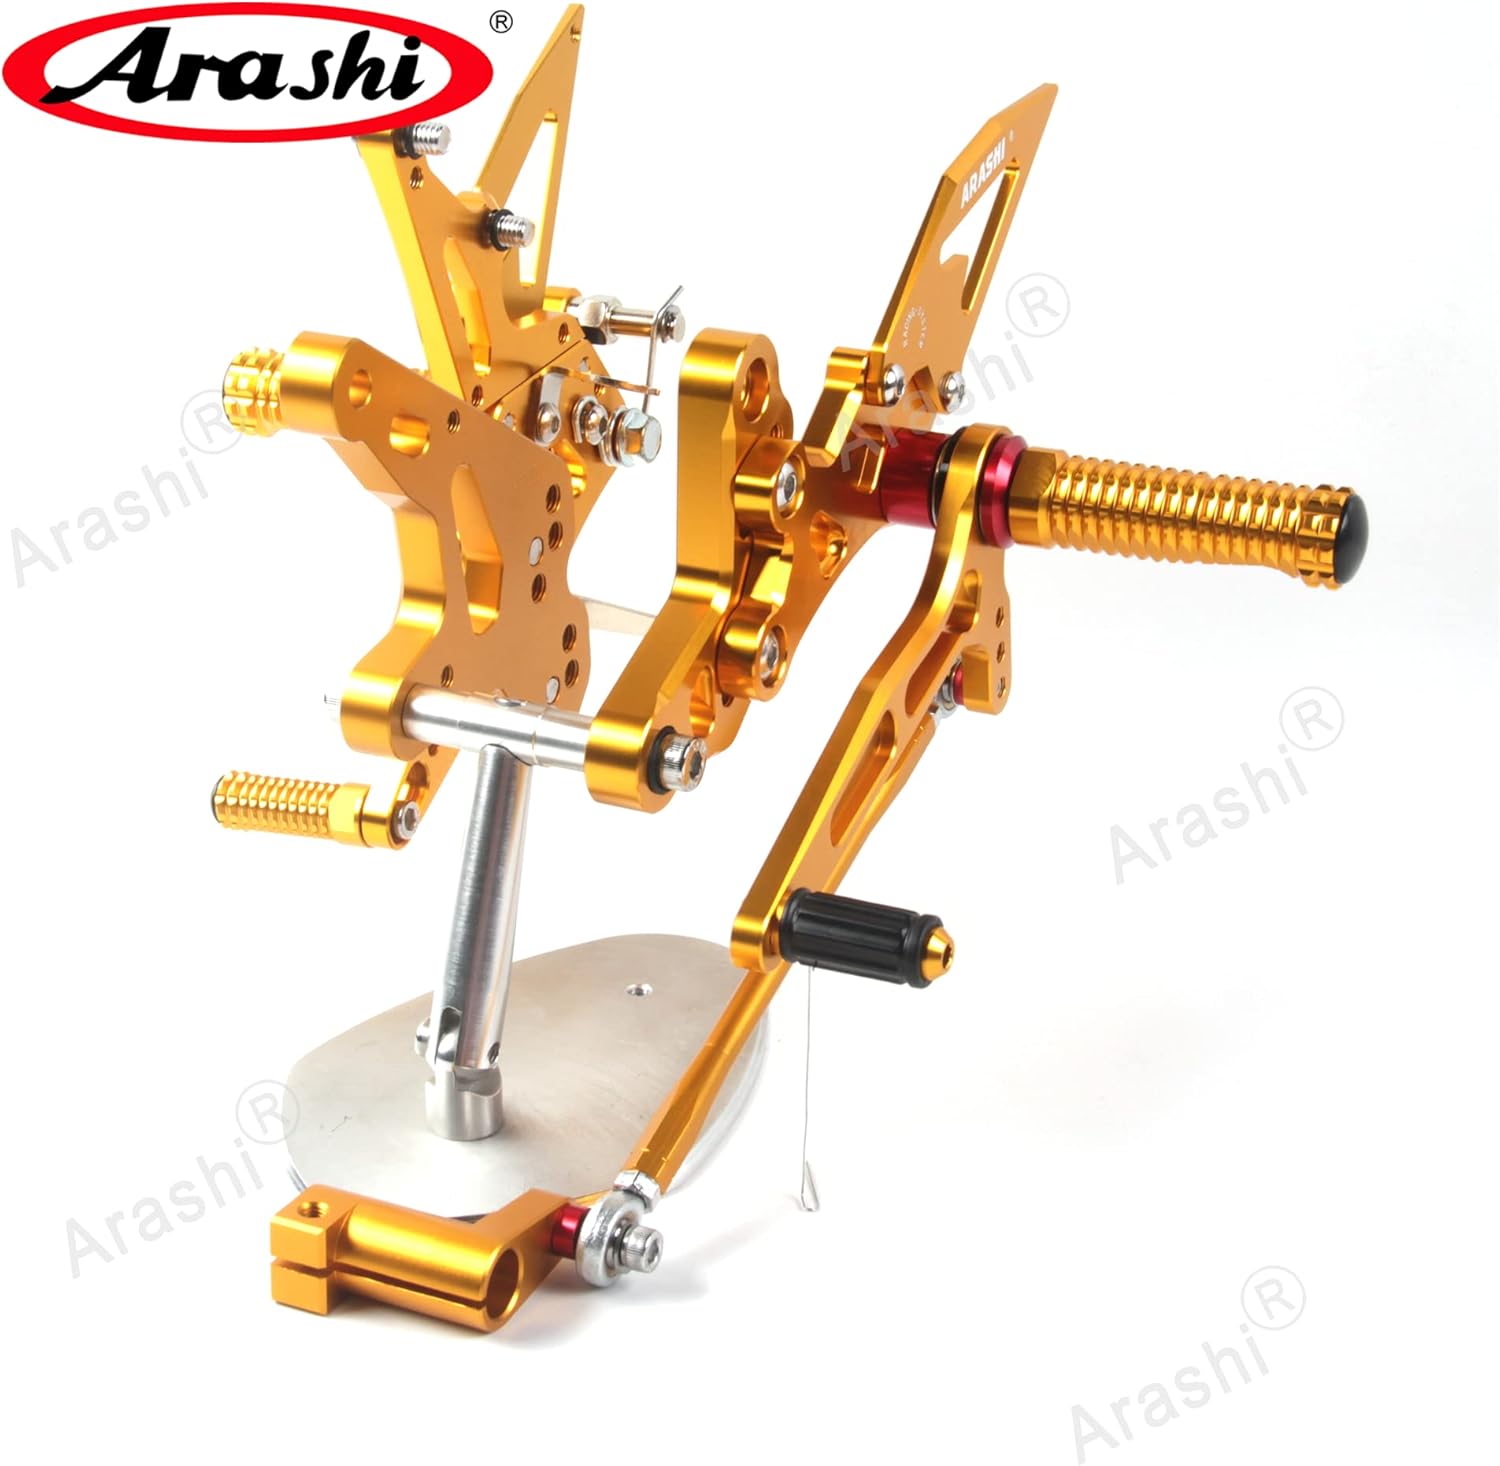
Image 3.1: Complete Arashi Version 2.2 Adjustable Rearsets assembly.
4. Configuració i instal·lació
The Arashi Version 2.2 Rearsets are designed for direct fitment on Kawasaki Ninja 400, Z400, and EX400 models from 2018-2023. Installation involves removing the stock footrests and installing the new adjustable rearsets. Ensure your motorcycle is securely supported on a stand before beginning.
4.1 Passos generals d'instal·lació
- Remove the OEM footrest assemblies from both sides of the motorcycle. Keep the OEM bolts as some may be required for the new installation if the provided hardware is not suitable.
- Attach the new Arashi rearset plates to the motorcycle frame using the appropriate mounting bolts. Ensure a secure fit.
- Install the footpegs, heel guards, and control levers (shift and brake) onto the rearset plates.
- Connect the shift linkage rod to the shift lever and the motorcycle's gear selector shaft.
- Connect the brake pedal to the rear brake master cylinder and install the external return spring.
- Adjust the position of the footpegs and levers to your preferred riding position (refer to Section 5).
- Apply thread-locking compound to all critical fasteners and tighten them securely.
- Perform a thorough functionality check of both the shift and brake systems before riding.
4.2 Brake Side Installation Notes
The brake side installation often requires careful attention, particularly when connecting and adjusting the brake light sensor. Ensure the brake pedal's movement does not interfere with the brake light switch, and the brake light activates correctly when the pedal is pressed.

Imatge 4.1: Detallada view of the brake side components, including the pedal, return spring, and adjustment points.
4.3 Shift Side Installation Notes
The shift linkage is designed for accurate gear changes. Ensure the shift rod is properly aligned and secured to prevent any binding or loose movement. The rearsets support both standard and reversed (GP) shift patterns.

Imatge 4.2: Detallada view of the shift side components, highlighting the shift linkage and footpeg.
5. Funcionament i ajust
The Arashi Version 2.2 Rearsets offer multiple adjustment points to customize your riding position. This includes the position of the footpegs, and the angle/reach of the shift and brake levers.
5.1 Footpeg Position Adjustment
The footpegs can be moved to various positions on the rearset plate. Loosen the mounting bolts, slide the footpeg assembly to the desired position, and re-tighten the bolts securely. The upgraded footpegs feature an enhanced knurled edge for slip resistance.
5.2 Lever Adjustment (Shift and Brake)
The shift and brake levers can be adjusted for angle and reach. This allows for a more comfortable and efficient operation based on your foot size and riding style. Ensure that after adjustment, the brake pedal does not remain partially depressed, which could lead to brake drag or overheating. Similarly, ensure the shift lever has full range of motion without obstruction.
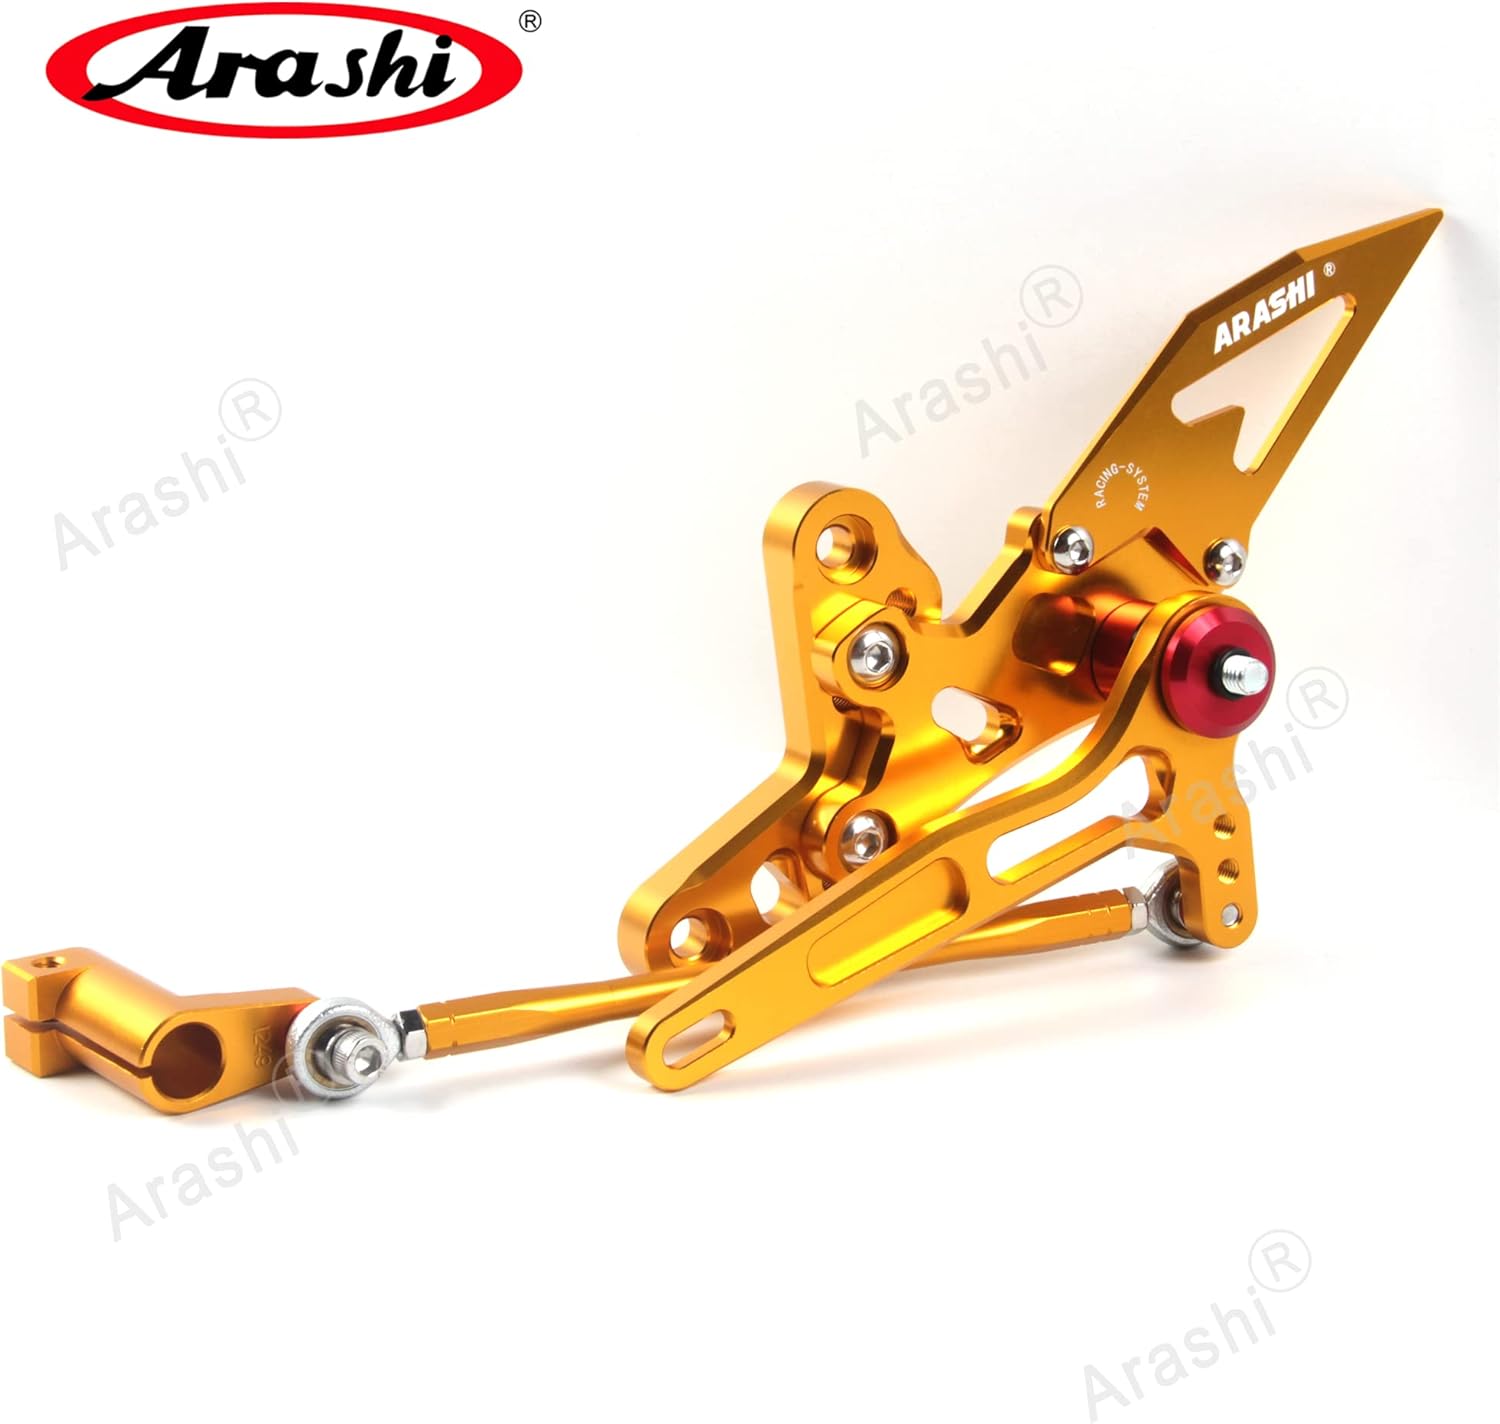
Imatge 5.1: Ex.ample of adjustable footpeg and lever positions on the rearset.
6. Manteniment
Proper maintenance ensures the longevity and safe operation of your Arashi rearsets.
- Neteja regular: Clean the rearsets periodically with a mild detergent and water to remove dirt, grime, and road debris. Avoid harsh chemicals that may damage the anodized finish.
- Inspeccionar els elements de fixació: Regularly check all mounting bolts and adjustment screws for tightness. Vibrations from riding can cause fasteners to loosen over time.
- Lubricació: Apply a small amount of appropriate grease or lubricant to the pivot points of the shift and brake levers to ensure smooth operation.
- Comproveu el desgast: Inspect footpegs, heel guards, and levers for signs of excessive wear or damage. Replace any worn or damaged components immediately.
7. Solució De Problemes
Aquesta secció tracta els problemes habituals que podeu trobar durant o després de la instal·lació.
| Problema | Causa possible | Solució |
|---|---|---|
| Brake light stays on or does not activate. | Incorrect adjustment of the brake light sensor or brake pedal. | Adjust the brake light sensor spring and brake pedal position until the light functions correctly. Ensure the pedal returns fully to its resting position. |
| Foot slips off pegs. | Footwear or riding conditions. | The footpegs feature an enhanced knurled edge for grip. Ensure your footwear provides adequate traction. |
| Dificultat per canviar de marxa. | Shift linkage misalignment or loose connections. | Check the shift linkage rod for proper alignment and ensure all connections are secure and free of binding. Lubricate pivot points if necessary. |
| Rearsets feel loose after installation. | Mounting bolts not sufficiently tightened. | Re-tighten all mounting bolts to the recommended torque specifications. Apply thread-locking compound. |
8. Especificacions
- Marca: Arashi
- Model: Version 2.2 Adjustable Rearsets (HFN112G)
- Material: Billet 6061-T6 Aircraft Grade Aluminum
- Color: Gold (for this variant)
- Muntatge: Kawasaki Ninja 400 / Z400 / EX400 / ABS / KRT Edition (2018-2023)
- Pes: Aproximadament 3.3 lliures
- Característiques: Adjustable footpeg positions, upgraded heel guard, enhanced knurled footpegs, customized shift linkage, external brake pedal return spring.
9. Suport
For any questions regarding installation, adjustment, or troubleshooting that are not covered in this manual, please contact Arashi customer support. Installation photos can be provided upon request if you require further visual guidance.
Contact information can typically be found on the official Arashi weblloc web o a través de la vostra plataforma de compra.