1. Acabatview
The Mrcartool Crankshaft Seal Removal and Installation Kit is a specialized tool set designed for the efficient and safe removal and installation of front and rear oil seals on various BMW engines. This kit is compatible with BMW N20, B38, N40, N42, N45, N46, N46T, N52, N53, N54, N55 engines. It provides the necessary components to perform these critical engine maintenance tasks with precision, preventing damage to the crankshaft or new seals.
The kit is constructed from high-quality carbon steel with an anti-oxidant coating, ensuring durability and a long service life. All tools are organized within a robust plastic carrying case for convenient transport and secure storage.

Image 1.1: Mrcartool Crankshaft Seal Removal and Installation Kit in its protective blue carrying case.
2. Informació de seguretat
Always prioritize safety when working with automotive tools and engine components. Failure to follow safety guidelines can result in personal injury or damage to the vehicle.
- Utilitzeu equips de protecció individual (EPI): Utilitzeu sempre ulleres de seguretat, guants i roba de treball adequada.
- Read Vehicle Service Manual: Consult your vehicle's specific service manual for detailed procedures and torque specifications related to crankshaft seal replacement.
- Ensure Vehicle Stability: Before working under the vehicle, ensure it is securely supported on jack stands or a lift. Never rely solely on a jack.
- Refredament del motor: Allow the engine to cool completely before beginning work to prevent burns.
- Mantenir la zona de treball neta: Maintain a clean and organized workspace to prevent accidents and ensure proper tool handling.
- Utilitzeu les eines correctes: Use only the tools provided in this kit for their intended purpose. Do not use damaged or modified tools.
- Evitar la força: If a component does not move easily, re-evaluate the procedure. Excessive force can cause damage.
3. Contingut del kit
The Mrcartool Crankshaft Seal Removal and Installation Kit includes the following components:
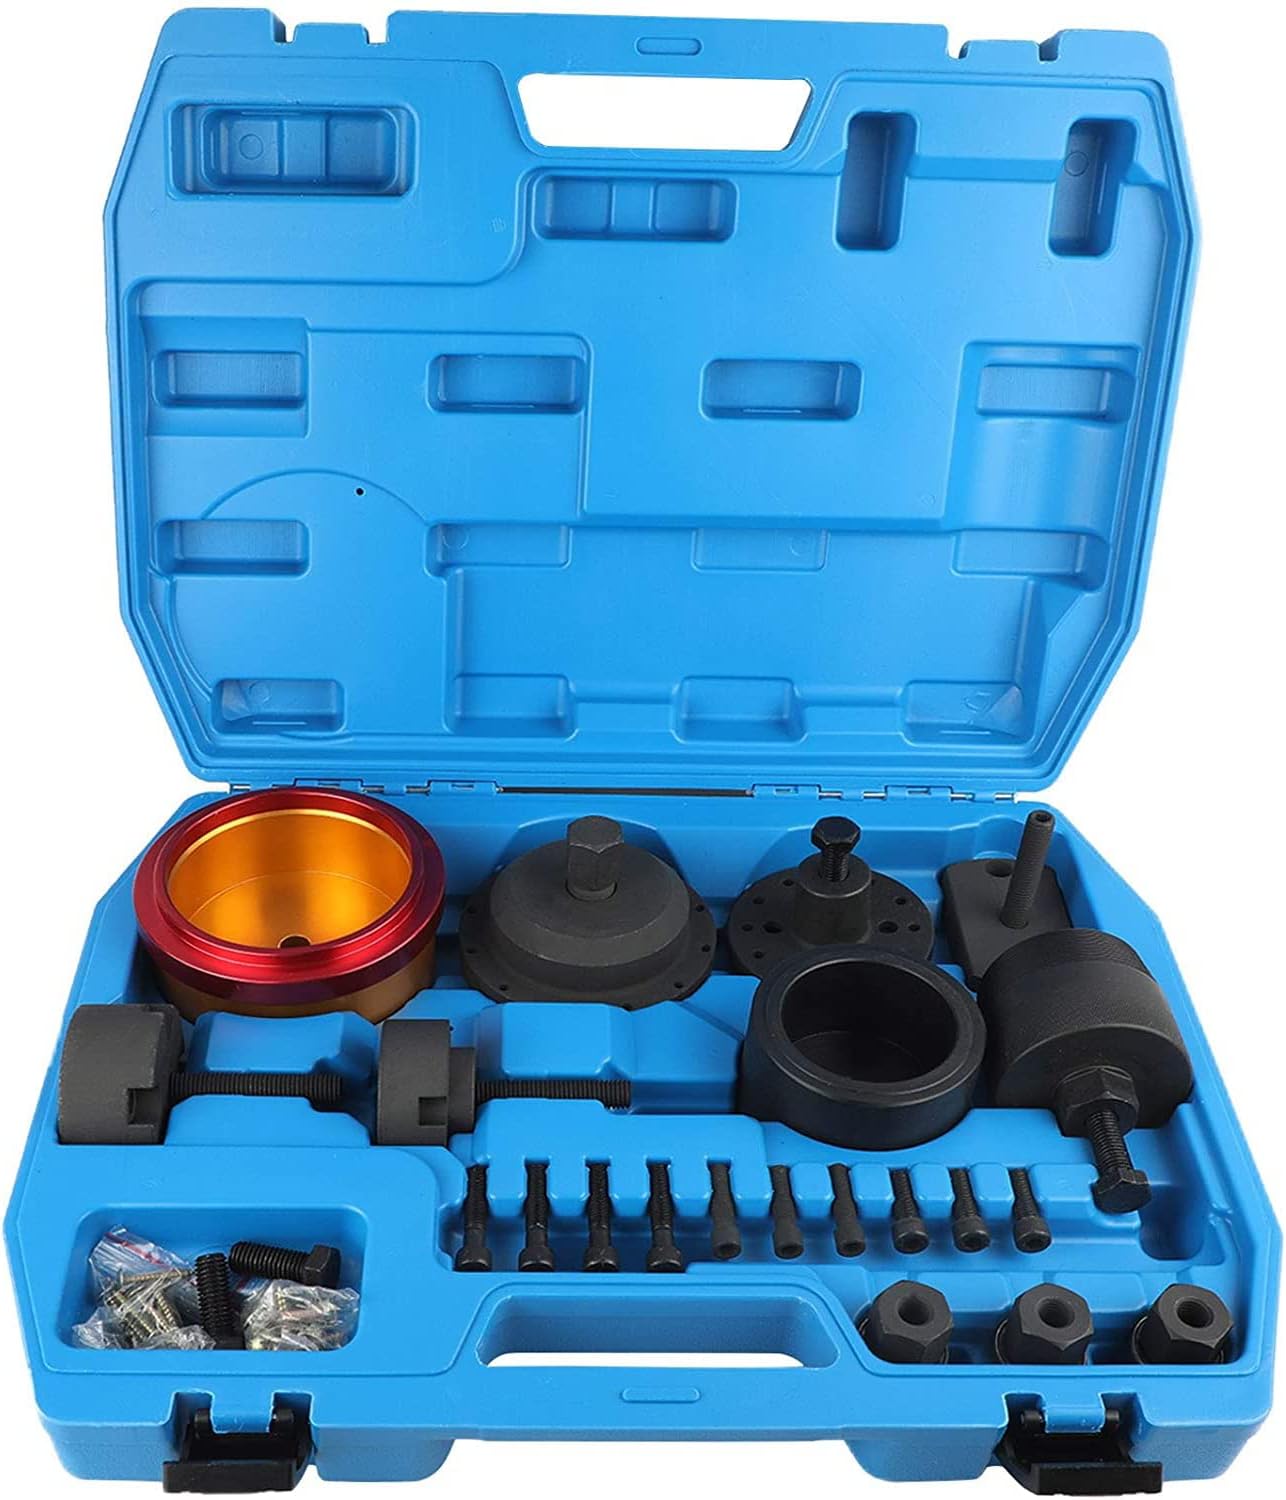
Image 3.1: Complete set of tools included in the kit.
- Crankshaft Front Oil Seal Remover: Tool for extracting the front crankshaft oil seal.
- Crankshaft Front Oil Seal Installer: Tool for precisely installing the new front crankshaft oil seal.
- Crankshaft Rear Oil Seal Remover: Tool for extracting the rear crankshaft oil seal.
- Crankshaft Rear Oil Seal Installer: Tool for precisely installing the new rear crankshaft oil seal.
- Various Adapters and Bolts: Specific adapters and bolts to ensure compatibility and proper fitment for different BMW engine models (OEM Equivalent Part Numbers: 119181, 119182, 119183, 119184, 119185, 119220, 119230, 119235, 110370).
- Plastic Carrying Case: Durable case for organization and protection of the tools.

Imatge 3.2: Detallada view of several key components from the kit.

Image 3.3: Additional specialized tools for crankshaft seal service.

Image 3.4: Specific components for seal removal and installation.
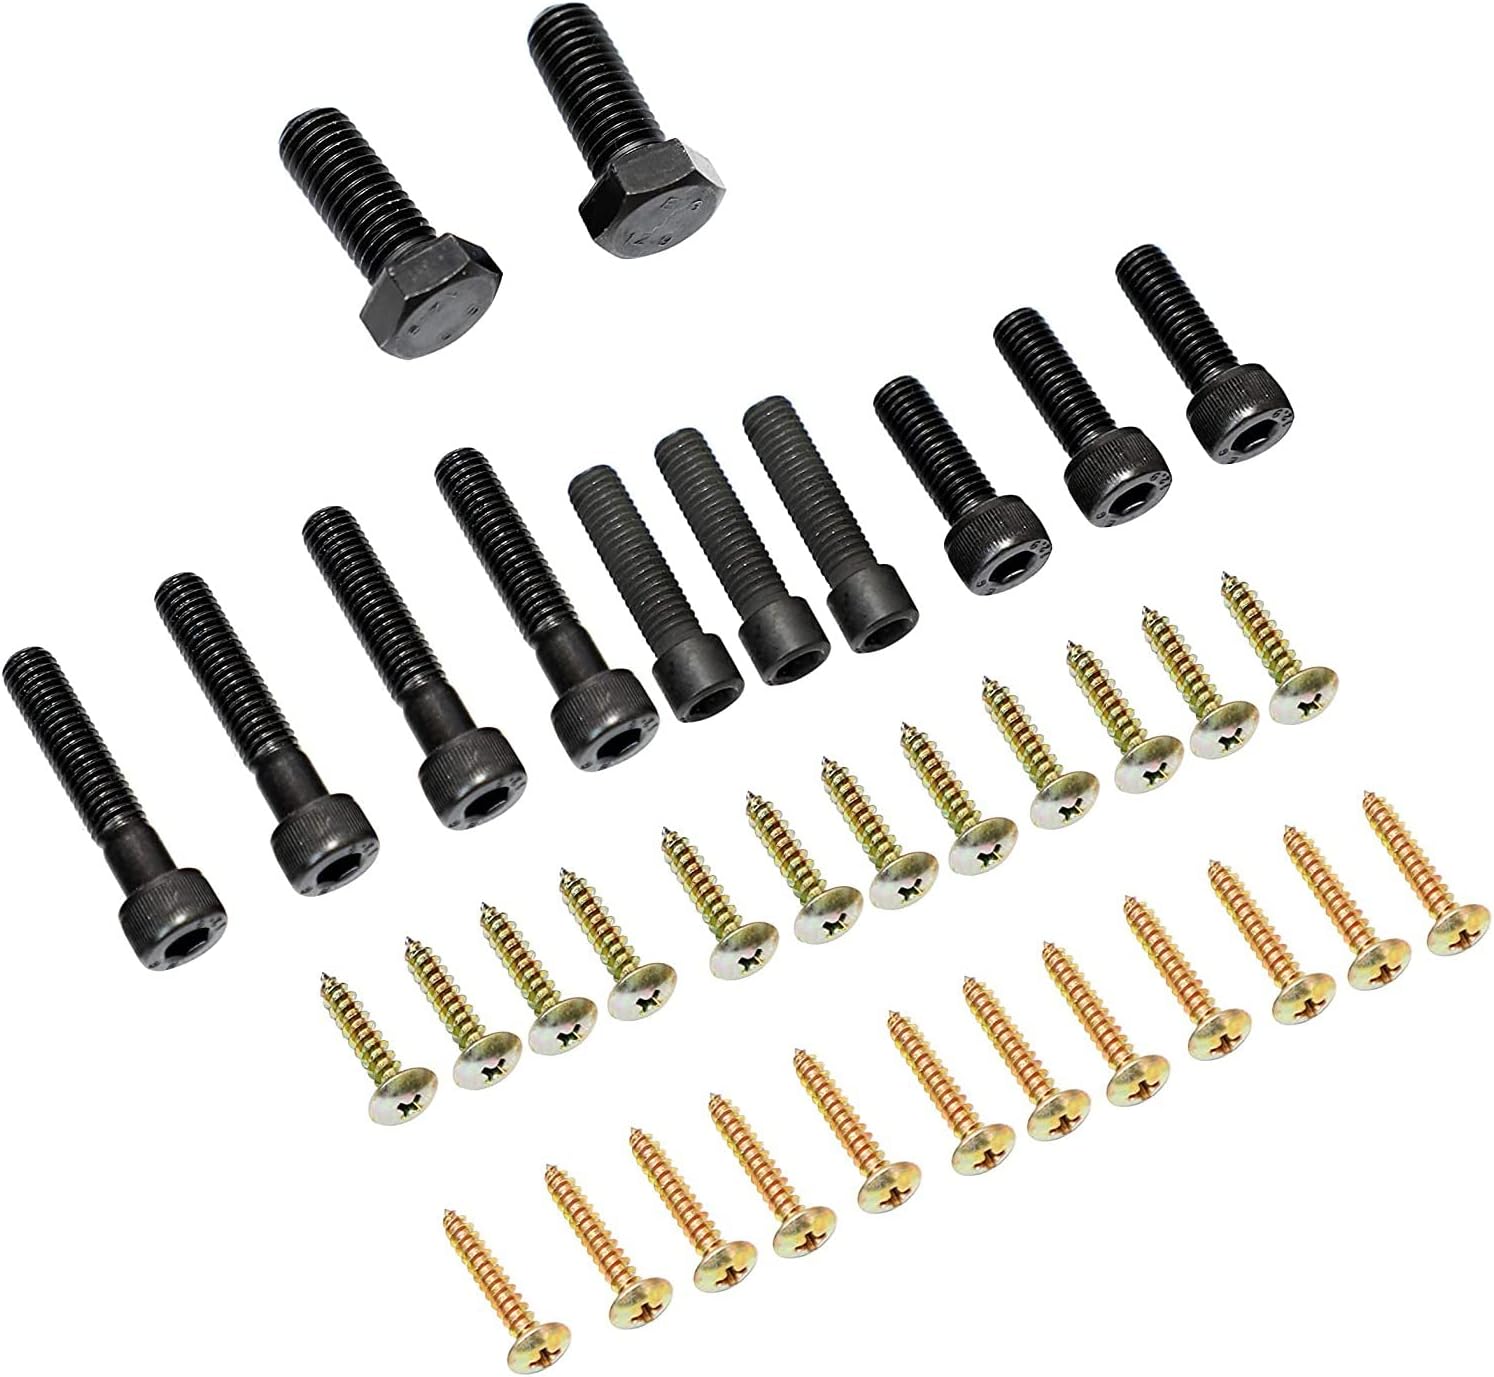
Image 3.5: Assortment of bolts and screws for tool assembly and securing.
4. Configuració
Before beginning any work, ensure you have all necessary components of the kit and that your vehicle is prepared according to its service manual. This typically involves:
- Identify the Correct Tools: Refer to your vehicle's service manual to identify the specific tools required for your engine model's crankshaft front or rear oil seal service.
- Clean the Work Area: Ensure the area around the crankshaft seal is clean and free of debris, oil, or dirt.
- Inspeccionar components: Visually inspect all kit components for any damage or wear before use.
- Lubricar els fils: Lightly lubricate the threads of any threaded rods or bolts with appropriate grease to ensure smooth operation and prevent galling.
5. Instruccions de funcionament
The following sections provide general guidance for using the Mrcartool Crankshaft Seal Removal and Installation Kit. Always consult your specific BMW service manual for detailed, model-specific instructions and torque values.
5.1. General Kit Usage Overview
Video 5.1: General demonstration of the Crankshaft Seal Removal and Installation Kit for BMW engines. This video provides an overview of the tools and their assembly.
5.2. Crankshaft Front Oil Seal Removal
- Prepara la zona: Remove any components obstructing access to the front crankshaft seal, such as the serpentine belt, crankshaft pulley, and timing cover (if necessary).
- Attach Removal Tool: Select the appropriate front seal removal tool from the kit. Securely attach it to the crankshaft or surrounding engine block using the provided bolts and adapters. Ensure the tool is seated flush and stable.
- Extract the Seal: Carefully turn the central bolt of the removal tool. This action will gradually pull the old crankshaft seal out of its bore. Ensure the seal is extracted evenly to avoid damaging the crankshaft or engine block.
- Inspect the Bore: Once the old seal is removed, thoroughly clean and inspect the seal bore for any damage, corrosion, or debris.
Video 5.2: Demonstration of the crankshaft front oil seal removal process using a specialized tool.
5.3. Crankshaft Front Oil Seal Installation
- Prepare New Seal: Lightly lubricate the lip of the new crankshaft seal with clean engine oil to aid installation and prevent damage.
- Position Installer Tool: Select the appropriate front seal installation tool. Place the new seal onto the installer tool, ensuring it is correctly oriented.
- Align and Install: Carefully align the installer tool and new seal with the crankshaft bore. Use the central bolt and outer housing of the installer tool to press the new seal evenly into place. Ensure the seal is seated to the correct depth as specified in your vehicle's service manual.
- Verifica la instal·lació: Once installed, visually inspect the seal to ensure it is flush and properly seated without any crimping or damage.
5.4. Crankshaft Rear Oil Seal Removal
- Accés al segell: This typically requires removal of the transmission and flywheel/flex plate to gain access to the rear crankshaft seal.
- Attach Removal Tool: Select the appropriate rear seal removal tool. Securely attach it to the crankshaft or engine block using the provided fasteners.
- Extract the Seal: Turn the central bolt of the removal tool to carefully extract the old rear crankshaft seal. Ensure even extraction to prevent damage.
- Inspect the Bore: Clean and inspect the seal bore for any imperfections.
5.5. Crankshaft Rear Oil Seal Installation
- Prepare New Seal: Lightly lubricate the lip of the new rear crankshaft seal with clean engine oil.
- Position Installer Tool: Select the appropriate rear seal installation tool. Place the new seal onto the installer tool, ensuring correct orientation.
- Align and Install: Align the installer tool and new seal with the crankshaft bore. Use the central bolt and outer housing to press the new seal evenly into place until it is seated to the correct depth.
- Verifica la instal·lació: Visually confirm the seal is properly seated.
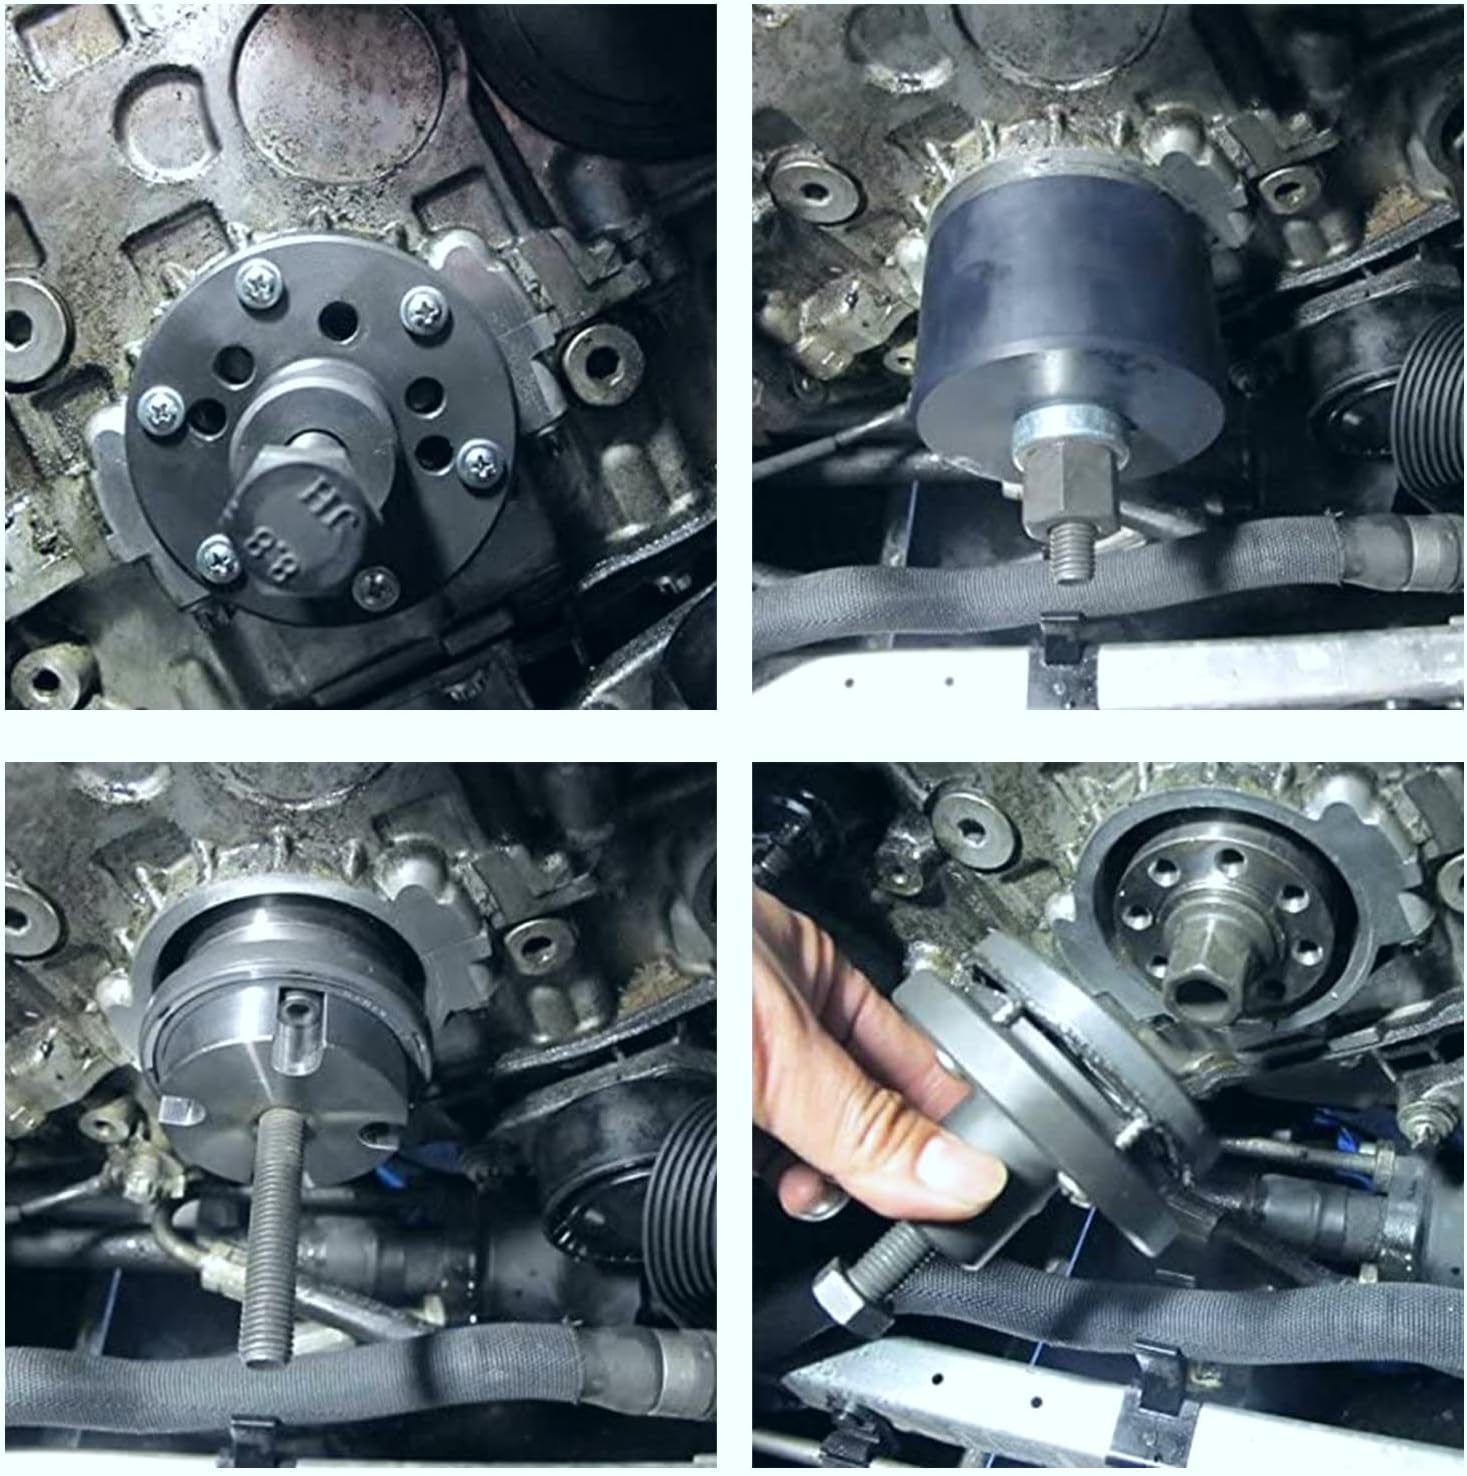
Image 5.1: The crankshaft seal tool in action during removal and installation.
6. Manteniment
Proper maintenance of your Mrcartool kit will ensure its longevity and reliable performance.
- Neteja: After each use, clean all tools thoroughly to remove oil, grease, and debris. Use a suitable degreaser if necessary.
- Lubricació: Apply a light coat of rust-preventative oil to all metal components, especially threaded parts, before storage.
- Emmagatzematge: Store the kit in its original plastic carrying case in a dry, clean environment to prevent corrosion and damage.
- Inspecció: Periodically inspect tools for any signs of wear, bending, or damage. Replace any damaged components immediately.
7. Solució De Problemes
If you encounter issues while using the kit, consider the following:
- Tool Not Fitting: Double-check the compatibility of the kit with your specific BMW engine model. Ensure you are using the correct adapter for the task.
- Seal Not Moving: Ensure all retaining bolts or clips for the old seal are removed. Verify the removal tool is correctly seated and aligned. Do not apply excessive force; re-evaluate the procedure.
- New Seal Damaged During Installation: Ensure the seal bore is clean and free of sharp edges. Lubricate the new seal's lip. Verify the installation tool is correctly aligned and pressing the seal evenly.
- Lliscament de l'eina: Ensure all bolts are tightened securely. The tool should be firmly seated against the engine block or crankshaft.
For persistent issues, consult a professional automotive technician or refer to your vehicle's detailed service manual.
8. Especificacions
| Característica | Detall |
|---|---|
| Marca | Mrcartool |
| Número de model | BMW Oil Seal Remover Installer Kit |
| Motors compatibles | BMW N20, B38, N40, N42, N45, N46, N46T, N52, N53, N54, N55 |
| OEM Equivalent Part Numbers | 119181, 119182, 119183, 119184, 119185, 119220, 119230, 119235, 110370 |
| Material | Carbon Steel with Anti-oxidant Coating |
| Pes de l'article | 17.16 lliures |
| Dimensions del producte | 17.72 x 14.96 x 3.54 polzades |
9. Garantia i Suport
Mrcartool is committed to providing high-quality products and customer satisfaction. For any questions, concerns, or warranty claims regarding your Crankshaft Seal Removal and Installation Kit, please contact Mrcartool customer service through the retailer where the product was purchased. Please retain your proof of purchase for warranty validation.