
1. Introducció
This manual provides detailed instructions for the installation, operation, and maintenance of your Suuonee 50A PWM Solar Charge Controller. This industrial-grade controller is designed for efficient energy management in solar power systems, featuring a built-in controller, LCD display, and advanced 3-stage PWM charging. Please read this manual thoroughly before installation and use to ensure optimal performance and safety.

Figura 1: Davant view of the Suuonee 50A PWM Solar Charge Controller, showing the LCD screen, control buttons, and USB ports.
2. Informació de seguretat
Si us plau, observeu les següents precaucions de seguretat durant la instal·lació i el funcionament:
- Ensure all wiring is correctly connected before powering on the controller. Incorrect wiring can damage the device or connected components.
- Connect the battery first, then the solar panel, and finally the load. Disconnect in the reverse order.
- The controller is designed for 12V/24V lead-acid batteries. Do not use it with other battery types unless specified.
- Instal·leu el controlador en una zona ben ventilada, allunyada de materials inflamables i de la llum solar directa.
- Avoid touching live terminals. Use insulated tools.
- This device is for indoor use only. Protect it from water and moisture.
3. Característiques del producte
The Suuonee 50A PWM Solar Charge Controller offers the following key features:
- Industrial-Grade Controller: Built-in industrial controller for stable and efficient energy management in various weather conditions.
- Pantalla LCD clara: Large LCD screen provides real-time data visibility and allows easy customization of parameters.
- Avançat 3-Stage PWM Charging: Fully optimized 3-stage Pulse Width Modulation (PWM) management system for efficient battery charging and prolonged battery lifespan.
- Comprehensive System Protections: Equipped with built-in safeguards including short-circuit protection, open-circuit protection, reverse polarity protection, and overload protection to prevent damage to connected devices.
- MOSFET Technology: Incorporates MOSFET technology to minimize reverse current and reduce heat generation, enhancing energy efficiency and extending product operational life.
- Sortida USB dual: Features two 5V/2A USB ports for charging external devices.

Figura 2: The controller features a 3-stage PWM charge management system and a large LCD display for adjustable parameters.
4. Especificacions
Detailed specifications for the Suuonee 50A PWM Solar Charge Controller:
| Paràmetre | Valor |
|---|---|
| Model | 50A |
| Voltage | 12 V / 24 V automàtic |
| Panell Solar Voltage | 12V system: 18V solar panel; 24V system: 36V solar panel |
| Charge Stop Voltage | 13.7 V (per defecte, ajustable) |
| Discharge Stop Voltage | 10.7 V (per defecte, ajustable) |
| Discharge Reconnect Voltage | 12.6 V (per defecte, ajustable) |
| Autoconsum | <10 mA |
| Sortida USB | 5V / 2A (Dual USB) |
| Material | ABS |
| Dimensions del producte | Aproximadament 3.94 x 3.94 x 3.94 polzades (100 x 100 x 100 mm) |
| Pes de l'article | Aproximadament 3.52 unces (0.1 kg) |
5. Producte acabatview
The solar charge controller features a compact design with a clear LCD display and intuitive controls.
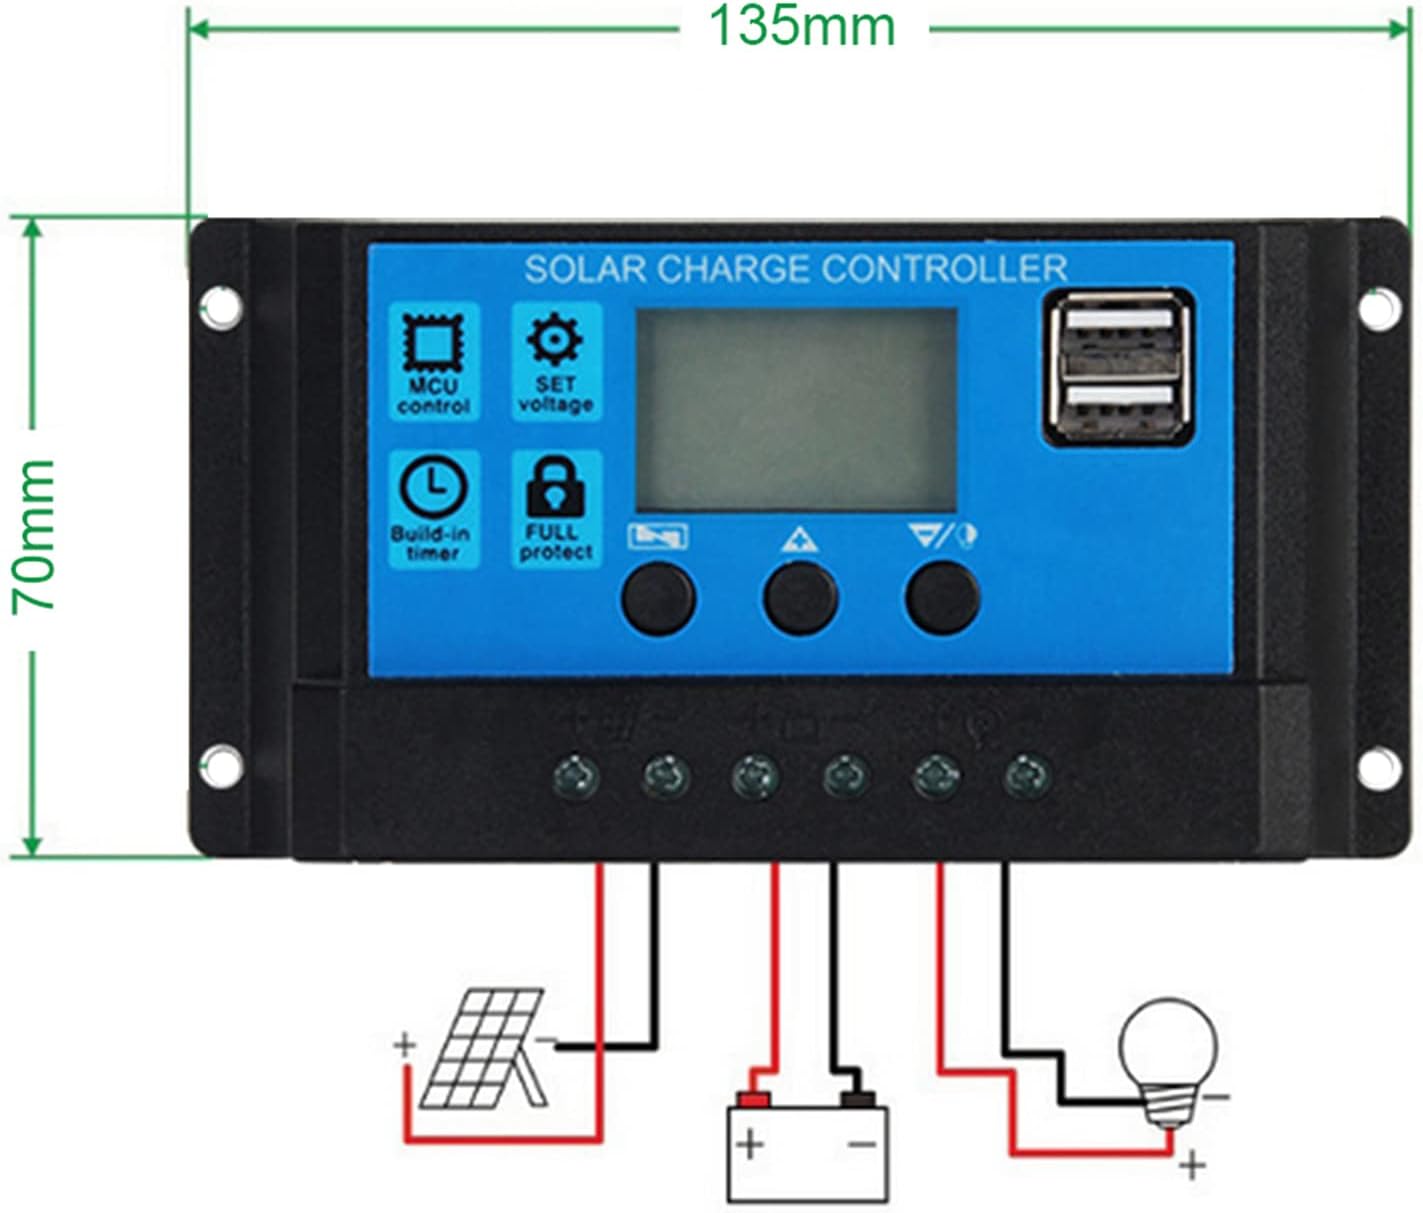
Figura 3: Davant i darrere views of the controller, showing terminals and mounting points.

Figura 4: Controller dimensions (135mm x 70mm) and a basic wiring diagram indicating connections for solar panel, battery, and load.
5.1. Components
- Pantalla LCD: Shows system status, parameters, and error codes.
- Botons de control: Three buttons for navigation and parameter adjustment.
- Ports USB: Two 5V/2A USB outputs for charging mobile devices.
- Blocs de terminals: Clearly labeled terminals for connecting solar panels, battery, and DC load.
6. Configuració i instal·lació
Seguiu aquests passos per a una instal·lació correcta:
- Preparació del cablejat: Ensure all wires are of appropriate gauge for the current and length, and that they are properly stripped.
- Connecta la bateria: Connect the battery to the charge controller first. Ensure correct polarity (+ to + and - to -). The LCD will light up.
- Connecteu el panell solar: Connect the solar panel to the charge controller. Ensure correct polarity.
- Connect DC Load: Connect the DC load to the charge controller. Ensure correct polarity.
- Muntatge: Mount the controller in a dry, well-ventilated area, away from direct sunlight and heat sources.
Important: Always connect the battery first and disconnect the battery last. Failure to follow this order may damage the controller.
7. Instruccions de funcionament
The controller's LCD display provides real-time information about your solar system. The three buttons allow for navigation and parameter adjustment.
7.1. LCD Display Modes
Press the 'Up' or 'Down' button to cycle through different display modes:
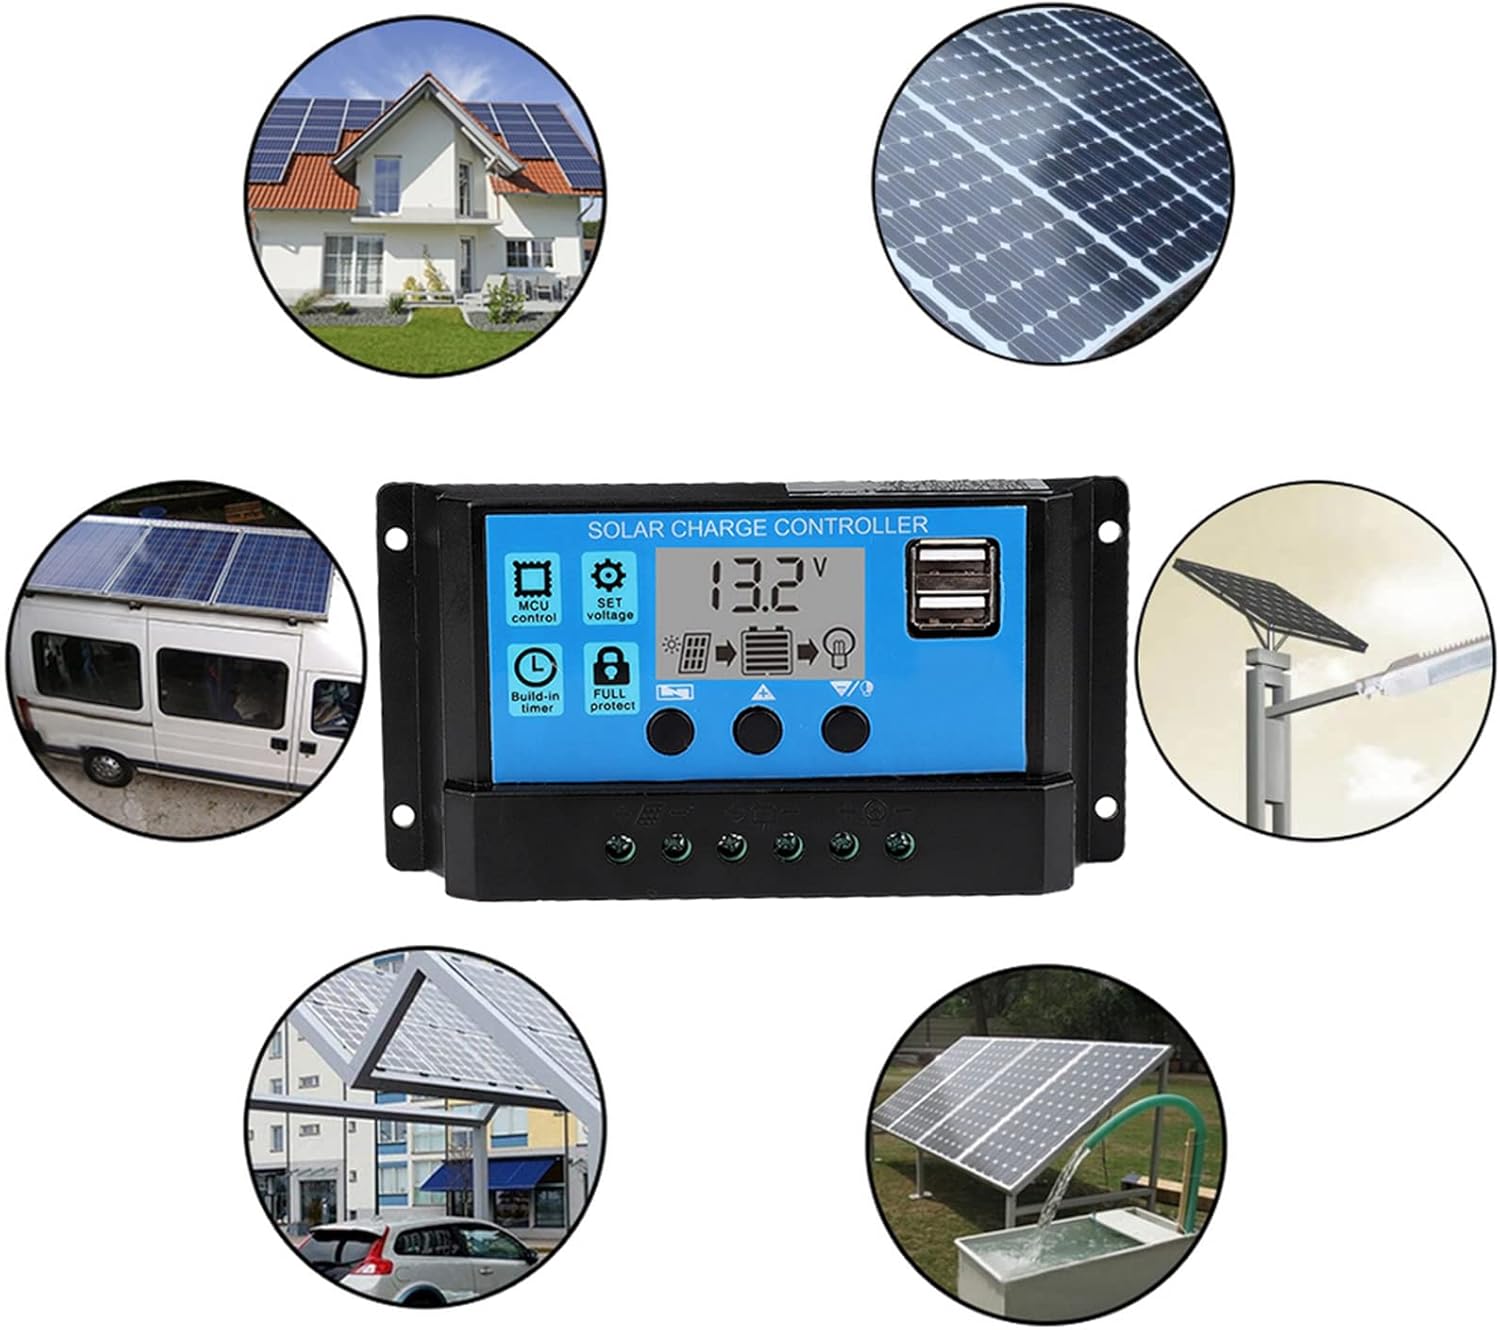
Figura 5: Flowchart illustrating the main interface and various adjustable parameters displayed on the LCD, including floating charging voltage, battery type, discharge recovery voltage, load work mode, and discharge cut-off voltage.
- Interfície principal: Mostra el volum actual de la bateriatage i estat de càrrega.
- Càrrega flotant Voltage (13.7V default): El voltage at which the battery is maintained after full charge.
- Battery Type (b01 default): Selects the battery type (e.g., b01 for sealed, b02 for gel, b03 for flooded).
- Descàrrega Recuperació Voltage (12.6V default): El voltage at which the load will reconnect after low voltage desconnexió.
- Load Work Mode (24H default): Controls when the load output is active (e.g., 24 hours, dusk to dawn, timed).
- Descàrrega de tall voltage (10.7V default): El voltage at which the load will disconnect to protect the battery from over-discharge.
7.2. Funcions del botó
- Menu Button (Left): Enters/exits parameter setting mode.
- Up Button (Middle): Increases parameter value or navigates up.
- Down Button (Right): Decreases parameter value or navigates down.
8. Configuració dels paràmetres
Per ajustar els paràmetres:
- Des de la pantalla principal, premeu i manteniu premuda la tecla Menú button for 5 seconds to enter parameter setting mode. The current parameter will start flashing.
- Utilitza el Up i Avall botons per ajustar el valor.
- Premeu el botó Menú button again to confirm the setting and move to the next parameter.
- To exit setting mode, press and hold the Menú button for 5 seconds, or wait for 10 seconds without any operation.
Nota: Adjusting parameters incorrectly can affect system performance and battery life. Refer to your battery manufacturer's specifications for optimal voltage configuració.
9. Manteniment
Regular maintenance ensures the longevity and efficiency of your solar charge controller:
- Neteja els terminals: Periodically check and clean all terminal connections to ensure they are tight and free from corrosion.
- Inspeccioneu el cablejat: Check all wiring for signs of wear, damage, or loose connections.
- Mantenir net: Keep the controller's surface clean and free from dust and debris. Use a dry cloth.
- Ventilació: Ensure the installation area remains well-ventilated to prevent overheating.
10. Solució De Problemes
Si teniu problemes, consulteu els següents problemes i solucions habituals:
| Problema | Causa possible | Solució |
|---|---|---|
| La pantalla LCD no mostra la pantalla | Bateria no connectada o de baix volumtage | Comproveu les connexions de la bateria i assegureu-vos del volum de la bateriatage supera els 8V. |
| Sense corrent de càrrega | Solar panel not connected, low sunlight, or reverse polarity | Check solar panel connections, ensure sufficient sunlight, verify polarity. |
| La càrrega no funciona | Load disconnected, battery low, or load work mode setting | Check load connections, charge battery, adjust load work mode. |
| Protecció de sobrecàrrega activada | Load current exceeds controller's rating | Reduce load or use a higher-rated controller. Disconnect load and reconnect after 30 seconds. |
| Protecció contra curtcircuits activada | Short circuit in load or wiring | Identify and fix the short circuit. The controller will automatically recover. |
11. Garantia i Suport
Per obtenir informació sobre la garantia o assistència tècnica, consulteu l'embalatge del producte o poseu-vos en contacte amb el vostre distribuïdor. Conserveu el rebut de compra com a comprovant de compra.