
1. Introducció
Gràcies per la compraasing the Nobsound Mini EL34 Tube Integrated Amplifier. This Class A, single-ended Hi-Fi amplifier is designed to deliver warm and rich audio performance. This manual provides essential information for the safe and optimal use of your amplificador, incloent-hi la configuració, el funcionament, el manteniment i la resolució de problemes.
2. Instruccions de seguretat
- Font d'alimentació: Assegureu-vos el amplifier is connected to a 100V AC power supply. Using an incorrect voltagPot fer malbé la unitat i anul·lar la garantia.
- Ventilació: Do not block the ventilation holes on the amplifier. Ensure adequate airflow around the unit to prevent overheating.
- Humitat: Mantenir el amplifier away from water, moisture, and high humidity environments.
- Fonts de calor: Eviteu col·locar el amplifier near heat sources such as radiators, heat registers, stoves, or other heat-producing appliances.
- Manipulació de tubs: Vacuum tubes can become very hot during operation. Avoid touching them directly. Allow sufficient time for tubes to cool before handling or replacing.
- Manteniment: No intenteu atendre aquest producte vosaltres mateixos. Consulteu tots els serveis a personal de servei qualificat.
- Neteja: Desconnecteu el cable d'alimentació abans de netejar. Feu servir un drap suau i sec. No utilitzeu netejadors líquids ni aerosols.
3. Contingut del paquet
Verifiqueu que tots els elements siguin presents al paquet:
- Nobsound Mini EL34 Tube Integrated Amplificador (x1)
- Cable d'alimentació (x1)
- Vacuum Tubes: 5Z2P (x1), EL34 (x2), 6N1 (x1)

Description: This image displays the Nobsound Mini EL34 Tube Integrated Amplifier along with its accessories. The amplifier unit is shown with its dimensions (260W x 230D x 175H mm). Also included are the power cord and the four vacuum tubes (one 5Z2P, two EL34, and one 6N1) that come with the ampmés viu.
4. Producte acabatview
4.1 Tauler frontal
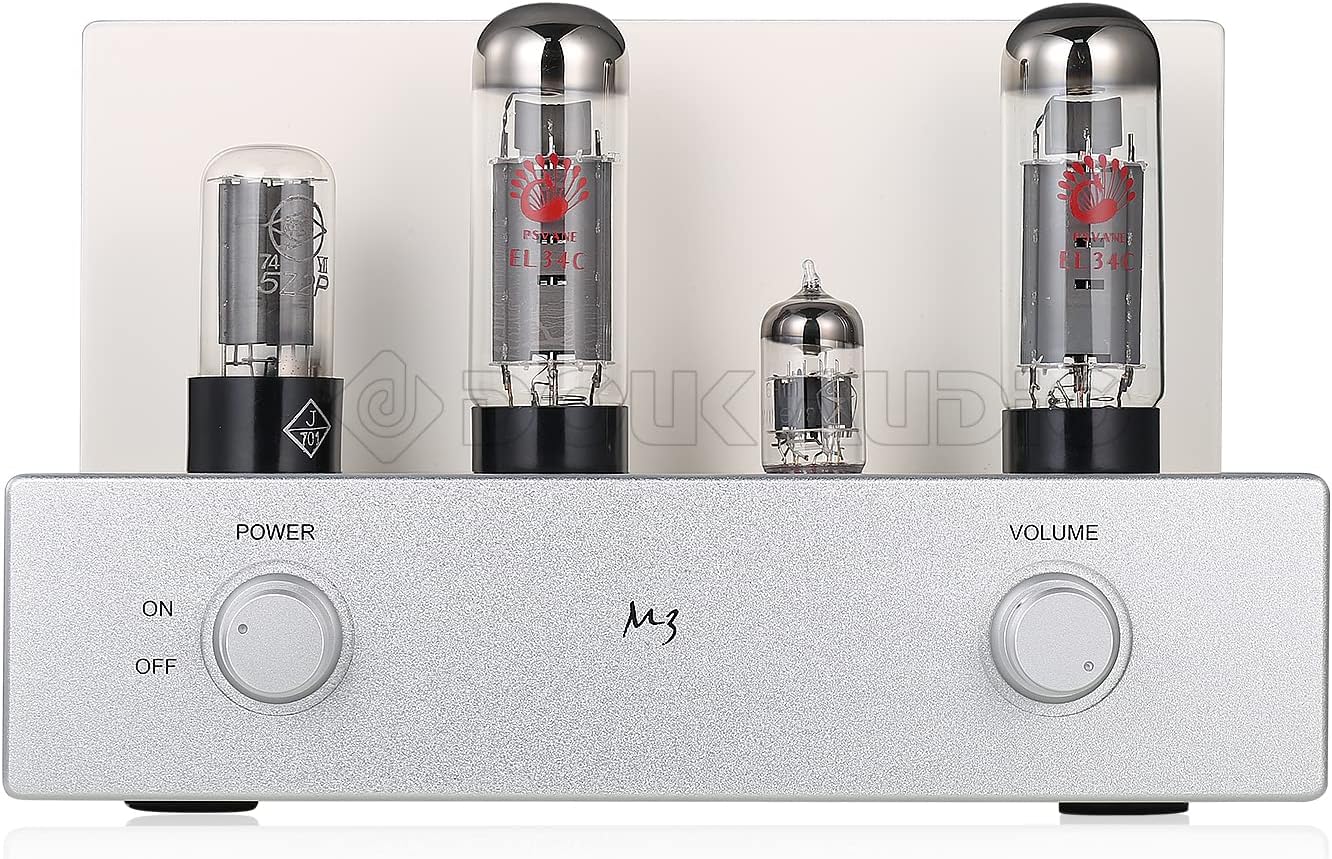
Description: This image shows the front panel of the Nobsound Mini EL34 Tube Integrated Amplifier. On the left, there is a rotary power switch with 'ON' and 'OFF' positions. On the right, a rotary volume control knob is visible. The vacuum tubes are prominently displayed on top of the unit.
- Interruptor d'alimentació: Gira el amplificador ON o OFF.
- Control de volum: Ajusta el volum de sortida general.
4.2 Panell posterior

Description: This image displays the rear panel of the Nobsound Mini EL34 Tube Integrated Amplifier. From left to right, it features two sets of RCA audio inputs labeled 'PC' and 'CD', with a selector switch to choose between them. To the right are the speaker output terminals, supporting both 4Ω and 8Ω impedance connections via banana plugs or bare wire. On the far right is the AC power input socket.
- PC Input (RCA L/R): Audio input for connecting devices like computers.
- CD Input (RCA L/R): Audio input for connecting devices like CD players.
- Interruptor selector d'entrada: Toggles between PC and CD audio inputs.
- Terminals de sortida d'altaveus: Connect your passive speakers. Supports 4Ω and 8Ω impedance.
- Entrada d'alimentació: Connecteu aquí el cable d'alimentació subministrat.
5. Configuració
5.1 Tube Installation (if not pre-installed)
If the vacuum tubes are not pre-installed, follow these steps:
- Carefully remove the tubes from their packaging.
- Identify the correct sockets for each tube type (5Z2P, EL34, 6N1). Refer to the markings on the ampxassís de lifier.
- Align the pins of each tube with the corresponding holes in the socket. Gently push the tube straight down until it is firmly seated. Do not force it.

Descripció: Aquesta imatge ofereix un primer pla view of the four vacuum tubes used in the Nobsound Mini EL34 Tube Integrated Amplifier. From left to right, they are one 5Z2P rectifier tube, two EL34 power tubes, and one 6N1 pre-amplifier tube.
5.2 Connectar altaveus
- Assegureu-vos el amplifier is turned OFF and unplugged from the power outlet.
- Connect your passive speakers to the speaker output terminals on the rear panel.
- Match the speaker impedance (4Ω or 8Ω) to the corresponding terminals on the ampmés viu.
- Connect the positive (+) terminal of the speaker to the positive (+) terminal of the amplifier, and the negative (-) terminal of the speaker to the negative (-) terminal of the amplifier. Ensure secure connections.
5.3 Connexió de fonts d'àudio
- Connect your audio source (e.g., CD player, PC, streamer) to either the 'CD' or 'PC' RCA input jacks on the rear panel using appropriate RCA cables.
- Ensure left (L) and right (R) channels are correctly connected.
5.4 Connexió d'alimentació
- After all audio and speaker connections are made, connect the supplied power cord to the power input socket on the rear panel.
- Plug the other end of the power cord into a 100V AC power outlet.
6. Instruccions de funcionament
- Encès: Turn the Power Switch on the front panel to the 'ON' position. The tubes will begin to glow, indicating the amplifier is warming up. Allow a few moments for the tubes to stabilize before playing audio.
- Seleccioneu l'entrada: Use the Input Selector Switch on the rear panel to choose between the 'PC' or 'CD' audio input, corresponding to your connected source.
- Ajustar el volum: Start with the Volume Control knob at its minimum setting. Begin playing audio from your source, then slowly turn the Volume Control clockwise to achieve your desired listening level.
- Apagar: Per apagar el amplifier, turn the Power Switch to the 'OFF' position.
7. Manteniment
- Neteja: Netegeu regularment el amplifier's exterior with a soft, dry cloth to remove dust. Do not use abrasive cleaners or solvents.
- Substitució del tub: Vacuum tubes have a finite lifespan. If you notice a degradation in sound quality or a tube fails, it may need replacement. Ensure the amplifier is OFF and unplugged, and the tubes have cooled completely before attempting replacement. Gently pull the old tube straight out and insert the new tube, aligning the pins carefully.
- Ventilació: Ensure the ventilation holes remain unobstructed to prevent overheating.
8. Solució De Problemes
| Problema | Causa possible | Solució |
|---|---|---|
| Sense sortida de so |
|
|
| So distorsionat |
|
|
| Soroll de brunzit o brunzit |
|
|
9. Especificacions
- Tipus: Tub de buit integrat Ampmés viu
- Model: Single-ended Class A
- Canals: 2.0
- Sensibilitat d'entrada: 550mV
- Potència de sortida: 2 × 8W (Ultralinear connection)
- Relació S/N: 85 dB
- Impedància d'entrada: 100 KΩ
- Impedància de sortida: 4Ω, 8Ω
- Font d'alimentació: 100 V AC
- Consum d'energia: 76W
- Resposta de freqüència: 30 Hz ~ 38 KHz
- Tubs de buit: 5Z2P (x1), EL34 (x2), 6N1 (x1)
- Entrada d'àudio: Stereo L/R RCA (CD / AUX, PC)
- Sortida d'àudio: Jacks d'altaveus de plàtan
- Dimensions (W×D×H): 260 mm × 230 mm × 175 mm
- Pes: 7.5 kg
10. Garantia i Suport
Nobsound products are designed for reliability and performance. For warranty information or technical support, please refer to the documentation provided with your purchase or contact your retailer. Keep your purchase receipt as proof of purchase.
For further assistance, you may visit the official Nobsound weblloc o poseu-vos en contacte amb el seu departament d'atenció al client.