
Carina CARINA Power & Stretch II
Carina Power Stretch 2020 Sewing Machine User Manual
Model: CARINA Power & Stretch II
Introducció
This manual provides comprehensive instructions for the setup, operation, maintenance, and troubleshooting of your Carina Power Stretch 2020 sewing machine. Please read this manual carefully before using the machine to ensure safe and efficient operation. Keep this manual for future reference.
The Carina Power Stretch 2020 is designed for ease of use, offering 23 utility and decorative stitches, including various overlock stitches for elastic materials. Its robust metal construction ensures durability and high piercing power for both thick and thin fabrics.
1. Configuració
1.1 Desembalatge i comprovació del contingut
Carefully remove the sewing machine from its packaging. Verify that all accessories listed in the 'Delivery Contents' section of the specifications are present. Retain the original packaging for storage or future transport.
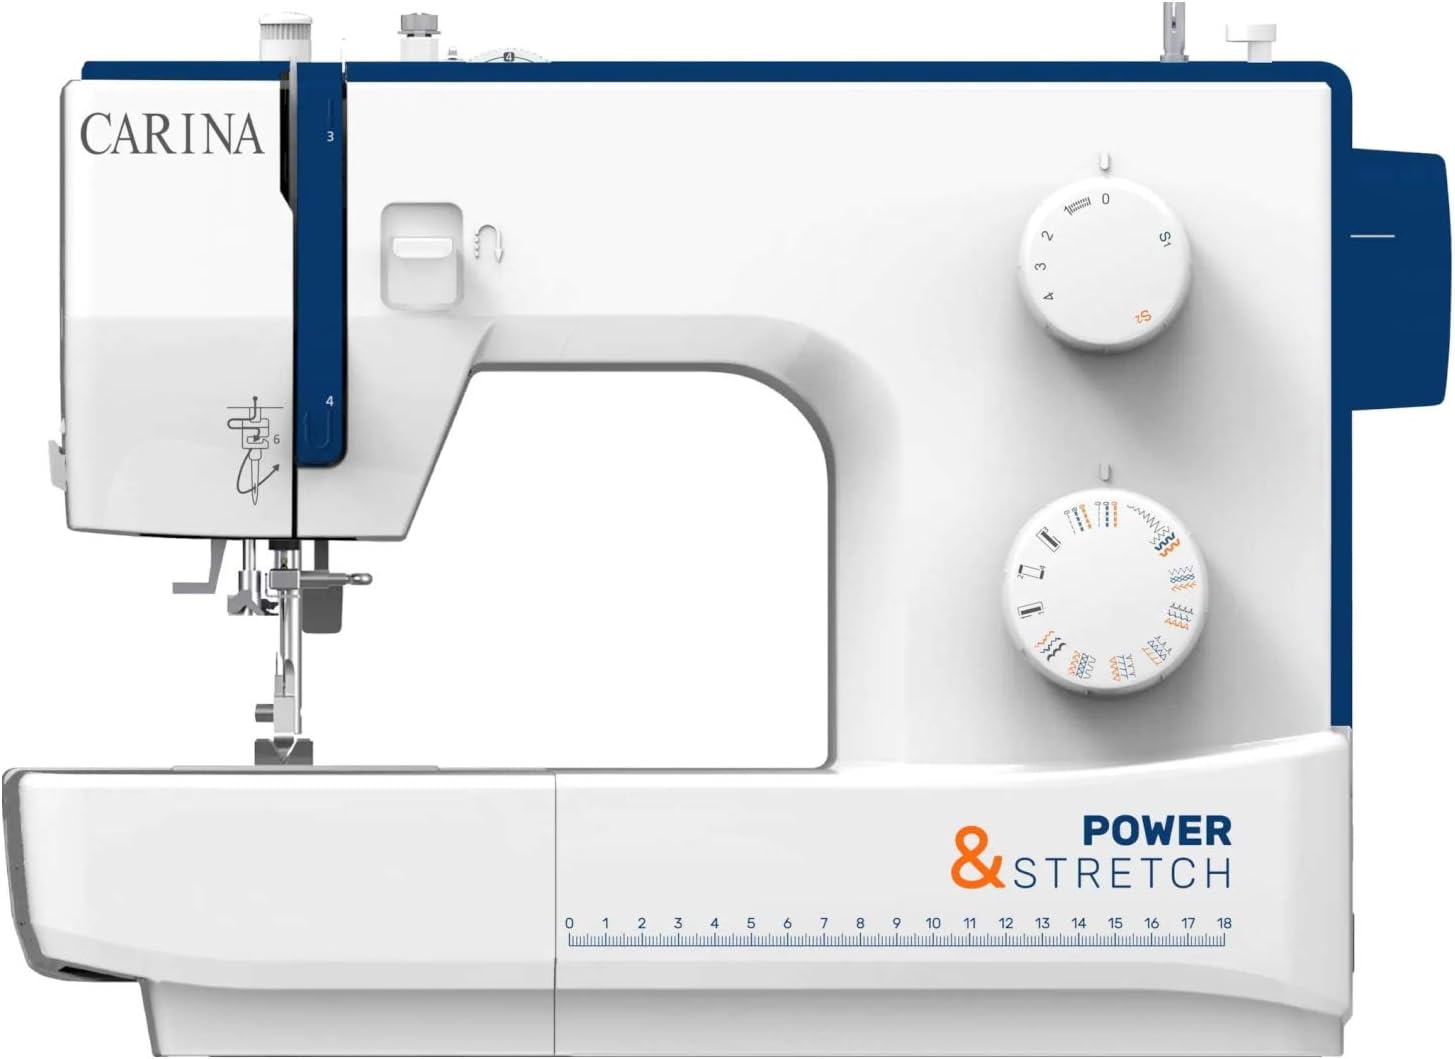
Image: The Carina Power Stretch 2020 sewing machine, showing its overall design with stitch selection dials and the 'Power & Stretch' branding.
1.2 Connexió d'alimentació
- Assegureu-vos que l'interruptor d'alimentació de la màquina estigui en la posició "OFF".
- Connect the power cord to the machine's power input jack.
- Plug the other end of the power cord into a standard electrical outlet (230V, 50Hz).
1.3 Enfilar la màquina
Un enfilat correcte és crucial per a una bona qualitat de la puntada.
1.3.1 Enrotllament de la bobina
- Col·loqueu una bobina de fil al portacarret.
- Guieu el fil a través del disc tensor de la bobina.
- Wind the thread a few times around an empty bobbin.
- Place the bobbin onto the bobbin winder spindle and push it to the right.
- Start the machine; the bobbin will wind automatically. Stop when full.
1.3.2 Inserting the Bobbin
- Obriu la placa de la coberta de la bobina.
- Introduïu la bobina enrotllada a la caixa de la bobina, assegurant-vos que el fil es desenrotlli en la direcció correcta (normalment en sentit antihorari).
- Pull the thread through the tension spring and into the thread guide.
- Tanqueu la placa de la coberta de la bobina.
1.3.3 Enfilat superior
- Aixequeu la palanca del peu premsador.
- Col·loqueu el carret de fil al portacarrets.
- Follow the numbered threading path indicated on the machine, guiding the thread through all guides and the tension discs.
- Pull the thread up through the take-up lever.
- Enfileu l'agulla de davant a darrere.
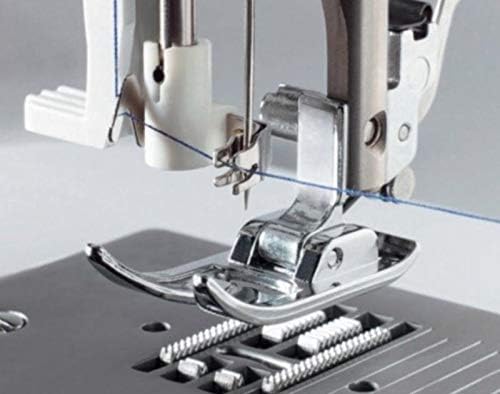
Imatge: Un primer pla view of the upper threading path on the sewing machine, showing the thread guided through various points towards the needle.
1.4 Instal·lació de l'agulla
- Gireu el volant cap a vosaltres per elevar l'agulla a la posició més alta.
- Afluixeu l'agulla clamp cargol.
- Insert a new needle with the flat side facing the back. Push it up as far as it will go.
- Apretar l'agulla clamp cargol de manera segura.

Imatge: Una imatge detallada view of the sewing machine's needle and presser foot, positioned above fabric, illustrating the working area.
1.5 Connexió del pedal
Connect the foot pedal cable to the designated jack on the sewing machine. The foot pedal controls the sewing speed.
2. Instruccions de funcionament
2.1 Selecció de puntades
The Carina Power Stretch 2020 offers 23 stitch programs. Use the stitch selection dial to choose the desired stitch. Refer to the stitch chart on the machine for visual guidance.

Image: A close-up of the two rotary dials on the sewing machine, one for stitch selection and the other for tension or stitch length adjustment.
2.2 Stitch Length and Width Adjustment
Adjust the stitch length using the dedicated dial. The maximum stitch length is 4.0 mm. The maximum stitch width is 4.6 mm. For optimal results, test on a scrap piece of your fabric.
2.3 Funció de trau
The machine features a 1-step automatic buttonhole function. Attach the buttonhole foot and follow the instructions in the stitch chart for precise buttonhole creation.
2.4 Cosir inversament
To secure stitches at the beginning and end of a seam, press and hold the reverse sewing lever/button. The machine will sew backward as long as the lever/button is engaged.
2.5 Free Arm Usage
Remove the accessory box to reveal the free arm. This feature is ideal for sewing cylindrical items such as pant legs, cuffs, and sleeves.
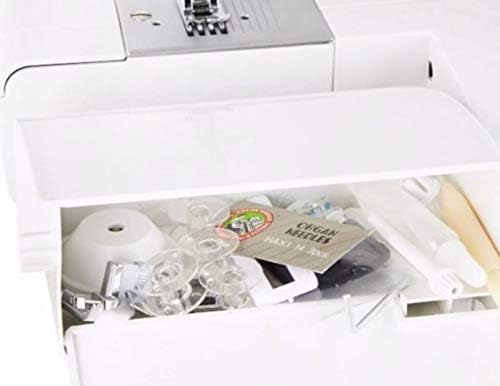
Image: An open accessory drawer of the sewing machine, revealing various sewing tools and bobbins stored inside.
2.6 Working with Different Fabrics
The machine's high piercing power and 6-point feed dog system allow it to sew through various fabric types, including thick materials, thin fabrics, and problematic elastic fabrics like jersey or stretch. Adjust needle type and thread tension as needed for specific materials.
3. Manteniment
3.1 Neteja
Regular cleaning is essential for optimal performance. Use the cleaning brush to remove lint and dust from the bobbin area and feed dog teeth. Do not use liquid cleaners or solvents.
3.2 Lubricació
Refer to the specific oiling points indicated in the detailed manual (if provided separately) or consult a qualified technician. Use only high-quality sewing machine oil.
3.3 Substitució de l'agulla
Replace the needle regularly, especially if it becomes bent, dull, or if you notice skipped stitches. Always use the correct needle type and size for your fabric.
4. Solució De Problemes
| Problema | Causa possible | Solució |
|---|---|---|
| Punts saltats | Agulla incorrecta, agulla doblegada, enfilat incorrecte. | Canvieu l'agulla i torneu a enfilar la màquina correctament. |
| Trenca fil | Incorrect thread tension, poor quality thread, needle bent/dull. | Adjust tension, use quality thread, replace needle. |
| La tela no s'alimenta | Feed dog lowered, lint accumulation. | Raise feed dog, clean feed dog area. |
| La màquina no arrenca | Power cord not connected, power switch off. | Check power connections, turn power switch on. |
Per a problemes que no figuren aquí, poseu-vos en contacte amb l'atenció al client.
5. Especificacions
| Característica | Detall |
|---|---|
| Model | CARINA Power & Stretch II |
| Programes de puntada | 23 (utility, decorative, overlock, special stitches) |
| Ojala | 1-step automatic |
| Longitud màxima de la puntada | 4.0 mm |
| Max. Stitch Width | 4.6 mm |
| Tensió del fil | Automàtic |
| Gos d'alimentació | 6-point, toothed |
| Braç lliure | Sí |
| Sistema de ganxos | Full metal CB-grip system |
| Il·luminació | Glare-free sewing light |
| Poder | 85 watts |
| Voltage | 230 volts, 50 Hz |
| Dimensions (aprox.) | A 37 x A 31 x P 15 cm |
| Pes (aprox.) | 5.6 kg |
| Accessoris inclosos | Universal/all-purpose foot, zipper foot, buttonhole foot, button sewing foot, blind hem foot, seam ripper/cleaning brush, edge guide, bobbins (3x), L-screwdriver, needle set, darning plate, spool pin, spool cap, oil bottle, felt pad, second spool pin, dust cover. |
6. Garantia i Suport
6.1 Informació de la garantia
Your Carina Power Stretch 2020 sewing machine comes with a 5 any de garantia. This warranty covers manufacturing defects and ensures reliable performance under normal use. Please retain your proof of purchase for warranty claims.
6.2 Atenció al client
For technical assistance, spare parts, or warranty service, please contact Carina customer support. Contact details can typically be found on the manufacturer's weblloc web o a la documentació de la compra.
Documents relacionatsCARINA Power & Stretch II


Ask a question about this manual
Ask about setup, troubleshooting, compatibility, parts, safety, or missing instructions. Manuals+ will review the question and use this page’s manual context to help answer it.