
1. Introducció
Welcome to the Artillery Hornet 3D Printer User Manual. This guide provides comprehensive instructions for setting up, operating, maintaining, and troubleshooting your new 3D printer. The Artillery Hornet is designed for ease of use and high-quality printing, featuring a highly pre-assembled structure and advanced components for reliable performance.
2. Informació de seguretat
- Feu servir sempre la impressora en una zona ben ventilada.
- Mantingueu les mans allunyades de les peces mòbils durant el funcionament.
- Do not touch the hotend or heated bed during or immediately after printing, as they can reach high temperatures.
- Ensure the power supply is correctly connected and grounded.
- Unplug the printer from the power source before performing any maintenance or cleaning.
- Keep the printer away from flammable materials and direct sunlight.
- Supervise children and pets when the printer is in operation.
3. Contingut del paquet
En desembalar, comproveu que hi hagi tots els components:
- Artillery Hornet 3D Printer (95% pre-assembled)
- Portabobina de filament
- Cable d'alimentació
- Cable USB
- Tool Kit (wrenches, screwdrivers, etc.)
- SD Card with Test Files i programari
- Manual d'usuari (aquest document)
- Sampel Filament
4. Producte acabatview
The Artillery Hornet features a robust metal integrated structure and a sleek design. Key components include:

Figura 4.1: global view of the Artillery Hornet 3D Printer.
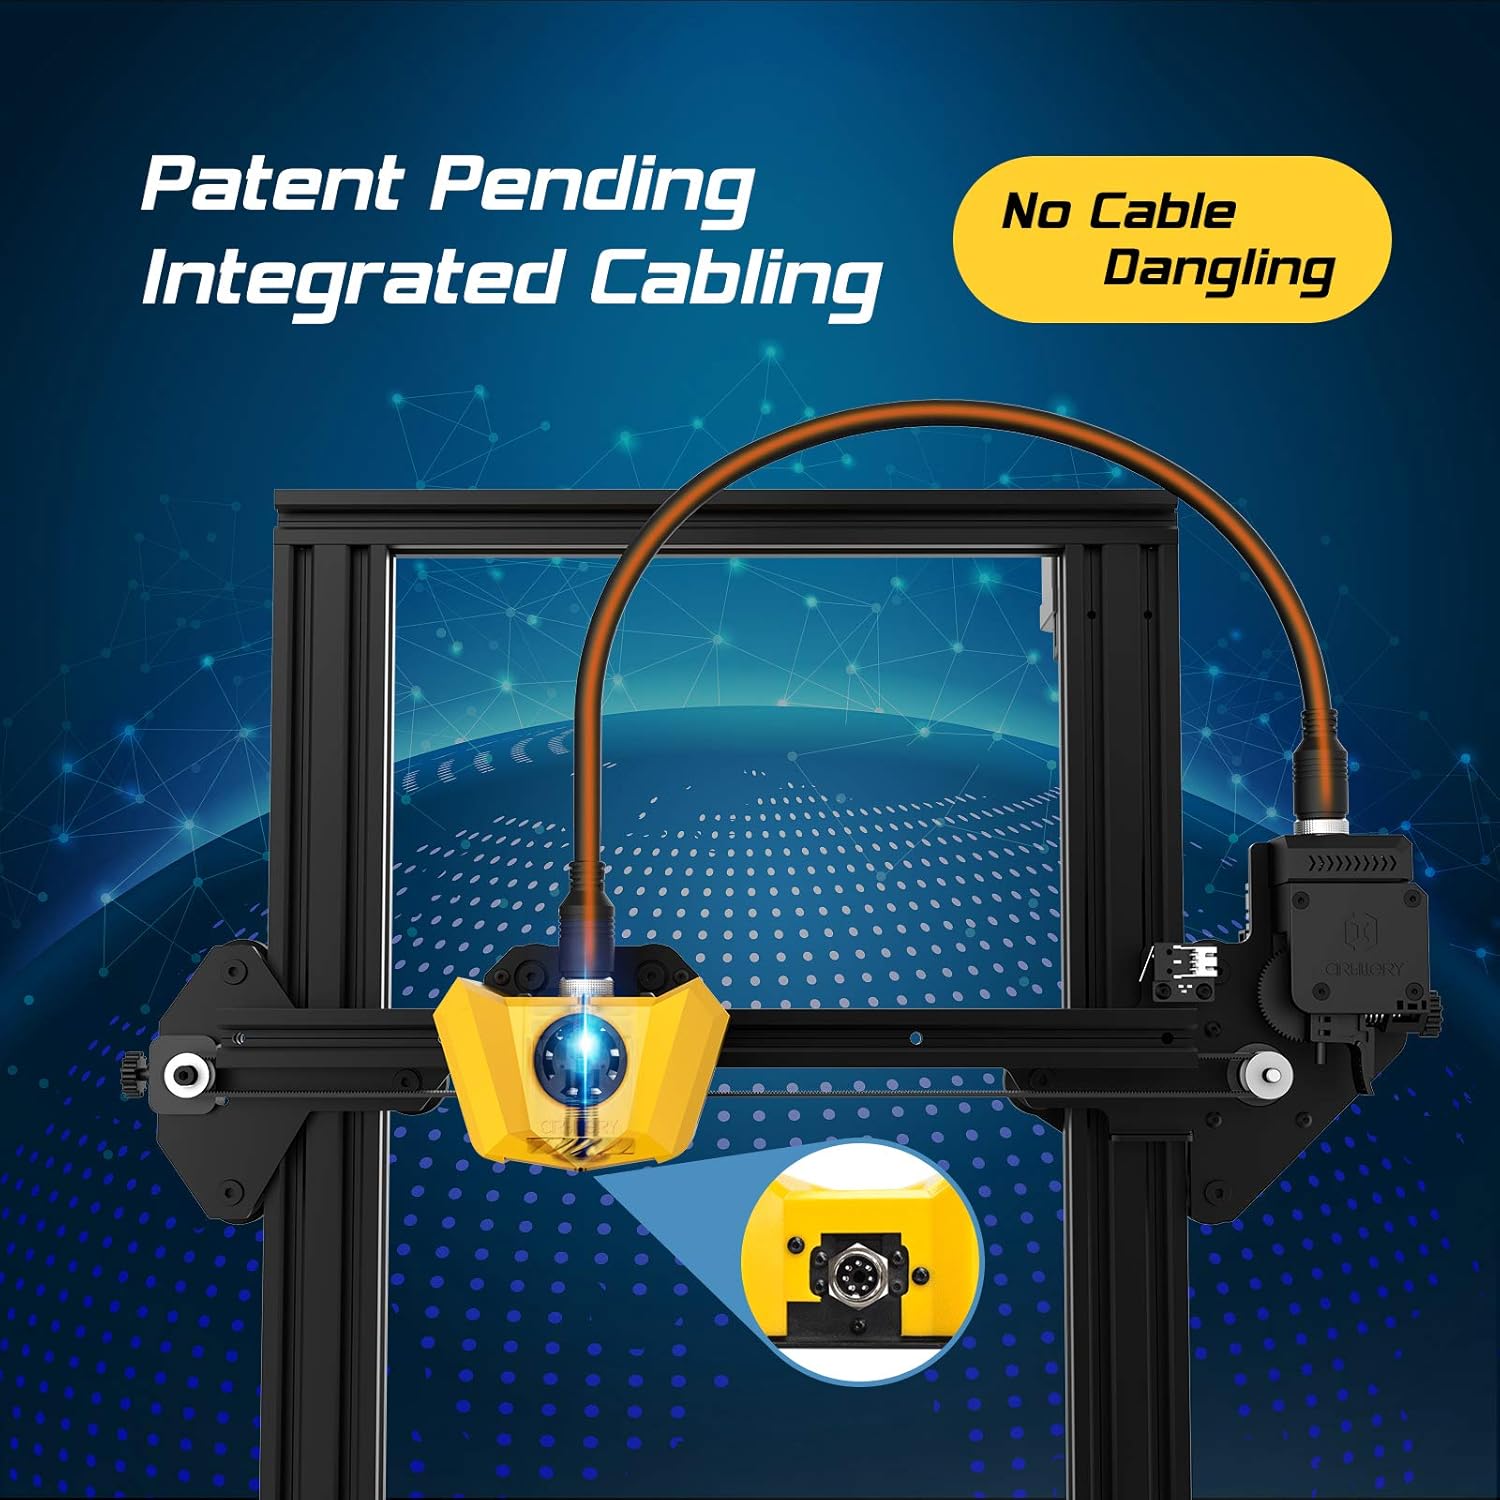
Figure 4.2: Close-up of the innovative integrated cabling system, designed to prevent cable dangling and ensure a neat setup.

Figure 4.3: Details of the New Titan Extruder and Modular Hotend, crucial for stable and precise filament feeding and melting.

Figure 4.4: The self-developed 32-bit motherboard with replaceable drivers, enabling ultra-silent printing and enhanced performance.

Figure 4.5: The user-friendly one-key knob integrated switch for easy operation and the adjustable filament holder designed to maintain a low center of gravity.
5. Guia de configuració
The Artillery Hornet is designed for quick and easy assembly, being 95% pre-assembled. Follow these steps to complete the setup:

Figure 5.1: The printer arrives 95% pre-assembled, requiring only a few minutes for final setup.
- Desembalatge: Traieu amb cura tots els components de l'embalatge.
- Attach Gantry: Secure the pre-assembled gantry to the base unit using the provided screws. The integrated cabling simplifies this connection.
- Instal·leu el portafilaments: Mount the adjustable filament holder to the designated slot on the side of the printer.
- Connectar l'alimentació: Connecteu el cable d'alimentació a la impressora i després a una presa de corrent amb connexió a terra.
- Encès: Flip the power switch located at the rear of the base unit.
- Bed Leveling: Perform manual bed leveling as instructed on the printer's display or in the detailed guide on the included SD card. Proper bed leveling is crucial for successful prints.
6. Instruccions de funcionament
Operating the Artillery Hornet is intuitive, thanks to its one-key knob integrated switch and efficient design.
6.1. Càrrega de filaments
- Place your filament spool onto the adjustable filament holder.
- Feed the filament through the filament sensor and into the Titan Extruder.
- Heat the hotend to the appropriate temperature for your filament type (e.g., 200°C for PLA).
- Use the one-key knob to select the 'Load Filament' option. The extruder will automatically pull the filament through the hotend until it extrudes smoothly.
6.2. Inici d'una impressió
- Prepare your 3D model using a slicing software (e.g., Cura, PrusaSlicer) and save it as a G-code file a la targeta SD.
- Introduïu la targeta SD a la ranura per a targetes SD de la impressora.
- Navigate the menu using the one-key knob to 'Print from SD' and select your desired G-code file.
- The printer will automatically heat up the bed and hotend, then begin printing. The self-developed 32-bit motherboard ensures ultra-silent operation during printing.
Vídeo 6.1: Un oficial acabatview of the Artillery Hornet 3D Printer, showcasing its features and printing capabilities.
7. Manteniment
Regular maintenance ensures optimal performance and longevity of your Artillery Hornet 3D Printer.
- Netegeu la base d'impressió: After each print, clean the print bed with isopropyl alcohol to ensure good adhesion for future prints.
- Neteja de broquets: Periodically clean the nozzle to prevent clogs. Use a brass brush or needle to clear any residue.
- Lubricate Z-axis Rod: Apply a small amount of lithium grease or similar lubricant to the Z-axis lead screw every few months to ensure smooth vertical movement.
- Revisar cinturons: Inspect the X and Y axis belts for proper tension and wear. Adjust if too loose or replace if damaged.
- Neteja del ventilador: Ensure cooling fans (for hotend, part cooling, and power supply) are free from dust and debris to prevent overheating.
8. Solució De Problemes
Aquí teniu alguns problemes comuns i les seves possibles solucions:
| Problema | Causa possible | Solució |
|---|---|---|
| Filament not feeding | Nozzle clog, tangled filament, incorrect loading. | Clear nozzle, untangle filament, re-load filament carefully ensuring it enters the Bowden tube correctly. |
| Poor print adhesion / Prints lifting | Unleveled bed, dirty print surface, incorrect bed temperature. | Re-level the print bed, clean the print surface with isopropyl alcohol, adjust bed temperature in slicing software. |
| Layering problems / Poor print quality | Loose belts, Z-axis wobble, incorrect print settings. | Check and tighten X/Y belts, ensure Z-coupler is secure, adjust print speed and temperature settings. |
| Printer is noisy | Loose components, worn bearings. | Check all screws and connections. The 32-bit motherboard is designed for silent operation, but external factors can cause noise. |
| Problemes de sobreescalfament | Blocked cooling fans. | Ensure all cooling fans are clear of obstructions and functioning correctly. |
9. Especificacions
| Característica | Especificació |
|---|---|
| Volum de construcció | 220 x 220 x 250 mm |
| Dimensions de la impressora | 17.1 "P x 16.1" W x 18.5" H |
| Pes de l'article | 17.6 lliures (8 quilograms) |
| Material | Alumini |
| Color | groc |
| Tipus d'extrusora | New Titan Extruder |
| Hotend Type | Modular Hotend |
| Placa base | 32-bit with replaceable drivers |
| Assemblea | 95% Pre-Assembled |

Figure 9.1: Dimensions of the Artillery Hornet 3D Printer.
10. Garantia i Suport
For warranty information and technical support, please refer to the documentation included with your product or visit the official Artillery weblloc web. Conserveu el rebut de compra com a comprovant de compra per a qualsevol reclamació de garantia.