
1. Introducció
The WINGONEER CellMeter 8 is a multi-functional digital device designed for RC enthusiasts. It serves as a battery capacity checker, balance discharger, and servo tester. This device provides accurate readings of individual cell voltages, total battery voltage, and remaining capacity for various battery types, helping users monitor battery health and optimize performance.
This manual provides detailed instructions on how to set up, operate, and maintain your CellMeter 8. Please read it thoroughly before use to ensure proper and safe operation.
2. Característiques del producte
- Compatibilitat versàtil de bateries: Supports LiPo, LiFe, Li-ion (2-8S), and NiCd/NiMH (4-8S) battery types.
- High-Visibility Backlit LCD: Clear display for easy reading of battery information, even in low light conditions.
- Precís voltage Mesura: Displays individual cell voltages, total battery voltage, volum cel·lular més alttage, lowest cell voltage, i el voltage difference between the highest and lowest cells.
- Pantalla de capacitat de la bateria: Shows the remaining battery capacity as a percentage (0-99%).
- Balance Discharge Function: Helps to balance individual cell voltages, optimizing battery performance and extending overall battery life.
- Integrated Servo Tester: Can be used to test standard and narrow servos, with a test range of 1000-2000us or 500-2500us.
3. Especificacions
| Paràmetre | Valor |
|---|---|
| Nom de l'element | CellMeter 8 Battery Capacity Checker |
| Corrent de descàrrega | 1A |
| Corrent de saldo | 1A |
| Voltage Precisió de la prova | 0.001 V |
| Tipus de bateries compatibles | Li-Po / Li-Ion / Li-Fe (2-8S), NiCd / NiMH (4-8S) |
| Servo Test Range | 1000-2000us or 500-2500us |
| Dimensions | 10.4 x 10 x 3 cm |
| Pes | 80 g |
| Número de model | 59298 |
| UPC | 736684079765 |
The table below summarizes the functions supported for different battery types:

Descripció de la imatge: This image displays a table outlining the functions of the CellMeter 8, indicating which features (Input Cells, Total Voltage Display, Max Cell Voltage Display, Min Cell Voltage Display, Individual Battery Cell Voltage, Individual Balance and Balance Discharger, Total Cell Battery Capacity) are supported for LiPo, LiFe, Li-ion, NiCd, and NiMH battery types. Checkmarks indicate supported features, while 'X' marks unsupported ones.
4. Configuració
Before using the CellMeter 8, ensure you understand the connection points and button functions.
4.1 Dispositiu acabatview

Descripció de la imatge: Un de dalt a baix view of the blue CellMeter 8 device. The LCD screen is prominent, displaying "CellMeter 8" and battery information. Below the screen are three buttons labeled "TYPE Setup Menu", "CELL Servo Test", and "MODE Discharge". A balance port is visible on the right side.
4.2 Connecting a Battery
- Lithium Batteries (LiPo, LiFe, Li-ion): Connect the balance plug of your battery to the 2-8S balance port on the right side of the CellMeter 8. Ensure the negative pin of the balance plug aligns with the negative indicator on the device. The device will automatically detect the cell count and display the voltage.
- NiCd/NiMH Batteries: Connect the discharge plug of your NiCd/NiMH battery to the dedicated NiCd/NiMH port on the device.
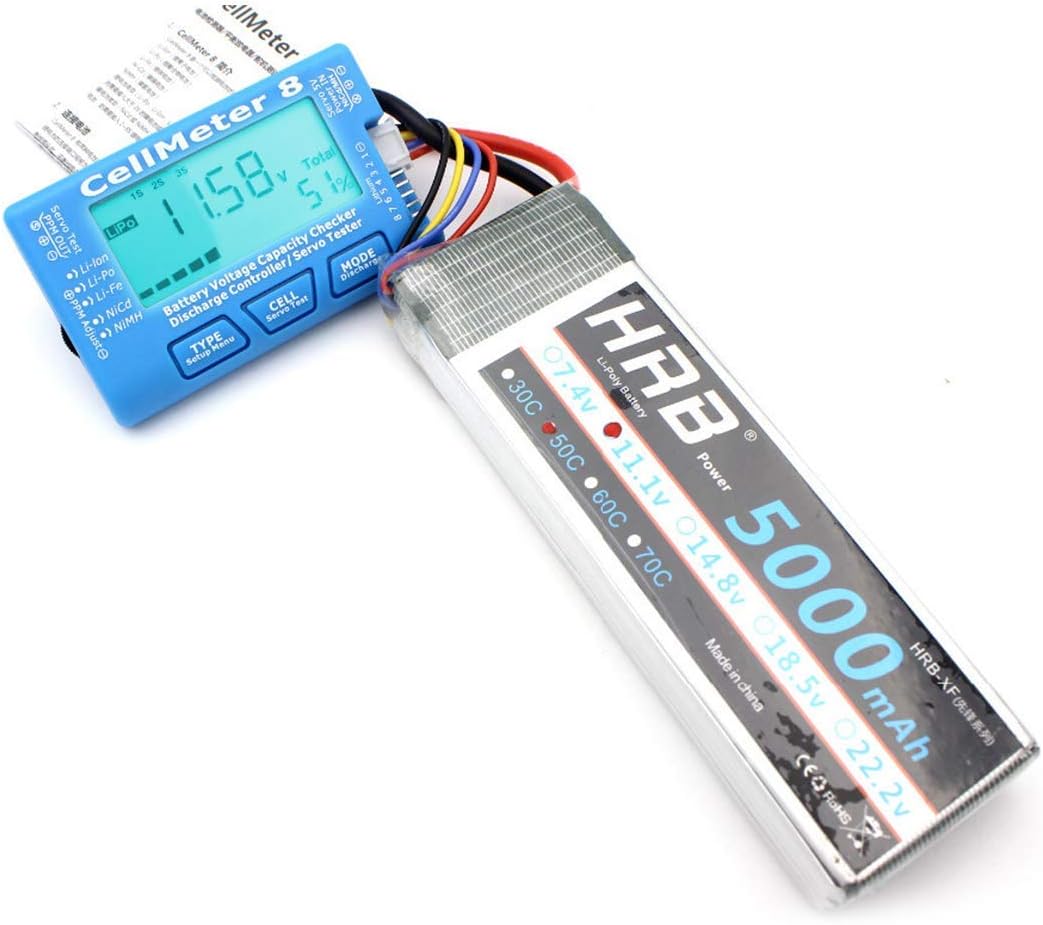
Descripció de la imatge: The CellMeter 8 is shown connected to a large HRB 5000mAh LiPo battery. The device's screen displays "11.58V" and "Total 51%", indicating the battery's current voltage and remaining capacity. The balance lead of the battery is plugged into the side of the CellMeter 8.
4.3 Connecting a Servo for Testing
To test a servo, connect it to the servo test port on the CellMeter 8. The servo test range can be set between 1000-2000us or 500-2500us.
5. Instruccions de funcionament
The CellMeter 8 features three buttons: TIPUS, CÈL·LULA, i MODE. These buttons allow you to navigate through different functions and display modes.
5.1 Battery Checking Functions
- Encès: Connect a battery to the appropriate port. The device will power on automatically and display the total voltage and remaining capacity.
- Changing Battery Type (TYPE button):
- Premeu el botó TIPUS button repeatedly to cycle through supported battery types (LiPo, LiFe, Li-ion). Ensure the displayed type matches your connected battery for accurate readings.
- Viewing Cell Voltages (CELL button):
- Premeu el botó CÈL·LULA botó repetidament per view el voltage of each individual cell in your lithium battery pack. The display will cycle through Cell 1, Cell 2, and so on, up to the maximum cell count.
- The display will also show the highest cell voltage, lowest cell voltage, i el voltagla diferència entre ells.
- Balance Discharge (MODE button):
- When a lithium battery is connected, press and hold the MODE button to initiate the balance discharge function. This will slowly discharge the higher voltage cells to match the lower ones, improving battery balance.
- The discharge current is 1A. Monitor the process and disconnect the battery when balancing is complete or if you need to stop.

Descripció de la imatge: A close-up of the CellMeter 8's backlit LCD screen. It displays "LiPo 1S 2S 3S" at the top, "11.72V" as the total voltage, and "Total 61%" for the remaining capacity. The balance port pins are visible on the right.
5.2 Servo Testing Function
- Enter Servo Test Mode: Connect a servo to the servo test port. Press the CÈL·LULA button (labeled "Servo Test") to enter servo testing mode.
- Adjust Servo Parameters: Utilitza el TIPUS i MODE buttons to adjust the servo test parameters, such as pulse width (1000-2000us or 500-2500us) or test mode (manual adjustment, automatic, neutral).
- Observe Servo Movement: The servo will move according to the set parameters, allowing you to verify its functionality.
6. Manteniment
- Neteja: Feu servir un drap suau i sec per netejar el dispositiu. No utilitzeu netejadors líquids ni dissolvents.
- Emmagatzematge: Store the CellMeter 8 in a cool, dry place away from direct sunlight and extreme temperatures.
- Manipulació: Eviteu deixar caure el dispositiu o sotmetre-lo a forts impactes.
- Connexions: Always ensure battery and servo connections are secure and correctly polarized to prevent damage to the device or components.
7. Solució De Problemes
| Problema | Causa possible | Solució |
|---|---|---|
| El dispositiu no s'encén. | Battery not connected or connected incorrectly. Battery voltage massa baix. | Ensure the battery is properly connected to the correct port. Check if the battery has sufficient charge. |
| Incorrect battery type displayed. | Device auto-detection error or wrong manual selection. | Premeu el botó TIPUS button to manually select the correct battery type (LiPo, LiFe, Li-ion). |
| Vol inexactetage lectures. | Poor connection. Damaged balance lead. | Ensure all connections are secure. Inspect battery balance leads for damage. |
| Servo not responding during test. | Servo connected incorrectly. Faulty servo. | Verify servo connection to the correct port and polarity. Test with a known working servo. |
8. Vídeos de productes
8.1 CellMeter Overview
Descripció del vídeo: Aquest vídeo ofereix un breu resumview of the CellMeter 8, showcasing its design and basic functions. It demonstrates the device from different angles, highlighting the LCD screen and control buttons. This video is provided by the seller, Eugee-JP.
9. Garantia i Suport
This WINGONEER product is designed for reliability and performance. For specific warranty information, please refer to the documentation included with your purchase or contact the retailer. For technical support or inquiries, please reach out to the manufacturer or your point of purchase.
Always ensure you are using genuine WINGONEER accessories and following all safety guidelines to maintain product warranty and ensure safe operation.