
1. Producte acabatview
The WAVLINK USB C M.2 NVMe SSD Enclosure provides a high-speed external storage solution for your NVMe M.2 SSDs. Designed for portability and ease of use, this enclosure supports data transfer speeds up to 10Gbps, making it ideal for large file transfers and demanding applications. Its robust design includes enhanced heat dissipation features to ensure optimal performance and longevity of your SSD.
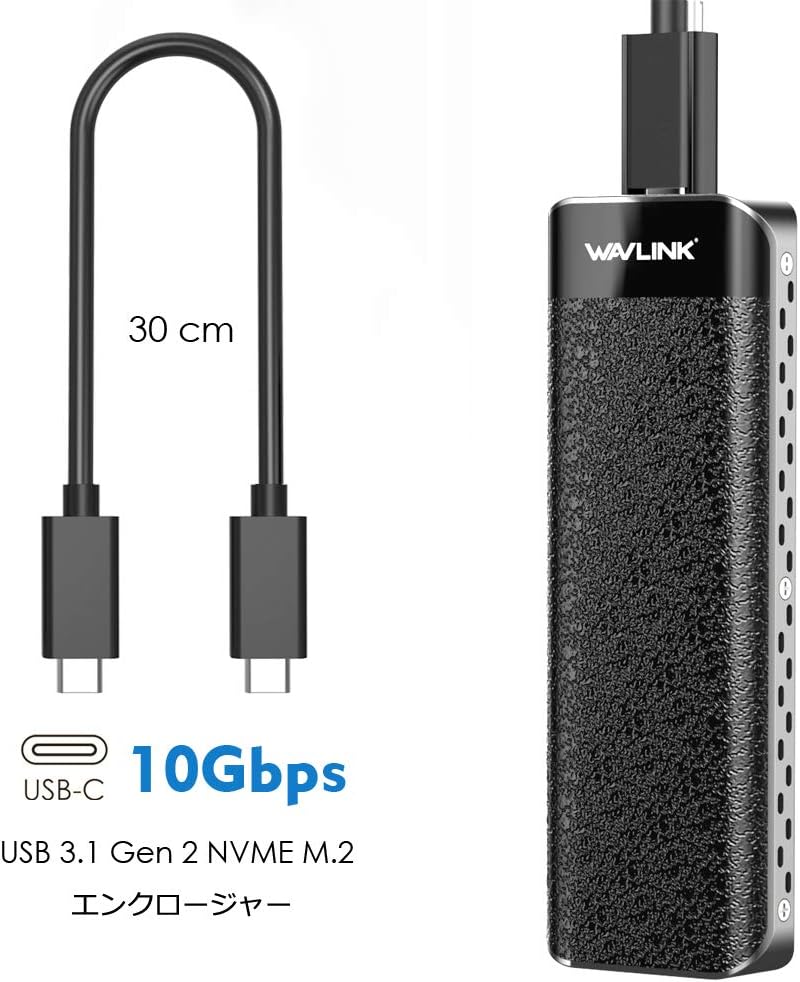
Image: The WAVLINK USB C M.2 NVMe SSD Enclosure connected via a 30cm USB-C cable, highlighting its 10Gbps USB 3.1 Gen 2 capability.
2. Contingut del paquet
Si us plau, verifiqueu que tots els elements siguin presents al vostre paquet:
- WAVLINK USB C M.2 NVMe SSD Enclosure
- Cable USB-C a USB-C
- Screwdriver (for securing SSD, if needed)
- Guia d'inici ràpid

Image: The product box displaying the enclosure, USB-C cable, screwdriver, and quick start guide.
3. Compatibilitat
3.1 Supported SSD Types
- M-Key NVMe M.2 SSDs
- B+M Key NVMe M.2 SSDs
- Supported SSD sizes: 2230, 2242, 2260, 2280 mm
3.2 Supported Operating Systems & Devices
- PC Windows
- Mac (macOS)
- dispositius Android
- Gaming Consoles: PS4, PS4 Pro, PS4 Slim, Xbox One, Xbox One X
3.3 Not Supported
- mSATA SSDs
- SATA M.2 SSDs
- SSDs from MacBook Pro/Air/iMac/Mac Pro

Image: A visual guide indicating that only NVMe PCIe SSDs are compatible, while mSATA and SATA SSDs are not.
4. Instruccions de configuració
Follow these steps to install your NVMe M.2 SSD into the enclosure:
- Obriu el recinte: Gently slide open the enclosure cover. The design is tool-free for easy access.
- Inseriu l'SSD: Align your NVMe M.2 SSD with the M-Key or B+M Key slot on the circuit board inside the enclosure. Insert the SSD firmly into the slot at an angle.
- Assegureu l'SSD: Once inserted, gently push down the SSD and secure it with the provided fastener or screw, if applicable. Ensure it is seated correctly.
- Apply Heatsink and Thermal Pad: For optimal heat dissipation, place the thermal pad onto the SSD chip, then attach the heatsink on top. This helps maintain performance during heavy use.
- Tanca el recinte: Slide the cover back onto the enclosure until it clicks securely into place.
- Connecta't al dispositiu: Use the provided USB-C cable to connect the enclosure to your computer or compatible device.
- Initialize New SSD (if applicable): If you are using a brand new SSD, it may need to be initialized and formatted through your operating system's Disk Management (Windows) or Disk Utility (macOS) before it can be used.

Image: The enclosure disassembled, revealing the circuit board, heatsink, and thermal pad, demonstrating compatibility with 2230/2242/2260/2280mm NVMe SSDs.

Image: The enclosure showing a ribbon mechanism designed to assist in pulling the SSD upwards for easy removal.
5. Instruccions de funcionament
The WAVLINK USB C M.2 NVMe SSD Enclosure is designed for plug-and-play operation, requiring no additional drivers for most modern operating systems.
- Connectar: After installing your SSD, connect the enclosure to your device using the USB-C cable.
- Dades d'accés: The enclosure will appear as an external drive on your computer or device. You can now drag and drop files, perform backups, or run applications directly from the SSD.
- Eliminació segura: Expulseu sempre la unitat del sistema operatiu de manera segura abans de desconnectar el cable per evitar que les dades es corrompin.

Image: The WAVLINK enclosure connected to a laptop via USB-C, illustrating its plug-and-play functionality with Mac OS X and Windows, and 10Gbps data transfer.
6. Manteniment
Proper maintenance ensures the longevity and optimal performance of your SSD enclosure.
- Neteja: Feu servir un drap suau i sec per netejar l'exterior de la carcassa. Eviteu netejadors líquids o materials abrasius.
- Manipulació: Handle the enclosure with care. Avoid dropping it or exposing it to extreme temperatures or humidity.
- Gestió de la calor: The integrated heatsink and thermal pad are designed to manage heat. Ensure the enclosure's ventilation holes (if any) are not obstructed during operation.
7. Solució De Problemes
Si teniu problemes, consulteu les solucions habituals següents:
- Recinte no reconegut:
- Ensure the USB-C cable is securely connected to both the enclosure and your device.
- Prova de connectar-te a un port USB diferent del dispositiu.
- Prova amb un altre cable USB-C si està disponible.
- Verify that the SSD is correctly installed inside the enclosure and fully seated in its slot.
- For new SSDs, ensure it has been initialized and formatted in your operating system's disk management utility.
- Velocitat de transferència de dades lenta:
- Ensure your device's USB port supports USB 3.1 Gen2 (10Gbps) or higher. Connecting to a slower USB port (e.g., USB 2.0 or USB 3.0 Gen1) will limit the speed.
- Confirm your SSD is an NVMe M.2 SSD, not a SATA M.2 SSD, as SATA SSDs have lower maximum speeds.
- Tanqueu totes les aplicacions en segon pla que puguin estar consumint recursos del sistema o E/S de disc.
- Enclosure Feels Warm:
- It is normal for the enclosure to become warm during high-speed data transfers, especially with NVMe SSDs. The heatsink is designed to dissipate this heat.
- Ensure the heatsink and thermal pad are correctly installed on the SSD.
- Avoid operating the enclosure in confined spaces without adequate airflow.
8. Especificacions
| Característica | Especificació |
|---|---|
| Marca | WAVLINK |
| Número de model | WLAMJP2C-ST238C-JP |
| Color | Negre |
| Material | Policarbonat (PC) |
| Velocitat de transferència de dades | Up to 10 Gigabits per second (USB 3.1 Gen2) |
| Interfície SSD compatible | NVMe M-Key, NVMe B+M Key |
| Supported SSD Form Factors | 2230, 2242, 2260 i 2280 mm |
| Number of Supported Devices | 1 |
| Compatibilitat de la plataforma de maquinari | Windows, Game Console |
| ASIN | B088831LJZ |
9. Garantia i Suport
WAVLINK products are designed for reliability and performance. For warranty information or technical support, please refer to the official WAVLINK weblloc web o contacteu directament amb el servei d'atenció al client. Conserveu el rebut de compra com a comprovant de compra per a reclamacions de garantia.