
1. Introducció
This manual provides comprehensive instructions for the safe and effective use, installation, and maintenance of your WINDFIRE Tactical Flashlight. This high-performance LED weapon light is designed for reliability and durability in various tactical and outdoor environments. Please read this manual thoroughly before operating the device.
2. Contingut del paquet
En obrir el paquet, comproveu que hi hagi tots els components següents:
- 1 x LED Tactical Weapon Flashlight
- 1 x Remote Pressure Switch
- 1 x 45 Degree 1" Quick Release Offset Weaver Rails Picatinny Mount
- 1 x Carregador
- 1 x Caixa d'emmagatzematge
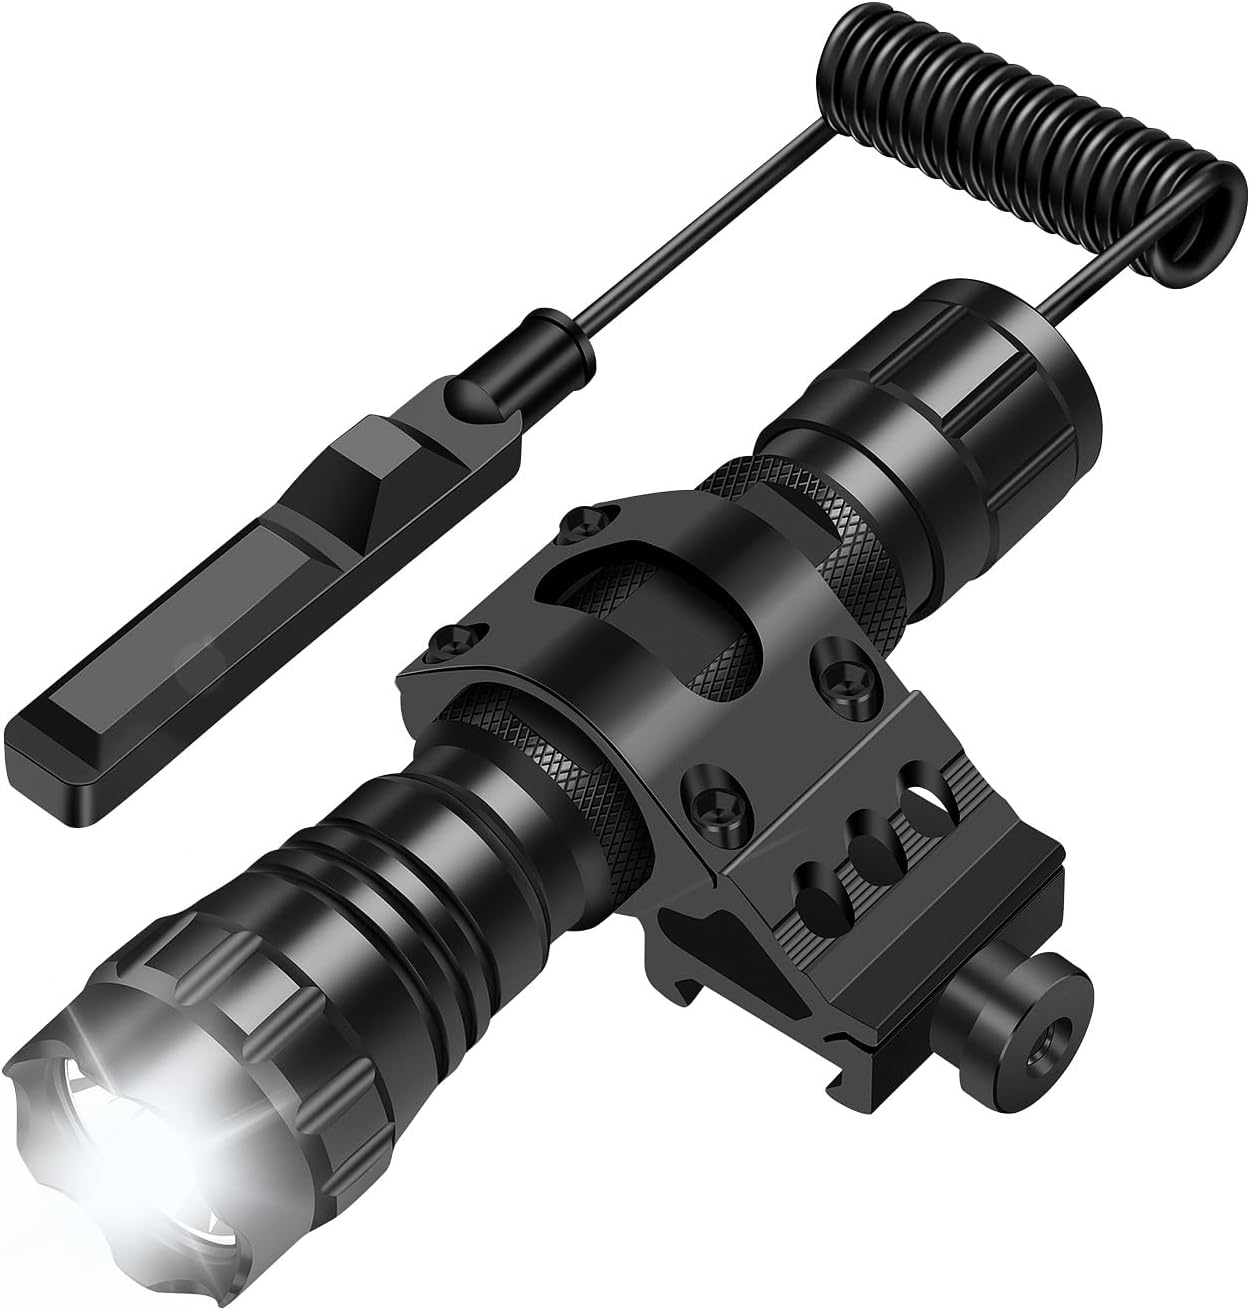
Image: Complete WINDFIRE Tactical Flashlight kit, including the flashlight, remote pressure switch, and offset mount.
3. Especificacions
Key technical specifications for the WINDFIRE Tactical Flashlight:
| Característica | Especificació |
|---|---|
| Número de model | WF-501B |
| Tipus de font de llum | LED |
| Brillantor | 2200 lúmens (màx.) |
| Distància del camí de la llum | 700 peus (aprox. 213 metres) |
| Font d'alimentació | Funciona amb bateria (necessita 1 bateria de polímer de liti) |
| Temps d'execució | Approx. 5 hours (with fully charged battery) |
| Material | Aliatge d'alumini de grau aeronàutic |
| Tipus d'acabat | Matte Black Anodized |
| Nivell de resistència a l'aigua | Impermeable IP65 |
| Pes de l'article | 3.18 unces (aprox. 90 grams) |
| Tipus de muntatge | Rifle Mount (Picatinny/Weaver Rail) |

Image: The WINDFIRE Tactical Flashlight demonstrating its IP65 water-resistant capabilities in a wet environment.
4. Informació de seguretat
To ensure safe operation and prevent damage to the flashlight or injury, please observe the following safety precautions:
- Seguretat ocular: Do not look directly into the LED light or shine it directly into the eyes of people or animals. The high intensity light can cause temporary vision impairment or permanent eye damage.
- Calor: The flashlight may become warm during prolonged use. This is normal. Avoid direct contact with the hot surface for extended periods.
- Seguretat de la bateria: Use only the recommended battery type. Do not mix old and new batteries, or different types of batteries. Do not dispose of batteries in fire. Keep batteries out of reach of children.
- Resistència a l'aigua: The flashlight is IP65 water-resistant, meaning it can withstand splashes and rain. It is no designed for diving or prolonged submersion in water.
- Nens: Keep the flashlight and its components out of reach of children to prevent accidental injury or ingestion of small parts.
5. Configuració
5.1 Instal·lació de la bateria
- Desenrosqueu la tapa posterior de la llanterna girant-la en sentit antihorari.
- Insert the recommended Lithium Polymer battery with the positive (+) end facing towards the flashlight head.
- Torneu a enroscar la tapa de la cua en sentit horari fins que estigui ben ajustada.
5.2 Mounting the Flashlight (Picatinny Rail Offset Mount)
The included 45-degree offset mount is designed for 20mm standard Picatinny/Weaver rails and fits flashlights with a 1-inch (25mm) body diameter.
- Loosen the screws on the mount to open the flashlight ring and the rail clamp.
- Place the flashlight into the 1-inch ring of the mount. Ensure it is seated firmly.
- Tighten the screws on the flashlight ring to secure the flashlight. Do not overtighten.
- Position the mount onto your 20mm Picatinny/Weaver rail.
- Tighten the nuts on the rail clamp to secure the mount to the rail. Ensure the mount is stable and does not wobble.

Imatge: Detallada view of the 45-degree quick release offset mount, showing its dimensions and how it attaches to a Picatinny rail.
5.3 Connecting the Remote Pressure Switch
The remote pressure switch provides versatile control options for your flashlight.
- Unscrew the standard tail cap from the flashlight.
- Screw the remote pressure switch's connector onto the flashlight's tail end, ensuring a secure connection.
- Route the pressure switch cable along your firearm or desired mounting surface.
- Secure the pressure pad to a convenient location using the adhesive backing or appropriate mounting accessories (not included).

Image: The WINDFIRE Tactical Flashlight with the remote pressure switch attached, illustrating its coiled cable and pressure pad.
6. Instruccions de funcionament
The WINDFIRE Tactical Flashlight offers two primary methods of operation: the standard tail cap switch and the remote pressure switch.
6.1 Tail Cap Switch Operation
When using the standard tail cap switch:
- Encendre: Press the button on the tail cap firmly until it clicks. The flashlight will illuminate.
- Apagar: Press the button again firmly until it clicks. The flashlight will turn off.
6.2 Remote Pressure Switch Operation
The remote pressure switch features two distinct modes for flexible control:
- Constant On Mode: Press the designated button on the pressure switch firmly to activate constant illumination. Press it again to turn the flashlight off.
- Momentary On Mode: Press and hold the designated pressure pad to activate momentary illumination. The light will remain on as long as the pad is pressed and will turn off upon release.

Image: Illustration showing the two types of flashlight switches: the standard tail cap switch and the remote pressure switch with its constant on and momentary on functions.
6.3 Càrrega de la bateria
Use the provided charger to recharge the battery when its performance diminishes.
- Traieu la bateria de la llanterna.
- Place the battery into the charger according to the polarity indicators.
- Connecteu el carregador a una presa de corrent adequada.
- Monitor the charger's indicator light (if available) to determine charging status. Unplug the charger once the battery is fully charged.
7. Manteniment
7.1 Neteja
- Netegeu el cos de la llanterna amb un drap net i suau.
- Per a la brutícia persistent, una mica deamp es pot utilitzar un drap i, a continuació, assecar-lo.
- No utilitzeu netejadors abrasius ni dissolvents, ja que poden danyar l'acabat.
7.2 Cura de la bateria
- Recharge the battery regularly, even if not frequently used, to maintain its lifespan.
- If storing the flashlight for an extended period, remove the battery to prevent leakage.
7.3 Emmagatzematge
- Store the flashlight in a cool, dry place, away from direct sunlight and extreme temperatures.
- Use the provided storage box to protect the flashlight and its accessories when not in use.
8. Solució De Problemes
If you encounter issues with your WINDFIRE Tactical Flashlight, refer to the following common problems and solutions:
| Problema | Causa possible | Solució |
|---|---|---|
| La llanterna no s'encén. | Battery is dead or low. Battery inserted incorrectly. Loose tail cap. | Charge or replace battery. Ensure battery polarity is correct. Tighten tail cap securely. |
| La llum és tènue o parpelleja. | Low battery. Loose connections. Dirty contacts. | Recharge battery. Ensure tail cap and remote switch (if used) are tight. Clean battery contacts with a clean cloth. |
| El pressostat remot no funciona. | Switch not securely connected. Damaged switch. | Ensure the remote switch is fully screwed onto the flashlight. If still not working, the switch may need replacement. |
| Mount is loose on rail. | Mounting nuts not tightened sufficiently. | Tighten the mounting nuts firmly. |
9. Garantia i Suport
For information regarding warranty coverage, returns, or technical support, please refer to the product's purchase documentation or contact WINDFIRE customer service directly through the retailer where the product was purchased. Keep your proof of purchase for any warranty claims.