1. Introducció
This manual provides detailed instructions for the setup, operation, and maintenance of your BMW Multi-Function Clock, Alarm, and Weather Station. This device combines a digital clock, an alarm with a snooze function, and a weather station that displays temperature. Please read this manual carefully before use to ensure proper functionality and to maximize your experience with the product.
2. Contingut del paquet
Si us plau, comproveu el contingut del paquet en desembalar-lo. Si falta algun article o hi ha algun dany, poseu-vos en contacte amb el vostre distribuïdor.
- BMW Multi-Function Clock, Alarm, and Weather Station Unit
- Manual d'usuari (aquest document)
3. Configuració
3.1. Instal·lació de la bateria
El dispositiu requereix 2 piles AAA (no inclòs) per al funcionament. Segueix aquests passos per instal·lar les piles:
- Localitzeu la tapa del compartiment de la bateria a la part posterior de la unitat.
- Feu lliscar o aixequeu suaument la tapa per obrir el compartiment.
- Introduïu dues piles AAA, assegurant-vos de la polaritat correcta (+ i -) tal com s'indica a l'interior del compartiment.
- Col·loqueu la coberta del compartiment de la bateria amb seguretat.
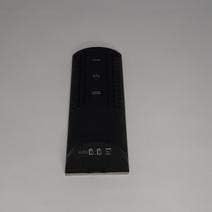
Figura 3.1: Enrere view of the device, illustrating the battery compartment and control buttons for setup.
3.2. Engegada inicial
After battery installation, the device display will illuminate, and it will typically show a default time or begin searching for a signal (if applicable for weather functions). Proceed to the operating instructions to set the time and other functions.
4. Instruccions de funcionament
4.1. Configuració de l'hora i la data
Per configurar la data i l'hora actuals:
- Manteniu premut el botó MODE button (usually located on the back or side) for a few seconds until the time display starts flashing.
- Utilitza el UP or ABAIX buttons (often labeled '+' or '-') to adjust the hour.
- Premeu MODE again to confirm the hour and move to the minutes.
- Ajusteu els minuts amb la tecla UP or ABAIX botons.
- Continueu prement MODE and adjusting with Amunt/Avall for year, month, and day settings.
- Premeu MODE una última vegada per sortir del mode de configuració.
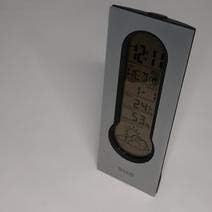
Figura 4.1: Front display of the device, showing the digital clock, temperature, and weather forecast icons.
4.2. Configuració de l'alarma
Per configurar l'hora de l'alarma:
- En el mode de visualització de l'hora normal, premeu el botó ALARMA botó (o MODE repeatedly until 'AL' or an alarm icon appears).
- Manteniu premut el botó ALARMA fins que l'hora de l'alarma comenci a parpellejar.
- Utilitza el UP or ABAIX botons per configurar l'hora d'alarma desitjada.
- Premeu ALARMA again to confirm the hour and move to the minutes.
- Ajusteu els minuts amb la tecla UP or ABAIX botons.
- Premeu ALARMA one last time to save the alarm setting. An alarm icon will typically appear on the display to indicate the alarm is active.
4.3. Using Snooze Function
Quan soni l'alarma, premeu el botó DORMITAR button (usually a large button on the top of the unit) to temporarily silence the alarm. The alarm will sound again after a few minutes (typically 5-10 minutes, depending on the model). To turn off the alarm completely, press any other button or let it ring until it automatically stops.

Figura 4.2: A dalt view of the device, highlighting the prominent SNOOZE button.
4.4. Visualització de la temperatura
The device continuously displays the ambient temperature. The temperature unit (Celsius or Fahrenheit) can usually be switched by pressing a dedicated button (e.g., 'C/F' or 'TEMP') or by holding down one of the adjustment buttons during time setting.
4.5. Weather Station Function
The integrated weather station provides a basic weather forecast using graphical icons (e.g., sun, clouds, rain). This forecast is based on internal barometric pressure changes and is an estimation for the local area. It is not connected to external weather services.
5. Manteniment
5.1. Neteja
To clean the device, use a soft, dry cloth. Do not use abrasive cleaners, solvents, or chemical sprays, as these can damage the surface and electronic components. Avoid getting moisture into the device.
5.2. Substitució de la bateria
When the display dims or functions become erratic, it is time to replace the batteries. Follow the battery installation steps in Section 3.1. Always replace both batteries at the same time with new AAA batteries.
6. Solució De Problemes
Si teniu problemes amb el dispositiu, consulteu els següents problemes i solucions habituals:
- La pantalla està en blanc o té poca llum:
Check if batteries are installed correctly. Replace with fresh AAA batteries. - L'hora o la data són incorrectes:
Refer to Section 4.1 to reset the time and date. Ensure you confirm each setting step. - Alarm is not sounding:
Verify that the alarm is set and activated (look for an alarm icon on the display). Ensure the volume is not set to zero if adjustable. - La lectura de temperatura sembla inexacta:
Ensure the device is not placed in direct sunlight, near heat sources, or in drafts, which can affect readings. Allow some time for the sensor to stabilize after placement. - Weather forecast icons are not changing:
The weather forecast is based on local barometric pressure changes and may take time to update. It provides a general trend, not a precise forecast.
7. Especificacions
| Característica | Detall |
|---|---|
| Marca | BMW |
| Número de model | 06017443015007 |
| Característiques especials | Alarm, Snooze, Temperature Display |
| Font d'alimentació | Bateria |
| Tipus de bateria | 2 piles AAA (no incloses) |
| ASIN | B089QGJ9VR |
8. Garantia i Suport
This product is covered by a standard manufacturer's warranty. For specific warranty terms and conditions, please refer to the documentation provided at the time of purchase or contact your retailer. For technical support or service inquiries, please reach out to the point of purchase or the manufacturer's customer service department.