
1. Introducció
This manual provides essential instructions for the safe and effective operation of your AOPUTTRIVER AP-770D Digital Multimeter. Please read this manual thoroughly before use and retain it for future reference. This device is designed for accurate measurement of various electrical parameters in a wide range of applications.
Informació de seguretat
- Respecteu sempre els codis de seguretat locals i nacionals.
- No utilitzeu el mesurador si sembla danyat o si l'aïllament dels cables de prova està compromès.
- Assegureu-vos que s'hagin seleccionat la funció i el rang correctes abans de fer mesures.
- Avoid making measurements on circuits with voltages exceeding the meter's rated limits.
- Substituïu les piles i els fusibles només pel tipus i la capacitat especificats.
2. Contingut del paquet
Verifiqueu que tots els elements que s'enumeren a continuació siguin presents al vostre paquet:
- AOPUTTRIVER AP-770D Digital Multimeter
- Cables de prova (vermell i negre)
- K-Type Thermocouple (Temperature Probe)
- Bateria de 9 V
- Manual d'usuari
- Bossa de transport
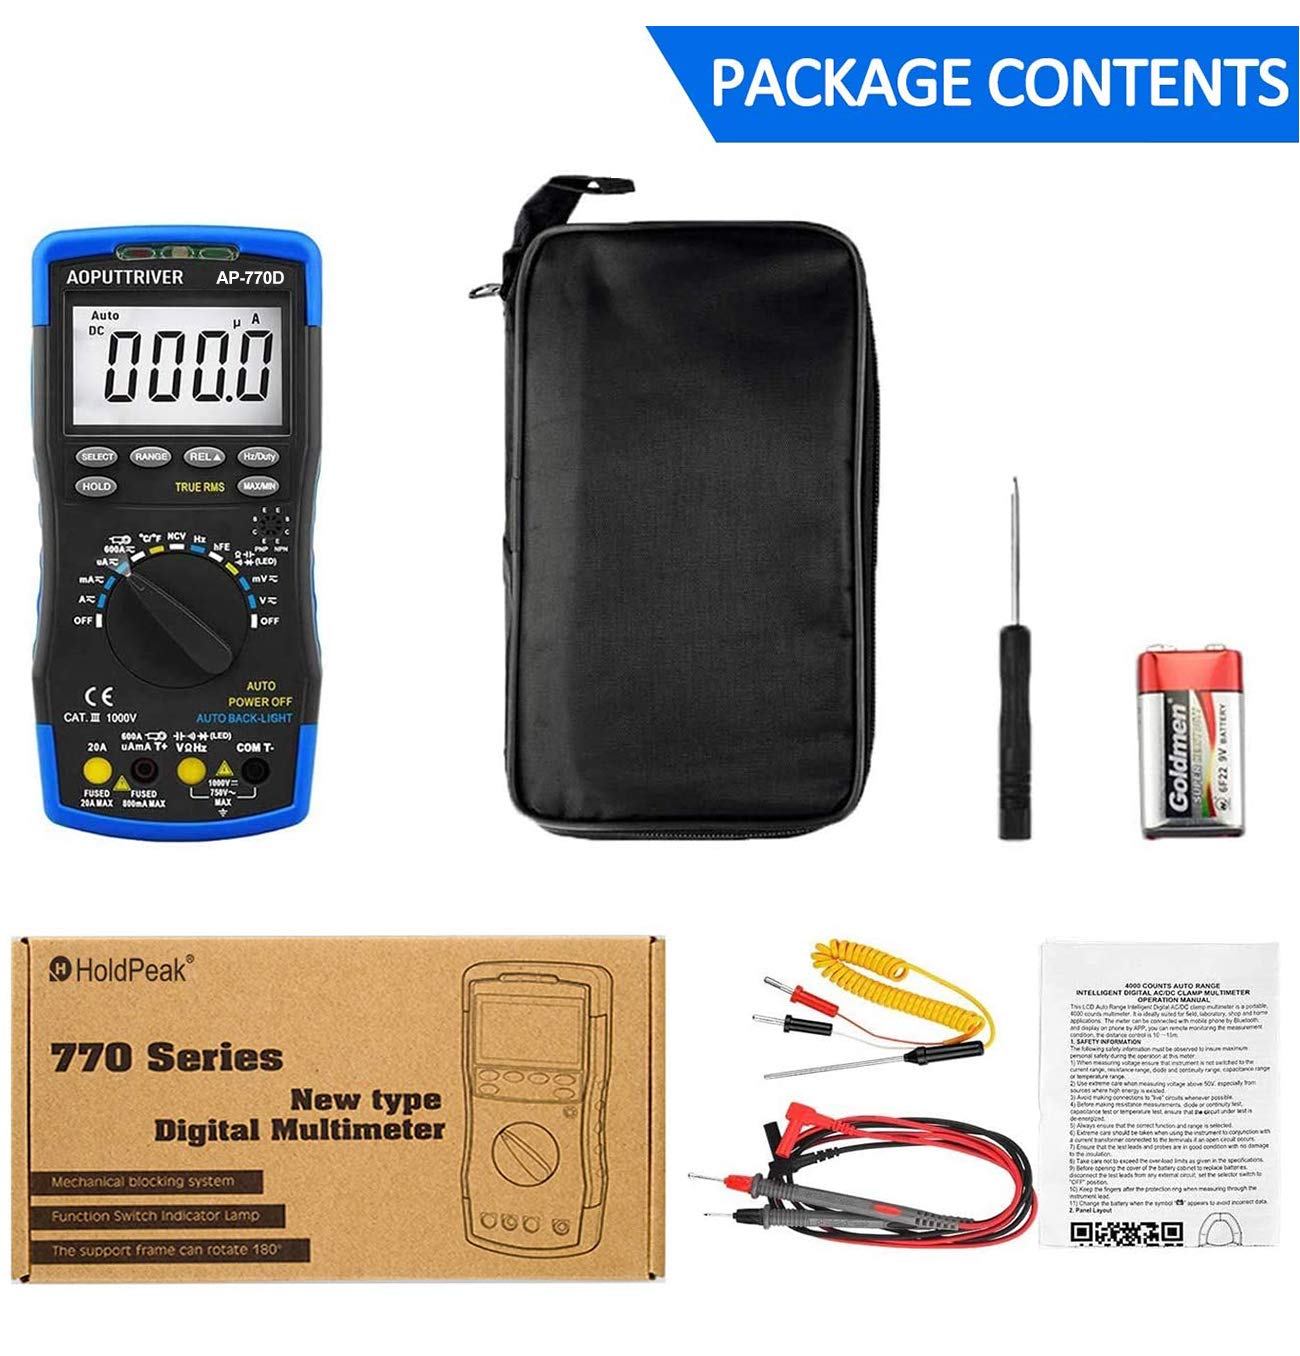
Figure 2.1: Contents of the AP-770D package, including the multimeter, test leads, temperature probe, battery, manual, and carrying pouch.
3. Producte acabatview
Familiarize yourself with the components of your AP-770D Digital Multimeter:

Figura 3.1: Frontal view of the AP-770D with key functions labeled.
- NCV Red Light: Indicates non-contact voltage detecció.
- CDS Sensor: Light sensor for auto backlight.
- NCV Green Light: Indicates non-contact voltage detecció.
- NCV Detection Area: Point for non-contact voltagLa detecció.
- Visualització: Large LCD for reading measurements.
- Tecla SELECT: Toggles between functions within a rotary switch position.
- Tecla HOLD: Congela la lectura actual de la pantalla.
- RANGE Key: Switches between auto-ranging and manual ranging.
- REL ▲ Key: Activates relative measurement mode.
- Hz/Duty Key: Selecciona la mesura de freqüència o cicle de treball.
- MAX/MIN Key: Registra lectures màximes i mínimes.
- Transistor hFE Test Input Jack: For testing transistor gain.
- Interruptor rotatiu: Selecciona la funció de mesura desitjada.
- VΩHz Input: Terminal d'entrada per a voltagMesures de resistència, freqüència, capacitància, díode i continuïtat.
- Entrada COM: Terminal comú (negatiu) per a totes les mesures.
- Entrada de 20A: Input terminal for high AC/DC current measurements (up to 20A).
- µA mA T+ Input: Input terminal for microampere/milliampere current and temperature measurements.

Figure 3.2: Dimensions of the AP-770D and its 180° swivel stand.
4. Configuració
4.1 Instal·lació de la bateria
The AP-770D requires one 9V battery for operation. To install or replace the battery:
- Assegureu-vos que el multímetre estigui apagat i que els cables de prova estiguin desconnectats.
- Localitzeu la tapa del compartiment de la bateria a la part posterior de la unitat.
- Feu servir un tornavís per afluixar el cargol que fixa la tapa de la bateria.
- Remove the cover and insert the 9V battery, observing correct polarity.
- Torneu a col·locar la tapa de la bateria i premeu el cargol.
4.2 Engegada inicial
Turn the rotary switch from the 'OFF' position to any desired measurement function. The display will illuminate. The meter features an auto backlight that activates in low-light conditions.
5. Modes de funcionament
The AP-770D offers a variety of measurement functions. Always ensure the correct function is selected and test leads are connected to the appropriate input jacks.
5.1 voltagMesura (CA/CC)
Per mesurar voltage:
- Poseu l'interruptor rotatiu a la posició 'V~' (Volum ACtage) or 'V∓' (DC Voltage) posició.
- Connect the red test lead to the 'VΩHz' input jack and the black test lead to the 'COM' input jack.
- Connecteu les sondes de prova al circuit o component que s'ha de mesurar.
- Llegeix el voltage valor a la pantalla.
5.2 Mesura de corrent (CA/CC)
Per mesurar el corrent:
- Set the rotary switch to the appropriate current range (µA, mA, or A). Use the 'SELECT' button to toggle between AC and DC current if applicable.
- Connect the red test lead to the 'µA mA T+' or '20A' input jack (depending on expected current) and the black test lead to the 'COM' input jack.
- Connect the test probes in series with the circuit to be measured.
- Llegiu el valor actual a la pantalla.
5.3 Mesura de la Resistència
Per mesurar la resistència:
- Set the rotary switch to the 'Ω' (Resistance) position.
- Connect the red test lead to the 'VΩHz' input jack and the black test lead to the 'COM' input jack.
- Connect the test probes across the component to be measured. Ensure the circuit is de-energized.
- Llegiu el valor de resistència a la pantalla.
5.4 Mesura de la capacitat
Per mesurar la capacitat:
- Set the rotary switch to the '––||––' (Capacitance) position.
- Connect the red test lead to the 'VΩHz' input jack and the black test lead to the 'COM' input jack.
- Connect the test probes across the capacitor. Ensure the capacitor is discharged before testing.
- Llegiu el valor de la capacitat a la pantalla.
5.5 Mesura de freqüència i cicle de treball
To measure frequency or duty cycle:
- Set the rotary switch to the 'Hz' position.
- Connect the red test lead to the 'VΩHz' input jack and the black test lead to the 'COM' input jack.
- Connecteu les sondes de prova a la font de senyal.
- Press the 'Hz/Duty' button to toggle between frequency and duty cycle readings.
5.6 Prova de díodes
To perform a diode test:
- Set the rotary switch to the '→|–' (Diode) position.
- Connect the red test lead to the 'VΩHz' input jack and the black test lead to the 'COM' input jack.
- Connecteu la sonda vermella a l'ànode i la sonda negra al càtode del díode.
- A forward voltage drop will be displayed for a good diode. Reverse the probes; the display should show 'OL' (Open Loop).
5.7 Prova de continuïtat
Per realitzar una prova de continuïtat:
- Set the rotary switch to the '▪))' (Continuity) position.
- Connect the red test lead to the 'VΩHz' input jack and the black test lead to the 'COM' input jack.
- Connecteu les sondes de prova a través del circuit o component.
- If continuity exists (resistance below a certain threshold), the buzzer will sound.
5.8 Mesura de la temperatura
Per mesurar la temperatura:
- Set the rotary switch to the '°C/°F' (Temperature) position.
- Connect the K-type thermocouple to the 'µA mA T+' and 'COM' input jacks, observing polarity.
- Place the thermocouple tip on or in the object whose temperature is to be measured.
- Read the temperature value on the display. Use the 'SELECT' button to switch between Celsius and Fahrenheit.

Figure 5.1: Measuring temperature of a liquid using the AP-770D's temperature probe.
5.9 Vol. sense contactetage (NCV) Detecció
Per detectar el volum de CAtage without contact:
- Set the rotary switch to the 'NCV' position.
- Move the NCV detection area (top of the meter) close to the conductor being tested.
- The NCV red and green lights will flash, and the buzzer will sound, indicating the presence of AC voltage. The intensity of the indication increases with stronger voltage.

Figure 5.2: Using the NCV function to detect live wires without direct contact.
5.10 hFE Test (Transistor Gain)
To test transistor hFE:
- Set the rotary switch to the 'hFE' position.
- Insert the transistor leads (Emitter, Base, Collector) into the corresponding holes in the 'Transistor hFE Test Input Jack'.
- Read the hFE value on the display.
6. Especificacions
| Característica | Valor |
|---|---|
| Nombre de visualitzacions | 40,000 recomptes |
| RMS veritable | Sí |
| Rang automàtic | Sí |
| NCV | Sí |
| Volum AC / DCtage | Fins a 1000V |
| Corrent CA / CC | Fins a 20A |
| Resistència | Fins a 60 MΩ |
| Capacitat | Fins a 60 mF |
| Freqüència | Fins a 10 MHz |
| Temperatura | Yes (with K-type thermocouple) |
| Prova de díode | Sí |
| Prova de continuïtat | Sí (amb brunzidor) |
| Prova hFE | Sí |
| Retroil·luminació automàtica | Sí |
| Apagat automàtic | Sí |
| Norma de seguretat | IEC-1010, CAT III 1000V |
| Font d'alimentació | Bateria de 9 V |
| Dimensions | 20 cm x 9 cm x 4 cm (aprox.) |
| Pes | 350 grams |
7. Manteniment
7.1 Neteja
Netegeu la c del comptadorasing amb anunciamp drap i detergent suau. No utilitzeu abrasius ni dissolvents. Assegureu-vos que el mesurador estigui completament sec abans d'utilitzar-lo.
7.2 Substitució de la bateria
When the battery symbol appears on the display, replace the 9V battery as described in Section 4.1.
7.3 Canvi de fusibles
If the current measurement function fails, the fuse may need replacement. Refer to the full user manual for detailed instructions on fuse replacement. Always use fuses with the specified ratings (e.g., Fused 20A MAX, Fused 500mA MAX).

Figure 7.1: The mechanical blocking system helps prevent incorrect lead insertion, enhancing safety during use.
8. Solució De Problemes
- Sense pantalla: Check battery installation and charge level. Replace battery if necessary.
- 'OL' a la pantalla: Indica una condició de fora del rang o un circuit obert. Seleccioneu un rang superior o comproveu les connexions.
- Lectures incorrectes: Ensure correct function and range are selected. Verify test lead connections and integrity.
- Current Measurement Failure: Comproveu el fusible. Substituïu-lo si està fundit (vegeu la secció 7.3).
9. Garantia i Suport
For warranty information or technical support, please refer to the contact details provided in your product packaging or visit the AOPUTTRIVER official website. Do not attempt to repair the device yourself, as this may void the warranty and pose a safety risk.