
1. Introducció
Thank you for choosing the Hella DR850 Dual-Channel Dash Cam. This device is designed to record your driving journey in Full HD, providing crucial evidence in case of incidents. It features Wi-Fi connectivity for seamless smartphone integration, G-Sensor for automatic incident recording, and advanced night vision capabilities. This manual provides detailed instructions for installation, operation, maintenance, and troubleshooting to ensure optimal performance of your dash cam.
2. Característiques del producte
- Gravació de doble canal: Simultaneous recording from front and rear cameras (rear camera sold separately).
- Full HD 1080P Front Camera: Captures clear video with a 145-degree wide-angle view.
- Wi-Fi integrat: Allows wireless transfer and playback of footage on a smartphone via a dedicated app.
- Sensor G: Automatically detects sudden impacts or braking and locks the current recording to prevent overwriting.
- Monitorització d'aparcament les 24 hores: Provides uninterrupted recording even when the vehicle is parked (requires continuous power supply).
- Visió nocturna: Superior video recording quality in low-light environments.
- Format-Free Technology: Reduces the need for regular SD card formatting.
- Suport de targeta Micro SD: Supports up to 128GB capacity.
- External GPS Module (Optional): Provides location and speed tracking (sold separately).
3. Identificació de components
Familiarize yourself with the various components of your Hella DR850 Dash Cam.
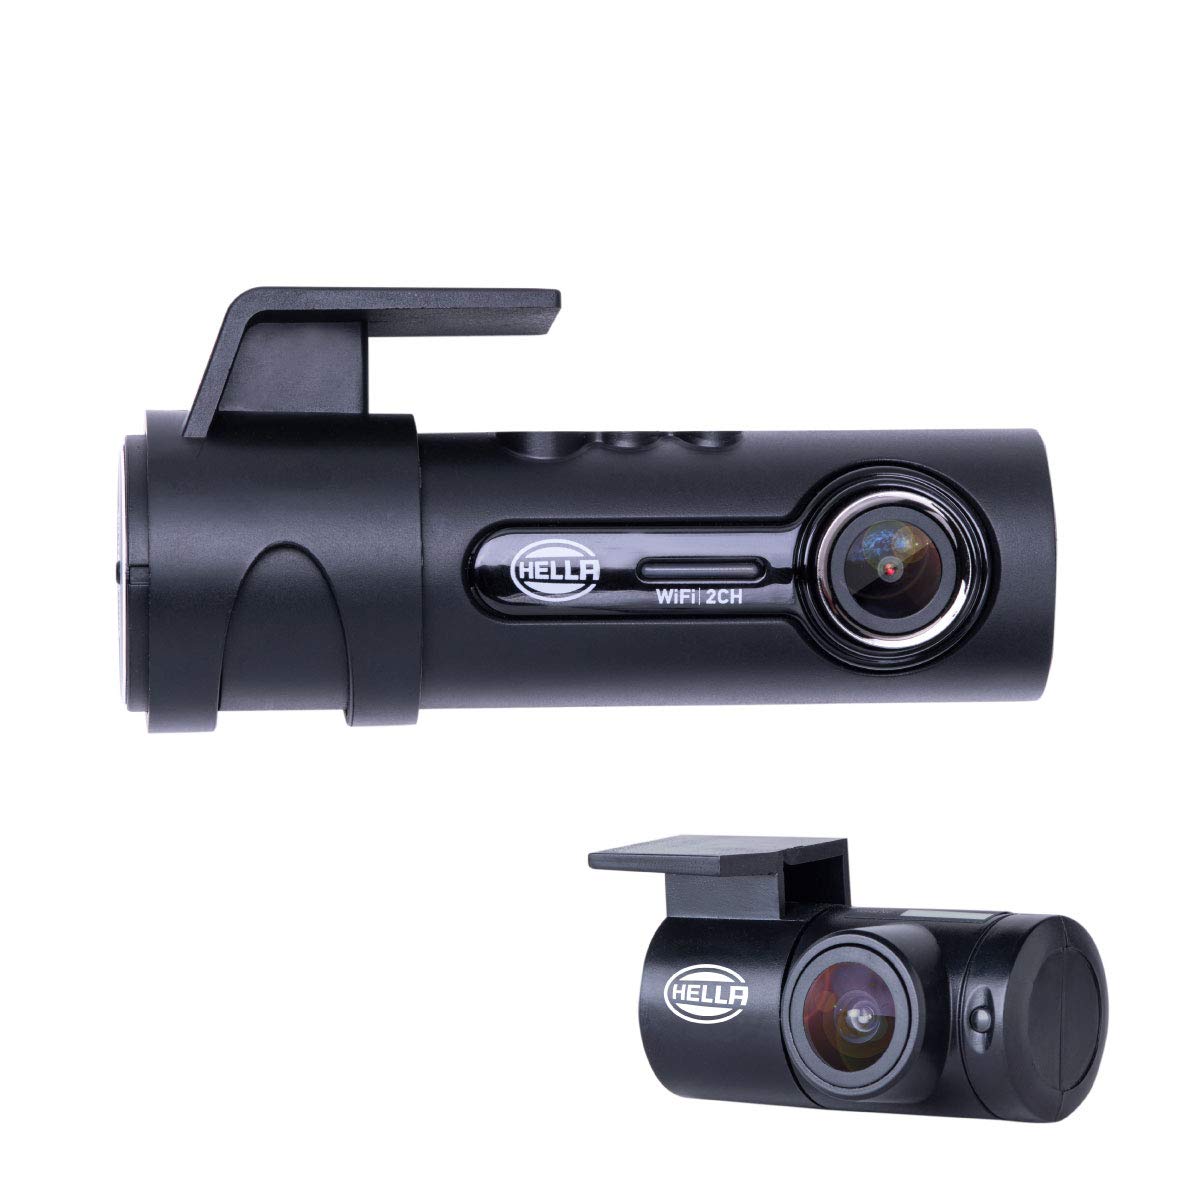
Figura 3.1: Frontal View
Shows the main camera lens and the Hella branding on the device body.

Figura 3.2: lateral View amb ports
Illustrates the R-CAM (rear camera), GPS (external GPS module), and DC-IN (power input) ports.

Figura 3.3: lateral View with SD Card Slot
Displays the Micro SD card slot and the built-in microphone opening.
4. Configuració i instal·lació
4.1 Muntatge de la càmera del salpicader
- Netegeu la zona del parabrisa on voleu muntar la càmera del salpicader. Assegureu-vos que no tingui pols ni greix.
- Fixeu el suport de muntatge a la càmera del salpicader.
- Peel off the protective film from the adhesive pad on the mounting bracket.
- Firmly press the dash cam onto the chosen spot on the windshield, ideally behind the rearview mirall per a una vista sense obstacles view. Hold for 30 seconds to ensure strong adhesion.
- Adjust the camera lens angle to capture the road ahead clearly.
4.2 Connexió de potència
- Connect the power cable to the DC-IN port on the dash cam.
- Route the power cable neatly along the edge of the windshield and dashboard to the vehicle's 12V power outlet (cigarette lighter socket).
- Plug the power adapter into the 12V power outlet. The dash cam will power on automatically when the vehicle's ignition is turned on.
4.3 Inserció de la targeta Micro SD
- Assegureu-vos que la càmera del salpicader estigui apagada.
- Insert a Class 10 or higher Micro SD card (up to 128GB) into the SD card slot until it clicks into place.
- Power on the dash cam. The device will prompt you to format the SD card if it's new or incompatible. Follow the on-screen instructions or use the mobile app to format the card.
4.4 Rear Camera Connection (Optional)
If you have purchased the optional rear camera, follow these steps:
- Munteu la càmera posterior al parabrisa posterior, assegurant una visió clara view.
- Connect the rear camera cable to the R-CAM port on the main dash cam unit.
- Route the cable neatly along the vehicle's interior trim.
4.5 Wi-Fi and App Setup
- Download the dedicated Hella DR850 app from your smartphone's app store (iOS or Android).
- Enceneu la càmera de tauler.
- On your smartphone, go to Wi-Fi settings and connect to the dash cam's Wi-Fi network (SSID usually starts with 'Hella_DR850_XXXX'). The default password can be found in the app or on the device itself.
- Open the Hella DR850 app. You can now view viu footage, access recorded videos, change settings, and format the SD card.
5. Instruccions de funcionament
5.1 Enregistrament automàtic
Once powered on, the Hella DR850 will automatically begin continuous loop recording. Older files will be overwritten by new recordings when the Micro SD card is full, except for locked emergency files.
5.2 Funció del sensor G
The built-in G-Sensor detects sudden impacts or rapid acceleration/deceleration. When triggered, it automatically saves and locks the current video segment, preventing it from being overwritten during loop recording. The sensitivity of the G-Sensor can be adjusted via the mobile app.
5.3 Parking Monitoring Mode
The DR850 supports 24-hour parking monitoring. When the vehicle is parked and the ignition is off, the dash cam can continue to record in a low-power mode or activate recording upon detecting motion or impact. This feature requires a continuous power supply (e.g., hardwire kit, sold separately) to prevent draining the vehicle's battery.
5.4 Ús de l'aplicació mòbil
The Hella DR850 mobile app provides comprehensive control and access:
- Viu View: Stream real-time video from the dash cam to your smartphone.
- Reproducció de vídeo: Browse and play back recorded videos directly on your phone.
- File Descarrega: Download important video clips to your smartphone's gallery.
- Ajust de configuració: Configure various dash cam settings, including video resolution, G-Sensor sensitivity, parking mode, and Wi-Fi password.
- Gestió de la targeta SD: Format the Micro SD card directly from the app.
6. Manteniment
6.1 Gestió de targetes Micro SD
Although the DR850 features format-free technology, it is recommended to format the Micro SD card periodically (e.g., once a month) to maintain optimal recording performance and prevent data corruption. This can be done via the mobile app or the dash cam's settings.
6.2 Neteja del dispositiu
To ensure clear video quality, regularly clean the camera lens with a soft, lint-free cloth. Do not use abrasive cleaners or solvents. Wipe the dash cam body with a dry or slightly damp tela segons sigui necessari.
7. Solució De Problemes
| Problema | Possible solució |
|---|---|
| La càmera del salpicader no s'encén. | Check the power cable connection to the dash cam and the vehicle's 12V outlet. Ensure the vehicle's ignition is on. Test the 12V outlet with another device. |
| L'enregistrament s'atura o es congela. | Ensure you are using a Class 10 or higher Micro SD card. Format the SD card. Try a different SD card. |
| Problemes de connexió Wi-Fi. | Ensure the dash cam's Wi-Fi is enabled. Restart both the dash cam and your smartphone. Re-enter the Wi-Fi password. Ensure you are within close proximity to the dash cam. |
| Vídeo footage és borrós o poc clar. | Clean the camera lens. Ensure the protective film has been removed from the lens. Check if the windshield area in front of the camera is clean. |
| G-Sensor is too sensitive or not sensitive enough. | Adjust the G-Sensor sensitivity settings via the Hella DR850 mobile app. |
| Parking monitoring not working. | Ensure the dash cam is receiving continuous power (e.g., via a hardwire kit). Verify parking mode settings in the mobile app. |
8. Especificacions
| Característica | Detall |
|---|---|
| Model | DR850 |
| Resolució de la càmera frontal | Full HD 1080P |
| Camp de View | 145 graus |
| Tecnologia de sensors òptics | CMOS |
| Mida del sensor òptic | 1/3 polzada |
| Característiques especials | Built-in Wi-Fi, G-Sensor, Night Vision, 24-hour Parking Monitoring |
| Emmagatzematge | Micro SD card, up to 128GB (Class 10 or higher recommended) |
| Dispositius compatibles | Telèfon intel·ligent (iOS/Android) |
| Tipus d'instal·lació | Muntatge en superfície |
| Dimensions del producte | 10.41 x 6.6 x 13.97 cm |
| Pes de l'article | 600 g |
| Fabricant | Hella |
9. Garantia i Suport
The Hella DR850 Dash Cam comes with a standard manufacturer's warranty. For specific warranty terms and conditions, please refer to the warranty card included with your product or visit the official Hella website. For technical support, troubleshooting assistance, or service inquiries, please contact Hella customer support through their official channels.