
1. Producte acabatview
Thank you for choosing the Lepro 10W LED Outdoor Floodlight. This manual provides essential information for the safe installation, operation, and maintenance of your new floodlight. Please read it thoroughly before use and retain it for future reference.
This product is a high-efficiency, IP65 waterproof LED floodlight designed for outdoor and indoor lighting applications such as gardens, yards, garages, and security lighting.
2. Informació de seguretat
- Desconnecteu sempre l'alimentació abans de la instal·lació o el manteniment.
- Si no esteu segurs, la instal·lació l'ha de dur a terme un electricista qualificat.
- Assegureu-vos que la font d'alimentació voltage coincideix amb els requisits del producte (220 volts).
- No mireu directament a la font de llum LED quan estigui encesa.
- Mantenir el producte allunyat de materials inflamables.
- No modifiqueu el producte de cap manera.
- Ensure all connections are secure and properly insulated to maintain IP65 rating.
3. Contingut del paquet
El paquet normalment inclou:
- 2 x Lepro 10W LED Outdoor Floodlights
- Maquinari de muntatge (cargols, ancoratges)
- Manual d'instruccions
4. Característiques del producte
- Alt Brillantor: 10W LED chip provides 850 lumens of 5000K cool white light, equivalent to a 70W incandescent bulb.
- Disseny durador: Constructed from die-cast aluminum and ultra-thin tempered glass, offering rust-proof and high-quality electrostatic adsorption surface treatment.
- Fàcil instal·lació: Features a bracket that can be easily mounted to ceilings, walls, or floors using two self-locking screws. Includes a 1-meter cable for connection.
- Dissipació de calor eficient: Ultra-thin body design with an integrated heat sink ensures optimal thermal performance and extends product lifespan.
- IP65 Waterproof & Wide Application: Rated IP65 for protection against dust and water jets, suitable for various indoor and outdoor lighting projects including gardens, squares, billboards, factories, docks, stadiums, patios, warehouses, courtyards, garages, driveways, and entrances.
5. Especificacions
| Especificació | Valor |
|---|---|
| Número de model | PR340010-DW-EU-2 |
| Consum d'energia | 10 watts |
| Flux lluminós | 850 lúmens |
| Temperatura de color | 5000K (blanc fred) |
| Voltage | 220 volts de corrent altern |
| Classificació IP | IP65 (impermeable) |
| Material | Alumini, Vidre temperat |
| Dimensions del producte (L x A x A) | 9 x 2.4 x 7.8 cm |
| Pes | 200 grams |
| Angle del feix | 110 graus |
| Longitud del cable | 1 metre |
| Tipus de muntatge | Wall-mounted, Ceiling-mounted, Ground-mounted |
Per obtenir informació detallada sobre l'eficiència energètica, consulteu la base de dades EPREL:
6. Configuració i instal·lació
Seguiu aquests passos per a una instal·lació segura i correcta:
- Preparació per a la instal·lació:
- Desconnecteu l'alimentació principal al disjuntor abans de començar qualsevol treball elèctric.
- Gather necessary tools: drill, screwdriver, wire strippers, electrical tape, and a pencil.
- Trieu la ubicació de muntatge:
Select a suitable location on a wall, ceiling, or ground that provides the desired illumination area. The floodlight can be adjusted to direct light as needed.
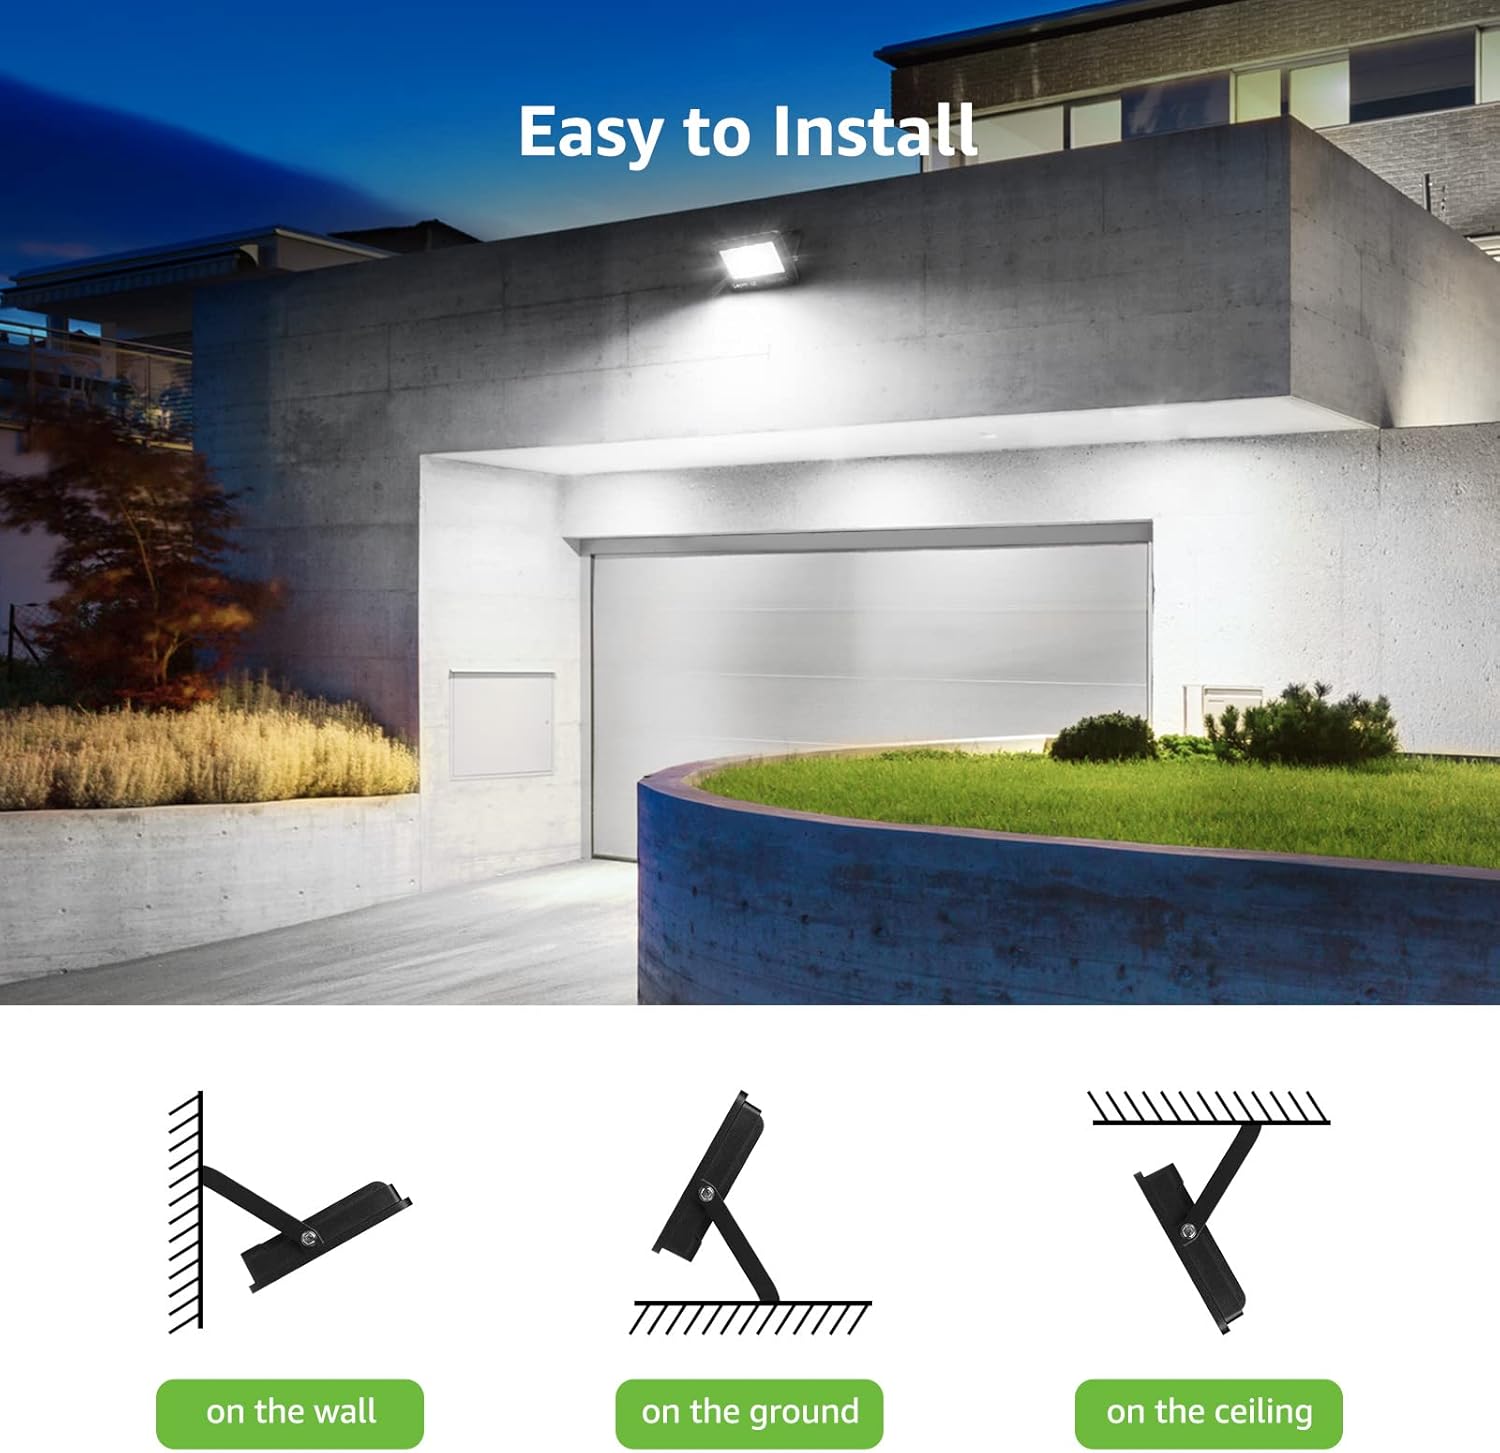
Image: Illustration of various mounting positions for the floodlight (wall, ground, ceiling).
- Marca i perfora els forats:
Use the floodlight's mounting bracket as a template to mark the drilling points on the chosen surface. Drill appropriate holes for the included mounting hardware.
- Assegureu el suport:
Attach the mounting bracket securely to the surface using the provided screws and anchors. Ensure it is firm and stable.
- Connexió del cablejat:
Connect the floodlight's cable to your main power supply. Observe the standard wiring color codes:
- Fil marró: Fil viu
- Yellow & Green Wire: Línia de terra
- Filferro blau: Fil neutre

Imatge: Detallada view of the floodlight's heat sink and wiring color codes for electrical connection.
Ensure all connections are tight and insulated with appropriate waterproof connectors or electrical tape to maintain the IP65 rating, especially for outdoor installations.
- Attach the Floodlight:
Mount the floodlight unit onto the secured bracket using the self-locking screws. Adjust the angle of the floodlight to your desired position.
- Restaura l'alimentació:
Un cop finalitzada la instal·lació i totes les connexions siguin segures, restableu l'alimentació a l'interruptor.

Image: The floodlight installed above a garage, demonstrating its wide beam angle and bright illumination.

Image: An outdoor floodlight illuminating a garden area from a height, showing its coverage.
7. Instruccions de funcionament
The Lepro 10W LED Outdoor Floodlight operates by direct electrical connection. Once properly installed and connected to a power source, it can be controlled via a standard wall switch or an external timer/sensor system (not included).
- Encendre: Activate the connected wall switch or power source.
- Apagar: Deactivate the connected wall switch or power source.
The floodlight provides instant full brightness upon activation.
8. Manteniment
Regular maintenance ensures optimal performance and longevity of your floodlight:
- Neteja: Periodically clean the glass surface with a soft, damp cloth to remove dust and debris. Do not use abrasive cleaners or solvents. Ensure power is off before cleaning.
- Inspecció: Regularly check the mounting bracket and wiring for any signs of damage, corrosion, or loose connections. Tighten screws if necessary.
- Durabilitat ambiental: The IP65 rating ensures resistance to water and dust. The floodlight is designed to withstand various weather conditions, including heat and frost.

Image: Visual representation of the floodlight's IP65 waterproof, heat resistance, and frost resistance features.
9. Solució De Problemes
Si teniu problemes amb el vostre focus, consulteu els problemes i solucions habituals següents:
| Problema | Causa possible | Solució |
|---|---|---|
| La llum no s’encén. | Sense font d'alimentació. Connexió de cablejat solta. Interruptor defectuós. | Comproveu si hi ha corrent a l'interruptor. Verifiqueu que totes les connexions de cablejat siguin segures. Test the switch with another device or replace it. |
| La llum parpelleja. | Font d'alimentació inestable. Connexió fluixa. | Ensure stable power. Check for loose wiring and tighten connections. |
| Lluentor reduït. | Lent bruta. Aging LED components. | Clean the glass surface of the floodlight. If the product is old, reduced brightness may indicate end of lifespan. |
Si el problema persisteix després de provar aquestes solucions, poseu-vos en contacte amb el servei d'atenció al client de Lepro.
10. Garantia i Suport
Lepro products are designed for quality and durability. This product is covered by a standard return policy of 30 days from the date of purchase. For specific warranty terms and conditions, please refer to your purchase documentation or contact Lepro customer support.
For technical assistance, troubleshooting, or warranty claims, please visit the official Lepro website or contact their customer service department. You can often find support information on the product packaging or the retailer's weblloc.
Recursos en línia: