
1. Introducció
This manual provides comprehensive instructions for the DORHEA ESP32 D1 Mini Development Board. This board is a compact and powerful solution for Internet of Things (IoT) projects, integrating Wi-Fi and Bluetooth capabilities. It is designed for developers and hobbyists to quickly prototype and deploy embedded applications.
2. Producte acabatview
The DORHEA ESP32 D1 Mini Development Board features the ESP32-WROOM-32 module, offering dual-core processing, integrated Wi-Fi (802.11b/n), and Bluetooth connectivity. It maintains the compact form factor of the WeMos D1 Mini series, making it compatible with a wide range of existing shields and accessories. The board includes a CP2104 USB-to-UART bridge for easy programming and serial communication.

Figure 2.1: DORHEA ESP32 D1 Mini Development Board with pin headers.
Les característiques clau inclouen:
- Integrated ESP32-WROOM-32 module.
- Wi-Fi (802.11b/n) and Bluetooth (Classic and BLE) connectivity.
- Compact D1 Mini form factor.
- CP2104 USB-to-UART bridge for programming.
- Multiple GPIO pins for various applications.

Figura 2.2: Angle view of the ESP32 D1 Mini board.
3. Instruccions de configuració
Follow these steps to set up your DORHEA ESP32 D1 Mini Development Board:
3.1. Connexió de maquinari
- Attach Pin Headers: Solder the included pin headers to the board if you intend to use it with a breadboard or custom circuitry. Ensure correct orientation.
- Connexió a l'ordinador: Use a Micro-USB cable to connect the ESP32 D1 Mini board to your computer. The board will draw power from the USB port.
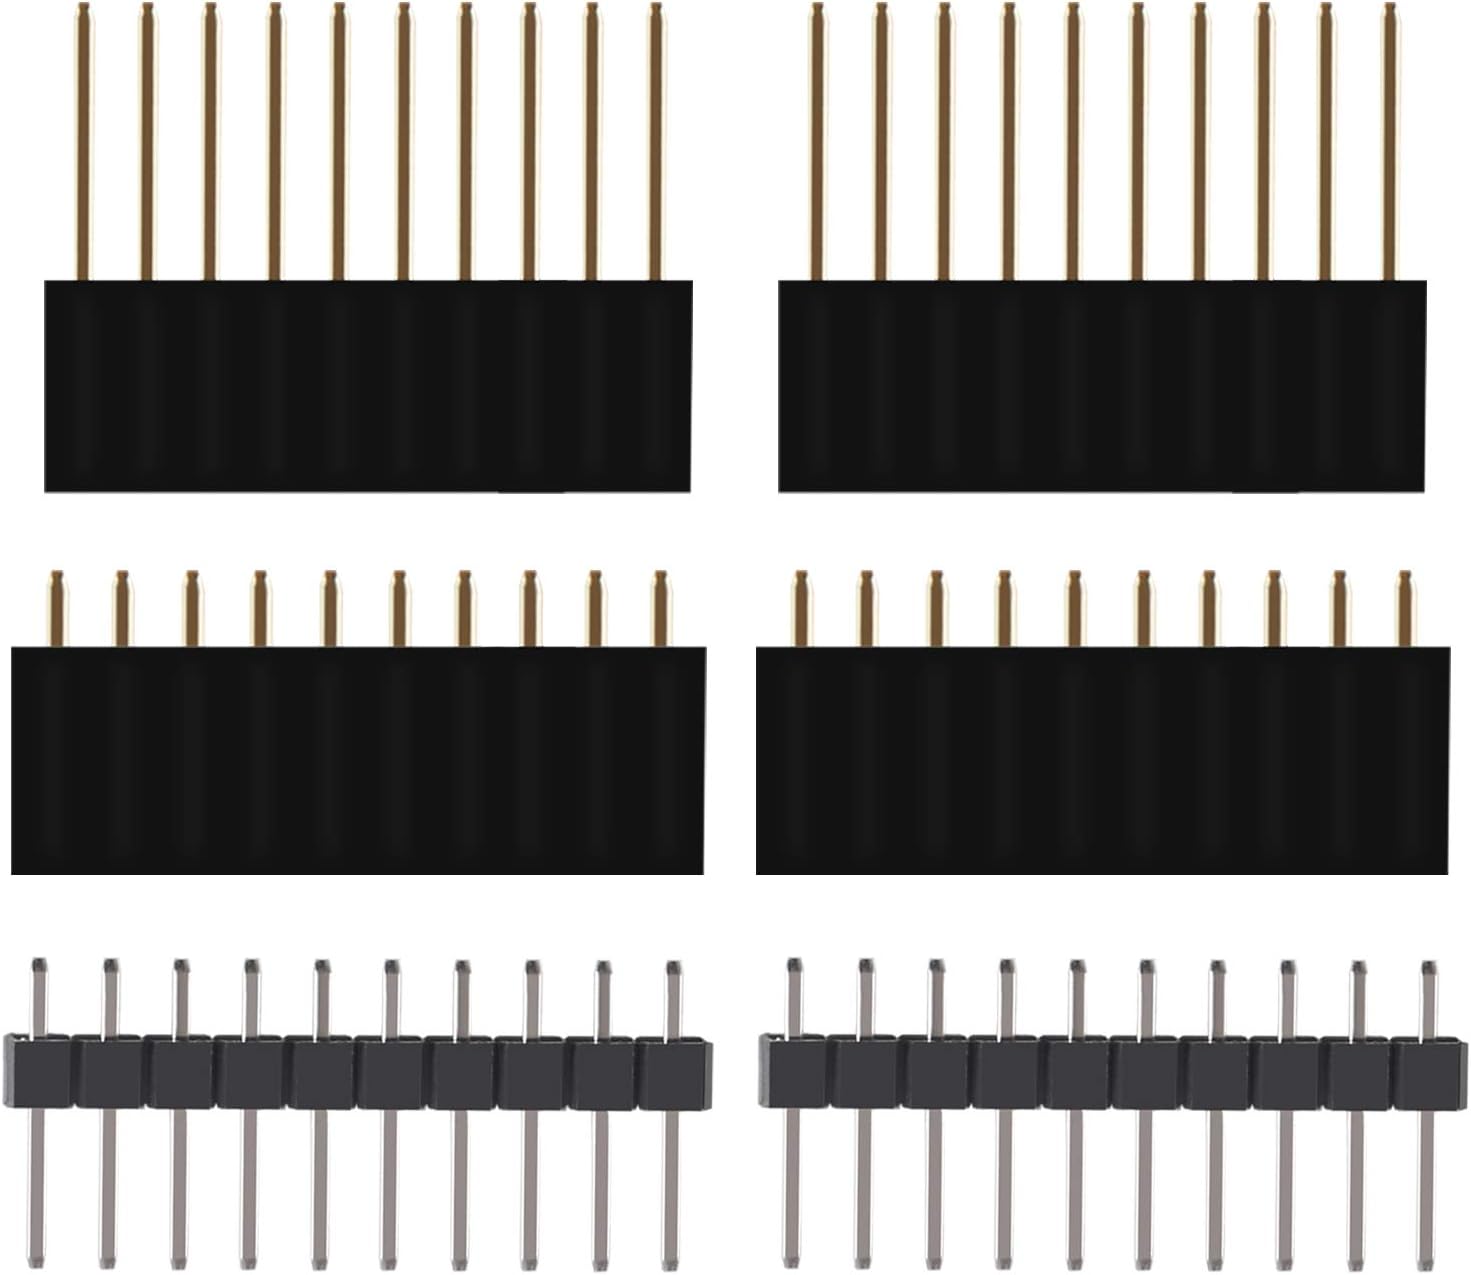
Figure 3.1: Included pin headers.
3.2. Instal·lació del controlador
The board uses a CP2104 USB-to-UART bridge. Most modern operating systems will install the necessary drivers automatically. If not, you may need to download and install the CP2104 drivers from Silicon Labs' official weblloc.
3.3. Software Setup (Arduino IDE)
The Arduino IDE is a popular choice for programming ESP32 boards:
- Instal·leu l'IDE d'Arduino: Baixeu i instal·leu la darrera versió de l'IDE d'Arduino des de la pàgina oficial d'Arduino. weblloc.
- Add ESP32 Board Support:
- Obriu Arduino IDE, aneu a File > Preferències.
- In the "Additional Board Manager URLs" field, add:
https://raw.githubusercontent.com/espressif/arduino-esp32/gh-pages/package_esp32_index.json - Vés a Tools > Board > Board Manager.... Cerca "ESP32" and install the "esp32 by Espressif Systems" package.
- Selecciona la junta: Vés a Tools > Board > ESP32 Arduino and select "ESP32 Dev Module" or a similar generic ESP32 board.
- Seleccioneu el port COM: Vés a Eines > Port and select the COM port corresponding to your ESP32 board.

Figure 3.2: ESP32 D1 Mini Pinout Diagram.
4. Instruccions de funcionament
Once your development environment is set up, you can begin programming and operating your ESP32 D1 Mini board.
4.1. Uploading Your First Sketch
- Open an ExampLI: A l'IDE d'Arduino, aneu a File > Examples > 01.Basics > Blink.
- Compile and Upload: Click the "Upload" button (right arrow icon) in the Arduino IDE. The IDE will compile the code and upload it to your ESP32 board. During upload, you might need to press and hold the BARRETA button on the board if the upload fails, then release it once the upload starts.
- Observa: The built-in LED on the board should start blinking, indicating successful operation.
4.2. Using Wi-Fi and Bluetooth
The ESP32's primary strength lies in its wireless capabilities. You can use the Arduino Wi-Fi and Bluetooth libraries to connect to networks, create access points, or communicate with other Bluetooth devices. Refer to the extensive online documentation and examples for specific implementations.
4.3. Ús del pin GPIO
The board provides numerous General Purpose Input/Output (GPIO) pins. These pins can be configured as digital inputs, digital outputs, analog inputs, or for various peripheral functions like I2C, SPI, UART, and PWM. Consult the pinout diagram (Figure 3.2) and ESP32 documentation for detailed pin functionalities.
5. Manteniment
Proper maintenance ensures the longevity and reliable operation of your ESP32 D1 Mini board.
- Mantenir net: Regularly clean the board with a soft, dry brush to remove dust and debris. Avoid using liquids.
- Protecció estàtica: Handle the board by its edges and avoid touching the components directly to prevent damage from electrostatic discharge (ESD). Store it in an anti-static bag when not in use.
- Condicions ambientals: Operate and store the board in a dry environment, away from extreme temperatures, humidity, and direct sunlight.
- Font d'alimentació: Always use a stable 5V power supply via the Micro-USB port. Avoid over-voltage or reverse polarity connections.
6. Solució De Problemes
Aquests són alguns problemes comuns i les seves solucions:
- Board Not Detected by Computer:
- Ensure the Micro-USB cable is fully inserted and functional.
- Verify CP2104 drivers are correctly installed (check Device Manager on Windows or
ls /dev/tty*on Linux/macOS). - Prova un altre port USB o ordinador.
- Upload Errors (Failed to connect to ESP32):
- Make sure the correct COM port is selected in the Arduino IDE.
- Manteniu premut el botó BARRETA button on the board, then click "Upload" in the IDE. Release the BARRETA button once the upload process starts.
- Ensure the board is powered correctly.
- Problemes de connexió Wi-Fi:
- Double-check Wi-Fi SSID and password in your code.
- Ensure the Wi-Fi network is 2.4 GHz, as ESP32 does not support 5 GHz Wi-Fi.
- Check the distance to the Wi-Fi router and potential interference.
- Unexpected Behavior/Crashes:
- Review your code for logical errors or memory issues.
- Ensure adequate power supply, especially when driving external components.
- Use the Serial Monitor in the Arduino IDE to view debug messages from your code.
For further assistance, consult online ESP32 communities and documentation resources.
7. Especificacions
| Característica | Especificació |
|---|---|
| Processador | Espressif ESP32, Dual-core 240 MHz |
| RAM | LPDDR3, 4 MB |
| Tipus sense fil | 802.11b/n Wi-Fi, Bluetooth |
| Suport del sistema operatiu | FreeRTOS, Linux |
| Connectivitat | Micro-USB (for power and data) |
| Dimensions (paquet) | 5.24 x 3.98 x 0.75 polzades |
| Pes de l'article | 2.22 unces |
| Nom del model | ESP32 D1 Mini |
| Fabricant | DORHEA |
8. Garantia i Suport
DORHEA products are manufactured to high-quality standards. This product is covered by the standard manufacturer's warranty against defects in materials and workmanship. Please refer to your purchase documentation for specific warranty terms and duration.
For technical support, troubleshooting assistance beyond this manual, or warranty claims, please contact DORHEA customer service through the platform where the product was purchased. Provide your order number and a detailed description of the issue for prompt assistance.