
NVX NVX XAD15
NVX XAD15 5000W RMS Monoblock AmpManual d'usuari més viu
Model: NVX XAD15 | Brand: NVX
1. Introducció
The NVX XAD Series Amplifiers represent the pinnacle of high-powered audio amplification, designed for sophisticated competition-level sound systems. The XAD15, like other models in the series, incorporates advanced features such as three-way protection circuitry, a wired remote bass level control, and a fully bridged Class-D amplifier design. This amplifier is engineered to be 1-Ohm stable, providing the necessary power for high-end or competition-grade subwoofer systems efficiently.
Característiques principals:
- 5000W Total RMS Output
- Frequency Response: 10 - 300 Hz
- Soft Start Turn-On Circuitry
- Pulse Width Modulated (PWM) MOSFET Power Supply
- Compact Dimensions: 10.5"W x 8.75"L x 2.5"H
- 1-Ohm Stable Operation
- 3-Way Protection Circuitry (Thermal, Overload, Speaker Shortage)
- Wired Remote Bass Level Control Included

Image: The NVX XAD15 monoblock amplifier shown with its included wired remote bass level control. The amplifier features a black, ribbed heatsink design for efficient cooling.
2. Informació de seguretat
Si us plau, llegiu atentament totes les instruccions abans d'instal·lar i fer funcionar el vostre amplificador. Si no es segueixen aquestes directrius, es poden produir danys a l'aparell. amplesions personals, de la vida útil o del vehicle.
- Desconnexió d'alimentació: Always disconnect the vehicle's negative battery terminal before making any power connections to prevent electrical shorts.
- Cablejat adequat: Ensure all wiring is correctly sized and fused according to the amplifier's power requirements. Incorrect wiring can lead to overheating and fire hazards.
- Ventilació: Muntar el ampl'extintor en un lloc que permeti una circulació d'aire adequada per evitar el sobreescalfament. No tapeu el ampaletes de refrigeració del lifter.
- Muntatge segur: Munteu de manera segura el amplifier to a solid surface to prevent it from becoming a projectile in the event of a sudden stop or collision.
- Instal·lació professional: If you are unsure about any aspect of the installation, seek assistance from a qualified car audio professional.
- Aigua i humitat: Mantenir el amplifier away from water and excessive moisture.
- Temperatura de funcionament: Eviteu operar el amplifier in extreme temperatures.
3. Contingut del paquet
En desempaquetar, comproveu que tots els articles hi siguin presents i que estiguin en bon estat:
- NVX XAD15 Monoblock Ampmés viu
- Control remot de nivell de greus amb cable
- Maquinari de muntatge (cargols)
- Manual d'usuari (aquest document)
Note: Power, ground, remote, RCA, and speaker wires are typically sold separately and are not included with the ampmés viu.
4. Configuració i instal·lació
Una instal·lació correcta és crucial per a un rendiment òptim i una major durabilitat del vostre amplificador. Segueix aquests passos amb atenció.
4.1 Ubicació de muntatge
Trieu una ubicació de muntatge que sigui seca, ben ventilada i segura. Eviteu muntar el amplifier directly on carpet or in enclosed spaces without airflow. Common locations include under seats, in the trunk, or behind rear seats.
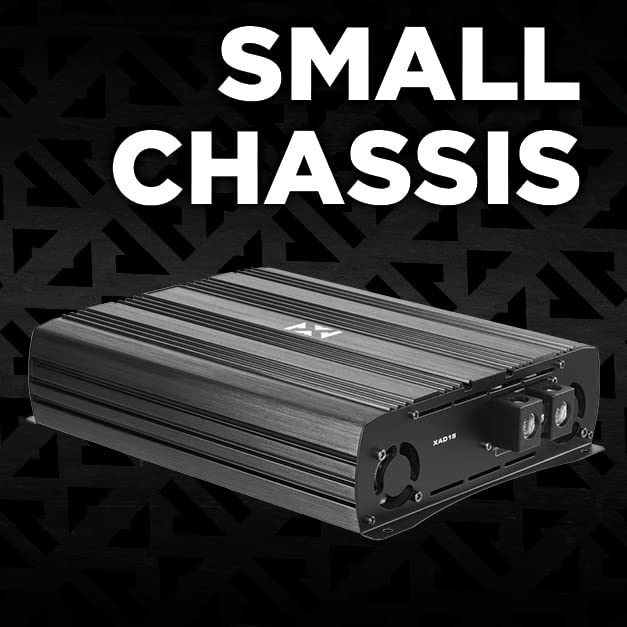
Image: The NVX XAD15 ampespectacle de vidaasing its compact chassis design, which allows for versatile mounting options in a vehicle.
4.2 Connexions de cablejat
Before making any connections, ensure the vehicle's battery negative terminal is disconnected.

Imatge: Primer pla view of the NVX XAD15 amplifier's power input terminals, labeled +12V, REM (Remote), and GND (Ground).
- Potència (+12 V): Connect a high-gauge power wire (e.g., 4 AWG or larger for 5000W RMS) directly from the positive terminal of the vehicle's battery to the amplifier's +12V terminal. Install an appropriate fuse holder (ANL or Mini-ANL) within 18 inches of the battery.
- Terra (GND): Connect a high-gauge ground wire of the same size as the power wire from the ampel terminal GND del transformador a una superfície metàl·lica neta i sense pintar del xassís del vehicle. Assegureu-vos que la connexió sigui sòlida i de baixa resistència.
- Remot (REM): Connecteu un cable de calibre més petit (per exemple, 18 AWG) des del amplifier's REM terminal to the remote turn-on output of your head unit. This wire tells the ampl'activador s'encén quan la unitat principal està activa.
- Entrada RCA: Connecteu els cables RCA del pre-amp output of your head unit to the "INPUT" RCA jacks on the ampmés viu.
- Sortida de l'altaveu: Connect your subwoofer(s) to the "SPEAKER OUTPUT" terminals. Ensure correct polarity (+ to + and - to -). The XAD15 is 1-Ohm stable, allowing for flexible wiring configurations for your subwoofers to achieve a 1-Ohm load.

Imatge: Part posterior view of the NVX XAD15 amplifier showing the input (RCA), output (speaker terminals), and control knobs for Subsonic, LPF, Gain, and Bass Boost.
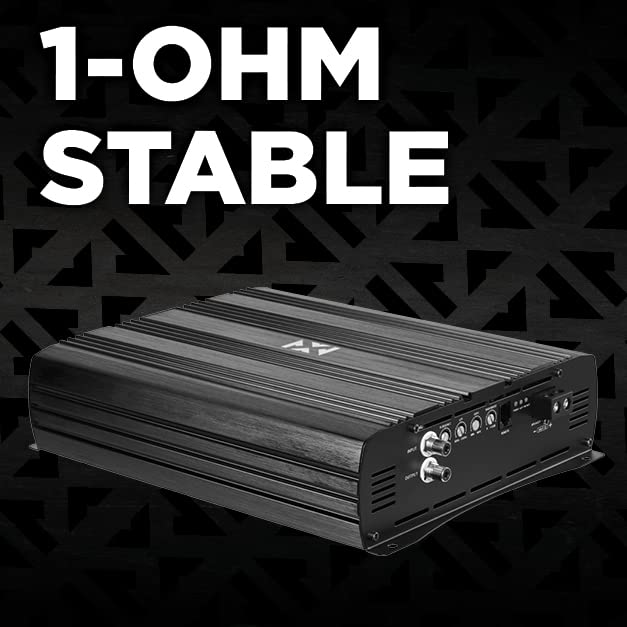
Image: Promotional image highlighting the 1-Ohm stable capability of the NVX XAD15 amplifier, indicating its ability to handle low impedance loads for powerful subwoofer performance.
5. Instruccions de funcionament
Un cop instal·lat, el amplifier requires proper adjustment to achieve optimal sound quality and prevent damage.
5.1 Engegada inicial
After all connections are made and double-checked, reconnect the vehicle's negative battery terminal. Turn on your head unit. The ampL'indicador d'engegada del lifer s'hauria d'il·luminar.
5.2 Ajust dels controls
- Gain (Level) Control: Això ajusta la sensibilitat d'entrada del amplifier to match the output voltage of your head unit. Start with the gain set to minimum. Play a familiar track with full dynamic range. Slowly increase the gain until you hear distortion, then back off slightly. This is NOT a volume control.
- Filtre de pas baix (LPF): This control allows only frequencies below the set point to pass through to the subwoofer. Typically set between 80Hz and 120Hz for subwoofers, depending on your system and preference.
- Filtre subsònic: This filter removes extremely low frequencies that are below the audible range and can cause damage to subwoofers without producing sound. Set this typically 5-10Hz below your subwoofer's port tuning frequency (if ported) or around 20-30Hz for sealed enclosures.
- Intensificació dels sons més greus: This control provides an increase in output at a specific frequency (e.g., 45Hz). Use sparingly, as excessive bass boost can lead to distortion and potential damage to your subwoofers.
5.3 Remote Bass Level Control
The included wired remote bass level control allows for convenient adjustment of the subwoofer output level from the driver's seat. Connect the remote to the "REMOTE" port on the amplifier. This control adjusts the overall output level of the amplifier, allowing you to fine-tune the bass intensity on the fly.

Image: Close-up of the NVX wired remote bass level control, featuring a rotary knob for adjusting the Class D level (Min to Max) and a power indicator light.
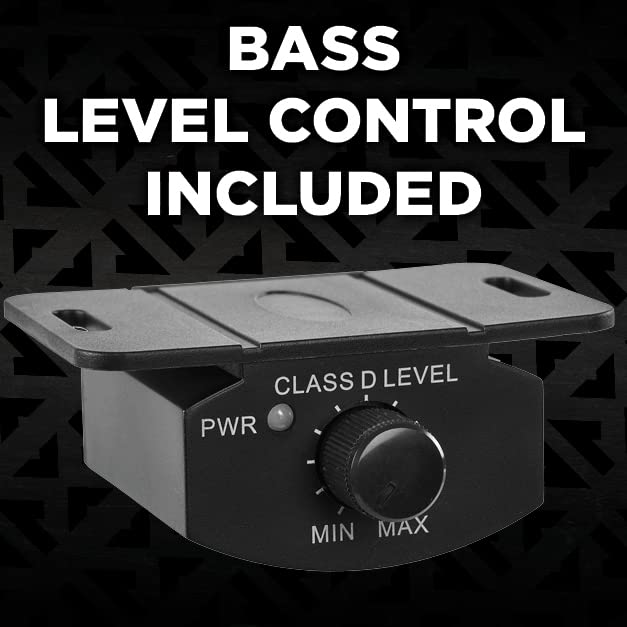
Image: The NVX wired remote bass level control, highlighting its inclusion with the amplifier for convenient bass adjustment.
6. Manteniment
Your NVX XAD15 amplifier is designed for reliable operation with minimal maintenance. However, periodic checks can help ensure its longevity.
- Neteja: Feu servir un drap suau i sec per netejar el amplifier's exterior. Do not use liquid cleaners or solvents. Ensure cooling fins are free of dust and debris.
- Comprovació de la connexió: Periodically inspect all power, ground, remote, RCA, and speaker connections to ensure they are secure and free from corrosion. Loose connections can cause performance issues or damage.
- Ventilació: Assegureu-vos el amplifier's mounting location remains clear of obstructions to maintain proper airflow.
7. Solució De Problemes
Si teniu problemes amb el vostre amplificador, consulteu els problemes i solucions habituals següents abans de contactar amb el servei d'assistència.
| Problema | Causa possible | Solució |
|---|---|---|
| Amplifier does not turn on (no power light). |
|
|
| No hi ha so del subwoofer. |
|
|
| Amplifier goes into protection mode (red light). |
|
|
| So distorsionat. |
|
|
8. Especificacions
Detailed technical specifications for the NVX XAD15 Monoblock Ampmés viu.
| Característica | Especificació |
|---|---|
| Número de model | NVX XAD15 |
| Potència de sortida RMS | 5000W Total RMS |
| Resposta de freqüència | 10 - 300 Hz |
| Impedància mínima | 1-Ohm Stable |
| AmpClasse lifier | Class D (Full Bridge) |
| Font d'alimentació | Pulse Width Modulated (PWM) MOSFET |
| Circuit de protecció | 3-Way (Thermal, Overload, Speaker Shortage) |
| Dimensions (L x L x A) | 10.5" x 8.75" x 2.5" (26.67 cm x 22.23 cm x 6.35 cm) |
| Voltage | 12 volts (CC) |
| Nombre de canals | 1 (Monobloc) |
| Certificacions | CE, CSA, FCC, RoHS, TUV, WEEE |
| UPC | 810021843339 |
9. Garantia i Suport
NVX products are designed for durability and performance. For specific warranty details, including coverage period and terms, please refer to the warranty card included with your product or visit the official NVX weblloc web. Conserveu el comprovant de compra per a reclamacions de garantia.
For technical support, troubleshooting assistance beyond this manual, or warranty inquiries, please contact NVX customer service through their official website or authorized dealer where the product was purchased.
Recursos en línia:
- Official NVX Weblloc: www.nvx.com (Nota: Això és un marcador de posició) URL, refer to actual product documentation for correct URL)
Ask a question about this manual
Ask about setup, troubleshooting, compatibility, parts, safety, or missing instructions. Manuals+ will review the question and use this page’s manual context to help answer it.