
Introducció
This instruction manual provides detailed guidance for the installation, operation, and maintenance of your Light My Bricks Light Kit, specifically designed for the LEGO Porsche 911 (LEGO Set 10295). Please read these instructions carefully before beginning the installation process to ensure proper functionality and to avoid damage to your lighting kit or LEGO model.
The Light My Bricks kit enhances your LEGO Porsche 911 by adding realistic illumination to various parts of the model, bringing it to life with custom-designed LED lights and wiring components. This kit does not include the LEGO Porsche 911 set itself.
Producte acabatview
The Light My Bricks Light Kit for the LEGO Porsche 911 (Model 10295) includes a variety of custom-designed lighting components to illuminate your LEGO model. These components are small and require careful handling during installation.

Image: The Light My Bricks Light Kit packaging alongside an illuminated LEGO Porsche 911 model, demonstrating the product's effect.
The kit typically contains:
- LED light strings or individual LEDs
- Cables de connexió
- Expansion boards
- Battery pack or USB power cable
- Adhesive squares or LEGO-compatible attachment pieces
Please verify all components are present upon opening the package. Refer to the included component list in your physical kit for exact contents.
Informació de seguretat
- Advertència de peces petites: This kit contains small parts which may pose a choking hazard. Keep out of reach of small children.
- Components elèctrics: Handle all electrical components with care. Do not bend wires excessively or apply undue force to connectors.
- Font d'alimentació: Use only the recommended power source (e.g., specified battery type or USB power) to avoid damage to the lights or the LEGO model.
- Entorn d'instal·lació: Perform installation in a well-lit, clean, and organized workspace to prevent loss of small parts.
- Desmuntatge: If partial disassembly of your LEGO model is required, do so carefully to avoid breaking LEGO bricks.
Instruccions de configuració
Installation of the Light My Bricks kit requires careful attention to detail. It is recommended to follow the step-by-step video instructions provided by Light My Bricks on their official website or YouTube channel for the LEGO Porsche 911 (Model 10295), as these visual guides offer the most precise installation method.
Passos generals d'instal·lació:
- Preparació: Ensure your LEGO Porsche 911 (Model 10295) is fully assembled and stable. Gather all components of the Light My Bricks kit.
- Identify Lighting Points: Review the instructions (physical or video) to identify where each light component will be placed on your LEGO model. Common areas include headlights, taillights, interior, and dashboard.
- Partial Disassembly (if necessary): Some areas of the LEGO model may require partial disassembly to properly route wires and install lights. Carefully remove only the necessary bricks.
- Instal·lar llums: Attach the LED lights to their designated positions. Many lights are designed to fit under or between LEGO studs. Use adhesive squares if provided for secure placement.
- Cables de ruta: Carefully route the thin connecting wires between LEGO bricks. Ensure wires are not pinched or stretched. Utilize existing gaps or create small channels by slightly adjusting brick placement if needed.
- Connect to Expansion Boards: Connect the individual light wires to the expansion boards. Pay attention to the correct orientation and port numbers as indicated in the detailed instructions.
- Connectar la font d'alimentació: Attach the expansion boards to the main power source (battery pack or USB cable).
- Funcionalitat de prova: Before reassembling all LEGO bricks, connect the power and test all lights to ensure they are working correctly. Adjust connections if any lights are not functioning.
- Assemblea final: Carefully reassemble any disassembled LEGO bricks, ensuring wires are neatly tucked away and not visible or damaged.
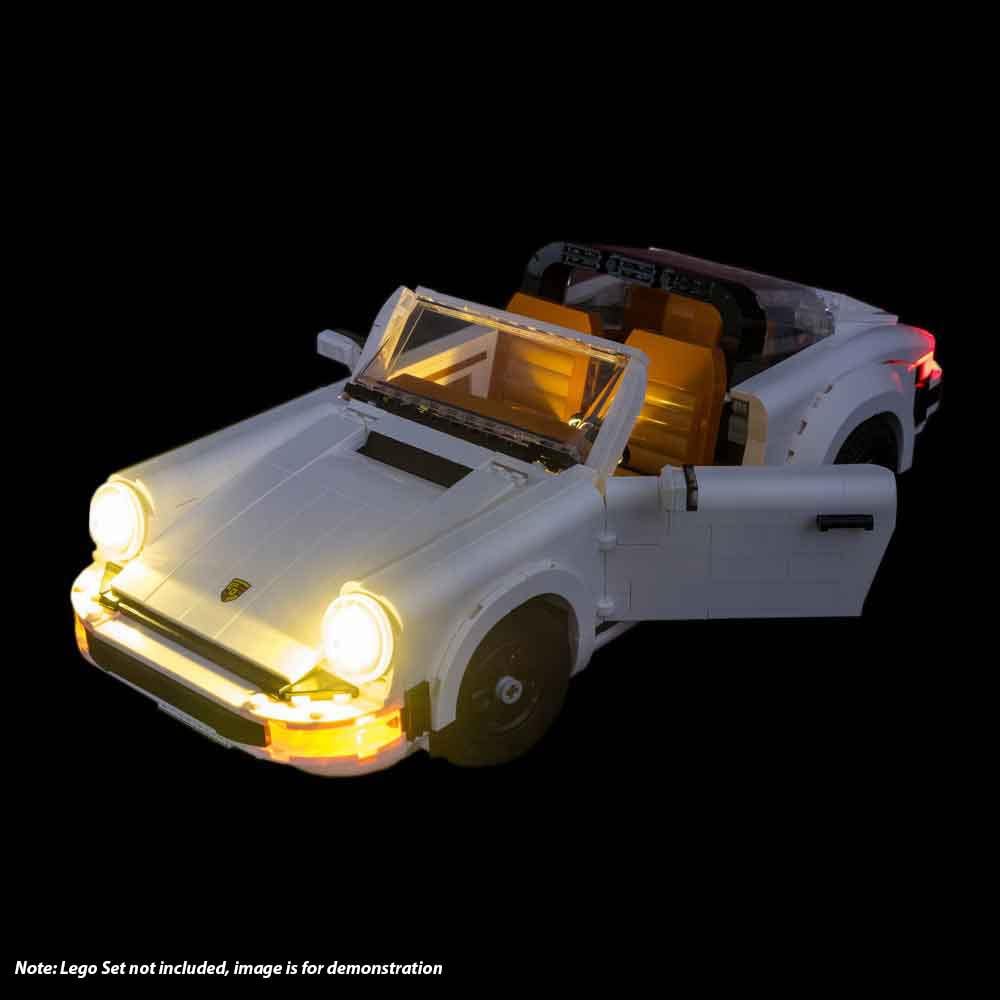
Imatge: Frontal view of the LEGO Porsche 911 in convertible configuration, showcasing the illuminated headlights and interior.

Imatge: Part posterior view of the LEGO Porsche 911 in convertible configuration, highlighting the illuminated taillights and license plate.

Imatge: Frontal view of the LEGO Porsche 911 in coupe configuration, showing the illuminated headlights and interior.
Instruccions de funcionament
Once the Light My Bricks kit is fully installed and connected to a power source, operation is straightforward:
- Encès: If using a battery pack, ensure fresh batteries are inserted and turn the switch to the "ON" position. If using a USB power cable, connect it to a compatible USB power adapter or port.
- Apagar: To turn off the lights, switch the battery pack to the "OFF" position or disconnect the USB power cable.
Some kits may include additional features such as remote controls or effect boards. Refer to your specific kit's documentation for instructions on these advanced functionalities.
Manteniment
- Neteja: To clean the lights or wires, gently wipe with a dry, soft cloth. Avoid using liquids or abrasive cleaners.
- Substitució de la bateria: If using a battery pack, replace batteries when lights dim or cease to function. Ensure correct polarity when inserting new batteries.
- Emmagatzematge: When not in use for extended periods, disconnect the power source (remove batteries or unplug USB) to prevent battery drain or potential damage. Store the model in a cool, dry place away from direct sunlight.
- Integritat del cable: Periodically inspect wires for any signs of wear, pinching, or damage. If damage is observed, contact customer support.
Resolució de problemes
| Problema | Causa possible | Solució |
|---|---|---|
| Els llums no s'encenen. | No power, loose connection, dead batteries. | Check power source (batteries or USB). Ensure all connections are secure. Replace batteries if necessary. |
| Alguns llums no funcionen. | Loose connection, damaged LED/wire. | Inspect connections for the non-working lights. Gently re-seat connectors. If a specific LED or wire is damaged, contact support. |
| Els llums parpellegen. | Alimentació inestable, connexió fluixa. | Ensure power source is stable. Check all connections, especially to the expansion board and power source. |
| Wires are visible or pinched. | Improper routing during installation. | Carefully re-route wires, ensuring they are tucked between bricks or in natural gaps. Avoid forcing bricks together if wires are obstructing. |
Especificacions
- Model de producte: 10295 (Light Kit for LEGO Porsche 911)
- Marca: Encén els meus maons
- Dimensions del producte: 4.72 x 1.18 x 7.87 polzades (dimensions de l'embalatge)
- Pes de l'article: 6.3 ounces (Packaging weight)
- Compatibilitat: Designed for LEGO Set 10295 (Porsche 911)
- Edat recomanada: 7 months and up (Note: Light kit installation is generally for older children/adults due to small parts and delicate handling.)
Garantia i Suport
For specific warranty information regarding your Light My Bricks Light Kit, please refer to the documentation included with your purchase or visit the official Light My Bricks weblloc. Els termes de la garantia solen cobrir els defectes de fabricació.
If you encounter any issues not covered in the troubleshooting section or require further assistance, please contact Light My Bricks customer support directly. Contact details can usually be found on their weblloc o embalatge del producte.