
Introducció
This manual provides essential information for the safe and effective use of your Vividia CT-6010 LCD/WiFi Flexible Two-Way Articulating Inspection Camera Borescope Videoscope. Please read these instructions carefully before operating the device and retain them for future reference.

Figure 1: Vividia CT-6010 Borescope main unit with flexible probe.
Configuració
1. Desembalatge i identificació dels components
Carefully unpack all items from the packaging. Ensure all components are present and undamaged. The package typically includes:
- Vividia CT-6010 Main Unit with LCD Display
- Flexible Articulating Probe (6mm diameter, 1.0m length)
- Adaptador/carregador de corrent
- Cable USB
- Maleta de transport
- Corretja d'espatlla

Figure 2: Contents of the Vividia CT-6010 package.
2. Càrrega del dispositiu
Before first use, fully charge the device. Connect the power adapter to the Entrada DC port on the main unit and plug it into a power outlet. The charging indicator will show the charging status.
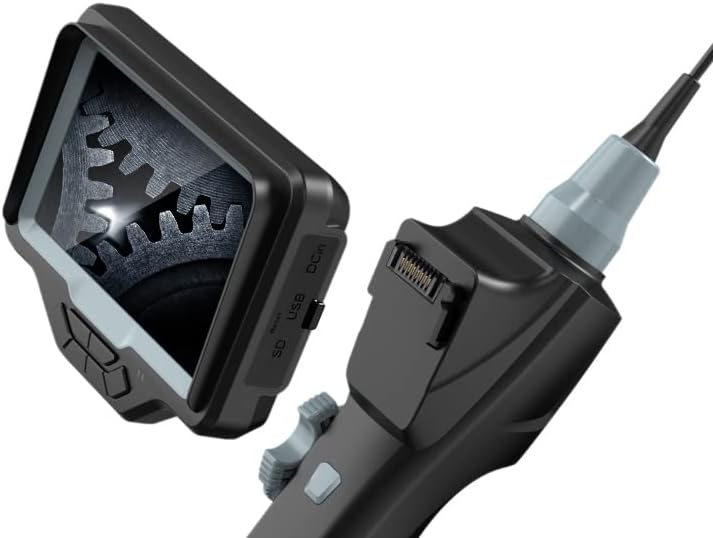
Figure 3: DC In port for charging, along with SD and USB ports.
3. Inserció d'una targeta SD
To save photos and videos, insert a compatible Micro SD card (not included) into the SD card slot on the side of the main unit. Ensure the card is inserted correctly until it clicks into place.
4. Encès / apagat
Manteniu premut el botó Poder button located on the control panel to turn the device on or off. The LCD screen will illuminate upon startup.
5. WiFi Connection (Optional)
The CT-6010 features built-in WiFi for connecting to iPhone, iPad, or Android devices. Follow these steps:
- Turn on the CT-6010 device.
- Enable WiFi on your mobile device.
- Cerca the CT-6010's WiFi network (usually named 'Vividia_XXXX').
- Connect to the network using the provided password (refer to the device screen or a sticker on the unit).
- Open the dedicated Vividia app on your mobile device to view the live feed and control functions.

Figura 4: Example of WiFi connection to a mobile device.
Instruccions de funcionament
1. Controls bàsics
The main unit features several buttons for operation:
- Botó d'encesa: Encén/apaga el dispositiu.
- Botó D'acord: Confirms selections in the menu or captures media.
- Botó de menú: Accedeix a la configuració del dispositiu.
- Botó de llum (*): Adjusts the brightness of the LED lights on the probe tip.
- Photo/Video Capture Button: A dedicated button on the handle for quick photo or video recording.

Figure 5: Location of the Photo/Video Capture button.
2. Probe Articulation
The CT-6010 features a two-way articulating probe. Use the articulation knob on the handle to precisely control the bending direction of the probe tip. The probe can bend more than 180 degrees in two directions, allowing for comprehensive inspection of hard-to-reach areas.
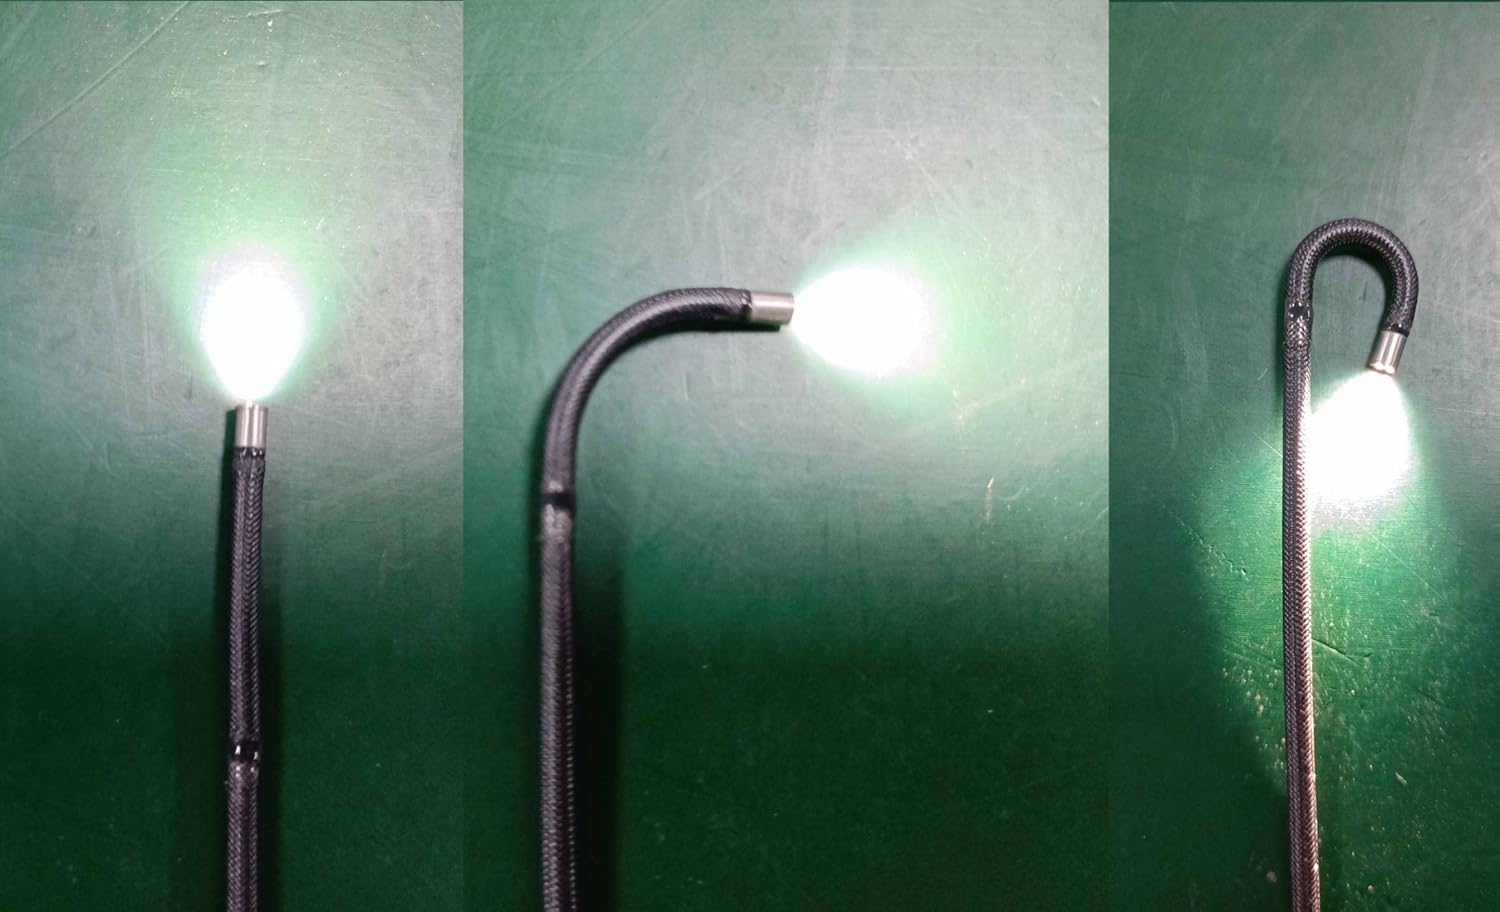
Figura 6: Examples of probe articulation.

Figure 7: Close-up of the articulating probe tip.
3. Ajust de la il·luminació
Premeu el botó * (Light) button to cycle through different brightness levels for the LED lights at the probe tip. Adjust the illumination to achieve optimal visibility in various inspection environments.
4. Captura de fotos i vídeos
Mentre viewing the live feed, press the Botó de captura de foto/vídeo on the handle to take a still image. To record a video, press and hold the button briefly to start recording, and press it again to stop. Captured media is saved to the inserted SD card.
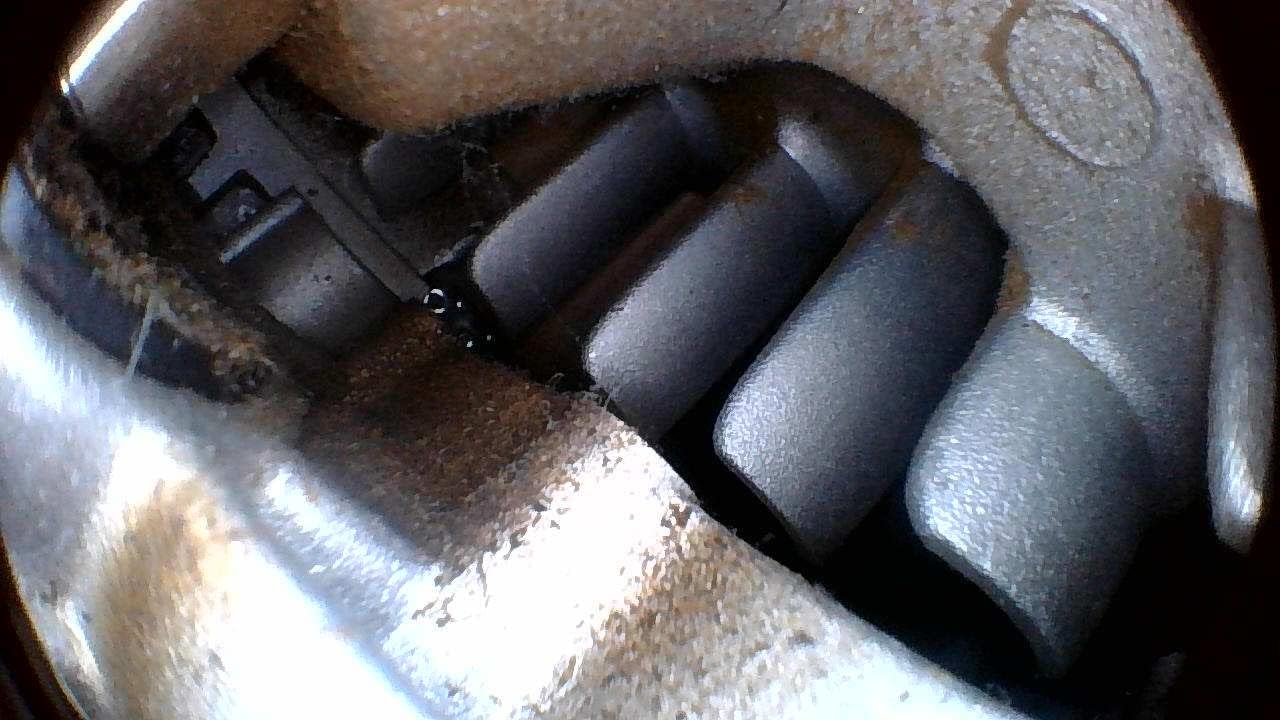
Figura 8: Example of an inspection view.
5. Navegació i configuració del menú
Premeu el botó Menú button to access device settings. Use the directional buttons (often integrated with OK/Light buttons) to navigate through options such as resolution, date/time, language, and playback. Press OK to confirm selections and Menú de nou per sortir.
Manteniment
1. Neteja
- Sonda: After each use, gently wipe the probe and camera lens with a soft, damp cloth. For stubborn dirt, use a mild cleaning solution. Ensure no liquid enters the main unit.
- Unitat principal: Wipe the main unit with a dry, soft cloth. Avoid using abrasive cleaners or solvents.
2. Cura de la bateria
Per allargar la durada de la bateria:
- Charge the device fully before long periods of storage.
- Eviteu emmagatzemar el dispositiu en entorns extremadament calents o freds.
- If not used for an extended period, charge the battery every 3-6 months.
3. Emmagatzematge
Store the CT-6010 in its carrying case in a cool, dry place, away from direct sunlight and extreme temperatures. Ensure the probe is coiled loosely and not sharply bent to prevent damage.
4. Resistència a l'aigua
The flexible probe is rated IP67 waterproof, meaning it can withstand immersion in water up to 1 meter for 30 minutes. The main unit is NOT waterproof. Do not immerse the main unit in water or expose it to heavy rain.
Resolució de problemes
| Problema | Causa possible | Solució |
|---|---|---|
| El dispositiu no s'encén. | Bateria baixa; botó d'engegada no premut correctament. | Charge the device fully; Press and hold the Power button for a few seconds. |
| Cap imatge a la pantalla. | Probe not connected properly; Camera lens obstructed/dirty. | Ensure the probe is securely connected; Clean the camera lens. |
| La connexió WiFi falla. | Incorrect password; App not installed; Device out of range. | Verify WiFi password; Install the correct Vividia app; Move closer to the device. |
| Probe articulation is stiff or stuck. | Obstruction; Mechanical issue. | Do not force the articulation. Gently retract the probe and check for obstructions. If the issue persists, contact support. |
| Mala qualitat d'imatge. | Insufficient lighting; Dirty lens; Incorrect focus (if adjustable). | Adjust LED brightness; Clean the camera lens; Ensure proper distance from object. |
Especificacions
| Característica | Detall |
|---|---|
| Diàmetre de la sonda | 6 mm (0.236 polzades) |
| Longitud de la sonda | 1.0 metre (3.3 peus) |
| Resolució de la càmera | HD 1280x720 |
| Articulació | 2-way, max. bending angle >180 degrees |
| Connectivitat | Built-in WiFi (for iPhone, iPad, Android) |
| Classificació impermeable | IP67 (probe only) |
| Mostra | LCD integrada |
| Resolució de captura de vídeo | 720p |
| Flash de la càmera | LEDs integrats |
| Fabricant | Vividia Technologies |
| Data de primera disponibilitat | 12 de gener de 2022 |

Figure 9: Probe diameter measurement.

Figure 10: Probe length illustration.
Garantia i Suport
Informació de la garantia
The Vividia CT-6010 is covered by a manufacturer's warranty. Please refer to the warranty card included with your product or visit the official Vividia Technologies weblloc web per obtenir informació detallada sobre els termes i condicions de la garantia.
Atenció al client
For technical assistance, troubleshooting beyond this manual, or warranty claims, please contact Vividia Technologies customer support. Contact information can typically be found on the manufacturer's weblloc web o a la documentació del producte.