
EZ Solar JB-1.2
EZ Solar JB-1.2 Rooftop PV Junction Box User Manual
Model: JB-1.2
1. Introducció
The EZ Solar JB-1.2 Rooftop PV Junction Box is designed to provide a secure and weather-tight enclosure for electrical connections in photovoltaic (PV) systems installed on various roof types, including composite shingle, tile, and metal roofs. This junction box simplifies the wiring process, offering a reliable solution for managing solar panel electrical connections while maintaining roof integrity. Its patented design ensures fast and easy installation with a minimum number of components.

Figura 1.1: superior view of the EZ Solar JB-1.2 Rooftop PV Junction Box, showing the EZ Solar logo and model number.
2. Informació de seguretat
Always adhere to local electrical codes and regulations. Installation should be performed by qualified personnel. Failure to follow these instructions may result in electric shock, fire, or other hazards.
- Desconnecteu totes les fonts d'alimentació abans de la instal·lació o el manteniment.
- Utilitzeu l'equip de protecció individual (EPI) adequat, incloent-hi guants i protecció ocular.
- Assegureu-vos que totes les connexions estiguin segures i aïllades correctament.
- Use only approved wiring and components that meet the required specifications.
- Properly seal all entry points to prevent water ingress.
3. Contingut del paquet
Verifiqueu que tots els components siguin presents abans de començar la instal·lació:
- EZ Solar JB-1.2 Rooftop PV Junction Box enclosure
- Ferramenteria de muntatge (cargols, volanderes)
- Gland nuts for cable entry
- Manual d'instruccions (aquest document)
4. Especificacions
| Atribut | Valor |
|---|---|
| Número de model | JB-1.2 |
| Marca | EZ Solar |
| Material | Plàstic |
| Color | Negre |
| Estil | Compacte |
| Tipus d'acabat | Recobert de pols |
| Dimensions del paquet | 14.09 x 11.14 x 3.31 polzades |
| Pes | 1.5 lliures |
5. Instal·lació
Proper installation is crucial for the long-term performance and weather resistance of the JB-1.2 junction box. Follow these steps carefully.
5.1. Preparació del lloc
- Identify the optimal location for the junction box on the roof, ensuring it is accessible for future maintenance and provides a direct path for wiring.
- Clean the roof surface where the junction box will be mounted, removing any debris or loose materials.
- Marqueu els punts de perforació per als cargols de muntatge.

Figura 5.1: Mésview of a rooftop solar installation, showing the context for junction box placement.
5.2. Mounting the Junction Box
- Apply a generous bead of roofing sealant around the marked drilling points on the roof surface. This is critical for preventing leaks.
- Position the junction box over the marked points and align the mounting holes.
- Secure the junction box to the roof using the provided mounting screws. Ensure screws are driven firmly but do not overtighten.
- Apply additional sealant over the screw heads and around the base of the junction box to create a watertight seal.

Figure 5.2: Applying sealant to the junction box base for a watertight seal.
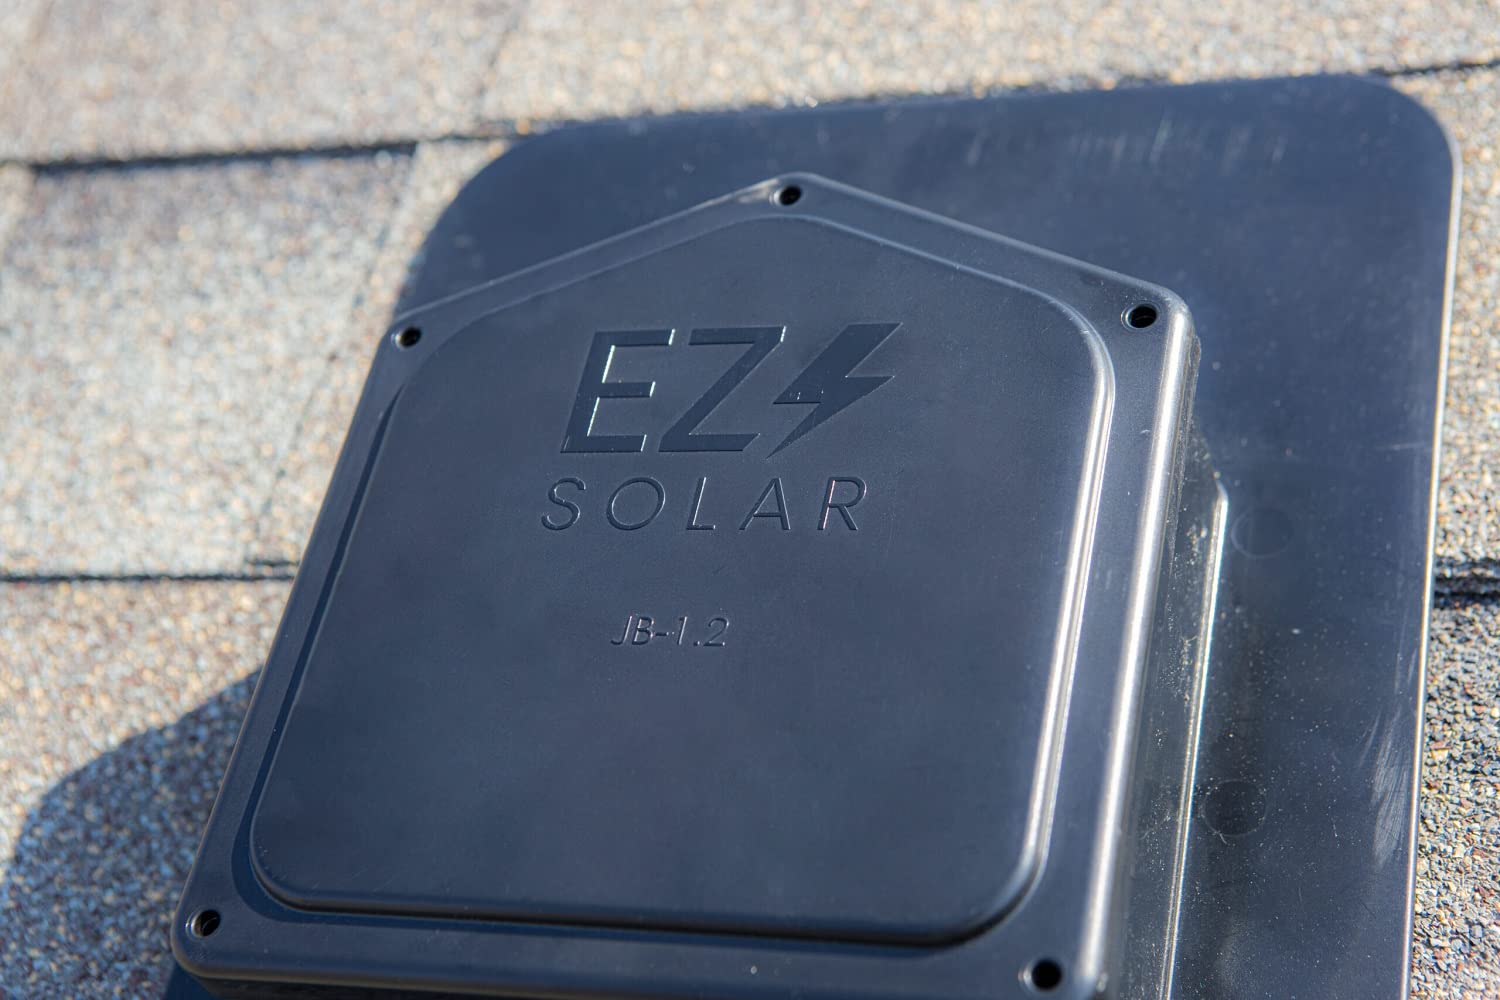
Figure 5.3: The JB-1.2 junction box securely mounted on a shingle roof.
5.3. Connexions de cablejat
- Open the lid of the junction box by removing the retaining screws.
- Feed the solar panel cables and the main circuit cables through the designated entry points using the provided gland nuts to ensure a tight seal.
- Connect the wires according to your system's electrical diagram. Ensure proper polarity and secure all connections using appropriate wire connectors (e.g., wire nuts, terminal blocks).
- Verify all connections are firm and insulated to prevent short circuits.

Figure 5.4: Internal wiring of the junction box, demonstrating cable routing and connections.

Figura 5.5: Detallada view of wire connections inside the JB-1.2, including ground and power lines.

Figure 5.6: The junction box on the roof with wiring in progress, showing the open enclosure.
5.4. Closing the Enclosure
- Carefully arrange the wires inside the junction box to avoid pinching when closing the lid.
- Place the lid back onto the enclosure, ensuring a proper fit.
- Secure the lid with the retaining screws, tightening them evenly to ensure a watertight seal.

Figure 5.7: The lid of the JB-1.2 junction box, ready to be secured.

Figure 5.8: The JB-1.2 junction box fully installed and sealed on a shingle roof, blending with the surroundings.
6. Funcionament
The EZ Solar JB-1.2 Rooftop PV Junction Box is a passive component designed to protect and organize electrical connections. Once properly installed and sealed, it requires no active operation. Its function is to provide a safe and weather-resistant enclosure for the wiring of your photovoltaic system.
7. Manteniment
Regular inspection of the junction box can help ensure the longevity and safety of your solar installation.
- Annual Visual Inspection: Periodically check the exterior of the junction box for any signs of damage, cracks, or degradation due to weather exposure.
- Integritat del segell: Inspect the sealant around the base and screw heads for any signs of cracking or deterioration. Reapply sealant as necessary to maintain a watertight barrier.
- Prensacables: Ensure that all cable gland nuts are tight and that cables are not pulling or stressing the entry points.
- Inspecció interna (si cal): If there are concerns about electrical issues or water ingress, disconnect power and carefully open the box to inspect internal wiring for corrosion, loose connections, or signs of overheating. This should only be done by qualified personnel.
8. Solució De Problemes
This section addresses common issues that may arise with the junction box. For complex electrical problems, consult a certified electrician.
8.1. Fuga d'aigua
- Símptoma: Water ingress inside the junction box or signs of moisture around its base.
- Possible causa: Inadequate sealing during installation or degradation of sealant over time.
- Solució: Disconnect power. Inspect all sealed areas (screw heads, base perimeter, cable glands). Clean and reapply high-quality roofing sealant to all affected areas. Ensure gland nuts are tightened securely around cables.
8.2. Connexions soltes
- Símptoma: Intermittent power, flickering lights, or reduced solar panel output.
- Possible causa: Wires not securely fastened within the junction box.
- Solució: Disconnect all power. Open the junction box and visually inspect all wire connections. Tighten any loose wire nuts or terminal screws. Ensure wires are properly seated.
9. Garantia i Suport
For warranty information and technical support, please refer to the official EZ Solar weblloc web o poseu-vos en contacte amb el seu departament d'atenció al client. Conserveu el rebut de compra com a comprovant de compra.
EZ Solar Contact Information:
- Weblloc: www.ezsolar.com (Exampenllaç, substituïu-lo per l'actual si està disponible)
- Correu electrònic: support@ezsolar.com (Exampcorreu electrònic, substituïu-lo per l'actual si està disponible)
Ask a question about this manual
Ask about setup, troubleshooting, compatibility, parts, safety, or missing instructions. Manuals+ will review the question and use this page’s manual context to help answer it.