1. Introducció
This manual provides detailed instructions for the installation, operation, and maintenance of your Veement VU12 12-inch 4K WiFi Mirror Dash Cam. Please read this manual thoroughly before using the product to ensure proper functionality and safety. Keep this manual for future reference.
2. Contingut del paquet
Verifiqueu que tots els elements que s'enumeren a continuació s'inclouen al vostre paquet:
- 1 x Veement VU12 Mirror Dash Cam
- 1 x Rear Camera Kit (24.6ft cable)
- 1 x Carregador de cotxe
- 1 x Antena GPS
- 4 x Rubber Mounting Straps
3. Producte acabatview
The Veement VU12 is a 12-inch mirror dash cam featuring 4K front recording, 1080P rear recording, WiFi connectivity, GPS tracking, voice control, and a touch screen interface. It is designed to provide comprehensive vehicle surveillance and driving assistance.

Image: The Veement VU12 Mirror Dash Cam, showing the main unit, front camera, rear camera, and GPS module.
4. Instal·lació
4.1 Mirror Dash Cam Installation
- Secure the mirror dash cam over your vehicle's existing rearview mirror using the provided rubber mounting straps. Ensure the camera lens has a clear view de la carretera.
- Adjust the angle of the front camera lens to capture the desired field of view.
4.2 Instal·lació de la càmera posterior
- Mount the rear camera at the rear of your vehicle, typically above the license plate or inside the rear window. Ensure it has a clear view.
- Connect the rear camera cable to the main dash cam unit. Route the cable neatly along the vehicle's interior trim to avoid interference.
- If connecting for reverse assistance, connect the red wire of the rear camera cable to your vehicle's reverse light positive wire.
4.3 Instal·lació de l'antena GPS
- Attach the GPS antenna to the windshield, away from metallic objects or other electronic devices that might interfere with the signal.
- Connect the GPS antenna cable to the designated port on the main dash cam unit.
4.4 Connexió d'alimentació
- Inseriu el carregador del cotxe a la presa de l'encenedor del vostre vehicle.
- Connecteu l'altre extrem del cable del carregador del cotxe al port d'entrada d'alimentació de la càmera del salpicader.
- Col·loqueu el cable d'alimentació amb cura per evitar obstruir-vos view o interferint amb els controls de conducció.
5. Configuració
5.1 Inserció de la targeta SD
- Insert a high-speed (Class 10 or higher) Micro SD card (up to 128GB, not included) into the designated slot on the dash cam.
- Format the SD card through the dash cam's settings menu before first use to ensure compatibility and optimal performance.
5.2 Configuració inicial
- Upon powering on, the dash cam will display the main interface.
- Access the settings menu by tapping the gear icon on the screen.
- Adjust date/time, video resolution, loop recording duration, G-sensor sensitivity, and other preferences as needed.
5.3 WiFi Connection and GPS Tracking
The dash cam features built-in WiFi and GPS for enhanced functionality.

Image: The dash cam's WiFi connection to a smartphone app and GPS tracking functionality, displaying a map with a recorded route and speed data.
6. Instruccions de funcionament
6.1 Enregistrament bàsic
Once powered on and an SD card is inserted, the dash cam will automatically begin loop recording. The front camera records in 4K, and the rear camera records in 1080P.
6.2 Control de veu
The VU12 supports hands-free voice commands for common operations. Speak clearly to the dash cam to activate functions.
- "Start recording": Initiates video recording.
- "Stop recording": Halts video recording.
- "Lock the video": Protects the current recording from being overwritten.
- "Show front camera": Displays only the front camera view.
- "Show rear camera": Displays only the rear camera view.
- "Show both cameras": Displays both front and rear camera views simultàniament.
- "Turn on screen": Activates the display.
- "Turn off screen": Deactivates the display while recording continues.

Image: A driver using voice commands to control the dash cam, illustrating the hands-free interactive voice control feature.
Sensor G de 6.3 polzades (enregistrament d'emergència)
The built-in G-sensor detects sudden impacts or collisions. When triggered, it automatically locks the current video segment, preventing it from being overwritten by loop recording. The sensitivity of the G-sensor can be adjusted in the settings.

Image: A graphic depicting two cars in a collision, with a lock icon symbolizing the G-sensor's function to automatically save emergency footage.
6.4 Enregistrament en bucle
The dash cam records video in continuous loops. When the memory card is full, the oldest unlocked fileLes noves gravacions sobreescriuen automàticament les dades. Això garanteix una gravació contínua sense intervenció manual.

Image: A graphic illustrating the continuous loop recording function, where older files are overwritten by new ones when the memory card is full.
6.5 Parking Monitor (24H Parking Surveillance)
With an optional hardwire kit (not included), the dash cam can provide 24-hour parking surveillance. If an impact is detected while parked, the dash cam will automatically record a short video and lock it. Time-lapse recording is also available with the hardwire kit to maximize memory storage.
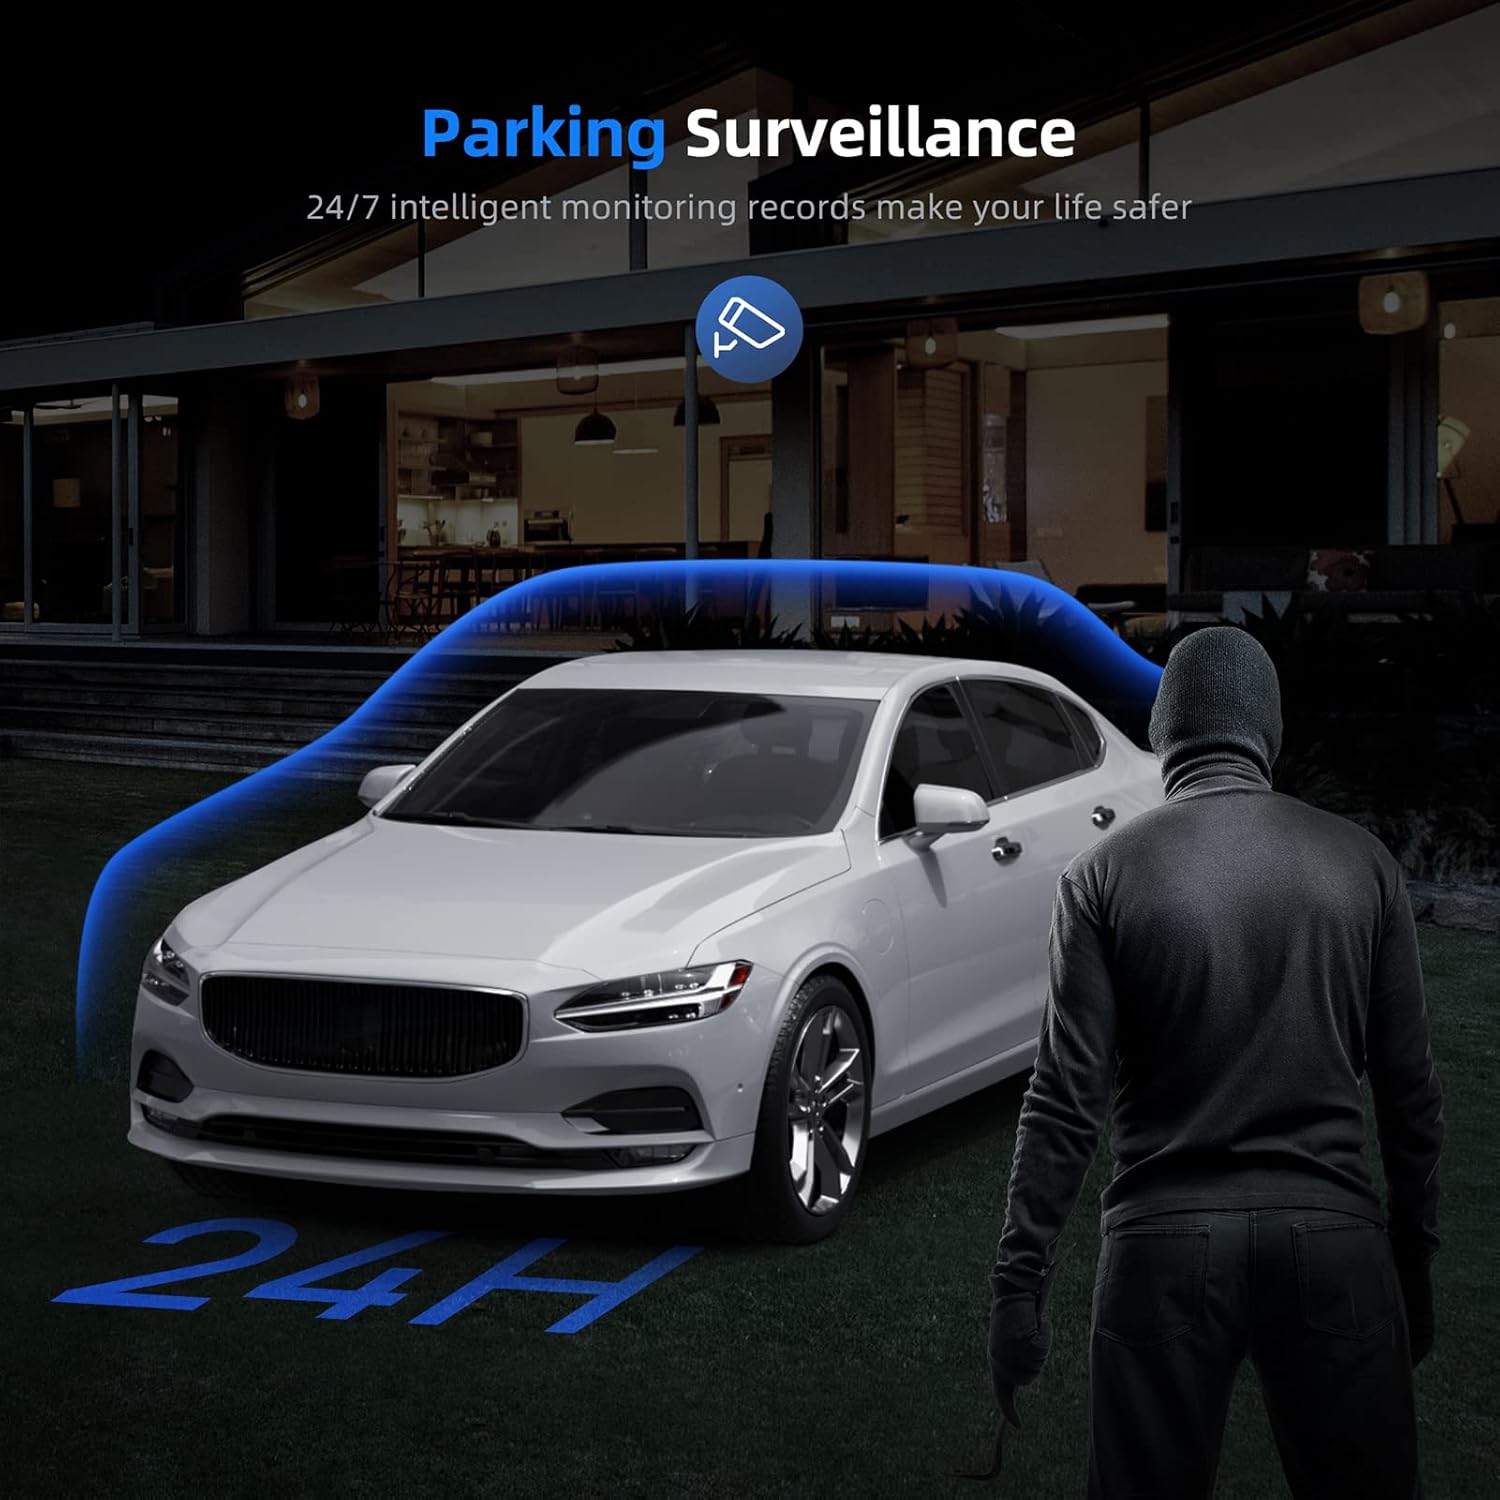
Image: A car parked at night with a figure approaching, illustrating the 24-hour parking surveillance feature.
6.6 Parking Assistance (Reverse Camera)
When the vehicle is shifted into reverse (and the rear camera is correctly wired to the reverse light), the dash cam screen will automatically display the rear camera view with parking assist lines, aiding in safe and easy parking.

Image: A car reversing into a parking spot, with parking assist lines displayed on the dash cam screen for guidance.
6.7 Visió nocturna
Equipped with a Sony Starvis sensor, the VU12 provides enhanced night vision capabilities, capturing clear details even in low-light conditions.

Image: The dash cam's display at night, demonstrating enhanced night vision capabilities with clear details of a street scene.
6.8 Gravació de vídeo 4K
The front camera records in Ultra HD 4K (3840*2160P), capturing sharp and detailed footage, including road signs and license plates.

Image: A comparison image showing the clarity difference between 4K and 1080P video recording, highlighting the superior detail of 4K footage.
7. App Connection (RoadCam APP)
The Veement VU12 features a built-in WiFi module, allowing you to connect to the "RoadCam" app on your smartphone for convenient control and file gestió.
- Download the "RoadCam" app from your smartphone's app store (iOS/Android).
- On the dash cam, navigate to the WiFi settings and enable the WiFi hotspot.
- On your smartphone, connect to the dash cam's WiFi network (SSID and password will be displayed on the dash cam screen).
- Obre l'aplicació "RoadCam". Ara pots view viu footage, navegar per vídeos gravats, descarregar files al telèfon i ajustar la configuració de manera remota.
8. Manteniment
- Neteja: Gently wipe the dash cam screen and lens with a soft, lint-free cloth. Avoid using abrasive cleaners or solvents.
- Cura de la targeta SD: Regularly format the SD card (at least once a month) through the dash cam's settings to maintain optimal performance and prevent data corruption. Replace the SD card if it shows signs of degradation or error.
- Temperatura: Eviteu exposar la càmera del salpicader a temperatures extremes durant períodes prolongats, ja que això pot afectar la durada de la bateria i la integritat dels components.
9. Solució De Problemes
| Problema | Possible solució |
|---|---|
| La càmera del salpicader no s'encén. | Comproveu la connexió d'alimentació al carregador del cotxe i assegureu-vos que la presa de l'encenedor del vehicle funcioni. |
| L'enregistrament s'atura inesperadament. | Ensure the SD card is Class 10 or higher and formatted correctly. The card might be full; enable loop recording or replace the card. |
| Vídeo footage és borrós o poc clar. | Clean the camera lens. Ensure the protective film has been removed. Check video resolution settings. |
| GPS signal is weak or unavailable. | Ensure the GPS antenna is properly connected and mounted in an open area, away from obstructions. |
| Voice control is not responding. | Speak clearly and directly towards the dash cam. Ensure the microphone is not obstructed. |
| La càmera posterior no es mostra. | Comproveu la connexió del cable de la càmera posterior a la unitat principal. Assegureu-vos que el cable no estigui malmès. |
10. Especificacions
| Característica | Detall |
|---|---|
| Nom del model | VU12 |
| Resolució de la càmera frontal | 4K (3840*2160P) |
| Resolució de la càmera posterior | 1080P (1920*1080P) |
| Pantalla de visualització | 12-inch IPS Full Touch Screen |
| Front Camera Field of View | 170° |
| Rear Camera Field of View | 160° |
| Sensor | Sony Starvis Sensor |
| Connectivitat | Wi-Fi, GPS (Geotagging) |
| Característiques especials | Voice Control, G-Sensor, Loop Recording, Parking Monitor (requires hardwire kit), Parking Assistance, Night Vision |
| Emmagatzematge | Micro SD Card (Class 10+, up to 128GB, not included) |
| Font d'alimentació | Carregador de cotxe (12V) |
| Dimensions (producte) | 13.39 x 4.72 x 2.76 polzades |
| Pes (article) | 2.07 lliures |
| Bateria | 1 bateria de polímer de liti (inclosa) |
11. Garantia i Suport
Veement products are covered by a limited warranty. For detailed warranty information, technical support, or service inquiries, please refer to the contact information provided with your purchase or visit the official Veement weblloc web. Si us plau, conserveu el comprovant de compra per a reclamacions de garantia.