
HITBOX HT111
HITBOX Automatic Welding Helmet User Manual
Model: HT111 | Brand: HITBOX
1. Introducció
Thank you for choosing the HITBOX Automatic Welding Helmet, Model HT111. This helmet is designed to provide superior eye and face protection during various welding and grinding operations. Featuring advanced auto-darkening technology with True Color views and a large viewing area, it ensures optimal clarity and comfort. Please read this manual thoroughly before use to ensure proper operation, maintenance, and safety.

Figure 1: HITBOX Automatic Welding Helmet (Model HT111)
2. Informació de seguretat
ADVERTIMENT: Welding and cutting processes produce intense light, heat, and harmful radiation that can cause severe eye and skin injuries. Always wear appropriate personal protective equipment (PPE) and follow all safety guidelines.
- Always inspect the helmet before each use for any damage, cracks, or loose parts. Do not use if damaged.
- Ensure the auto-darkening filter (ADF) is clean and free from scratches.
- Verify the helmet's shade setting is appropriate for your welding process and amperage before striking an arc.
- This helmet protects against UV/IR radiation even in the light state (shade DIN 4). However, always ensure the ADF darkens properly before beginning work.
- Do not immerse the helmet in water or any liquids.
- Do not modify the helmet or its components. Unauthorized modifications can compromise safety.
- Utilitzeu només peces de recanvi originals.
- Ensure adequate ventilation in your work area to avoid inhaling welding fumes.
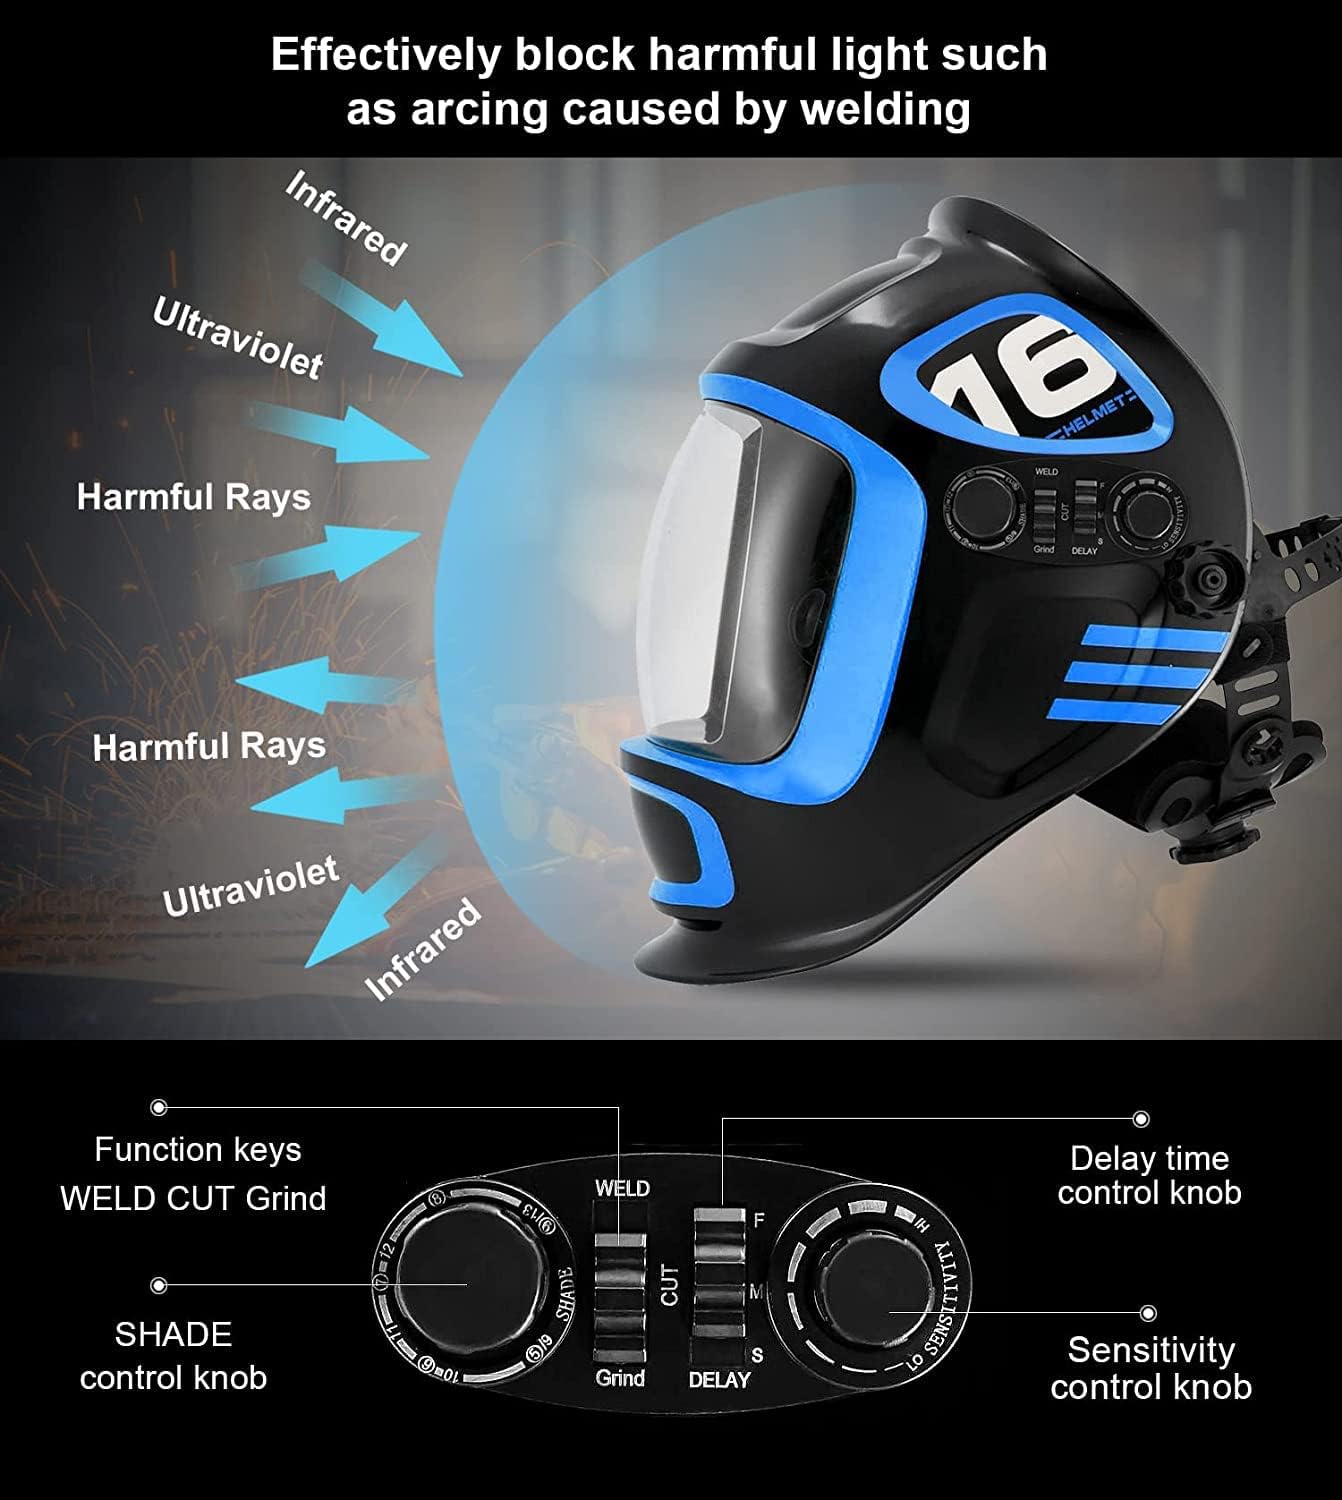
Figure 2: The helmet effectively blocks harmful ultraviolet and infrared radiation during welding.
3. Components del producte
The HITBOX Automatic Welding Helmet consists of the following main components:
- Carcassa del casc: Provides overall face and head protection.
- Auto-Darkening Filter (ADF): The electronic lens that automatically darkens upon arc ignition.
- Outer Protective Lens: Protects the ADF from spatter and scratches.
- Inner Protective Lens: Protects the inside of the ADF.
- Headgear Assembly: Adjustable straps and padding for comfortable and secure fit.
- Perilles de control: For adjusting shade, sensitivity, and delay settings.
- Arc Sensors (4): Detect the welding arc to trigger the ADF.
- Panell solar: Powers the ADF and recharges the internal battery.

Figure 3: Included components and accessories with the HITBOX Welding Helmet.
4. Configuració i ajust
Proper adjustment of the headgear is essential for comfort and safety.
- Assemble Headgear: If not pre-assembled, attach the headgear to the helmet shell using the pivot points. Ensure it is securely fastened.
- Ajustar el diàmetre de la diadema: Use the knob at the back of the headgear to adjust the circumference until it fits snugly but comfortably around your head.
- Ajustar la corretja superior: Adjust the top strap to position the helmet correctly on your head, ensuring the viewing window is at eye level.
- Adjust Distance from Face: Use the side knobs to adjust the distance of the helmet from your face. The ideal distance allows for clear vision and prevents fogging, without obstructing movement.
- Ajust d'angle: The helmet's angle can be adjusted to suit your working position.
- Funcionalitat de prova: Before welding, press the "TEST" button on the ADF (if available) to ensure it darkens properly. This confirms the battery and sensors are functioning.

Figure 4: Adjustable headgear for a personalized and comfortable fit.
5. Instruccions de funcionament
The HITBOX HT111 helmet supports multiple modes for various applications.
5.1. Selecció de mode
The helmet features a mode selector switch (WELD/CUT/GRIND) typically located on the side or inside the helmet.
- WELD Mode: For TIG, MIG, MMA, and Plasma welding. The ADF will automatically darken to the selected shade when an arc is detected.
- GRIND Mode: For grinding operations. In this mode, the ADF remains in its light state (DIN 4) to provide clear vision while protecting against impacts. The auto-darkening function is disabled.
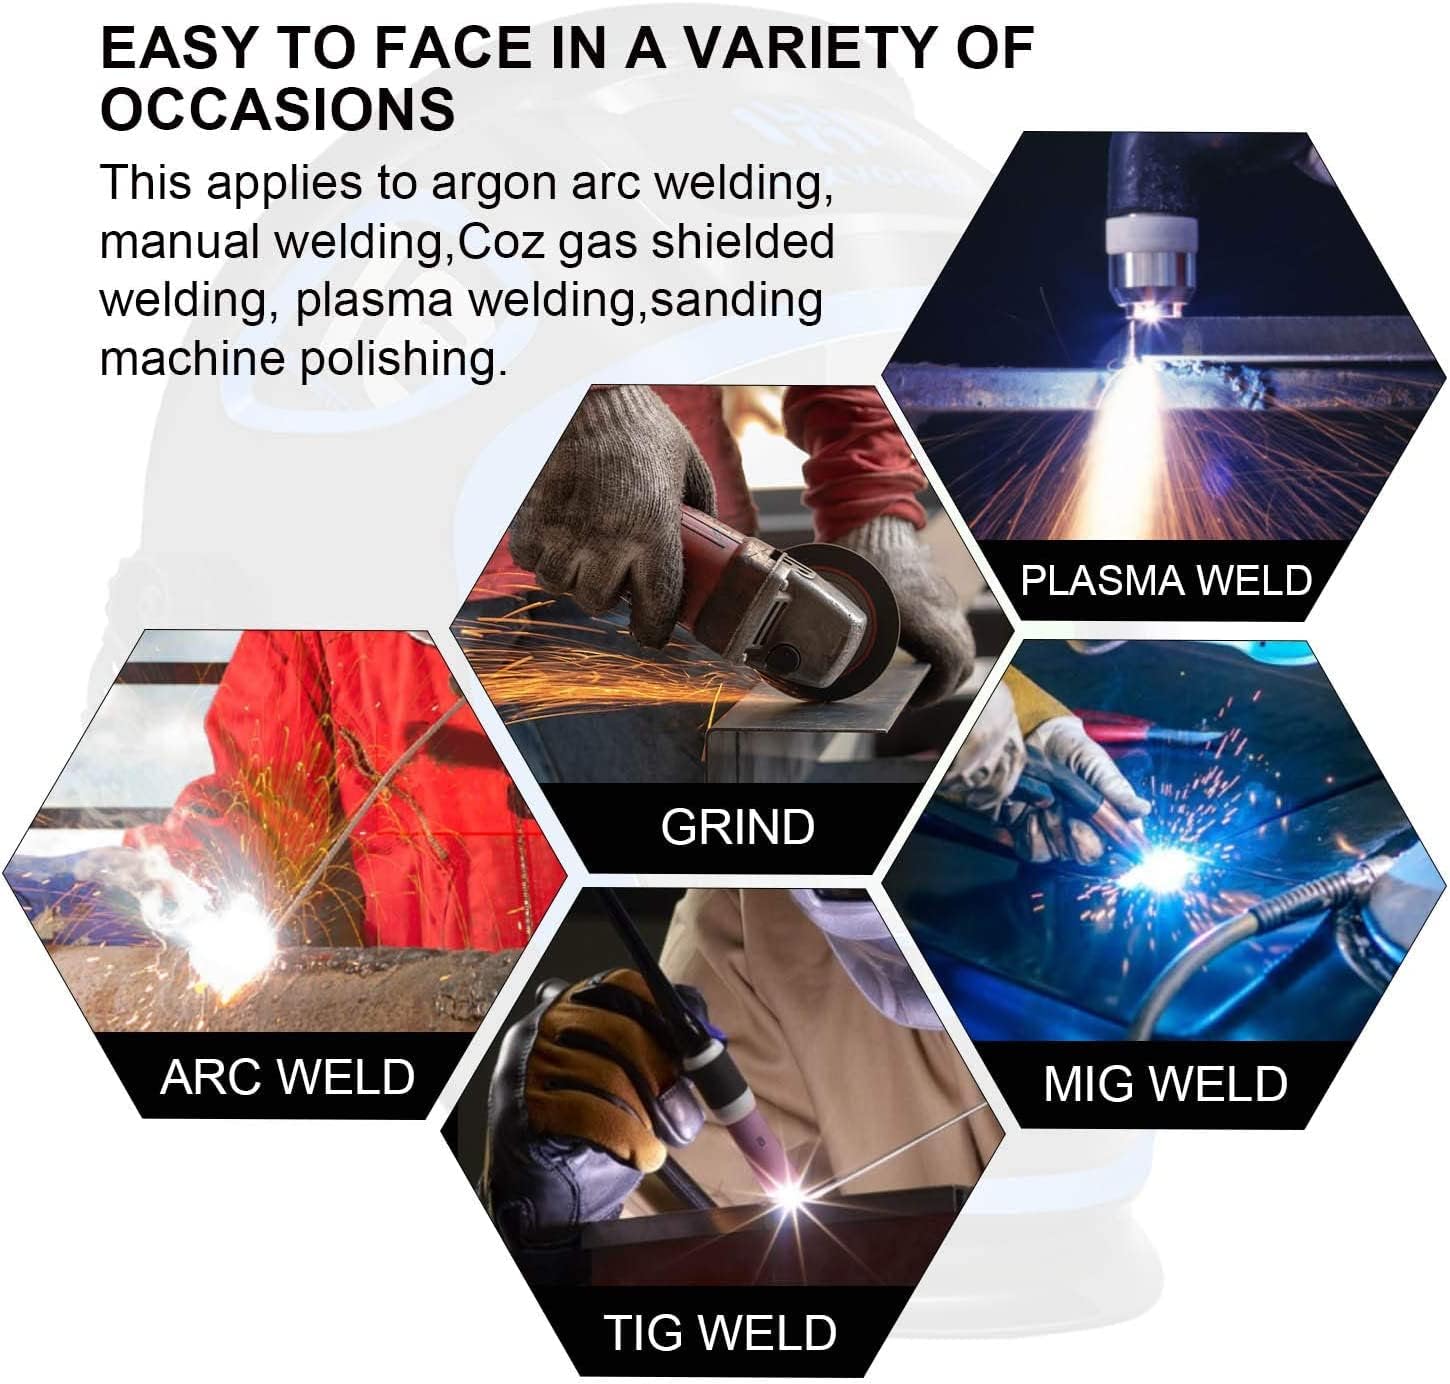
Figure 5: The helmet is suitable for various welding processes and grinding.
5.2. Control Knob Adjustments
The helmet is equipped with control knobs for fine-tuning performance:
- SHADE Control Knob (DIN 5/9-9/13): Adjusts the darkness level of the ADF. Refer to welding shade charts for appropriate settings based on your welding process and amperage. Start with a higher shade and decrease if visibility is poor.
- SENSITIVITY Control Knob: Adjusts how sensitive the arc sensors are to light. Increase sensitivity for low-amperage TIG welding or when working in low light conditions. Decrease sensitivity to prevent false triggering from ambient light.
- DELAY Time Control Knob (0.1S-0.8S): Adjusts the time the ADF remains dark after the arc extinguishes. A shorter delay is suitable for tack welding, while a longer delay helps protect eyes from afterglow or multiple short arcs.
Figure 6: Control knobs for adjusting shade, sensitivity, and delay settings.
6. Manteniment
Regular maintenance ensures the longevity and proper functioning of your welding helmet.
- Neteja:
- Clean the helmet shell with mild soap and water. Avoid harsh solvents.
- Clean the outer and inner protective lenses regularly with a soft, clean cloth and a suitable lens cleaning solution. Replace scratched or damaged lenses immediately.
- Gently wipe the ADF surface with a soft, dry cloth. Do not use abrasive materials or liquids directly on the ADF.
- Substitució de la bateria: The helmet uses a CR2 battery (1 included). While the solar panel extends battery life, the battery may eventually need replacement. Refer to the battery compartment for instructions on how to replace it. Ensure correct polarity.
- Emmagatzematge: Store the helmet in a dry, clean place away from direct sunlight and extreme temperatures. Use the provided storage bag to protect it from dust and scratches.
7. Solució De Problemes
If you encounter issues with your welding helmet, refer to the table below for common problems and solutions.
| Problema | Causa possible | Solució |
|---|---|---|
| ADF does not darken when arc is struck. |
|
|
| ADF flickers or darkens intermittently. |
|
|
| Mala visibilitat a través de l'ADF. |
|
|
If the problem persists after trying these solutions, please contact HITBOX customer support.
8. Especificacions tècniques
| Característica | Especificació |
|---|---|
| Número de model | HT111 (LYX800-F) |
| Viewàrea d’inici | 3.94" x 3.66" (10 cm x 9.3 cm) |
| Claredat òptica | 1/1/1/2 |
| Ombra d'estat clar | DIN 4 |
| Ombra d'estat fosc | DIN 5/9 - DIN 9/13 (Adjustable) |
| Sensors d'arc | 4 |
| Hora de canvi | ≤1/10000S |
| Temps de retard | 0.1S - 0.8S (Adjustable) |
| Font d'alimentació | Solar Cell & Replaceable Lithium Battery (1x CR2 included) |
| Protecció UV/IR | Fins a l'ombra DIN 16 en tot moment |
| Material | ABS |
| Pes | 850 grams |
| Temperatura de funcionament | -5 °C a +55 °C (23 °F a 131 °F) |

Figura 7: Gran viewing area for enhanced visibility.
9. Garantia i Suport
HITBOX products are manufactured to high-quality standards. For warranty information, technical support, or replacement parts, please contact your local dealer or visit the official HITBOX website. Please have your model number (HT111) and purchase date available when contacting support.
Fabricant: HITBOX
Weblloc: www.hitbox.com (Example link, actual webel lloc web pot variar)
Ask a question about this manual
Ask about setup, troubleshooting, compatibility, parts, safety, or missing instructions. Manuals+ will review the question and use this page’s manual context to help answer it.