
1. Introducció
This manual provides detailed instructions for the OOWOLF Monitor Light Bar Pro-Plus, Model TL03. It covers product setup, operational procedures, maintenance guidelines, troubleshooting tips, and comprehensive specifications. Please read this manual thoroughly to ensure proper use and to maximize the benefits of your monitor light bar.
2. Contingut del paquet
Verifiqueu que tots els elements que s'enumeren a continuació s'inclouen al vostre paquet:
- OOWOLF Computer Monitor Lamp
- Comandament a distància sense fil
- Cable de càrrega USB-C
- Manual d'usuari (aquest document)
3. Guia de configuració
3.1 Muntatge de la barra de llums
The OOWOLF Monitor Light Bar is designed for easy and secure attachment to most monitors. It utilizes a combination of a gentle spring and a counterweight to maintain position without damaging your screen.
- Obriu suaument el clamp mechanism on the light bar.
- Position the light bar on top of your monitor, ensuring the front light faces your desk and the backlight faces the wall behind the monitor.
- Adjust the counterweight at the back to ensure a stable fit. The small lip at the front helps prevent overlap with monitors that have small bezels.
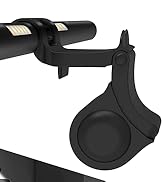
Figure 1: Illustration of the light bar's mounting mechanism.
3.2 Connexió de potència
Connect the provided USB-C cable to the light bar's power input and the other end to a 5V USB power source (e.g., computer USB port, power bank, or USB wall adapter).
Figure 2: USB-C power connection.
4. Instruccions de funcionament
The OOWOLF Monitor Light Bar is controlled via its wireless remote. Ensure the remote has power and is within range of the light bar.
4.1 Funcions de control remot
The wireless remote control allows for convenient adjustment of the light bar's settings. The remote features dedicated buttons for various functions:
- On/Off: Powers the light bar on or off.
- Ajust de brillantor (+/-): Increases or decreases the light intensity. This is a stepless dimming feature.
- Front Light Control: Toggles or adjusts the front-facing light.
- Control de la llum de fons: Toggles or adjusts the rear-facing backlight.
- Indica la llum: (Function not explicitly detailed, typically a status indicator).

Figure 3: Wireless remote control functions.
4.2 Ajust de la brillantor i la temperatura del color
The light bar offers stepless dimming and adjustable color temperature to suit various tasks and environments.
- Brillantor: Use the '+' and '-' buttons on the remote to adjust the brightness from 0% to 100%. The light bar remembers your last brightness setting.
- Temperatura de color: The light bar supports color temperatures from 3100K (warm white) to 6500K (cool white). Use the dedicated color temperature buttons on the remote to cycle through or adjust the desired warmth.
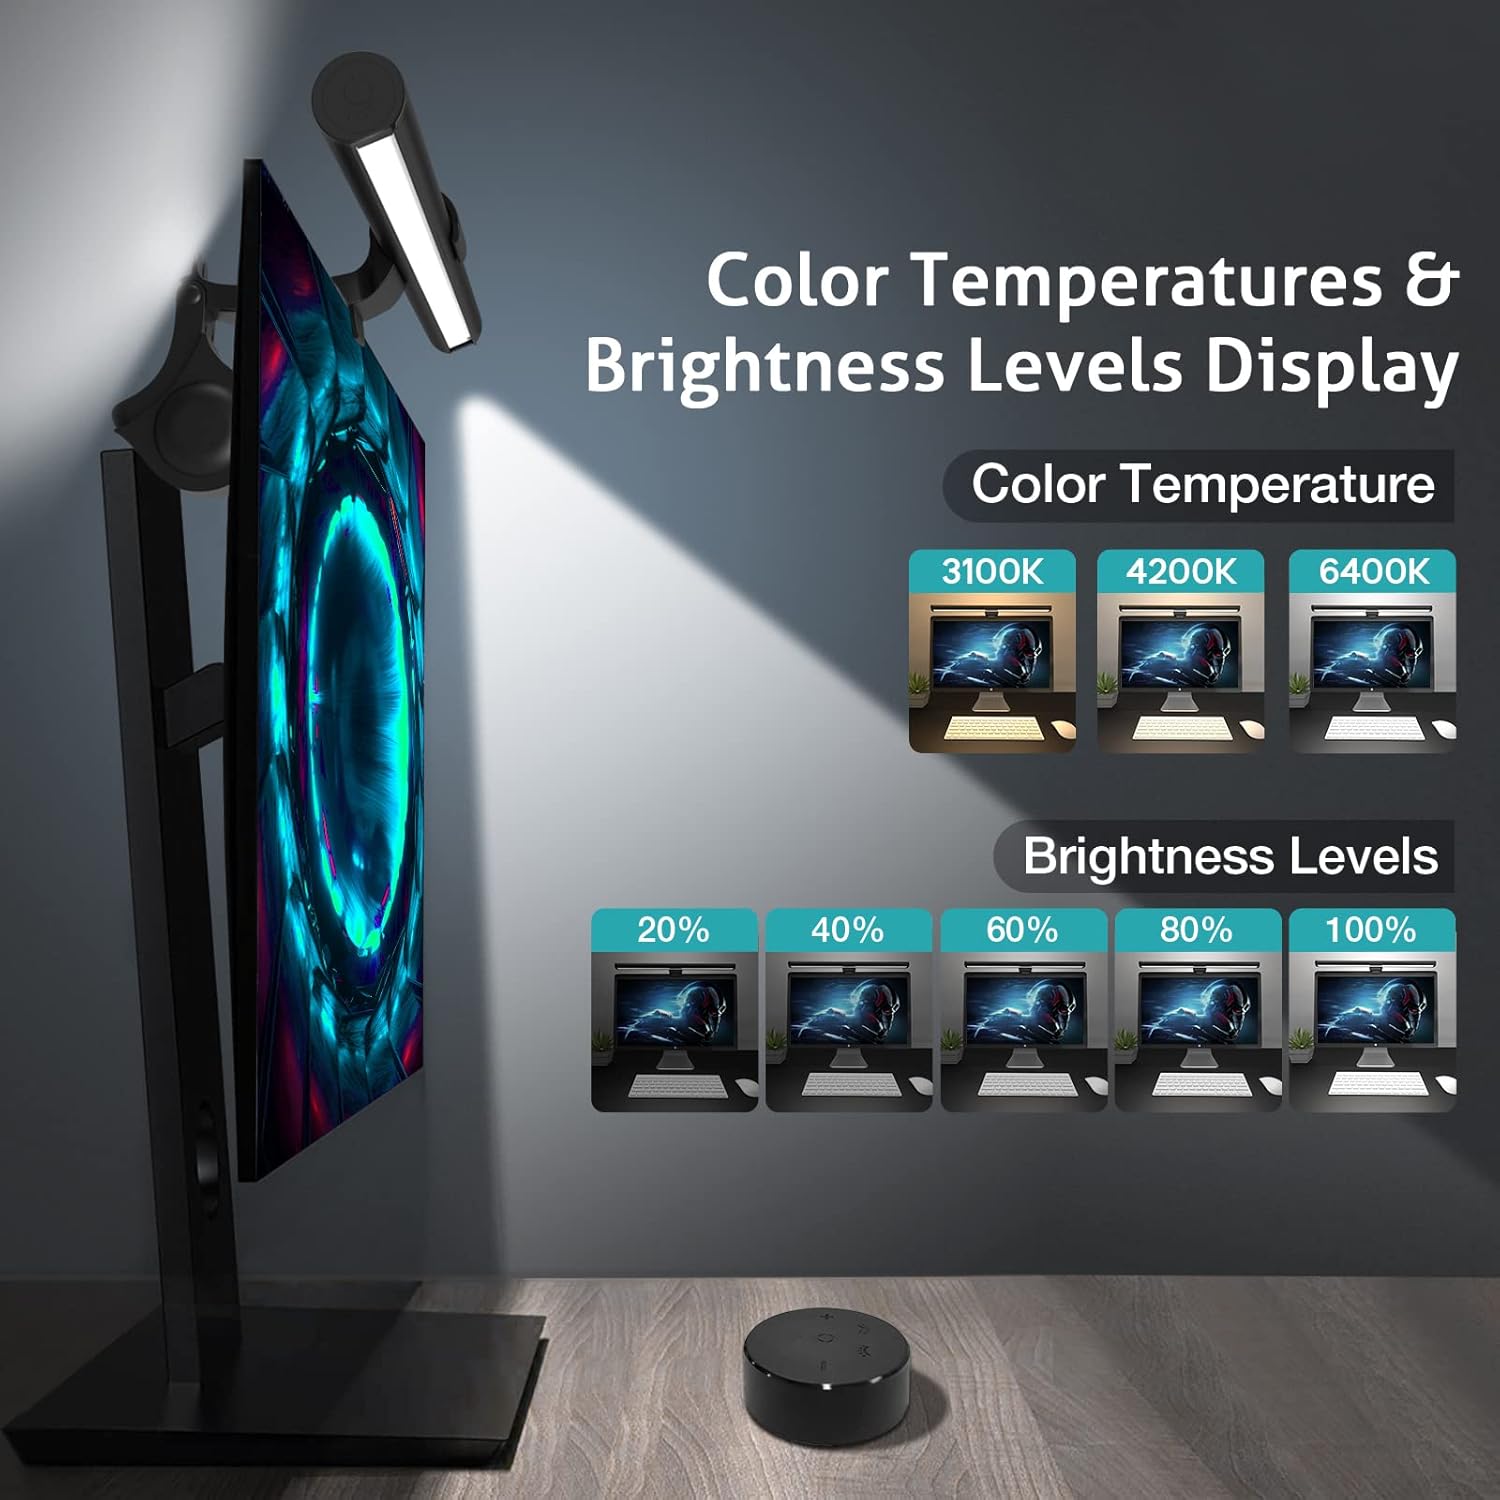
Figure 4: Color temperature and brightness level display.
4.3 Característiques de la cura dels ulls
The OOWOLF Monitor Light Bar incorporates several features designed to reduce eye strain and enhance visual comfort:
- No Blue Light Hazard: El lamp minimizes blue light exposure, which can contribute to eye fatigue during prolonged screen use.
- Il·luminació sense parpelleig: Advanced technology ensures a consistent and stable light output, eliminating visible flicker that can cause discomfort.
- High CRI (Color Rendering Index) ≥95: A high CRI ensures that colors on your screen and workspace appear more accurate and vibrant, closer to natural light.
- Asymmetric Light Source: The design directs light onto your desk area, preventing glare on your screen and direct light into your eyes. The 60° beam angle avoids glare, while the 120° beam angle supplies ample environmental light.
- Convenient Backlight Feature: The backlight provides a soft ambient glow behind your monitor, reducing the contrast between the screen and the surrounding environment, further minimizing eye strain.

Figure 5: Blue light reduction.

Figure 6: High CRI for natural color reproduction.

Figure 7: Asymmetric light design for glare prevention.

Figure 8: Dimmable front and back light functionality.
5. Manteniment
To ensure the longevity and optimal performance of your OOWOLF Monitor Light Bar, follow these simple maintenance guidelines:
- Neteja: Disconnect the power before cleaning. Use a soft, dry cloth to wipe the light bar and remote control. Avoid using abrasive cleaners, solvents, or harsh chemicals, as these can damage the finish or electronic components.
- Emmagatzematge: If storing the light bar for an extended period, ensure it is clean and dry. Store it in a cool, dry place away from direct sunlight and extreme temperatures.
6. Solució De Problemes
If you encounter any issues with your OOWOLF Monitor Light Bar, please refer to the following common problems and solutions:
- La barra de llums no s'encén:
- Ensure the USB-C cable is securely connected to both the light bar and the power source.
- Verify that the power source (e.g., USB port, wall adapter) is functional.
- Comproveu la pila del comandament a distància. Substituïu-la si cal.
- El control remot no respon:
- Assegureu-vos que la pila del comandament a distància no estigui esgotada.
- Confirm there are no obstructions between the remote and the light bar.
- If the issue persists, try unplugging the light bar from power for a few minutes and then reconnecting it to reset the device.
- Light Bar Appears Unstable on Monitor:
- Adjust the counterweight at the back of the light bar to achieve a more secure fit.
- Ensure the monitor's thickness is compatible with the light bar's clampmecanisme d'acció.
- Brillantor o parpelleig inconsistents:
- While the light bar features flicker-free technology, ensure the power source provides stable 5V output.
- If using a USB hub, try connecting directly to a computer port or wall adapter.
7. Especificacions
| Característica | Detall |
|---|---|
| Número de model | TL03 |
| Dimensions del producte | 0.79 "P x 16.14" W x 0.79" H |
| Pes de l'article | 1.19 lliures |
| Material | Alumini |
| Tipus d'acabat | Polit |
| Tipus de font de llum | LED |
| Nombre de fonts de llum | 84 |
| Wattage | 5.00 watts |
| Voltage | 5 Volts |
| Brillantor | 300 lumens |
| Temperatura de color | 3100K - 6500K (ajustable) |
| Índex de reproducció del color (CRI) | ≥95 |
| Mètode de control | Control remot |
| Font d'alimentació | Cable elèctric (USB-C) |
| Longitud del cable | 59 polzades |
| Característiques especials | Adjustable Color Temperature, Dimmable, Remote Control, Backlight, No Glare, Eye Caring, Flicker-Free |
8. Informació de la garantia
The OOWOLF Monitor Light Bar Pro-Plus (Model TL03) comes with a Garantia limitada d'1 any from the date of purchase. This warranty covers manufacturing defects and issues arising from normal use. Please retain your proof of purchase for warranty claims. For specific terms and conditions, or to initiate a warranty claim, please contact customer support.
9. Atenció al client
For further assistance, technical support, or inquiries regarding your OOWOLF Monitor Light Bar, please visit the official OOWOLF store or contact their customer service department.
OOWOLF Store: https://www.amazon.com/stores/OOWOLF/page/89547BC8-2A8C-41F2-9EE8-DA80D7F234C8
