
1. Introducció
This manual provides essential instructions for the safe and effective operation, installation, and maintenance of your ZGOOD Sun-II 12L Autoclave Sterilizer. Please read this manual thoroughly before operating the device and retain it for future reference. This autoclave is designed for steam sterilization of medical and laboratory instruments.
2. Instruccions de seguretat
- Seguretat elèctrica: Ensure the autoclave is connected to a grounded power outlet with the correct voltage (220V 50Hz or 110V 60Hz). Do not operate with damaged power cords.
- Perill de vapor: Hot steam can cause severe burns. Always allow the autoclave to cool and pressure to equalize before opening the door. Use heat-resistant gloves when handling sterilized items.
- Qualitat de l'aigua: Use only distilled water for operation. Tap water can lead to mineral buildup and damage the unit.
- Col·locació: Place the autoclave on a stable, level surface with adequate ventilation. Do not block ventilation openings.
- Manteniment: Regular cleaning and maintenance are crucial for optimal performance and safety. Refer to the maintenance section.
- Parada d'emergència: Familiarize yourself with the location of the power switch for emergency shutdown.
3. Producte acabatview
The ZGOOD Sun-II 12L Autoclave Sterilizer features a full automatic microprocessor control system, a digital display, and a data printing function. It performs 3 times pre-vacuum preceding vacuum drying to ensure efficient sterilization.
3.1 Components principals
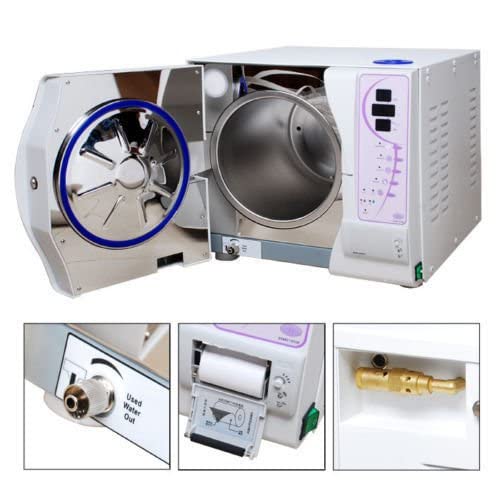
Figura 3.1: Davant view of the ZGOOD Sun-II 12L Autoclave Sterilizer with the chamber door open, showing the main unit and control panel.
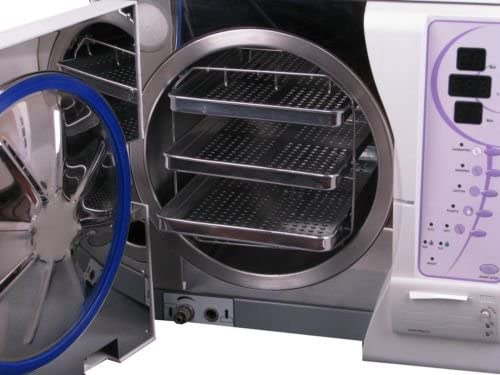
Figura 3.2: Interior view of the sterilization chamber, equipped with three removable trays for holding instruments.
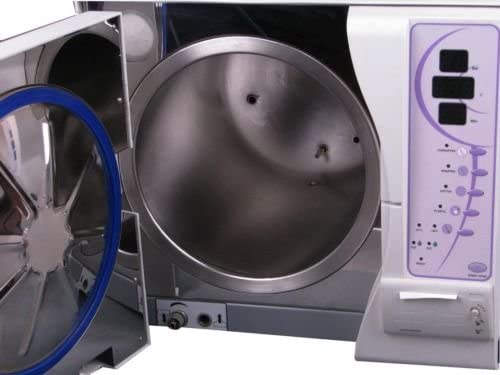
Figura 3.3: Interior view of the sterilization chamber without trays, showing the smooth stainless steel surface.
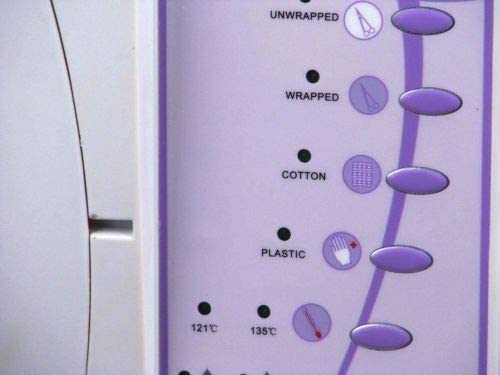
Figura 3.4: Close-up of the digital display panel, indicating pressure in Bar, temperature in Celsius, and cycle time in minutes.
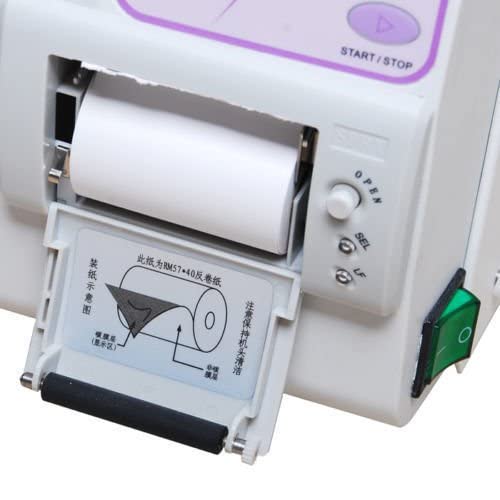
Figura 3.5: Close-up of the control panel, showing buttons for selecting sterilization programs such as Unwrapped, Wrapped, Cotton, and Plastic, along with temperature options (121°C, 135°C).
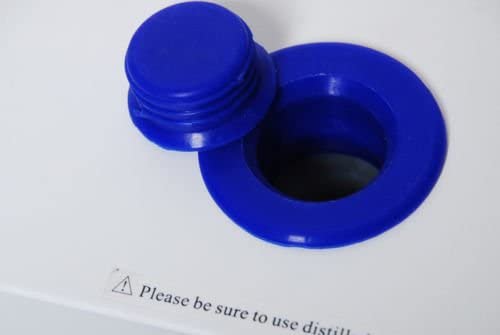
Figura 3.6: Integrated thermal printer for recording sterilization cycle data, with instructions for paper loading.
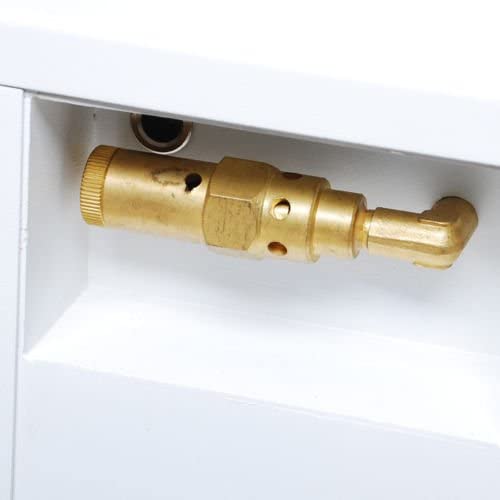
Figura 3.7: Water inlet port, typically used for adding distilled water to the reservoir.
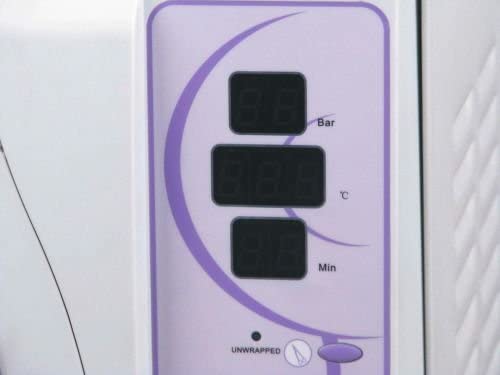
Figura 3.8: Used water outlet valve, designed for convenient drainage of waste water.
3.2 Característiques clau
- Full Automatic Microprocessor Control: Ensures precise and reliable sterilization cycles.
- Pantalla digital: Provides real-time information on pressure, temperature, and cycle status.
- Vacuum Drying: Features 3 times pre-vacuum preceding vacuum drying for thorough sterilization and drying of instruments.
- Data Printing: Integrated printer for documentation of sterilization parameters.
- Waste Water Management: Equipped with a full water alarm system and designed for waste circulation disinfection.
- Interfície fàcil d'utilitzar: Modularized panel for easy operation and breakdown alarm system for dynamic status monitoring.
4. Configuració
- Desembalatge: Carefully remove the autoclave from its packaging. Inspect for any shipping damage.
- Col·locació: Position the unit on a sturdy, level surface capable of supporting its weight. Ensure adequate clearance (at least 10 cm) around all sides for ventilation.
- Connexió d'alimentació: Connect the power cord to a grounded electrical outlet matching the specified voltage (220V 50Hz or 110V 60Hz).
- Ompliment d'aigua: Open the water inlet (refer to Figure 3.7) and fill the reservoir with distilled water only until the appropriate level is reached. Do not overfill.
- Printer Paper Installation: If not already installed, load the thermal paper into the integrated printer as shown in Figure 3.6.
5. Instruccions de funcionament
- Encès: Flip the main power switch to the 'ON' position. The digital display (Figure 3.4) will illuminate.
- Load Instruments: Open the chamber door. Place instruments to be sterilized onto the trays (Figure 3.2). Ensure instruments are properly prepared (cleaned, dried, and packaged if necessary). Do not overload the chamber.
- Tanca la porta: Securely close the chamber door. Ensure it is latched properly to prevent steam leakage.
- Seleccioneu el programa: Use the control panel buttons (Figure 3.5) to select the appropriate sterilization program (e.g., Unwrapped, Wrapped, Cotton, Plastic) and temperature (121°C or 135°C) based on the items being sterilized.
- Inici del cicle: Press the 'START/STOP' button to begin the sterilization cycle. The display will show the current status, pressure, and temperature.
- Finalització del cicle: Once the cycle is complete, an audible alarm may sound, and the display will indicate completion. The unit will automatically perform vacuum drying.
- Unload Instruments: Allow the autoclave to cool down and pressure to fully equalize before carefully opening the door. Use heat-resistant gloves to remove sterilized items.
- Apagar: After use, turn off the main power switch.
6. Manteniment
- Neteja diària: Netegeu l'exterior del bloc amb l'anunciamp cloth. Clean the chamber interior and trays regularly to prevent residue buildup.
- Drenatge d'aigua: Regularly drain the waste water tank using the used water outlet (Figure 3.8). The full water alarm system will alert you when drainage is required.
- Distilled Water Only: Always replenish the water reservoir with distilled water. Never use tap water or deionized water, as this can cause scaling and damage.
- Inspecció del segell de la porta: Periodically inspect the door seal for any signs of wear or damage. A damaged seal can lead to steam leaks and inefficient sterilization.
- Manteniment de la impressora: Ensure the printer paper is replaced when low (Figure 3.6). Keep the printer mechanism clean.
7. Solució De Problemes
The ZGOOD Sun-II Autoclave is equipped with an automatic alarm system for breakdowns. Refer to the display for specific error codes or messages.
- Alarm Sounds / Error Code Displayed:
- Consult the specific error code in the full technical manual (if available) or contact customer support.
- Common issues include low water level, door not properly sealed, or power fluctuations.
- Sterilization Cycle Not Starting:
- Assegureu-vos que la porta estigui completament tancada i amb pany.
- Check if the water reservoir has sufficient distilled water.
- Verifiqueu la connexió d'alimentació.
- Poor Drying Results:
- Ensure instruments are not overloaded.
- Verify that the vacuum drying phase is enabled and completing its cycle.
- Printer Not Functioning:
- Check if printer paper is loaded correctly and not jammed (Figure 3.6).
- Ensure the printer cover is closed securely.
For issues not covered here, please contact ZGOOD customer support.
8. Especificacions
| Model | Sun-II |
| Capacitat | 12 litres |
| Poder | 1,800W (various configurations up to 2,300W) |
| Voltage | 220V 50Hz / 110V 60Hz |
| Pre-Vacuum Cycles | 3 times preceding vacuum drying |
| Tipus de control | Full Automatic Microprocessor |
| Vacuum Measurement | Reaches -0.80 bar |
| Dipòsits d'aigües residuals | Full water alarm system, waste circulation disinfection possible |
| UPC | 737417204836 |
| ASIN | B0BCDD65P6 |
9. Garantia i Suport
For warranty information, technical support, or service inquiries, please contact your authorized ZGOOD dealer or visit the official ZGOOD website. Please have your model number (Sun-II) and ASIN (B0BCDD65P6) ready when contacting support.