
Introducció
Thank you for choosing the VIFLYKOO Weather Station. This device provides real-time indoor and outdoor temperature and humidity monitoring, atmospheric pressure readings, and a 12-hour weather forecast. This manual will guide you through the setup, operation, and maintenance of your weather station to ensure optimal performance.
Contingut del paquet
Si us plau, comproveu el contingut del paquet per assegurar-vos que hi hagi tots els elements:
- 1 x VIFLYKOO Weather Station Main Unit
- 3 sensors remots sense fil
- 1 x cable USB
- 1 x User Manual (Multi-language)
Producte acabatview
Familiarize yourself with the main unit's components and controls:

This image shows the rear panel of the VIFLYKOO Weather Station main unit, highlighting key features and controls.
- Table stand hole
- Tapa de la bateria
- Max/Min reading button
- Resetting and sensor scanning button
- Data/Time setting button
- Ganxo de paret
- Snooze/Light display button
- Display in °C or °F button
- Display in 12 or 24 hour format button
- Botó de configuració d'alarma
- DC 5V power input socket
Configuració
1. Alimentació de la unitat principal
The main weather station unit can be powered by either a USB cable or batteries.

This image illustrates the two power modes for the main unit (USB cable or 3 AAA batteries) and the battery compartment for the outdoor transmitter (2 AA batteries).
- Potència USB: Connect the included USB cable to the DC 5V power input socket (11) on the back of the main unit and plug the other end into a USB power adapter (not included) or a computer USB port.
- Potència de la bateria: Open the battery cover (2) and insert 3 AAA batteries (not included) according to the polarity markings. When operating on batteries, the backlight will only illuminate for 8 seconds after pressing the 'Snooze/Light' button.
2. Installing Remote Sensors
Each wireless remote sensor requires 2 AA batteries (not included).
- Open the battery compartment on the back of each remote sensor.
- Insert 2 AA batteries, observing the correct polarity.
- Tanqueu el compartiment de la bateria de manera segura.
3. Col·locació del sensor
The remote sensors have a transmission range of up to 100 meters. Choose suitable locations for accurate readings.
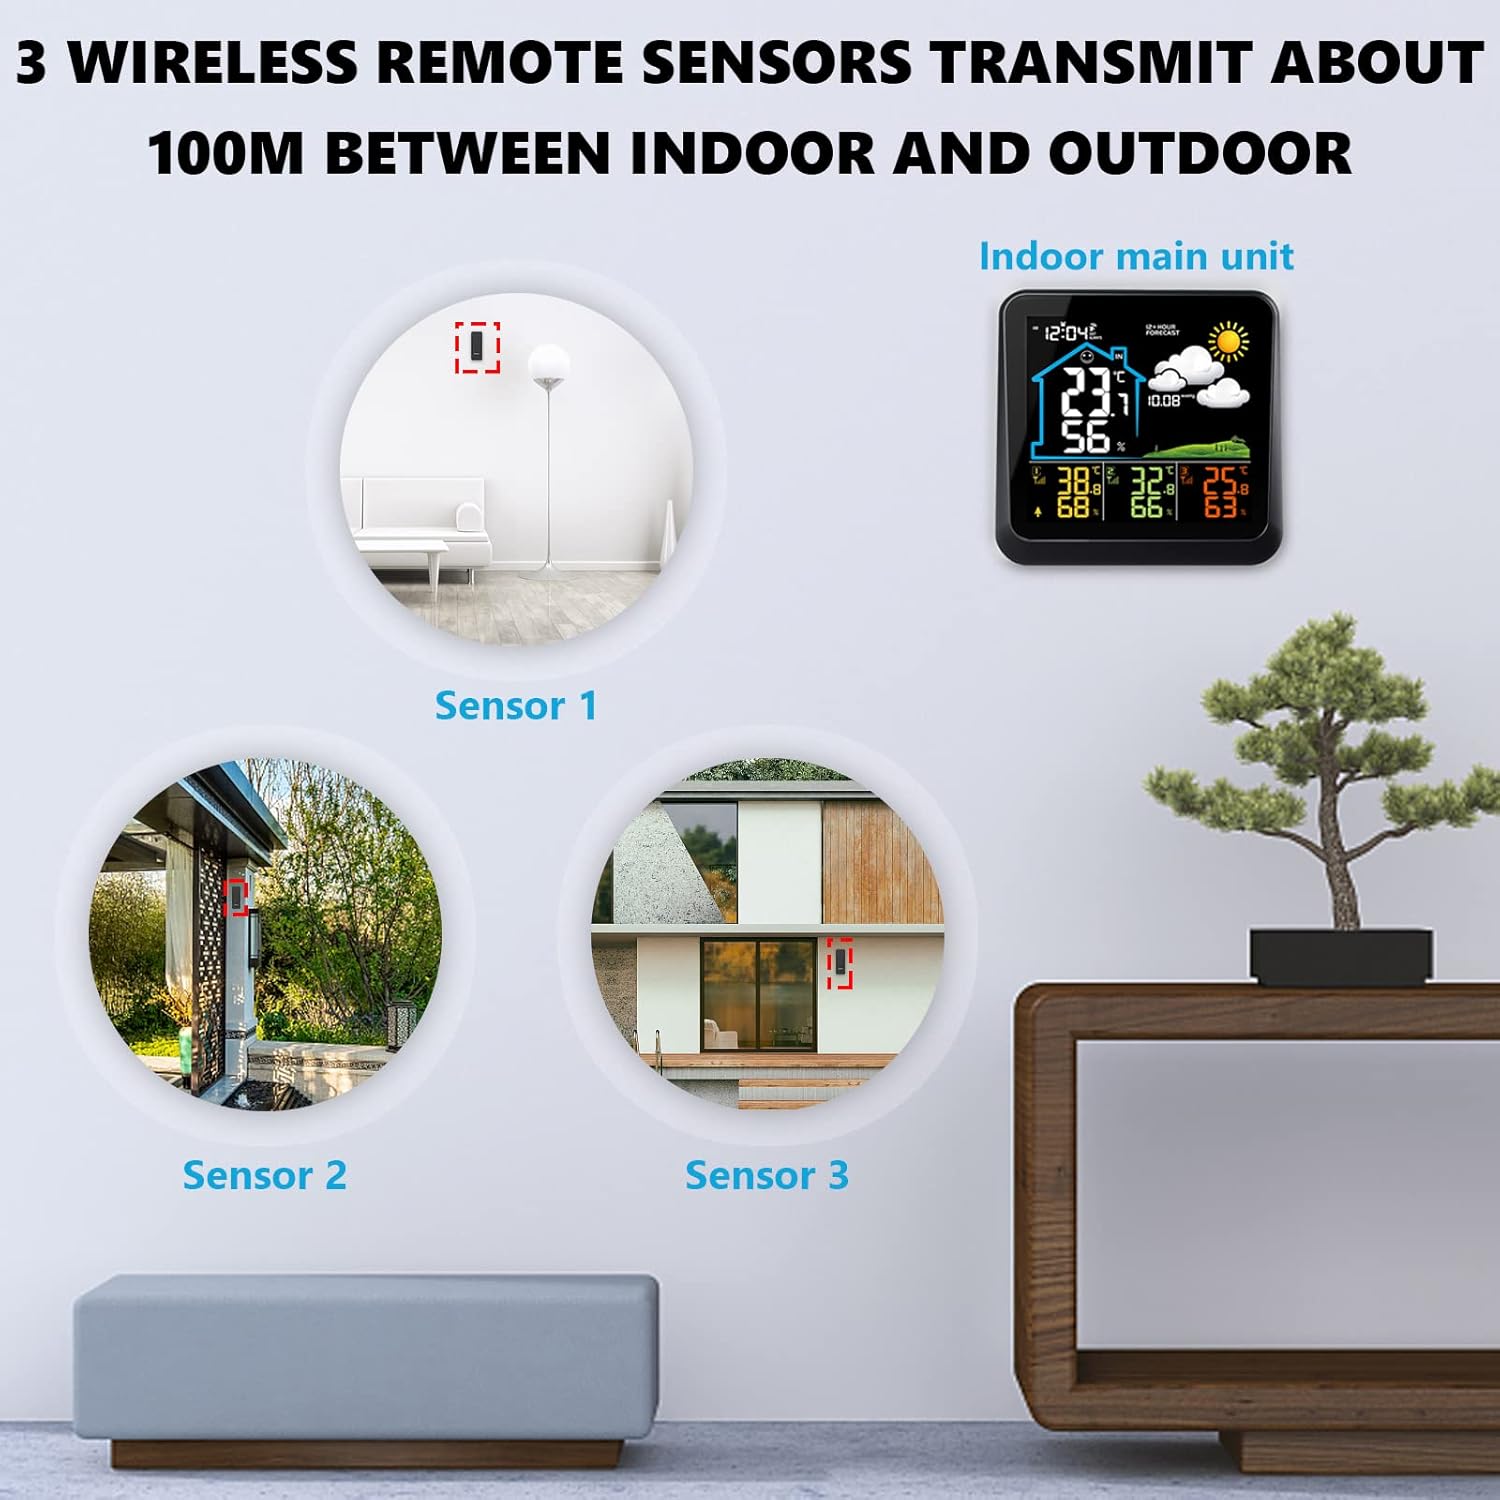
This image demonstrates suitable locations for placing the three wireless remote sensors, such as a baby's room, a wine cellar, or a garden, to monitor temperature and humidity.
- Place sensors in areas where you need to monitor temperature and humidity, such as baby rooms, wine cellars, gardens, or backyards.
- Ensure sensors are protected from direct sunlight and heavy rain for accurate outdoor readings.
- Avoid placing sensors near large metal objects or strong electromagnetic interference sources.
4. Configuració inicial (hora, data, unitats)
After powering on, the main unit will automatically search for the remote sensors. Once connected, you can set the time, date, and preferred units.
- Press the 'Data/Time setting' button (5) to enter time setting mode.
- Use the 'Max/Min reading' (3) and 'Resetting and sensor scanning' (4) buttons to adjust values.
- Press 'Data/Time setting' (5) again to confirm and move to the next setting (e.g., year, month, day, 12/24 hour format).
- To switch between Celsius (°C) and Fahrenheit (°F), press the 'Display in °C or °F' button (8).
- To switch between 12-hour and 24-hour time format, press the 'Display in 12 or 24 hour' button (9).
Instruccions de funcionament
1. Característiques de la pantalla
The color LCD screen displays various information at a glance:
- Temperatura i humitat interiors/exteriors
- 12-Hour Weather Forecast
- Pressió atmosfèrica (hPa)
- Hora i data
- Indicador de nivell de confort
- Indicador de bateria
2. Configuració de l'alarma
Per configurar una alarma:
- Press the 'Alarm setting' button (10) to enter alarm setting mode.
- Use the adjustment buttons (3, 4) to set the desired alarm time.
- Press 'Alarm setting' (10) again to confirm.
3. Snooze/Backlight Function
- Funcionament amb bateria: Press the 'Snooze/Light display' button (7) to illuminate the screen for 8 seconds.
- Funcionament USB: Repeatedly press the 'Snooze/Light display' button (7) to cycle through low brightness, high brightness, or off modes.
- When an alarm sounds, press the 'Snooze/Light display' button (7) to activate the snooze function. The alarm will sound again after a short interval.
4. Max/Min Readings
Press the 'Max/Min reading' button (3) to view the maximum and minimum recorded temperature and humidity values. Press again to cycle through current, maximum, and minimum readings.
5. Previsió meteorològica
The station provides a 12-hour weather forecast based on atmospheric pressure trends. The forecast accuracy is approximately 75%.

This image shows the various weather forecast icons used by the station: Sunny, Freeze, Cloudy, Partly Cloudy, and Rainy.
Forecast icons include: Sunny, Sunny to Cloudy, Cloudy, Rainy, Snowy.
Note: If the weather station is moved, it may take 12 to 24 hours for the atmospheric pressure to adjust and recalculate the forecast.
6. Indicador de confort interior
The display includes a comfort indicator based on indoor humidity levels:

This image displays the main unit's screen, indicating comfort levels: optimal (40-70% RH), high (70-100% RH), and low (0-40% RH).
- òptim: 40-70% Relative Humidity (RH)
- Alt: 70-100% HR
- Baix: 0-40% HR
Manteniment
1. Substitució de la bateria
- When the battery indicator appears on the main unit, replace the 3 AAA batteries.
- For remote sensors, replace the 2 AA batteries when their performance degrades.
- Always replace all batteries at the same time with new ones of the same type.
2. Neteja
Wipe the main unit and sensors with a soft, damp cloth. Do not use abrasive cleaners or immerse the devices in water.
Resolució de problemes
| Problema | Causa possible | Solució |
|---|---|---|
| No hi ha cap pantalla a la unitat principal | Sense electricitat o amb piles baixes. | Connect USB power or replace AAA batteries. |
| Remote sensor not connecting / Incorrect outdoor readings | Sensor batteries low or dead; sensor out of range; interference. | Replace AA batteries in sensor. Move sensor closer to main unit. Avoid obstacles. Press 'Resetting and sensor scanning' button (4) on main unit to re-scan. |
| Display shows 'LL.L' or 'HH.H' | Temperature or humidity is outside the measurable range. | This indicates the reading is below the minimum ('LL.L') or above the maximum ('HH.H') operating range. The device is functioning as expected under extreme conditions. |
| Previsió meteorològica imprecisa | Station recently moved; forecast is an estimation. | Allow 12-24 hours for the station to recalibrate after moving. Forecasts are based on atmospheric pressure trends and are not 100% accurate. |
Especificacions

This image provides the physical dimensions of the main weather station unit (14.5cm x 14cm) and the remote sensor (10cm x 3.8cm).
| Característica | Detall |
|---|---|
| Marca | VIFLYKOO |
| Número de model | 3 sensor |
| Tipus de visualització | LCD color |
| Tecnologia de connectivitat | Sense fil, USB |
| Font d'alimentació (unitat principal) | Cable USB (inclòs) o 3 piles AAA (no incloses) |
| Power Source (Remote Sensors) | 2 x AA batteries per sensor (not included) |
| Rang de temperatura interior | De 0 ° C a +50 ° C (32 ° F a 122 ° F) |
| Interval de temperatura exterior | -30 °C a +60 °C (-22 °F a 140 °F) |
| Gamma d’humitat | 20% a 90% HR |
| Distància de transmissió sense fils | Up to 100 meters (open air) |
| Característiques especials | 12-hour weather forecast, Max/Min records, Alarm, Snooze, Comfort indicator |
| Dimensions de la unitat principal | Approx. 14.5 cm x 14 cm |
| Dimensions del sensor remot | Approx. 10 cm x 3.8 cm |
Garantia i Suport
La informació sobre la garantia del producte i l'atenció al client normalment es proporciona amb la documentació de compra o a la fitxa oficial del fabricant. website. Please refer to those resources for details on warranty coverage, returns, and technical assistance.