
Producte acabatview
The ROFAVEZCO USB 3.0 4-Port 4K 60Hz HDMI KVM Switch is designed to control up to four HDMI source devices (such as PCs, game consoles, or media players) from a single USB keyboard, mouse, and monitor. This switch supports high-resolution video up to 4K@60Hz and offers versatile connectivity with USB 3.0 ports for peripherals. It includes SPDIF 5.1 audio output and is compatible with various operating systems including Windows and Linux.
Its robust metal casing ensures stable performance and efficient heat dissipation, while the threaded power adapter connection prevents accidental power loss. The compact design allows for easy integration into any workspace.
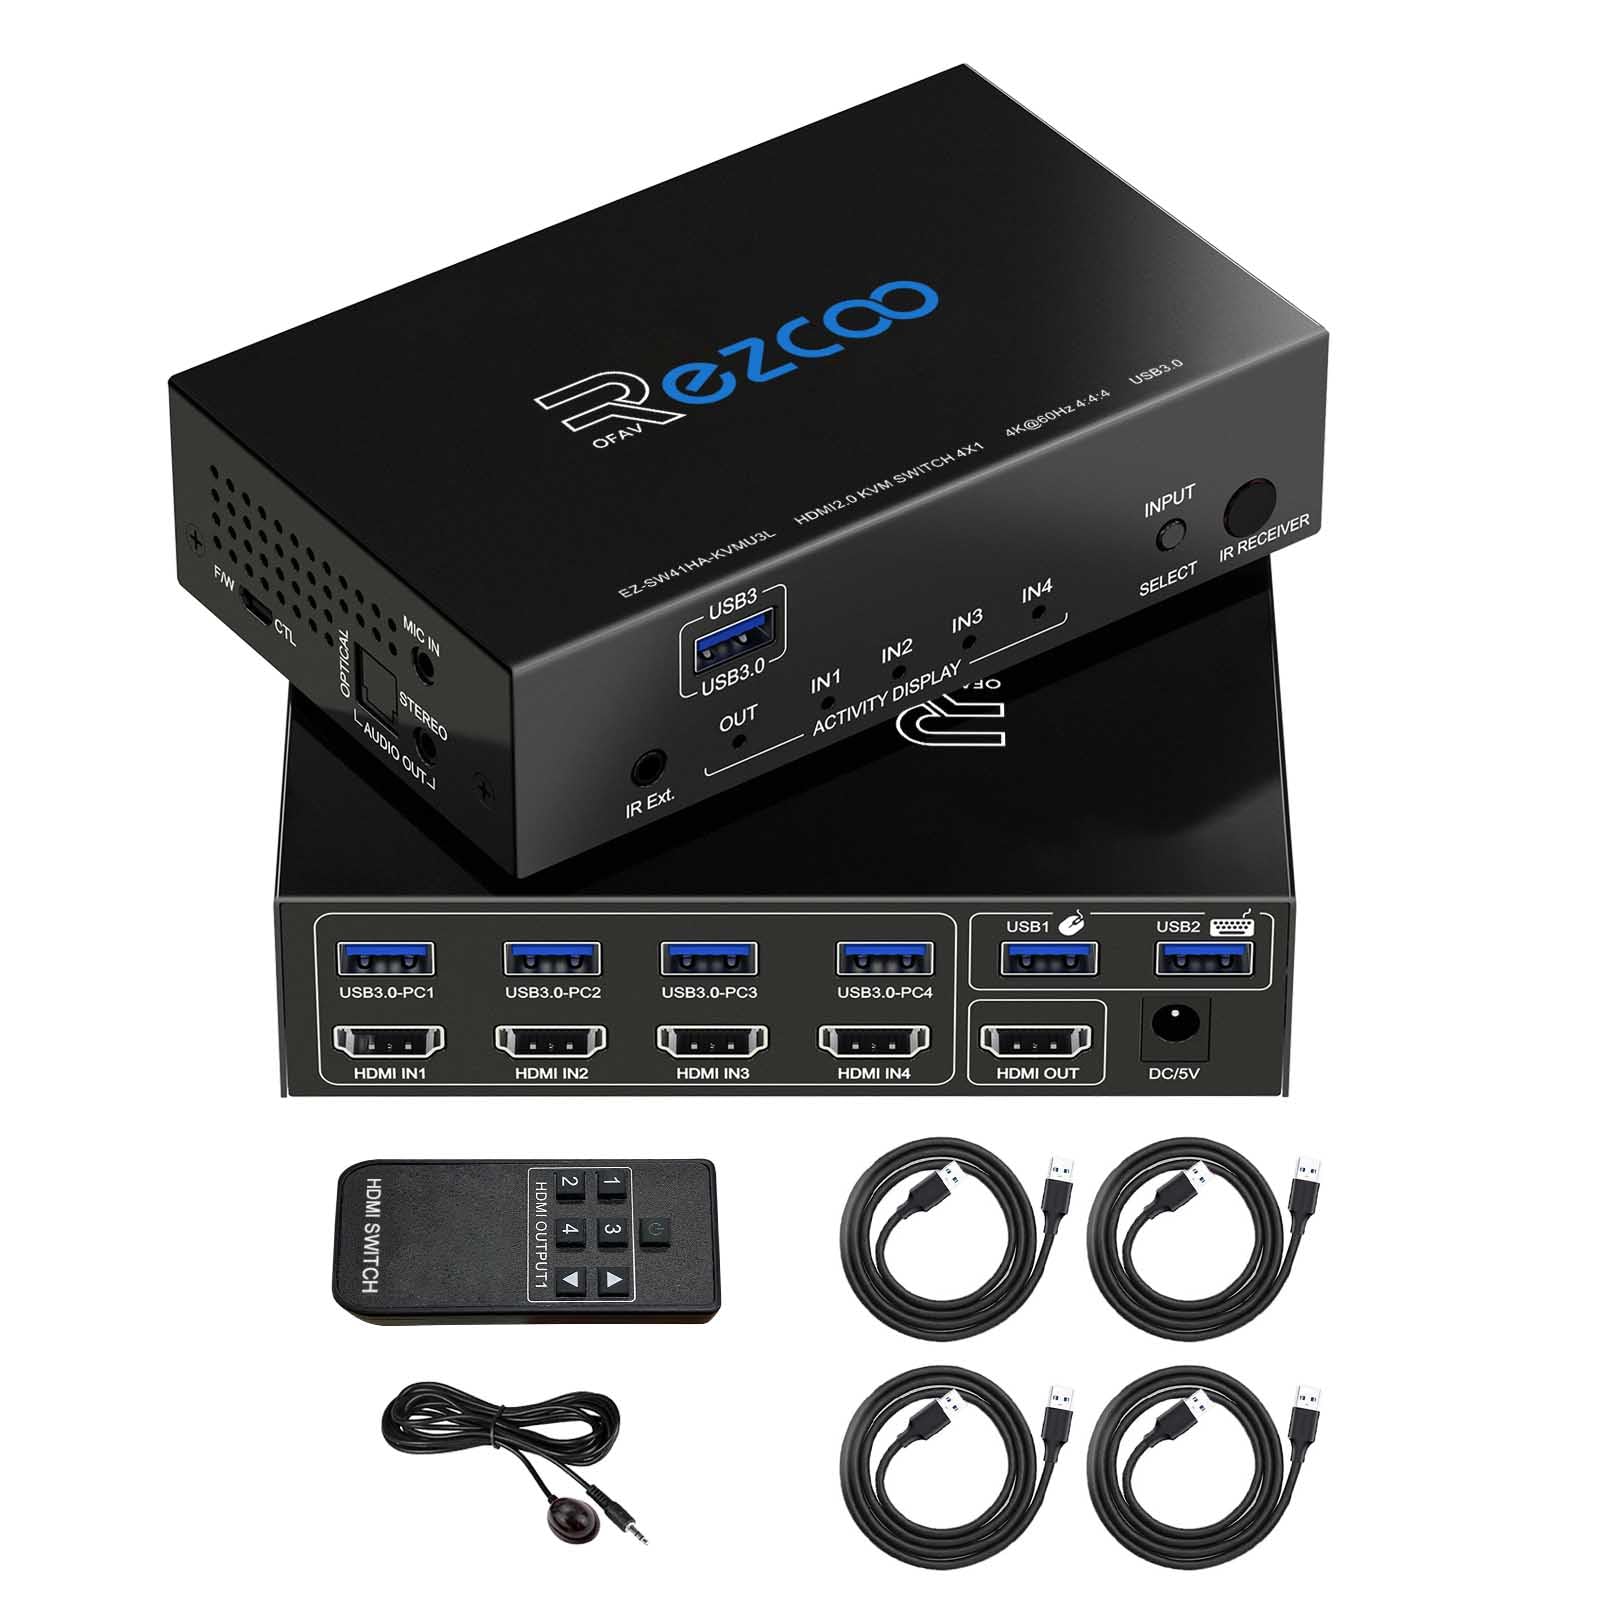
Figure 1: The ROFAVEZCO KVM Switch in a typical setup, connecting four PCs to a single monitor, keyboard, and mouse.
Guia de configuració
- Encès: Connect the power adapter to the KVM switch and a power outlet.
- Connect HDMI and USB Cables: For each source device (PC, console, etc.), connect an HDMI cable from the device's HDMI output to an Entrada HDMI port on the KVM switch. Simultaneously, connect a USB 3.0 cable from the source device's USB port to the corresponding ENTRADA USB port on the KVM switch. Ensure both HDMI and USB cables are connected for each source.
- Connecta el monitor: Connect your monitor's HDMI input to the SORTIDA HDMI port del commutador KVM.
- Connecteu el teclat i el ratolí: Connecteu el teclat i el ratolí USB als ports USB dedicats del commutador KVM.
- Connecteu els perifèrics: Utilize the additional USB 3.0 ports for other peripherals such as printers, scanners, or USB drives.
- Connexions d'àudio: For external audio, connect your audio system to the SPDIF or 3.5mm audio output ports.
- Activació inicial: After connecting all cables, allow approximately 20 seconds for the USB switch to activate. The KVM switch will remember the last active HDMI input source when power is cycled.

Figure 2: Connection Diagram for the KVM Switch. This image illustrates how to connect multiple PCs, a monitor, keyboard, mouse, and other USB peripherals to the KVM switch.

Figure 3: Rear Panel Connections. This image highlights the HDMI input and output ports, USB input ports for source devices, and the power input.
Funcionament del commutador KVM
The KVM switch offers multiple methods for switching between connected source devices:
1. Front Panel Button Switching
Premeu el botó SELECCIONA button on the front panel of the KVM switch to cycle through the connected input sources (IN1, IN2, IN3, IN4). The active input will be indicated by an LED light.
2. Comandament a distància IR
Use the provided IR remote control to switch between inputs. Point the remote at the IR receiver on the KVM switch and press the corresponding input number (1, 2, 3, or 4) to select a source. The IR remote allows for convenient switching, especially if the KVM switch is placed out of direct reach.
3. Hotkey Switching (Keyboard)
The KVM switch supports hotkey commands via your connected keyboard. Specific hotkey combinations can be used to switch inputs without needing to press buttons on the device or use the remote. Refer to the detailed hotkey list in the full user manual for specific commands.

Figure 4: Switching Methods. This image illustrates the button switch, IR remote control, and IR extension cable for input selection.
Sortida d'àudio
The KVM switch extracts audio from the HDMI signal and provides it through SPDIF 5.1 and 3.5mm stereo audio outputs. This allows you to connect external speakers or headphones for enhanced audio experience.

Figure 5: Audio Extraction Setup. This image demonstrates connecting external audio devices like speakers and a microphone to the KVM switch.
Manteniment
- Neteja: Use a soft, dry cloth to clean the exterior of the KVM switch. Avoid using liquid cleaners or aerosols.
- Ventilació: Ensure the KVM switch is placed in a well-ventilated area to prevent overheating. Do not block the ventilation openings.
- Gestió de cables: Mantingueu els cables organitzats i lliures de doblegaments o doblegaments excessius per evitar danys.
- Actualitzacions de firmware: Reviseu periòdicament el fabricant website for any available firmware updates to ensure optimal performance and compatibility. The device supports firmware upgrades via its Micro USB port.
Resolució de problemes
- Sense senyal de vídeo:
- Ensure all HDMI cables are securely connected to both the source devices and the KVM switch, as well as to the monitor.
- Verify that the correct input source is selected on the KVM switch.
- If experiencing a RE-HDMI signal issue, press and hold the SELECCIONA button for 5 seconds to re-read EDID for 4K@60Hz, 5.1 audio.
- Try connecting the HDMI cable directly from the source to the monitor to rule out cable or source issues.
- El teclat/ratolí no respon:
- Ensure the USB 3.0 cables from the source devices are connected to the corresponding USB IN ports on the KVM switch.
- Verify that the keyboard and mouse are connected to the dedicated USB ports on the KVM switch.
- Some gaming or specialized keyboards/mice may require direct connection or specific drivers. Try a standard keyboard/mouse to test functionality.
- Reinicieu el commutador KVM i els ordinadors connectats.
- Sense sortida d'àudio:
- Check all audio cable connections (SPDIF, 3.5mm) to your audio system.
- Ensure the audio output settings on your source device are correctly configured to output audio via HDMI.
- Verify that your audio system is powered on and set to the correct input.
- Connexió intermitent:
- Ensure the power adapter is securely connected and providing stable power. The threaded design helps prevent accidental disconnection.
- Comproveu si hi ha connexions de cable soltes.
- Reduce cable lengths if possible, especially for HDMI, to minimize signal degradation.
Especificacions del producte
| Número de model | EZ-SW41KVMU3L |
| Marca | ROFAVEZCO |
| Fabricant | EZCOOTECH |
| Material | Metall |
| Dimensions (L x A x A) | 0.1 x 0.1 x 0.1 cm (Product); 1 x 1 x 1 mm (Item) |
| Pes | 871 grams |
| Suport de resolució de vídeo | Up to 4K@60Hz (3840x2160@60Hz), 1920x1080@144Hz, 2560x1440@144Hz |
| Estàndard HDMI | HDMI 2.0, HDCP 2.2 |
| Ports USB | 4 x USB 3.0 (Input), Additional USB 3.0 ports for peripherals |
| Sortida d'àudio | SPDIF 5.1, 3.5mm Stereo Audio |
| Mètodes de canvi | Front Panel Button, IR Remote Control, Hotkey (Keyboard) |
| Vol. Operatiutage | 100 Volts |
| Valoració actual | 1 A |
| Compatibilitat | Windows 10/7/2000/XP/Vista, Linux, UNIX, Ubuntu, Fedora, Mac, Android, Steam OS |
Informació de la garantia
The product comes with a standard manufacturer's warranty. For specific details regarding the warranty period and coverage, please refer to the documentation included with your purchase or contact ROFAVEZCO customer support.
The provided information indicates a warranty description of "1", which typically refers to a 1-year warranty. Please confirm with the manufacturer for precise terms.
Atenció al client
For technical assistance, troubleshooting, or warranty claims, please contact ROFAVEZCO customer support.
- Tipus de contacte: Correu electrònic
- Venedor: ezcoo HITECH
- Assistència en línia: També podeu visitar el ROFAVEZCO Brand Store on Amazon per obtenir informació addicional sobre el producte i recursos d'assistència.
