
1. Introducció
This manual provides essential information for the installation and maintenance of your plplaaoo iPhone Xs Max LCD Touch Screen Replacement. Please read this guide thoroughly before attempting any repair or installation.
This product is designed to replace a damaged or non-functional screen on an iPhone Xs Max, restoring its display and touch functionality.
2. Producte acabatview
The plplaaoo iPhone Xs Max LCD Touch Screen Replacement is a high-quality component designed to restore the visual and tactile interface of your device. It includes the LCD display and the touch digitizer assembly.
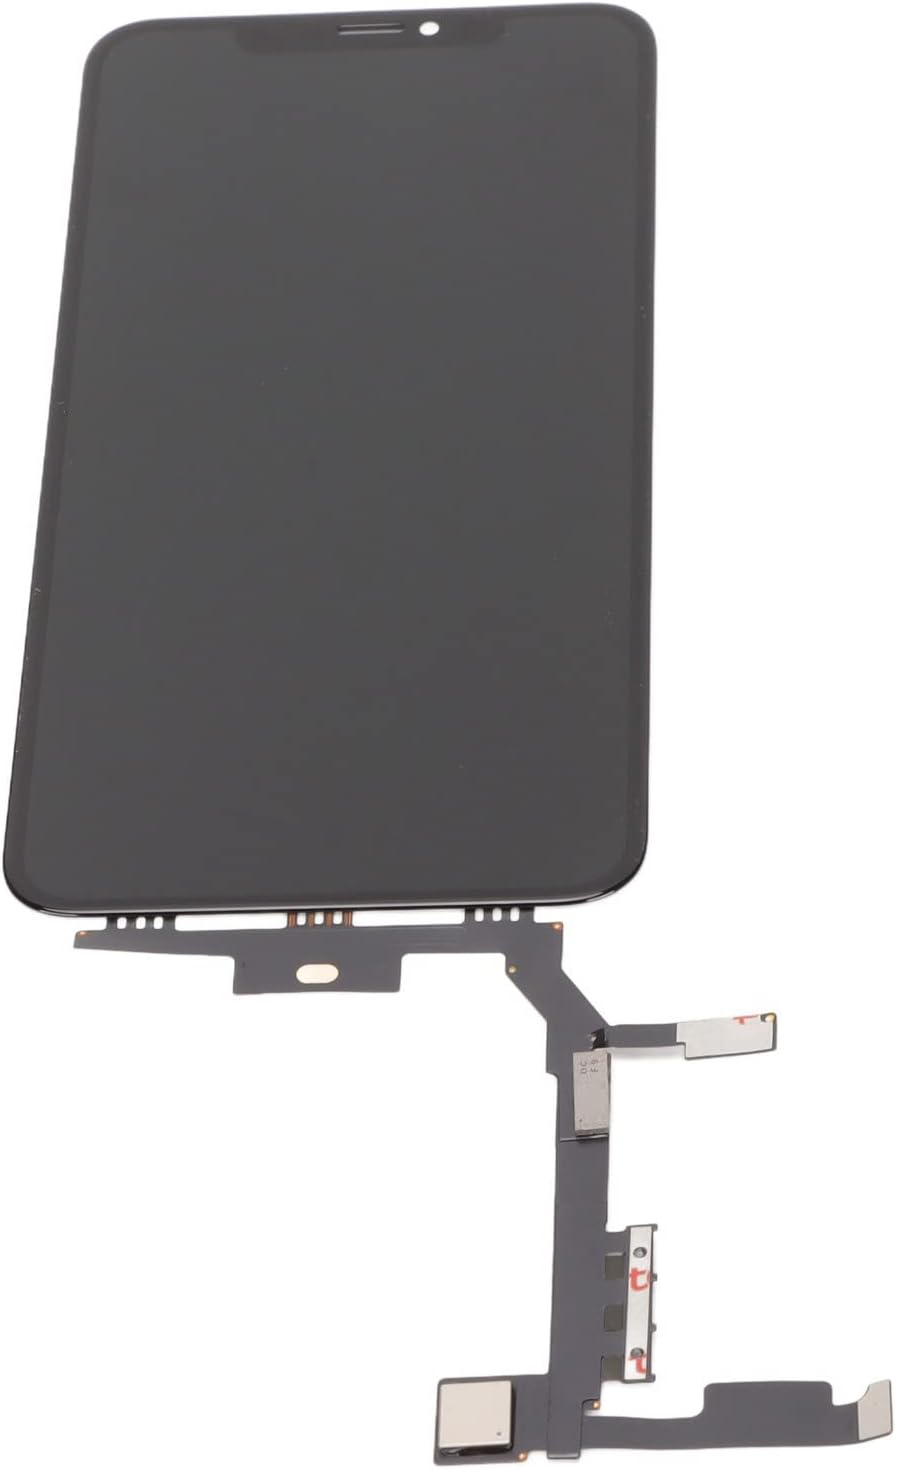
Imatge 2.1: Frontal view of the iPhone Xs Max LCD Touch Screen Replacement, showing the display panel and connected flex cables.
Característiques principals:
- Compatibilitat: Meticulously engineered for iPhone Xs Max, ensuring a precise fit.
- Functionality Restoration: Designed to restore the smartphone's original display quality and touch responsiveness.
- Qualitat del material: Constructed from premium LCD materials for visual clarity and durability.

Image 2.2: Illustration showing potential variations between new and old production models of the screen replacement. Both types are functionally compatible.
3. Precaucions de seguretat
Before beginning any repair, please observe the following safety guidelines:
- Apagueu el dispositiu: Ensure the iPhone Xs Max is completely powered off before starting the replacement process.
- Desconnecta la bateria: Always disconnect the battery connector first to prevent short circuits or damage to components.
- Protecció ESD: Use anti-static precautions (e.g., anti-static wrist strap, mat) to prevent electrostatic discharge damage to sensitive electronic components.
- Manejar amb cura: LCD screens are fragile. Handle the replacement screen and internal components with extreme care to avoid damage.
- Protecció ocular: Wear appropriate eye protection to guard against small flying debris or glass shards.
- Instal·lació professional recomanada: Due to the complexity and delicate nature of smartphone repairs, professional installation is highly recommended. Improper installation can lead to further damage to the device.
4. Configuració i preinstal·lació
4.1 Eines necessàries:
- Pentalobe screwdriver (for bottom screws)
- Tornavís de cap Phillips
- Tornavís de tres puntes Y000
- Ventosa
- Plastic opening tools (spudgers)
- Pinces
- Heat gun or hairdryer (optional, for softening adhesive)
4.2 Comprovacions prèvies a la instal·lació:
- Inspect the new screen for any visible damage (cracks, scratches) before installation.
- Test the screen functionality (display, touch) by temporarily connecting it to the logic board before fully assembling the device. Do not remove protective films or adhesive until the screen is confirmed to be working correctly.
- Assegureu-vos que el vostre espai de treball estigui net, ben il·luminat i lliure d'electricitat estàtica.
5. Guia d'instal·lació
This section outlines the general steps for replacing the screen. Specific details may vary, and it is highly recommended to consult detailed video tutorials or professional repair services.
5.1 Desmuntatge:
- Treure els cargols Pentalobe: Use a Pentalobe screwdriver to remove the two screws located on either side of the charging port.
- Open the Device: Apply heat to the edges of the screen to soften the adhesive. Use a suction cup and plastic opening tool to carefully pry open the screen assembly, starting from the bottom edge.
- Desconnecta la bateria: Once the screen is partially open, disconnect the battery connector from the logic board. This is a critical safety step.
- Disconnect Display Cables: Carefully disconnect the flex cables connecting the display and front sensor assembly to the logic board.
- Elimina la pantalla antiga: Once all cables are disconnected, the old screen assembly can be fully removed.

Image 5.1: A technician wearing gloves carefully disassembling an iPhone, with various tools and components laid out on a workbench. This illustrates the delicate nature of the repair process.
5.2 Transfer Components:
Transfer the earpiece speaker and front sensor assembly from the old screen to the new replacement screen. This typically involves removing small screws and carefully detaching the flex cable assembly.

Imatge 5.2: Un primer pla view of the flex cables and connectors on the back of an iPhone screen, highlighting the intricate connections that need to be handled during component transfer.
5.3 Reassembly:
- Connecta una nova pantalla: Carefully connect the display and front sensor flex cables of the new screen to the corresponding connectors on the logic board.
- Torneu a connectar la bateria: Torneu a connectar el connector de la bateria.
- Funcionalitat de prova: Before sealing, power on the device and test the display, touch response, and front camera/sensors to ensure everything is working correctly.
- Seal the Device: If the test is successful, carefully align the new screen and press it firmly into place, ensuring the adhesive seals properly.
- Replace Pentalobe Screws: Reinstall the two Pentalobe screws at the bottom of the device.
6. Manteniment i cura
Per garantir la longevitat i el rendiment òptim de la vostra nova pantalla, seguiu aquests consells de manteniment:
- Protector de pantalla: Apply a high-quality screen protector immediately after installation to prevent scratches and minor impacts.
- Funda protectora: Use a durable protective case to safeguard your device from drops and bumps.
- Neteja: Netegeu la pantalla amb un drap suau i sense borrissol, preferiblement de microfibra. Eviteu productes químics agressius o materials abrasius.
- Eviteu condicions extremes: Protect your device from extreme temperatures and direct exposure to water or excessive humidity.
7. Solució De Problemes
Si teniu problemes després de la instal·lació, consulteu els problemes i solucions més comuns següents:
| Problema | Causa possible | Solució |
|---|---|---|
| La pantalla no s'encén / Pantalla negra | Loose display cable connection, battery not connected, damaged screen. | Check all flex cable connections, ensure battery is connected, try a hard reset. If problem persists, the screen may be faulty. |
| El tacte no respon / Toques fantasma | Loose digitizer cable, static electricity, damaged digitizer. | Ensure digitizer cable is securely connected. Power off and restart. If issue continues, the digitizer may be faulty. |
| Lines on screen / Discoloration | Damaged display panel, loose display cable. | Check display cable connection. If lines persist, the LCD panel may be damaged. |
| Front camera/sensors not working | Front sensor assembly not transferred correctly or damaged. | Recheck the transfer and connection of the front sensor assembly. Ensure no dust or debris is obstructing the sensors. |
If these steps do not resolve the issue, it is recommended to seek professional assistance.
8. Especificacions del producte
- Tipus de producte: LCD Touch Screen Replacement
- Compatibilitat: iPhone Xs Max
- Material: LCD Premium
- Número de model: plplaaoozprh60t8ng
- Pes de l'article: 0.704 unces
9. Garantia i Suport
For information regarding warranty coverage and customer support, please refer to the seller's return policy or contact the seller directly through the platform where the purchase was made.
The seller's return policy indicates a Reemborsament/substitució de 30 dies duration. Please retain your proof of purchase for any warranty claims.
Per a més ajuda, podeu visitar el plplaaoo Store on Amazon.