aigo ACSE240-BK
Aigo AC SE 240 Rainbow 240mm Water Cooler Instruction Manual
Model: ACSE240-BK
1. Producte acabatview
The Aigo AC SE 240 is an all-in-one (AIO) liquid CPU cooler designed to provide efficient thermal management for your computer's processor. Featuring a 240mm radiator and two fans with Rainbow lighting, it offers effective cooling performance for a wide range of Intel and AMD sockets.
This manual provides essential information for the proper installation, operation, and maintenance of your Aigo AC SE 240 Water Cooler.
2. Contingut del paquet
Please verify that all components listed below are present in your package before proceeding with the installation.
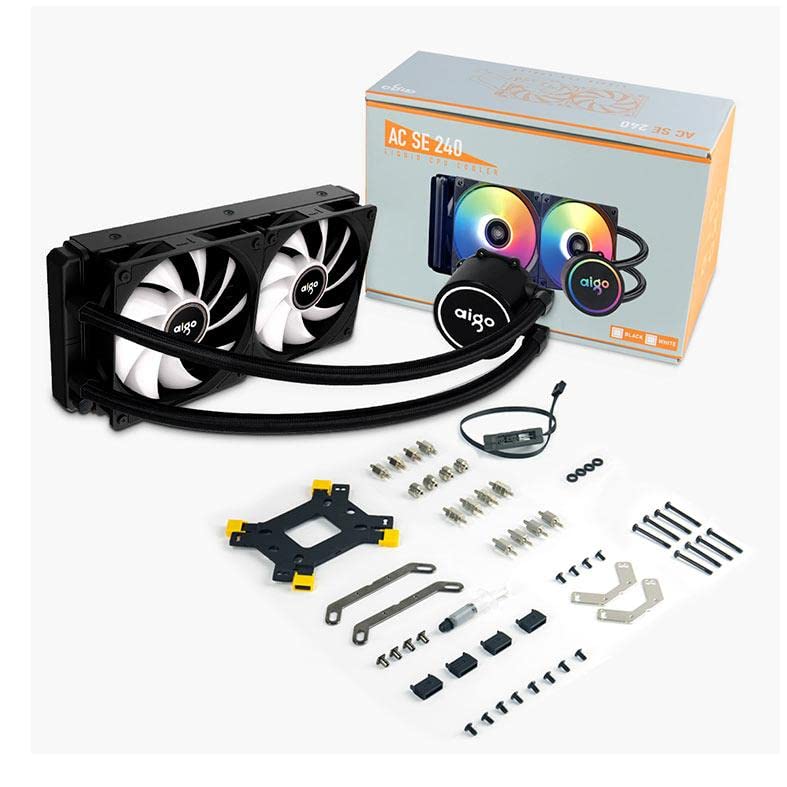
Imatge: All components included with the Aigo AC SE 240 Water Cooler, laid out on a white background. This includes the radiator with two fans, the CPU block/pump, tubing, various mounting brackets for Intel and AMD sockets, screws, thermal paste, and a fan/RGB controller.
- 240mm Radiator with integrated pump/CPU block and tubing
- Two 120mm Fans (Rainbow lighting)
- Intel Mounting Bracket Kit (LGA 2066/ 2011-v3 / 2011 / 1700 / 1366 / 1200 / 115X)
- AMD Mounting Bracket Kit (FM1 / FM2 / FM2+ / AM2 / AM2+ / AM3 / AM3+ / AM4)
- Backplate for Intel sockets
- Cargols i separadors de muntatge
- Pasta tèrmica
- Fan/RGB Controller (if applicable, inferred from image)
- Manual d'usuari (aquest document)
3. Guia d'instal·lació
This section provides general steps for installing the Aigo AC SE 240 Water Cooler. Refer to your motherboard and PC case manuals for specific instructions regarding component placement and cable management.
3.1 Prepare the CPU and Motherboard
- Assegureu-vos que el vostre sistema estigui apagat i desconnectat de la font d'alimentació.
- Traieu qualsevol refrigerador de CPU existent. Netegeu bé la superfície de la CPU amb alcohol isopropílic per eliminar la pasta tèrmica antiga.
- Identify the correct mounting bracket for your CPU socket (Intel or AMD).
3.2 Install the Radiator and Fans
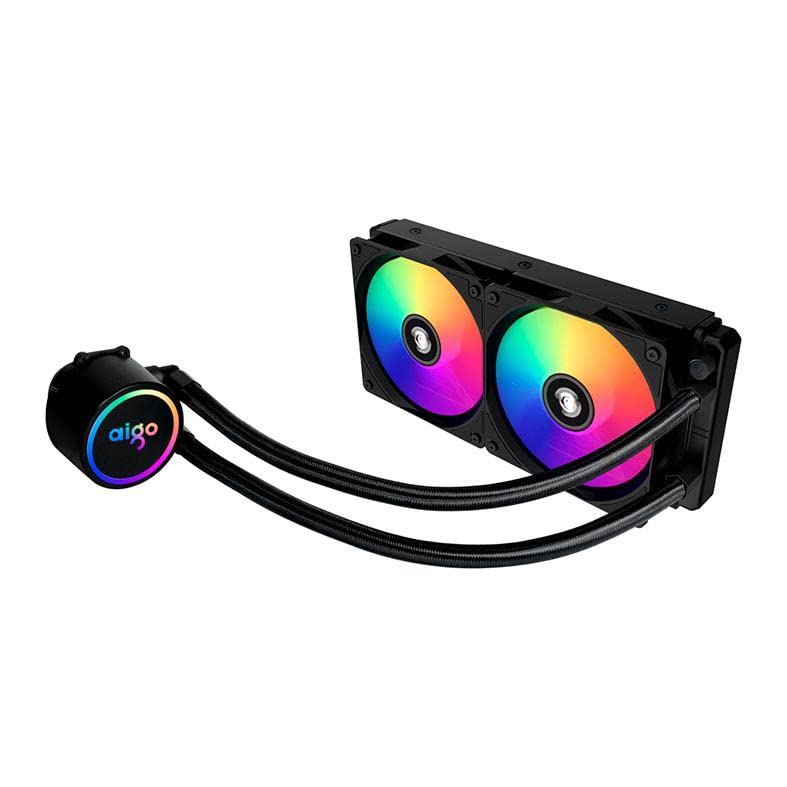
Imatge: The Aigo AC SE 240 Water Cooler showing the 240mm radiator with two fans attached, displaying their rainbow LED lighting. The pump/CPU block is connected via two braided tubes.
- Attach the two 120mm fans to the radiator using the provided long screws. Ensure the fan airflow direction is correct for your case (typically intake or exhaust).
- Mount the radiator assembly to an available 240mm fan mount in your PC case (e.g., top, front, or rear). Use the appropriate screws to secure it.
3.3 Install the CPU Block/Pump
- Apply a small amount of thermal paste to the center of your CPU's integrated heat spreader (IHS). A pea-sized dot is usually sufficient.
- Attach the correct mounting standoffs and brackets to your motherboard around the CPU socket. For Intel sockets, you may need to install the backplate first.
- Carefully place the CPU block/pump onto the CPU, aligning the mounting holes.
- Secure the CPU block/pump with the provided thumb screws or nuts, tightening them in a diagonal pattern until snug. Do not overtighten.
3.4 Connecteu els cables
- Connect the pump's power cable to a dedicated AIO_PUMP or CPU_FAN header on your motherboard. If neither is available, use a SYS_FAN header.
- Connect the fan power cables to the CPU_FAN and/or SYS_FAN headers on your motherboard, or to the included fan/RGB controller.
- Connect the RGB cables from the fans and pump to the included RGB controller, and then connect the controller to an available RGB header on your motherboard (if applicable) or a SATA power connector.
- Organitza els cables per a una circulació d'aire i una estètica òptimes.
4. Instruccions de funcionament
Once installed, the Aigo AC SE 240 Water Cooler operates automatically. The pump and fans will adjust their speeds based on CPU temperature, as controlled by your motherboard's BIOS/UEFI settings or dedicated software.
- Configuració de la BIOS/UEFI: Access your motherboard's BIOS/UEFI to configure fan curves and pump speed settings. It is recommended to set the pump to run at 100% speed for optimal cooling performance and to prevent air bubbles from settling.
- Control de programari: If your motherboard supports it, you may use manufacturer-provided software to fine-tune fan speeds, monitor temperatures, and customize RGB lighting effects.
- Inici inicial: During the first few minutes of operation, you might hear gurgling sounds as air bubbles are purged from the loop. This is normal and should subside.
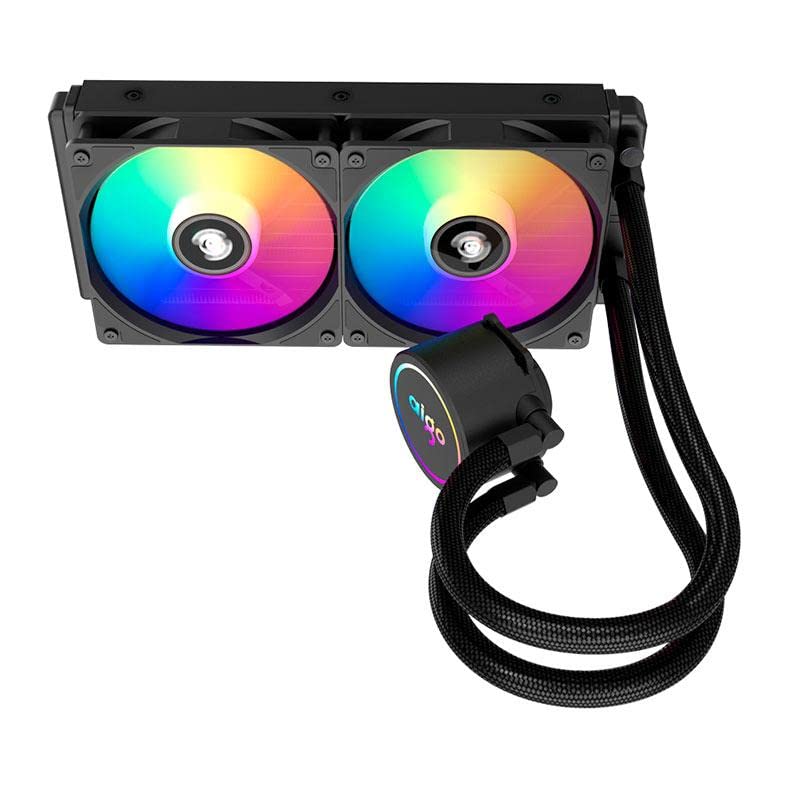
Imatge: Un de dalt a baix view of the Aigo AC SE 240 Water Cooler, highlighting the CPU block with its illuminated Aigo logo and the two rainbow-lit fans on the radiator.
5. Manteniment
Un manteniment regular garanteix un rendiment òptim i una llarga vida útil del vostre refrigerador d'aigua.
- Neteja de pols: Netegeu periòdicament la pols de les aletes del radiador i de les aspes del ventilador amb aire comprimit o un raspall suau. L'excés de pols pot impedir el flux d'aire i reduir l'eficiència de la refrigeració.
- Inspecció de tubs: Visually inspect the tubing and connections for any signs of leaks, kinks, or damage. Address any issues immediately.
- Soroll de la bomba: If the pump starts making unusual noises, it may indicate air trapped in the loop or a failing pump. Ensure the pump is running at full speed and try gently tilting your PC case to help dislodge air bubbles.
6. Solució De Problemes
This section addresses common issues you might encounter with your Aigo AC SE 240 Water Cooler.
| Problema | Causa possible | Solució |
|---|---|---|
| Temperatures altes de la CPU |
|
|
| Fans/RGB not lighting up |
|
|
| Soroll inusual de la bomba |
|
|
7. Especificacions
Detailed technical specifications for the Aigo AC SE 240 Water Cooler.
- Model: ACSE240-BK
- Intel Socket Compatibility: LGA 2066/ 2011-v3 / 2011 / 1700 / 1366 / 1200 / 115X
- AMD Socket Compatibility: FM1 / FM2 / FM2+ / AM2 / AM2+ / AM3 / AM3+ / AM4
- Longitud del tub: 395 mm
- Velocitat de la bomba: 3200 ± 10% RPM
- Bomba Voltage: 12 V
- Mides del radiador: 274 x 120 x 27 mm
- Dimensions del ventilador: 120 x 120 x 25 mm
- Velocitat del ventilador: 800 ~ 1800 RPM
- Flux d'aire: 64.05 CFM
- Nivell de soroll: 30 dBA ± 10%
- TDP: 210W
- Mètode de refrigeració: Líquid (Aigua)
- Dispositius compatibles: Escriptori
8. Garantia i Suport
For warranty information, technical support, or service inquiries, please refer to the official Aigo weblloc web o poseu-vos en contacte amb el vostre distribuïdor. Conserveu el comprovant de compra per a reclamacions de garantia.
Official Aigo Weblloc: www.aigocooler.com (Nota: Això és un marcador de posició URL. Please verify the actual official website for Aigo products.)
Ask a question about this manual
Ask about setup, troubleshooting, compatibility, parts, safety, or missing instructions. Manuals+ will review the question and use this page’s manual context to help answer it.