
Zgrmbo DS-6626
Zgrmbo 16-inch Digital Wall Clock User Manual
Model: DS-6626
1. Introducció
Thank you for choosing the Zgrmbo 16-inch Digital Wall Clock. This manual provides detailed instructions for setting up, operating, and maintaining your new clock. Please read this manual thoroughly before use to ensure proper function and longevity of the product.

Image 1.1: Zgrmbo 16-inch Digital Wall Clock with its various display features.
2. Contingut del paquet
Si us plau, comproveu el paquet per veure si hi ha els elements següents:
- Zgrmbo 16-inch Digital Wall Clock (Model DS-6626)
- Control remot
- Cable d'alimentació USB
- Wall Adapter (USB to AC)
- CR2032 Battery (for memory function)
- Mounting Pegs/Screws
- Plantilla de muntatge
- Manual d'usuari
3. Característiques del producte
- Pantalla LED gran: 16.2-inch screen with 4.25-inch jumbo digits for clear visibility from a distance.
- Pantalla multifunció: Shows time, date, indoor temperature, and day of the week.
- Comandament a distància: Conveniently adjust settings, brightness, alarms, and timers.
- Brillantor ajustable: 10-level manual brightness adjustment and an auto-brightness mode that adapts to ambient light.
- Cronòmetre i temporitzador: Integrated functions for various timing needs.
- Funció de memòria: Built-in CR2032 battery preserves time and settings during power outages (display turns off during battery backup).
- Muntatge flexible: Designed for wall mounting with multiple cable routing options.
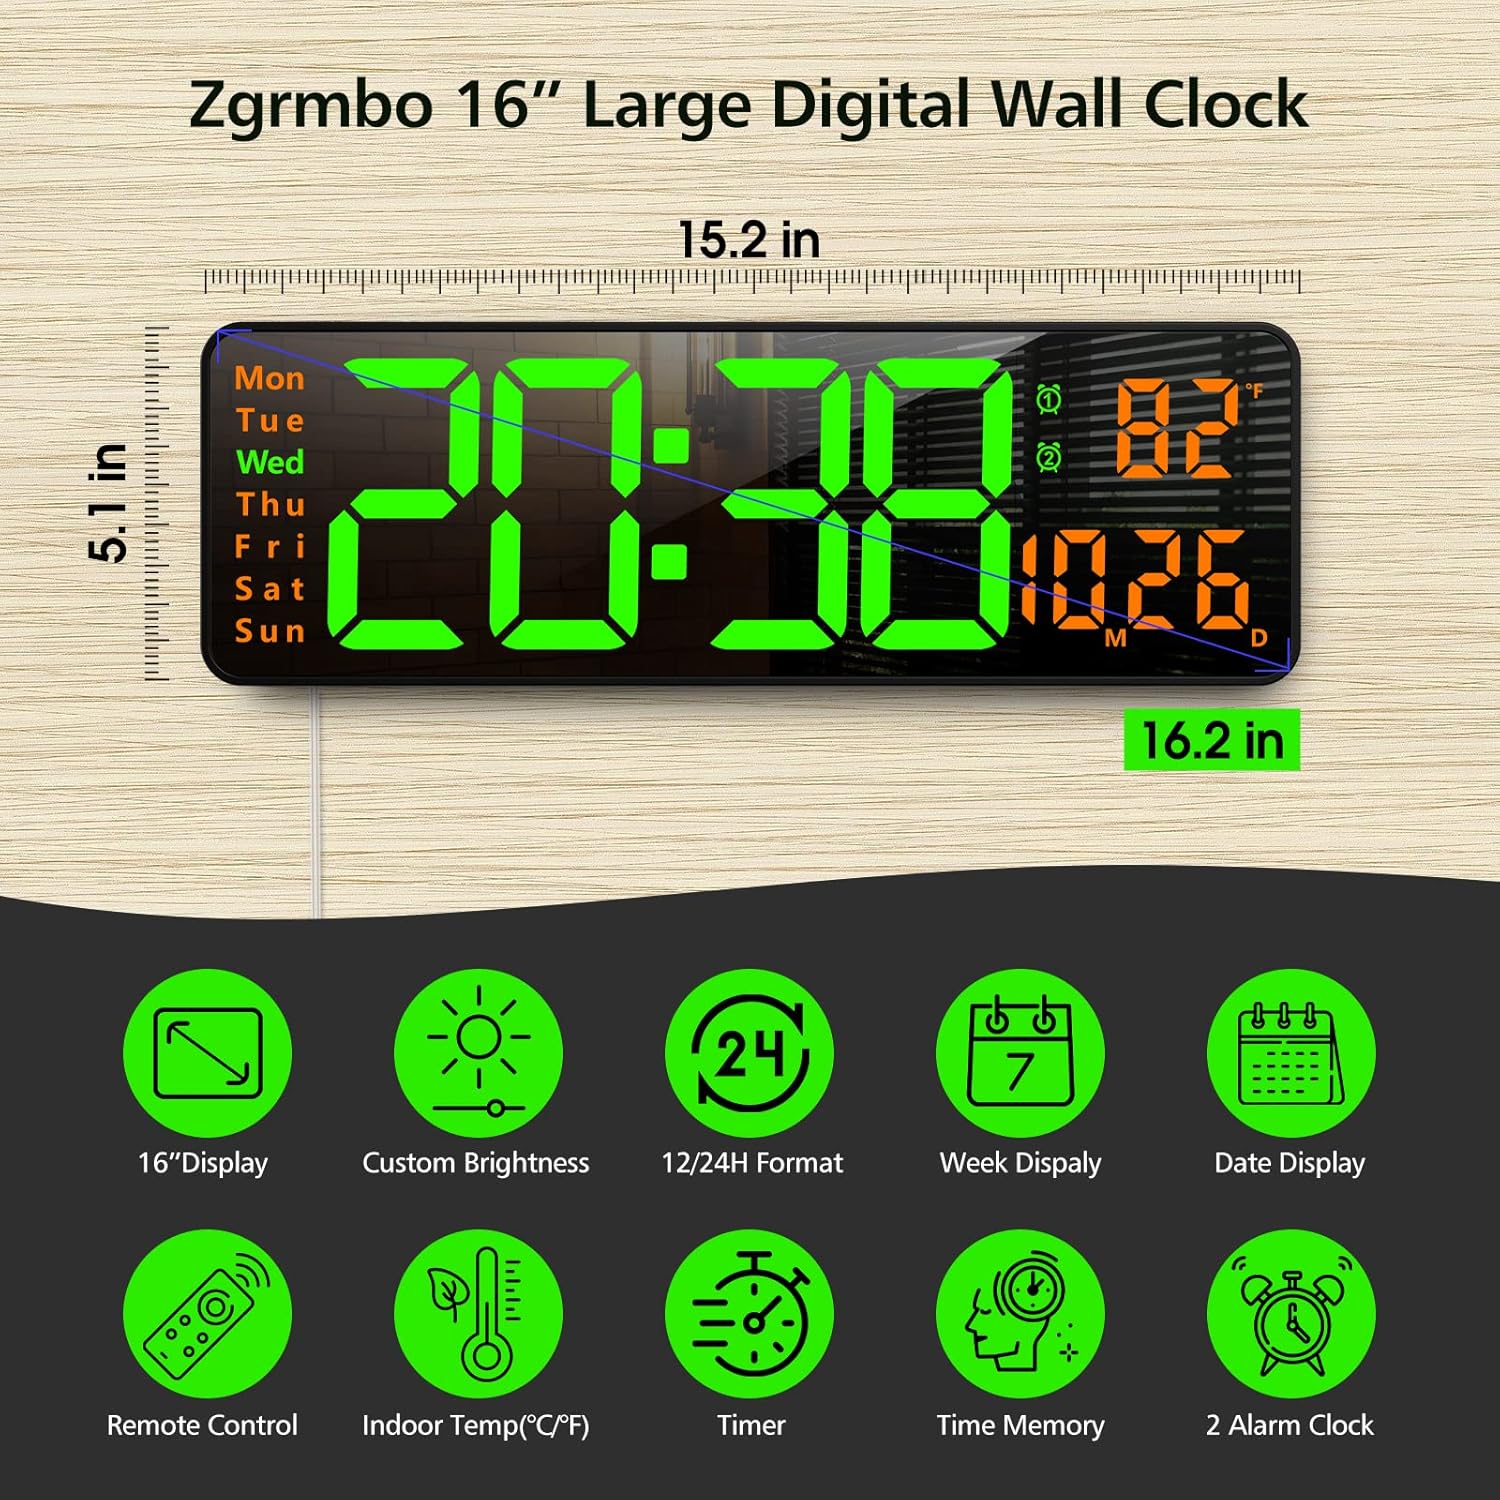
Imatge 3.1: acabatview of the clock's dimensions and primary features.
4. Configuració
4.1. Connexió d'alimentació
- Insert the CR2032 battery into the battery compartment on the back of the clock. This battery maintains settings during power interruptions.
- Connect the USB power cable to the clock and then to the provided wall adapter.
- Plug the wall adapter into a standard electrical outlet. The clock display will illuminate.
4.2. Muntatge a la paret
The clock can be easily mounted on a wall using the provided template and hardware.
- Select a desired location on the wall.
- Use the mounting template to mark the positions for the mounting pegs/screws.
- Install the mounting pegs/screws into the marked positions.
- Align the keyhole slots on the back of the clock with the installed pegs/screws and slide the clock into place.
- Route the power cable through one of the designated cutouts on the back of the clock to ensure it lies flush against the wall. Excess cable can be wrapped around the designated area on the back of the clock.
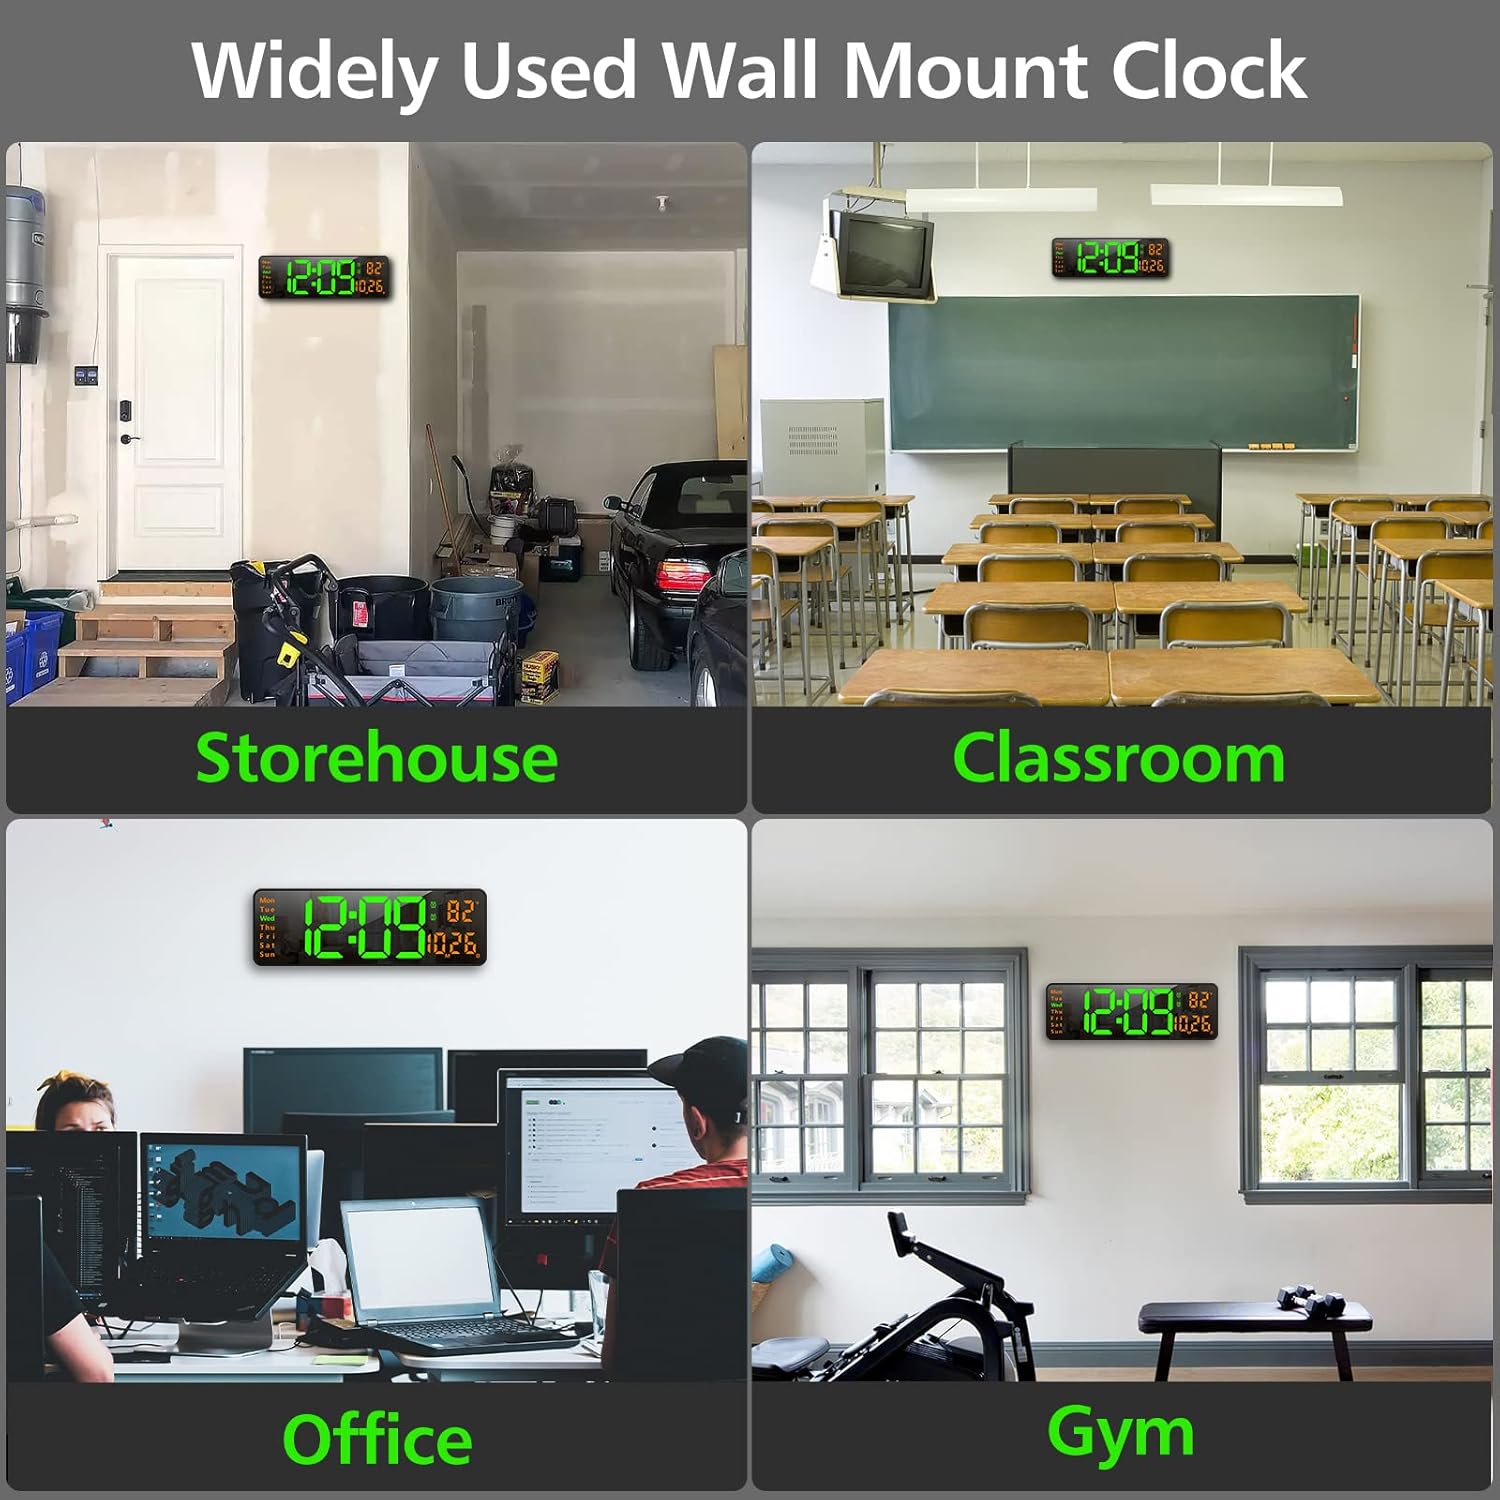
Imatge 4.1: Ex.amples of the clock mounted in different environments.
5. Instruccions de funcionament
The clock can be operated using the remote control or the buttons on the back of the unit.
5.1. Control remot sobreview
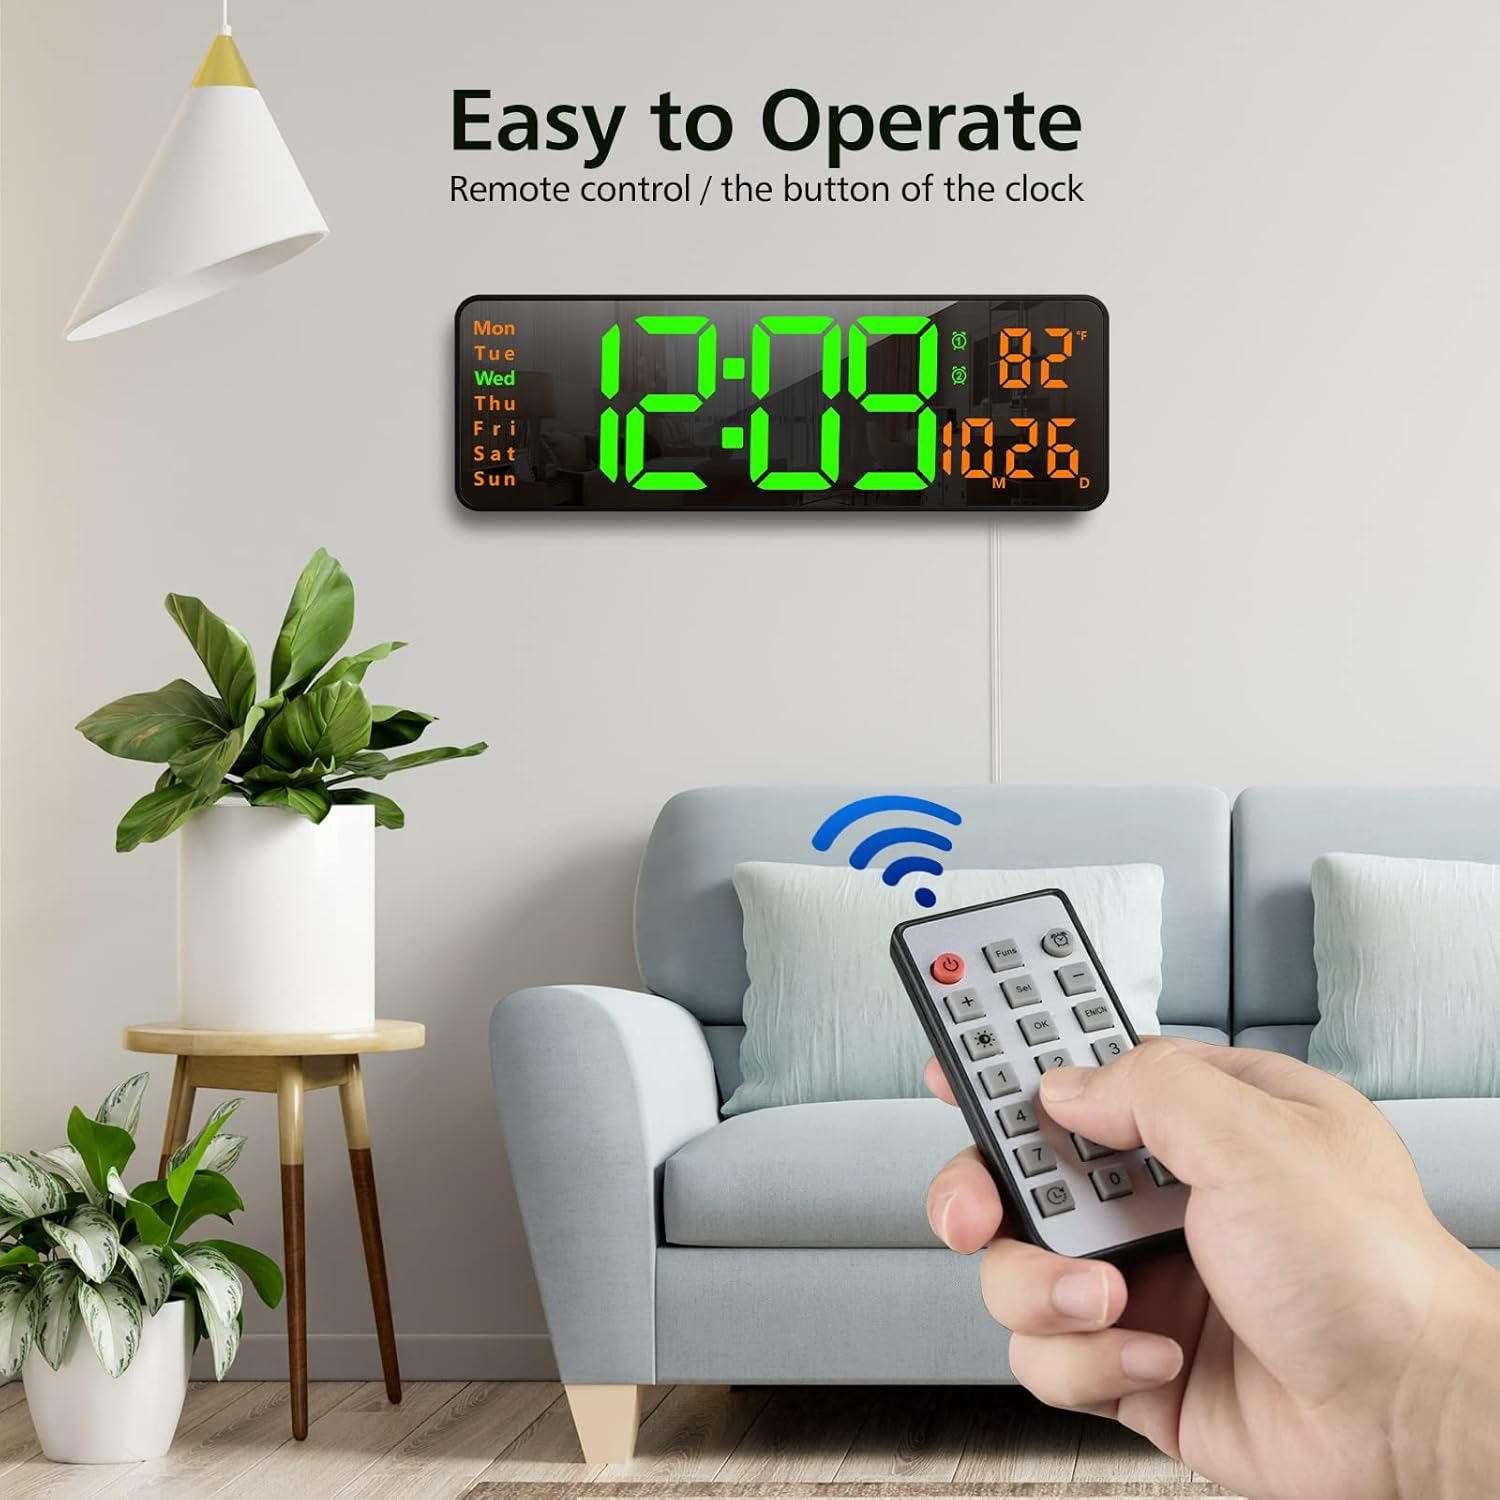
Image 5.1: Using the remote control to operate the clock.
- Botó d'encesa: Encén/apaga la pantalla.
- Funs Button: Cycles through various functions (e.g., time, date, temperature display modes).
- Botó d'alarma: Accedeix a la configuració de l'alarma.
- Botó de configuració: Enters setting mode for time, date, etc.
- Botons +/-: Adjust values up or down during setting.
- Brightness Button (Lightbulb icon): Cycles through brightness levels or activates auto-brightness.
- Botó D'acord: Confirma les seleccions.
- Botons numèrics (0-9): For direct input of time/date values.
- Timer Buttons (Clock icons): Activates and controls the timer/stopwatch functions.
5.2. Configuració de l'hora i la data
- Press the 'Set' button on the remote control. The time display will start flashing.
- Use the '+/-' buttons to adjust the hour. Press 'Set' again to confirm and move to minutes.
- Adjust minutes using '+/-' buttons. Press 'Set' to confirm.
- Continueu aquest procés per definir l'any, el mes i el dia.
- After setting the date, you may be prompted to select 12-hour or 24-hour format. Use '+/-' and 'Set' to choose.
- The clock will automatically exit setting mode after a few seconds of inactivity or by pressing 'OK'.
5.3. Ajust de brillantor
The clock offers 10 levels of brightness and an automatic adjustment mode.
- Press the 'Brightness' button (lightbulb icon) on the remote control once to cycle through manual brightness levels (L-01 to L-10).
- Press the 'Brightness' button twice quickly to activate the auto-brightness mode (L-AU). The clock will then adjust its brightness based on ambient light conditions.

Image 5.2: Visual representation of the 10-level brightness adjustment and auto-brightness feature.
5.4. Configuració d'alarmes
The clock supports up to two alarms.
- Press the 'Alarm' button (clock icon) on the remote control. The alarm time will flash.
- Use the '+/-' buttons to set the desired alarm hour. Press 'Set' to confirm.
- Use the '+/-' buttons to set the desired alarm minutes. Press 'Set' to confirm.
- Repeat for the second alarm if needed.
- To activate/deactivate an alarm, press the 'Alarm' button repeatedly until the alarm indicator (1 or 2) appears/disappears next to the temperature display.
5.5. Using the Timer/Stopwatch
The clock features both a countdown timer and a stopwatch function.
- Temporitzador de compte enrere: Press the 'Timer' button (clock with arrow down icon) on the remote. Use the number buttons to input the desired countdown time (e.g., 10 for 10 minutes). Press 'OK' to start. Press 'OK' again to pause/resume. Long press 'Timer' to reset.
- Cronòmetre: Press the 'Timer' button (clock with arrow up icon) on the remote. Press 'OK' to start. Press 'OK' again to pause/resume. Long press 'Timer' to reset.

Image 5.3: The digital timer function in use.
6. Manteniment
- Neteja: Use a soft, dry cloth to clean the display and body of the clock. Avoid abrasive cleaners or solvents.
- Substitució de la bateria: The CR2032 battery for the memory function should be replaced periodically (e.g., every 1-2 years) to ensure settings are retained during power outages.
- Emmagatzematge: If storing the clock for an extended period, unplug it from power and remove the CR2032 battery. Store in a cool, dry place.
7. Solució De Problemes
| Problema | Causa possible | Solució |
|---|---|---|
| La pantalla del rellotge està apagada. | Sense corrent, apagadatage, or remote control power button pressed. | Ensure power cable is securely plugged in. Check power outlet. Press the power button on the remote. |
| La configuració es perd després d'apagar l'alimentaciótage. | La pila de memòria CR2032 està morta o no està instal·lada. | Install or replace the CR2032 battery. |
| El comandament a distància no funciona. | Remote battery is dead or plastic tab not removed. | Remove the plastic tab from the remote battery compartment. Replace the remote control battery. |
| Lectura de temperatura incorrecta. | Sensor interference or unit not calibrated. | Ensure the clock is not near heat sources or direct sunlight. The temperature sensor is for indoor ambient temperature. |
8. Especificacions
- Marca: Zgrmbo
- Model: DS-6626
- Tipus de visualització: LED digital
- Mida de la pantalla: 16.2 polzades (diagonal)
- Altura de dígits: 4.25 inches (time digits)
- Dimensions del producte: 15.2 cm d'amplada x 5.1 cm d'alçada
- Font d'alimentació: Elèctric amb cable (USB)
- Bateria de seguretat: 1x CR2032 (for memory function)
- Material: Plàstic, LED
- Tipus de muntatge: Muntatge de paret
- Característiques especials: Adjustable Brightness, Alarm, Large Display, Timer, Stopwatch, Date, Week, Temperature.
9. Garantia i Suport
Zgrmbo offers an 18 mesos de garantia for this product, along with a Política de devolució de 45 dies. For any questions, technical support, or warranty claims, please contact Zgrmbo customer service through your purchase platform or visit the official Zgrmbo store page.
We are committed to providing high-quality products and excellent customer service. Your satisfaction is our priority.
Ask a question about this manual
Ask about setup, troubleshooting, compatibility, parts, safety, or missing instructions. Manuals+ will review the question and use this page’s manual context to help answer it.