
EPEVER XTRA3210N
EPEVER MPPT XTRA-N XTRA3210N Solar Charge Controller User Manual
Model: XTRA3210N | Brand: EPEVER
1. Introducció
The EPEVER MPPT XTRA-N series solar charge controller utilizes advanced Maximum Power Point Tracking (MPPT) technology to efficiently manage power from your solar panels to charge batteries. This manual provides detailed instructions for the installation, operation, and maintenance of your XTRA3210N controller to ensure optimal performance and longevity.
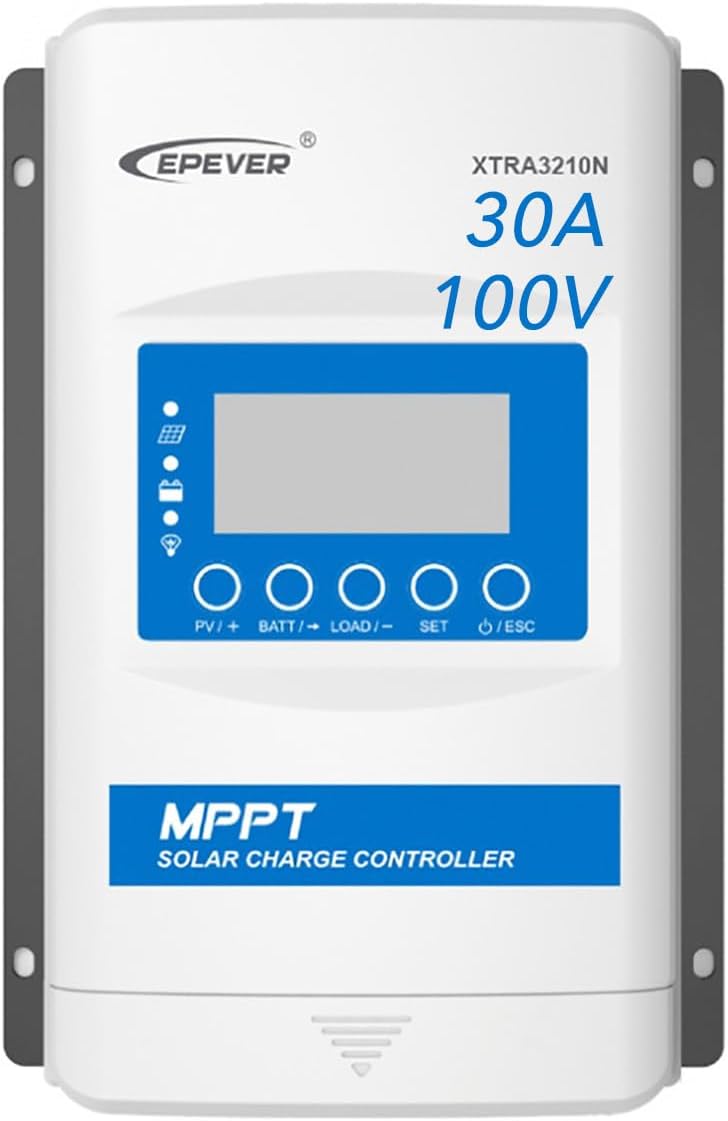
Figure 1: EPEVER MPPT XTRA-N XTRA3210N Solar Charge Controller. This image shows the front view of the charge controller with its display and control buttons.
2. Informació de seguretat
Llegiu atentament totes les instruccions i advertències abans de la instal·lació i el funcionament. Si no seguiu aquestes instruccions, podeu patir descàrregues elèctriques, incendis o lesions greus.
- ADVERTIMENT: The controller may be damaged if the maximum PV open circuit voltage (Voc) exceeds 100V (XTRA**10N) / 150V (XTRA**15N) at the minimum operating ambient temperature.
- NOTA: If PV modules are connected in series, the open circuit voltage of the PV module must not exceed 46V (XTRA**06N), 92V (XTRA**10N) at an ambient temperature of 25°C.
- Ensure all connections are secure and correct polarity is observed.
- No intenteu desmuntar ni reparar el controlador vosaltres mateixos. Poseu-vos en contacte amb personal qualificat per al servei tècnic.
- Instal·leu el controlador en una zona ben ventilada, allunyada de materials inflamables i de la llum solar directa.
3. Característiques del producte
The EPEVER XTRA-N series incorporates advanced features for superior solar charging:
- Tecnologia MPPT avançada: Precisely detects multiple Maximum Power Points (MPP) of the solar module, leading to 20-30% more power output compared to traditional controllers.
- Alta eficiència: Features over 99.5% tracking efficiency and up to 98% conversion efficiency.
- Comprehensive Electronic Protection: Includes protection against PV reverse polarity, PV overcurrent, PV short circuit, input overvoltage/undervoltage, battery reverse polarity, battery overvoltage/overdischarge, load short circuit/overload, and overheating.
- Àmplia compatibilitat de bateries: Supports various battery types including Lead-Acid (AGM, GEL, Flooded, USER defined) and Lithium batteries (parameters adjustable via LCD display).
- Pantalla LCD: Provides real-time operating data and allows for parameter configuration.
- Corrent de càrrega ajustable: The charge current can be adjusted via the app, with a minimum nominal charge current of 1A.
Figure 2: High Tracking and Conversion Efficiency.

Figure 3: Supported Battery Types including Lead-Acid and Lithium.
Figure 4: MPPT technology provides 20-30% power increase.
Figure 5: Ideal for RV solar installations.
4. Especificacions tècniques
| Paràmetre | Valor |
|---|---|
| Sistema nominal Voltage | 12 / 24VDC automàtic |
| Corrent de càrrega nominal | 30A |
| Corrent nominal de descàrrega | 30A |
| Màx. Circuit obert PV Voltage | 100 V |
| Rated Charge Power (12V) | 390W |
| Rated Charge Power (24V) | 780W |
| Temperatura de funcionament | -25 °C a +45 °C |
| Classe de protecció | IP30 |
| Dimensions (L x A x A) | 230 x 165 x 63 mm |
| Pes | 1.31 Kg |
| Tipus de visualització | LCD |
| Material | Policarbonat (PC) |

Figure 6: Physical dimensions and weight of the XTRA3210N controller.
5. Contingut del paquet
En obrir el paquet, comproveu que tots els elements que s'enumeren a continuació hi són presents i que es troben en bon estat:
- 1x MPPT XTRA-N XTRA3210N Solar Charge Controller
- 1x Manual d'usuari (aquest document)
Note: Accessories such as external displays (MT50), communication cables (RS485 to USB, RS485 to RS485), WiFi/Bluetooth modules, and temperature sensors are not included and must be purchased separately if required.

Figura 7: Mésview of accessory connection options for the EPEVER XTRA-N series.
6. Configuració i instal·lació
Follow these steps for proper installation of your solar charge controller. Ensure all power sources are disconnected before making any connections.
6.1 Component acabatview
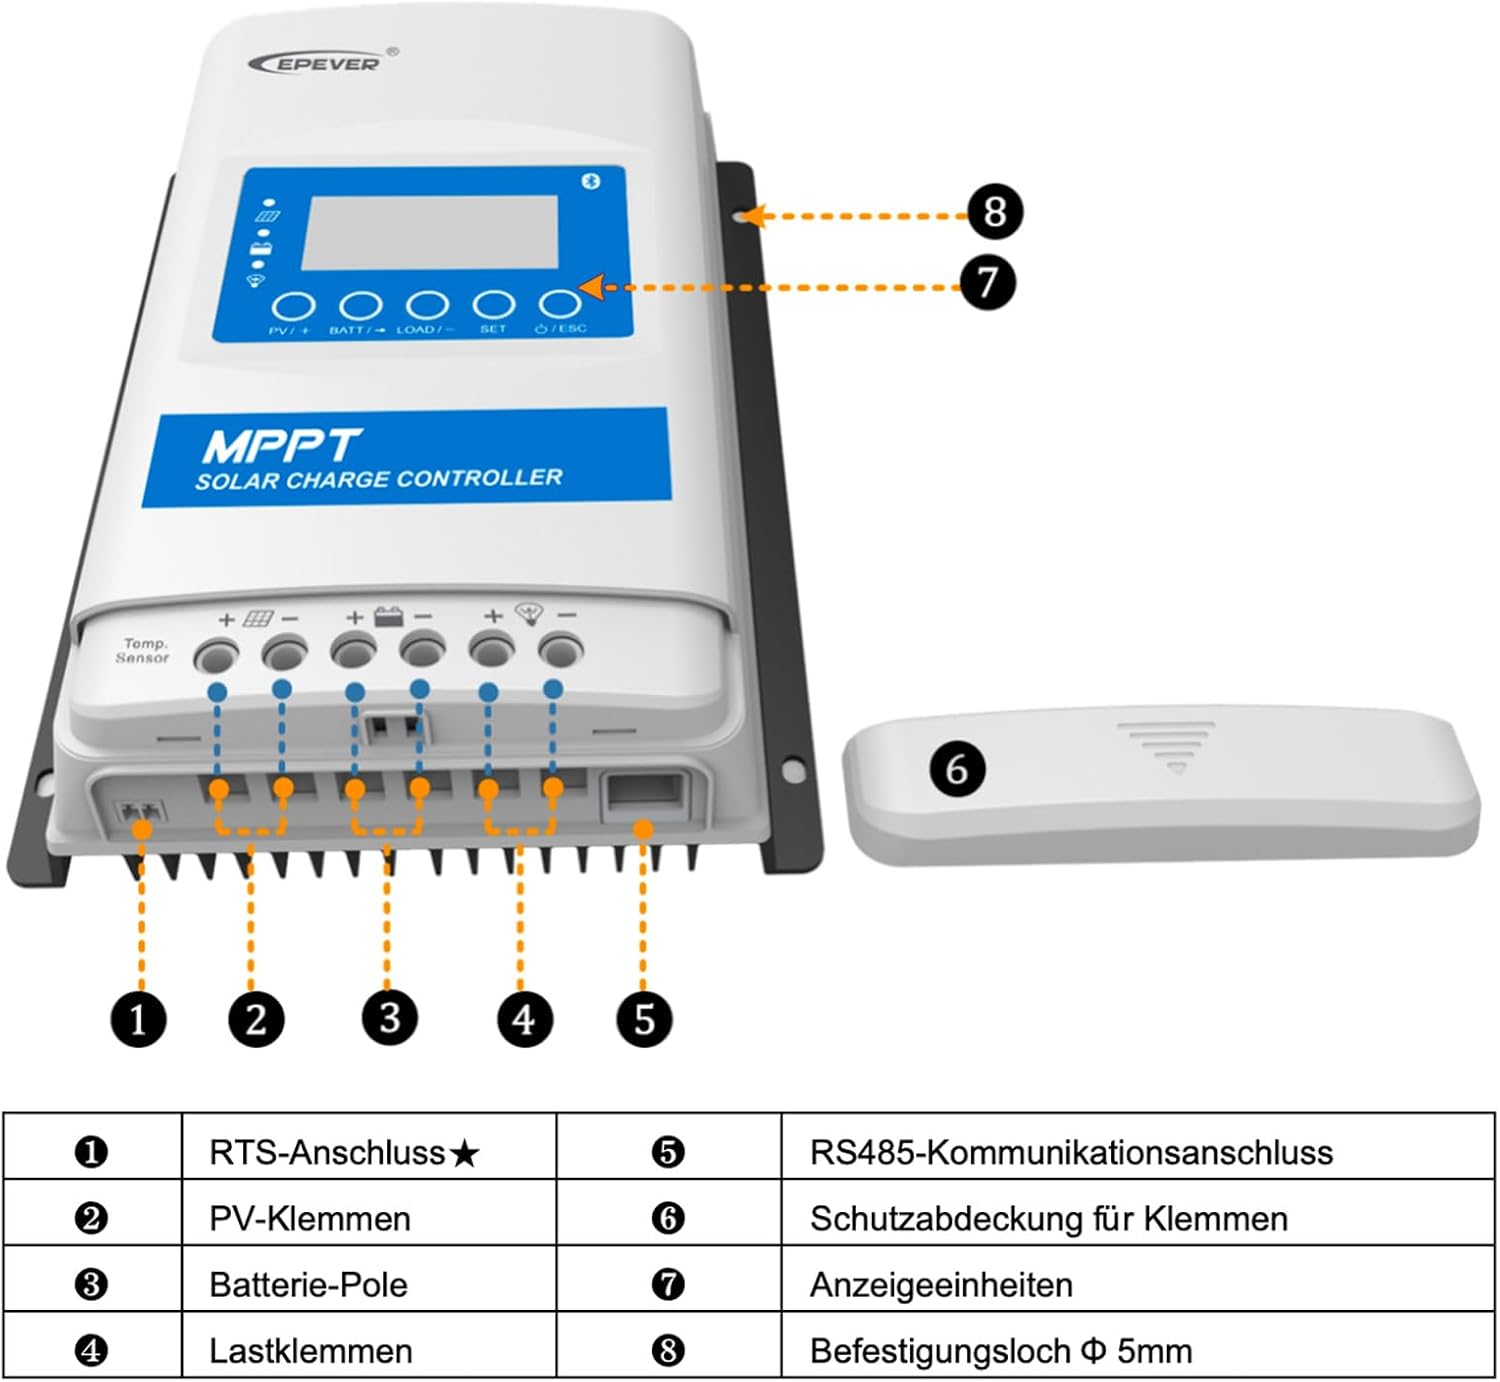
Figure 8: Labeled components and connection points of the XTRA3210N controller.
| No. | Component |
|---|---|
| 1 | RTS (Remote Temperature Sensor) Port |
| 2 | Terminals fotovoltaics |
| 3 | Terminals de la bateria |
| 4 | Terminals de càrrega |
| 5 | Port de comunicació RS485 |
| 6 | Coberta protectora del terminal |
| 7 | Display Units (LCD and Buttons) |
| 8 | Mounting Holes (Φ 5mm) |
6.2 Connection Sequence
It is crucial to follow the correct connection order to prevent damage to the controller or other components.
- Step 1: Connect the Battery. Connect the battery to the charge controller's battery terminals. Ensure correct polarity (+ to + and - to -). The controller will detect the battery voltage.
- Step 2: Connect the Load (Optional). If using a DC load directly from the controller, connect it to the load terminals.
- Step 3: Connect the Solar Modules. Connect the solar panel array to the PV terminals of the controller. Ensure correct polarity. The controller will begin charging.
- Step 4: Connect Optional Accessories. Connect any optional accessories such as the remote temperature sensor (RTS), external display, or communication modules.
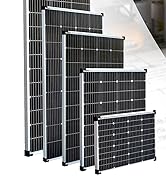
Figura 9: Example connection sequence, Step 1: Connect solar modules to form a 12V(2s) array.

Figura 10: Example connection sequence, Step 2: Set up a 12V battery bank (battery not included).
Figura 11: Example connection sequence, Step 3: Connect the charge controller to the battery bank.

Figura 12: Example connection sequence, Step 4: Plug the output of the solar module into the PV input of the controller. This diagram also illustrates a system without a battery.

Figure 13: Installation diagram for battery mode, showing connections for solar panel, controller, battery, and load.
7. Instruccions de funcionament
Once installed, the controller will automatically begin operating. The LCD display provides real-time system status and allows for parameter adjustments.
7.1 Pantalla i botons
The front panel features an LCD screen and five buttons for navigation and settings:
- PV/+ Button: S'utilitza per navegar pels menús o augmentar valors.
- BATT/- Button: S'utilitza per navegar pels menús o disminuir valors.
- LOAD/- Button: Used to control load output or navigate menus.
- Botó SET: Used to enter settings mode or confirm selections.
- ON/OFF/ESC Button: Used to turn load on/off or exit current menu/setting.
7.2 Configuració dels paràmetres
You can adjust various charging and load parameters directly from the controller's display or via a connected app/PC software (with optional communication modules).

Figure 14: The charge current is adjustable via the app, with a minimum nominal charge current of 1A.
7.3 Supported Battery Types
The controller supports a wide range of battery types. For Lithium batteries, parameters can be customized via the LCD display or communication software.
- Bateries de plom-àcid: AGM, GEL, Flooded, USER (user-defined).
- Bateries de liti: LiFePO4, Li (NiCoMn)O2 (user-defined).

Figure 15: Visual representation of supported battery types, along with key specifications like rated current, max PV input, and nominal voltage.
8. Manteniment
Regular maintenance ensures the longevity and optimal performance of your EPEVER charge controller.
- Neteja: Mantingueu el controlador net i lliure de pols i brutícia. Feu servir un drap sec per netejar-lo.
- Connexions: Comproveu periòdicament totes les connexions del cablejat per assegurar-vos que estiguin ben ajustades i que no estiguin corroses. Les connexions soltes poden causar sobreescalfament i danys.
- Ventilació: Ensure the installation area has adequate ventilation to prevent overheating. Keep vents clear.
- Condicions ambientals: Verifiqueu que l'entorn operatiu es mantingui dins dels rangs de temperatura i humitat especificats.
9. Solució De Problemes
Aquesta secció ofereix solucions a problemes comuns que podeu trobar. Per a problemes que no figuren aquí, poseu-vos en contacte amb l'atenció al client.
| Problema | Causa possible | Solució |
|---|---|---|
| No display/Controller not powering on | Bateria no connectada o de baix volumtage; reverse polarity; loose connection. | Comproveu les connexions de la bateria i el voltage. Ensure correct polarity. Tighten all connections. |
| No charging from PV | PV panels not connected; insufficient sunlight; PV voltage too low/high; reverse polarity. | Check PV connections and polarity. Verify sunlight conditions. Ensure PV voltage is within controller's operating range. |
| La càrrega no funciona | Load output disabled; overload; short circuit; low battery voltage. | Check load settings on controller. Reduce load. Check for short circuits. Ensure battery is sufficiently charged. |
| Sobreescalfament | Poor ventilation; excessive ambient temperature; overload. | Improve ventilation around the controller. Ensure ambient temperature is within limits. Reduce load if possible. |
10. Garantia i Suport
The EPEVER MPPT XTRA-N XTRA3210N Solar Charge Controller comes with a Garantia del fabricant de 2 anys.
For technical support, warranty claims, or further assistance, please contact your local dealer or the manufacturer directly. Please have your product model number (XTRA3210N) and purchase information ready when contacting support.
Certificacions: CE, FCC, IEC, ETL, and RoHS compliant.
Ask a question about this manual
Ask about setup, troubleshooting, compatibility, parts, safety, or missing instructions. Manuals+ will review the question and use this page’s manual context to help answer it.