
ODK 0V
ODK 63 inch Computer Desk User Manual
Model: 0V
1. Introducció
Thank you for choosing the ODK 63 inch Computer Desk. This desk is designed to provide a versatile and functional workspace for gaming, home office, or general use. It features integrated power outlets, LED lighting, a monitor stand, and convenient storage shelves. This manual provides detailed instructions for assembly, operation, maintenance, and troubleshooting to ensure optimal performance and longevity of your desk.
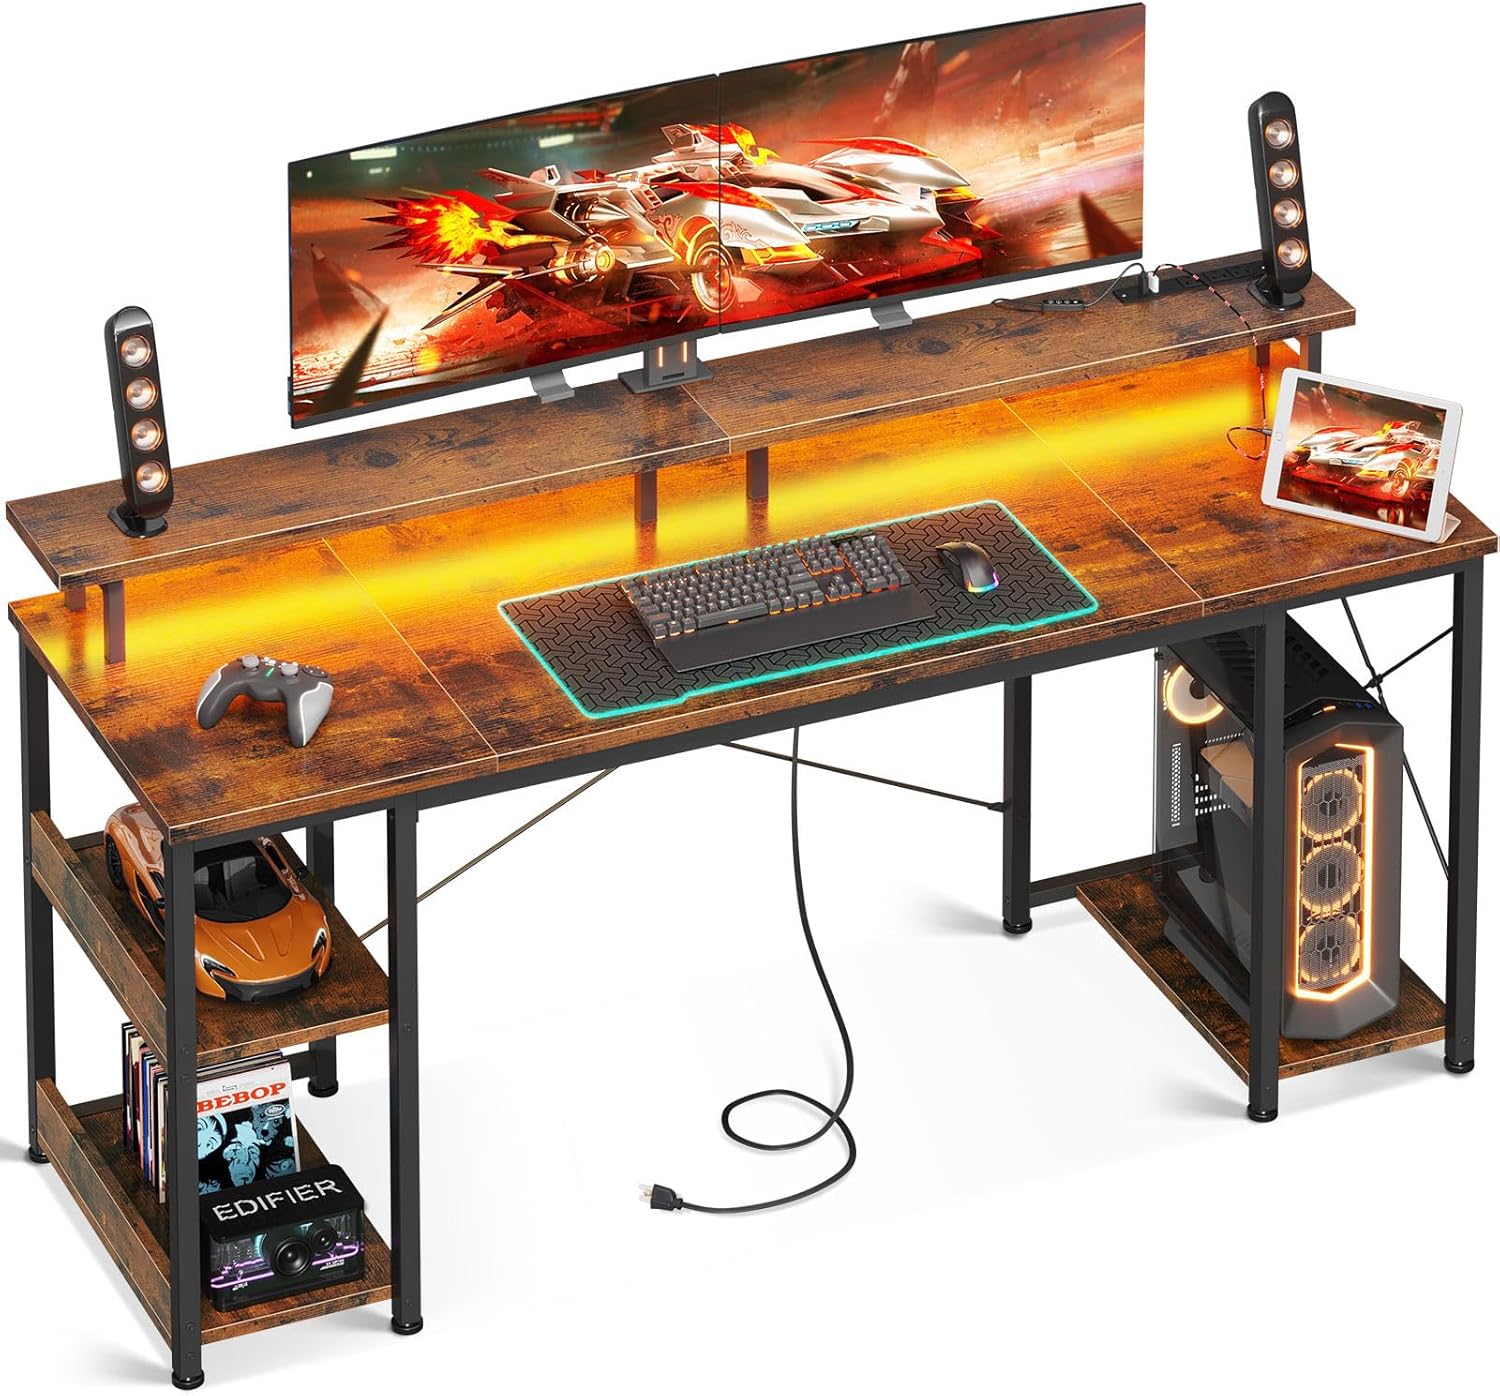
Figure 1: ODK 63 inch Computer Desk in a gaming setup, showcasing its monitor stand, LED lighting, and side storage shelves.
2. Informació de seguretat
Please read all safety warnings and instructions carefully before assembling and using this product. Failure to follow these instructions may result in electric shock, fire, and/or serious injury.
- Ensure all components are securely fastened before use. Periodically check and retighten screws as needed.
- No sobrecarregueu l'escriptori ni les prestatgeries més enllà de la seva capacitat de pes indicada.
- Keep liquids away from electrical components (power outlets, LED lights) to prevent electric shock.
- Only use the integrated power outlets and USB ports with devices that meet their specified voltage and current ratings (120V/12A AC Outlets, 5V/2A USB Ports).
- No intenteu modificar ni reparar els components elèctrics. Poseu-vos en contacte amb personal qualificat per al servei tècnic.
- Keep children and pets away from the desk during assembly. Small parts can be a choking hazard.
- Col·loqueu l'escriptori sobre una superfície plana i estable per evitar que bolqui.
3. Muntatge i muntatge
Assembly is required for this desk. It is recommended to have two people for assembly. Please ensure all parts are present before beginning.
3.1. Contingut del paquet
Verify that all components listed in the packing list are included and undamaged. If any parts are missing or damaged, contact ODK customer support.
3.2. Passos de muntatge
- Desempaquetar i identificar les peces: Carefully unpack all components and lay them out on a clean, soft surface (e.g., a blanket or cardboard) to prevent scratches. Identify each part using the provided assembly diagram.
- Muntatge del marc: Begin by assembling the metal frame components. Ensure the orientation of each piece matches the instructions, as some parts may not be symmetrical.
- Fixeu els prestatges laterals: Secure the side storage shelves to the main frame. Note that the bottom shelf on one side can be removed to accommodate a larger PC tower, offering flexible storage options.
- Install Desktop Panels: Attach the desktop panels to the assembled frame. Do not fully tighten all screws until all panels are in place and aligned. This allows for minor adjustments to ensure a flush fit.
- Suport de monitor de muntatge: Secure the long monitor stand to the main desktop. This elevated stand provides ergonomic viewing and additional storage space.
- Instal·leu una regleta d'endolls: Integrate the recessed power strip into the designated slot on the monitor stand. Ensure the power cord is routed safely and securely.
- Connecteu els llums LED: Install the RGB LED light strips beneath the monitor stand. Follow the specific instructions for securing them. Consider mounting them towards the back for a softer glow and better cable management, as suggested by some users.
- Ajustament final: Once all components are in place and aligned, systematically tighten all screws. Avoid overtightening to prevent damage to the materials.

Figure 2: The design allows for the removal of the bottom shelf on one side to create space for a PC tower, enhancing versatility.

Figure 3: The integrated monitor stand elevates displays for improved ergonomics and provides additional surface area.
For a visual guide to assembly, please refer to the official product video:
Video 1: Official ODK Computer Desk Assembly and Feature Overview. This video demonstrates the assembly process and highlights key features of the desk, including the monitor stand and storage options.
4. Instruccions de funcionament
4.1. Funcionament dels llums LED
The desk is equipped with RGB LED light strips to enhance your workspace ambiance. The lights are controlled via a remote or integrated button.
- Encès/apagat: Premeu el botó d'engegada del controlador per encendre o apagar els llums.
- Canvi de color: Use the color selection buttons to cycle through 10 static color options.
- Modes dinàmics: Select from 10 dynamic modes for various lighting effects, such as fading, flashing, or pulsing.
- Ajust de brillantor: Adjust the brightness level to your preference using the designated buttons.

Figure 4: Detail of the RGB LED light strips and their controller, illustrating the 10 dynamic modes and 10 color options.
4.2. Preses de corrent integrades i ports USB
The recessed power strip provides convenient access to power for your devices.
- Preses de CA: The desk includes 3 standard 120V/12A AC outlets. Plug in your computer, monitor, or other AC-powered devices.
- Ports USB: Two 5V/2A USB ports are available for charging smartphones, tablets, or powering USB accessories.
- Cable d'alimentació: The power strip is connected via a 6.6-foot power cord. Ensure it is plugged into a grounded wall outlet.

Figure 5: The recessed power strip features three AC outlets and two USB ports for convenient device charging and power.
4.3. Monitor Stand and Storage Shelves
The desk is designed with functionality in mind, offering dedicated spaces for your equipment and accessories.
- Suport de monitor: The elevated monitor stand helps maintain an ergonomic viewing angle, reducing neck and eye strain. It can accommodate multiple monitors or a large ultrawide display.
- Side Storage Shelves: The multi-tiered side shelves provide ample space for books, gaming accessories, office supplies, or decorative items. The bottom shelf on one side is removable to fit a larger PC tower.
5. Manteniment i cura
Proper care will extend the life and appearance of your ODK Computer Desk.
- Neteja: Netegeu les superfícies de l'escriptori amb un drap suau iamp cloth. Avoid harsh chemicals or abrasive cleaners that could damage the finish. For the metal frame, a mild soap solution can be used.
- Pols: Regularly dust the desk, especially around the power outlets and LED lights, to prevent dust buildup.
- Components elèctrics: Ensure the power outlets and USB ports are free from dust and debris. Do not insert foreign objects into the ports.
- Estancament del cargol: Reviseu periòdicament tots els cargols i elements de fixació per assegurar-vos que romanen ajustats. Torneu a apretar-los si cal per mantenir l'estabilitat.
- Eviteu la sobrecàrrega: Do not place excessively heavy items on the desk or shelves. Refer to the specifications for weight limits.
- Calor i humitat: Avoid placing hot items directly on the desk surface. Protect the desk from excessive moisture or direct sunlight.
6. Solució De Problemes
If you encounter issues with your ODK Computer Desk, refer to the following common problems and solutions.
| Problema | Causa possible | Solució |
|---|---|---|
| L'escriptori està inestable o trontolla. | Cargols solts; terra irregular. | Check and tighten all assembly screws. Ensure the desk is on a level surface; use shims if necessary. |
| Els llums LED no funcionen. | Power connection loose; remote battery dead; LED strip damaged. | Check if the LED power cable is securely plugged into the power strip. Replace remote battery. If still not working, contact customer support. |
| Power outlets/USB ports are not functioning. | Desk power cord unplugged; circuit breaker tripped; device not compatible. | Ensure the desk's main power cord is securely plugged into a working wall outlet. Check your home's circuit breaker. Verify device power requirements match the desk's output. |
| Les peces no s'alineen durant el muntatge. | Orientació incorrecta de les peces; cargols massa apretats prematurament. | Review the assembly instructions carefully for correct part orientation. Loosen all screws, adjust alignment, then retighten. |
If the problem persists after attempting these solutions, please contact ODK customer support for further assistance.
7. Especificacions del producte
| Característica | Detall |
|---|---|
| Marca | ODK |
| Número de model | 0V |
| Dimensions del producte (P x A x A) | 63 "P x 21.7" W x 34" H |
| Pes de l'article | 52.8 lliures |
| Color | Vintage |
| Estil | Modern |
| Material base | Metall |
| Tipus de material superior | Metall |
| Característica especial | Built-In Monitor Stand, LED Lights, Power Outlets, Storage Shelves |
| Classificació de la presa de corrent altern | 120V/12A (3 endolls) |
| Classificació del port USB | 5V/2A (2 ports) |
| Longitud del cable d'alimentació | 6.6 peus |
| Muntatge obligatori | Sí |

Figure 6: Detailed dimensions of the ODK 63 inch Computer Desk, including the monitor stand and side shelves.
8. Garantia i Suport
ODK is committed to providing high-quality products and customer satisfaction. For specific warranty information regarding your ODK 63 inch Computer Desk, please refer to the warranty card included in your product packaging or visit the official ODK weblloc.
If you have any questions, require technical assistance, or need to report a missing/damaged part, please contact ODK customer support through the following channels:
- Assistència en línia: Visita el ODK Store on Amazon per a preguntes freqüents i opcions de contacte.
- Suport per correu electrònic: Refer to your product packaging for the dedicated customer service email address.
- Suport telefònic: Refer to your product packaging for the dedicated customer service phone number.
Please have your model number (0V) and purchase date ready when contacting support.
Ask a question about this manual
Ask about setup, troubleshooting, compatibility, parts, safety, or missing instructions. Manuals+ will review the question and use this page’s manual context to help answer it.